Microsoft Word 2004 Bedienungsanleitung
Microsoft
Office-software
Word 2004
Lesen Sie kostenlos die 📖 deutsche Bedienungsanleitung für Microsoft Word 2004 (24 Seiten) in der Kategorie Office-software. Dieser Bedienungsanleitung war für 27 Personen hilfreich und wurde von 2 Benutzern mit durchschnittlich 4.5 Sternen bewertet
Seite 1/24
Ohio University
Computer Services Center
July, 2004
Microsoft Word 2003 Reference Guide
__________________________________________
Computer Services’ Central Technology Services
http://www.ohio.edu/cts
1
What is Microsoft Word?
Microsoft Word 2003 is a powerful word
processing program that is primarily used for
text-intensive types of documents. With
Microsoft Word 2003 you can create general
types of word processing including, business
letters, newsletters, proposals, contracts, and
manuscripts.
To Start Microsoft Word 2003
1. Click the Start button, trace to Programs,
then trace to Microsoft Office and select
Microsoft Office Word 2003.
Open an Existing File
1. From the File menu, select Open.
2. Click the down arrow next to the Look in
field.
3. Navigate to the folder or disk drive where
your file is stored. If you do not see the file
that you want to open, click the down
arrow next to the Files of type field.
4. Click on All Files.
5. Click to select the document you want to
open.
6. Click the Open button.
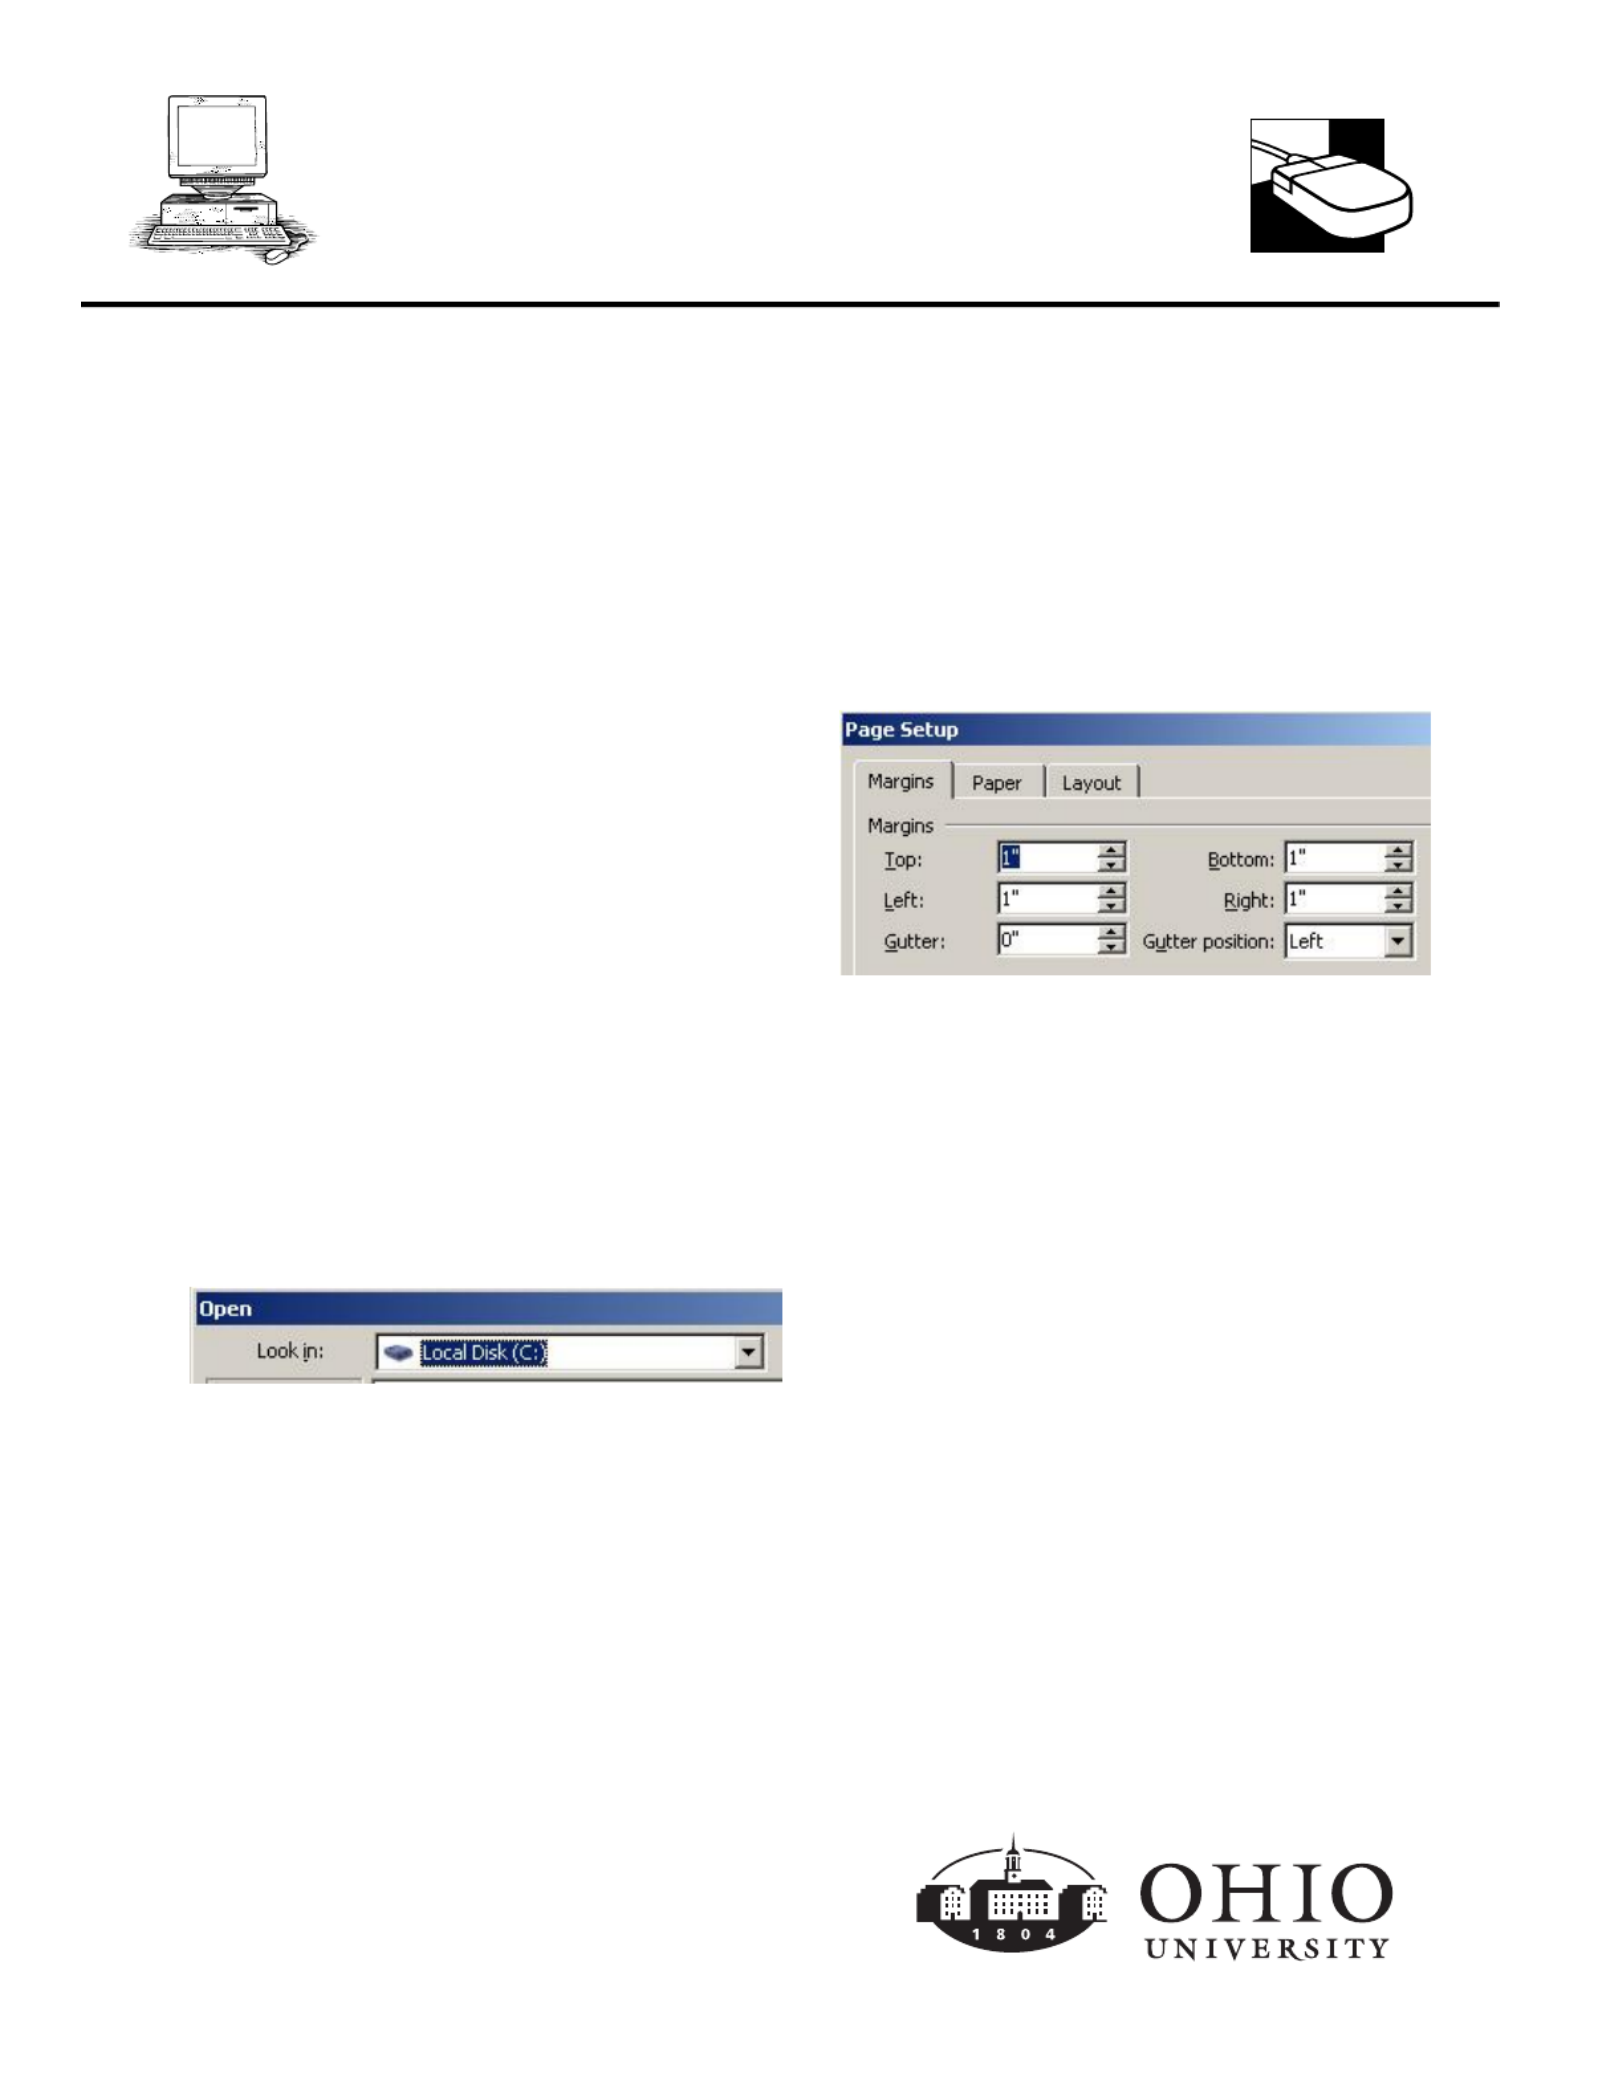
Adjust Page Margins
1. Click to place the insertion point (cursor)
at the beginning of the document.
2. From the File Menu, select Page Setup.
3. Adjust the margins by typing in an exact
measurement or click the up/down arrows
to increase/decrease the margin
measurement for each: top, bottom, left,
and right.
4. Click OK.
Select A Single Word
1. Place the mouse pointer (I beam) directly
on the word.
2. Double-click.
Select A Line of Text
1. Place the mouse pointer arrow in the left
margin, in front of the line of text you want
to select. (The I beam will become a North
East arrow.)
2. Single-click.

__________________________________________
Computer Services’ Central Technology Services
http://www.ohio.edu/cts
2
Select A Paragraph
1. Place the mouse pointer arrow in the left
margin, in front of the paragraph of text
you want to select. (The I beam will
become a North East arrow.)
2. Double-click.
Select All Text
The Select All feature is a quick way to
highlight all of the text within the entire
document.
1. Place the mouse pointer arrow in the left
margin. (The I beam will become a North
East arrow.)
2. Triple-click.
3. Or from the Edit menu, select Select All.
Select Text Using Click + Shift Key
1. Click to place the insertion point in front of
the text that you want to select.
2. Press and hold the Shift key on your
keyboard.
3. Click the I beam (mouse pointer) at the
end of the range of text that you want to
select.
Select Non-Subsequent Text Using the
CTRL Key
1. Highlight the text that is to be modified.
2. Press and hold down the Ctrl key on your
keyboard.
3. Highlight the additional text that is to be
modified.
4. Format the text as desired.
Format Text
A font is a set of all characters available in one
typeface and size, including uppercase letters,
lowercase letters, punctuation, and numerals.
To change the appearance of text, you may
change the font as well as the font style (bold,
italic, underline). Be sure to choose a font that
is legible and practical.
1. Highlight the text that is to be modified.
2. To highlight all of the text within the
document: from the Edit menu, select
Select All.
3. From the Format menu, select Font.
4. Click to select the desired font, font style,
size, font color, underline style, effects, etc.
(An example of an Effect is the shadow
feature.)
5. In the Preview Pane, verify your selections.
6. Click OK.
Font Color
1. Highlight the text that is to be modified.
2. Click the Font Color button in the
formatting toolbar.
3. Click to select the desired color. If you do
not see the color you want, click More Colors
to select a color.
Text Effects
1. Highlight the text that is to be modified.
2. From the Format menu, select Font.
3. Click to select the Text Effects tab.
4. Click to select the desired Animation. (An
example of an animation is Marching Red
Ants.)
5. In the Preview Pane, verify your selections.
6. Click OK.

__________________________________________
Computer Services’ Central Technology Services
http://www.ohio.edu/cts
3
Format Painter to Copy Text
Formatting
The format painter tool allows you to copy all
character formatting to newly selected text.
1. Highlight the text that contains the formats
you want to copy.
2. Click the Format Painter button in
the standard toolbar. (This copies the
character formatting.)
3. Click, hold and drag the paintbrush mouse
pointer over the text you want to format.
Cut, Copy, and Paste
It’s important to understand the difference
between cut and copy. When you cut text, you
remove it from its original location and place it
in a new location. When you copy text, the
duplicate text can be placed in a new location
while the original text remains in its primary
location.
1. Highlight the text that is to be cut or
copied.
2. Click the Cut button in the standard
toolbar. Or from the Edit menu, select Cut.
3. If you want to duplicate the text to put in a
different location, while the original text
remains in its current location, click the
Copy button in the standard toolbar.
Or from the Edit menu, select Copy.
4. Click to place the insertion point where
you want to put the text.
5. Click the Paste button in the standard
toolbar. Or from the Edit menu, select Paste.
Move Text with Drag and Drop
1. Highlight the text that is to be moved.
2. Place the mouse pointer directly on the
highlighted text.
3. Click, hold and drag the highlighted text to
the desired location.
Align Text
1. Highlight the text that is to be modified.
2. To highlight all of the text within the
document: from the Edit menu, select
Select All.
3. Click the desired alignment button:
Align Right
With right alignment, the right
side of the paragraph is aligned
with the right margin or indent.
Align Left
Left alignment is Word’s default
alignment for body text. The left
side of the paragraph is aligned
with the left margin or indent.
Center
With center alignment, each line
of a paragraph is centered between
the left and right margins or
indents.
Justify
With justified alignment, the
paragraph is aligned with both the
left and right margins or indents.
Center Text Vertically on the Page
1. From the File menu, select Page Setup.
2. Click to select the Layout tab.
3. Click the down arrow next to the Vertical
alignment Center field, and select (or Top,
Justified, or Bottom).
Produktspezifikationen
| Marke: | Microsoft |
| Kategorie: | Office-software |
| Modell: | Word 2004 |
Brauchst du Hilfe?
Wenn Sie Hilfe mit Microsoft Word 2004 benötigen, stellen Sie unten eine Frage und andere Benutzer werden Ihnen antworten
Bedienungsanleitung Office-software Microsoft

2 September 2024
9 August 2024
6 August 2024
31 Juli 2024
29 Juli 2024
29 Juli 2024
29 Juli 2024
27 Juli 2024
27 Juli 2024
19 Juli 2024
Bedienungsanleitung Office-software
Neueste Bedienungsanleitung für -Kategorien-

11 August 2024
9 August 2024
8 August 2024
6 August 2024

16 Juli 2024