Nexa TMT-918 Bedienungsanleitung
Nexa Fernbedienung TMT-918
Lies die bedienungsanleitung für Nexa TMT-918 (8 Seiten) kostenlos online; sie gehört zur Kategorie Fernbedienung. Dieses Handbuch wurde von 59 Personen als hilfreich bewertet und erhielt im Schnitt 4.6 Sterne aus 7 Bewertungen. Hast du eine Frage zu Nexa TMT-918 oder möchtest du andere Nutzer dieses Produkts befragen? Stelle eine Frage
Seite 1/8
TMT-918
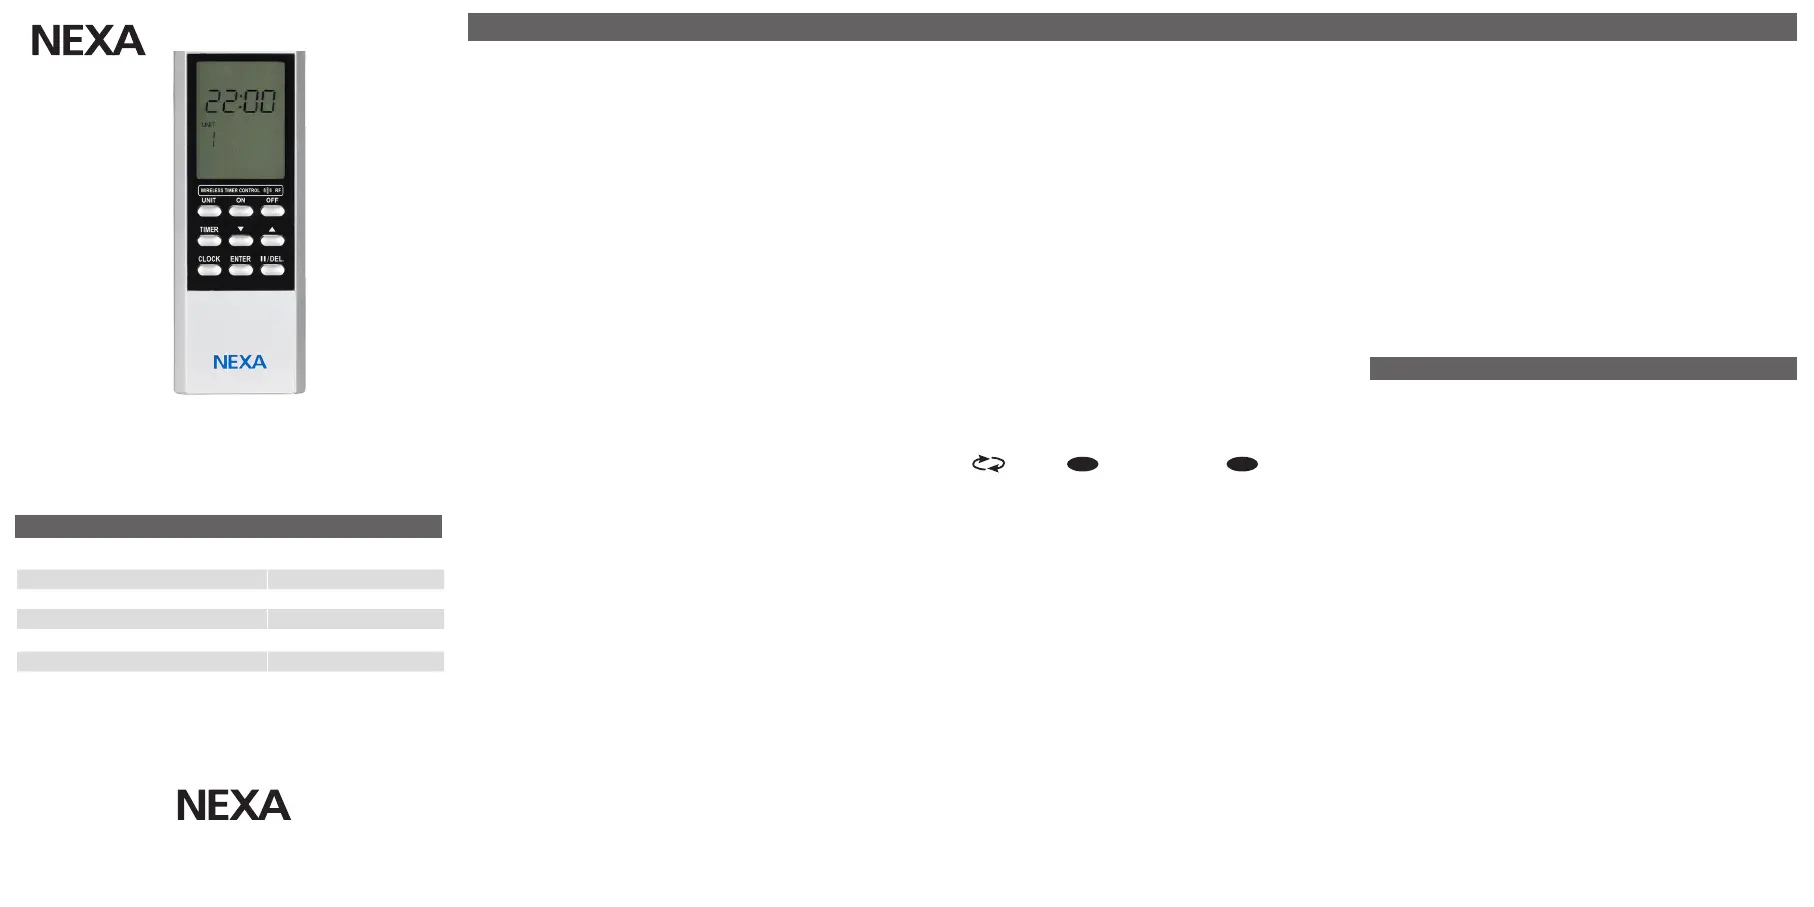
Fjärrkontroll med timer
KANALER
TMT-918 har 16 st unika kanaler (UNIT) för att styra System Nexa
mottagare. Varje kanal kan styra en eller era mottagare, detta sker
genom att lära mottagare att ”lyssna” på en specik kanal.
Se avsnittet INLÄRNING.
INLÄRNING
Mottagare utan knapp för inlärning.
1. Anslut mottagaren (plug-in) till ett eluttag. Mottagaren ställer sig i
inlärningsläge så snart den spänningssätts.
2. Välj den kanal (UNIT) som mottagaren skall kopplas till. Stega till
önskad kanal med pil Upp / Ned.
3. Tryck på ”ON” knappen på fjärrkontrollen inom 6 sekunder.
Mottagare med knapp för inlärning.
1. Anslut mottagaren (plug-in) till ett eluttag. Aktivera inlärningsläge
med ett kort tryck på knapp för inlärning, LED indikering på
mottagaren blinkar sakta.
2. Välj den kanal (UNIT) som mottagaren skall kopplas till. Stega till
önskad kanal med pil Upp / Ned.
3. Tryck på ”ON” knappen på fjärrkontrollen inom 6 sekunder.
BEKRÄFTELSE INLÄRNING
LED Indikering på mottagaren blinkar snabbt, är en lampa ansluten
till mottagaren blinkar denna två gånger.
RADERING AV INLÄRD MOTTAGARE
Mottagare utan knapp för inlärning.
1. För att radera en minnesplats, tag ut mottagaren ur vägguttaget.
2. Vänta minst 6 sekunder.
3. Anslut mottagaren igen till ett eluttag.
4. Välj den kanal (UNIT) som mottagaren skall kopplas till. Stega till
önskad kanal med pil Upp / Ned.
5. Tryck på ”OFF” knappen på fjärrkontrollen inom 6 sekunder.
Mottagare med knapp för inlärning.
1. Aktivera inlärningsläge med ett kort tryck på knapp för inlärning,
LED indikering på mottagaren blinkar sakta.
2. Välj den kanal (UNIT) som mottagaren skall kopplas till. Stega till
önskad kanal med pil Upp / Ned.
3. Tryck på ”OFF” knappen på fjärrkontrollen inom 6 sekunder.
BEKRÄFTELSE AV RADERING
LED indikering på mottagaren blinkar snabbt, är en lampa ansluten
till mottagaren blinkar denna två gånger.
STYRA MOTTAGARE MANUELLT
1. Stega till önskad kanal med pil Upp / Ned.
2. Tryck på ”ON” för på eller ”OFF” för av.
TIMERS
För att kunna ställa in timer för på- och avslag måste du först
lära in fjärrkontrollen till de mottagare du vill styra. Se avsnittet
INLÄRNING.
TMT-918 har plats för upp till 12 olika timerinställningar för att slå på
och av vid förinställda tider. Varje TIMER kan påverka en eller era
mottagare, detta beror på hur mottagarna har lärts in.
Vill Du styra en grupp med era mottagare samtidigt med en timer
är den bästa metoden att lära in alla mottagare i gruppen på samma
kanal (UNIT) och sedan skapa en timerinställning för den kanalen.
INSTÄLLNING AV TIMER
1. Håll inne knappen ”timer” i 3 sekunder för att gå till timerskärmen
2. Använd pilarna och stega till önskad Timer (1-12) med pil Upp /
Ned, tryck sedan på ”ENTER”
3. Använd pilarna och stega till önskad kanal (UNIT) som skall
styras, tryck sedan på ”ENTER”
4. Använd pilarna och stega till önskad Timme för påslag, tryck på
”ENTER”, stega till önskad Minut för påslag, tryck på ”ENTER”
5. Använd pilarna och stega till önskad Timme för frånslag tryck på
”ENTER”, stega till önskad Minut för frånslag, tryck på ”ENTER”
6. Använd pilarna för att välja om aktuell TIMER ska köras varje
dag en gång eller slumpmässigt (lamporna
tänds och släcks slumpmässigt mellan den inställda tiden för på-
och frånslag) och tryck på ”ENTER” för att bekräfta
Din timer är nu tillagd och minnesplatsen syns på hemskärmen för
att indikera att den är aktiv.
RADERA EN TIMER
1. Håll inne knappen ”timer” i 3 sekunder för att gå till timerskärmen
2. Använd pilarna och stega till den Timer (1-12) du vill radera
3. Håll inne II/DEL-knappen i tre sekunder, den inställda tiden börjar
blinka
4. Tryck på ”enter” för att bekräfta att du vill radera vald timer
Din timer är nu raderad och syns inte längre på hemskärmen.
PAUSA EN TIMER
1. Håll inne knappen ”timer” i 3 sekunder för att gå till timerskärmen
2. Använd pilarna för att växla mellan minnesplatserna och välja den
timer du vill pausa
3. Tryck kort en gång på II/DEL-knappen, en ruta börjar då blinka
runt den markerade minnesplatsen
4. Tryck på ”ENTER” för att bekräfta
Din timer är nu pausad och en ruta syns runt minnesplatsen på
hemskärmen för att indikera att den är pausad. Upprepa stegen
ovan för en pausad TIMER för att ta bort pausen och åter aktivera
timern.
STÄLL IN KLOCKAN
1. Håll inne knappen ”clock” i 3 sekunder för att gå till
klockinställningen
2. Använd pilarna för att ändra tid, timme och minut och tryck på
”ENTER” för att bekräfta varje steg och gå vidare
BARNSÄKERT LÄGE
Håll inne knapparna ”ENTER” och II/DEL i 3 sekunder för att
aktivera barnsäkert läge. Detta gör att fjärrkontrollen inte reagerar
när du trycker på knapparna och bokstäverna CP (child proof) dyker
upp för att indikera att läget är aktivt. Håll inne knapparna ”ENTER”
och II/DEL i 3 sekunder igen för att inaktivera det.
SVENSKA
TMT-918
Batteri1 x CR2032
ProtokollSystem Nexa (433,92 MHz)
Kanaler16
Max ERP10 mW
Mått 45 x 120 x 18mm
TEKNISK DATA
Declaration of conformity is available at www.nexa.se
NEXA AB, DATAVÄGEN 37B, 436 32 ASKIM, SWEDEN
[email protected] | www.nexa.se
SE Säkerhet och information
Räckvidd inomhus:upp till 30 m (optimala förhållanden).
Räckvidden är starkt beroende av lokala förhållanden, till exempel
om det nns metaller i närheten. Exempelvis har den tunna
metallbeläggning i energiglas med låg emissivitet negativ inverkan
på radiosignalernas räckvidd. Det kan nnas begränsningar
för användningen av enheten utanför EU. Om tillämpligt bör du
kontrollera att enheten överensstämmer med lokala föreskrifter.
Max belastning: Anslut aldrig lampor eller utrustning som
överskrider mottagarens maximala belastning. Det kan leda till fel,
kortslutning eller brand.
Livsuppehållande utrustning: Använd aldrig Nexas produkter
till livsuppehållande utrustning eller andra apparater där fel eller
störningar kan få livshotande följder.
Störningar: Alla trådlösa enheter kan drabbas av störningar som
kan påverka prestandan och räckvidden. Det minsta avståndet
mellan två mottagare bör därför vara åtminstone 50 cm
Reparation: Försök inte att reparera produkten. Den innehåller inga
reparerbara delar.
Vattentäthet: Produkten är inte vattentät. Se till att den alltid är
torr. Fukt gör att elektroniken inuti fräts sönder och kan leda till
kortslutning, fel och risk för elstötar.
Rengöring: Rengör produkten med en torr trasa. Använd inte
kemikalier, lösningsmedel eller starka rengöringsmedel.
Miljö: Utsätt inte produkten för stark värme eller kyla, eftersom det
kan skada eller förkorta de elektroniska kretsarnas livslängd.
S1
Produktspezifikationen
| Marke: | Nexa |
| Kategorie: | Fernbedienung |
| Modell: | TMT-918 |
Brauchst du Hilfe?
Wenn Sie Hilfe mit Nexa TMT-918 benötigen, stellen Sie unten eine Frage und andere Benutzer werden Ihnen antworten
Bedienungsanleitung Fernbedienung Nexa

6 März 2026
21 August 2024
21 August 2024
21 August 2024
20 August 2024
19 Juni 2024
Bedienungsanleitung Fernbedienung
Neueste Bedienungsanleitung für -Kategorien-
21 März 2026
17 März 2026
14 März 2026
2 März 2026
1 März 2026
26 Februar 2026
26 Februar 2026
16 Februar 2026
27 Januar 2026
17 Januar 2026