Uniden CEZAI 2998 Bedienungsanleitung
Lesen Sie kostenlos die 📖 deutsche Bedienungsanleitung für Uniden CEZAI 2998 (36 Seiten) in der Kategorie Telefon. Dieser Bedienungsanleitung war für 14 Personen hilfreich und wurde von 2 Benutzern mit durchschnittlich 4.5 Sternen bewertet
Seite 1/36

CEZAI2998 base
with answering
system
Base AC adapter
(PS-0034)
Telephone
cord
Coiled
cord
(to connect
handset to base)
Corded
handset
Desk/wall
mount stand
(may be attached to the base)
Charger AC adapter
(PS-0035)
Battery
cover
EZX290
accessory
handset and
charger
If you purchased
model number:
You should
have:
CEZAI2998 1 of each
CEZAI2998-2 2 of each
CEZAI2998-3 3 of each
CEZAI2998-4 4 of each
CEZAI2998-5 5 of each
CEZAI2998-6 6 of each
You will also nd:
Rechargeable
battery pack
(BT-1007)
If any items are missing or damaged, contact our Customer Care Line
immediately. Never use damaged products!
Need Help? Get answers 24/7 at our website: .www.uniden.com
If You... Contact Uniden’s... Phone Number
have a question or problem Customer Care Line* 817-858-2929 or
800-297-1023
need a replacement part or an
accessory (headset, belt clip, etc.) Parts Department* 800-554-3988
need special assistance due to a
disability Accessibility Help Line 800-874-9314
(voice or TTY)
* During regular business hours, Central Standard Time. Visit our website for detailed business
hours.
CEZAI2998 Series User's Guide
What's in the box?

Important Safety Precautions!
When using your telephone equipment, basic safety precautions should
always be followed to reduce the risk of fire, electric shock and injury to
persons, including the following:
This unit is NOT waterproof. DO NOT expose it to rain or moisture.
Do not use this product near water, for example, near a bath tub, wash
bowl, kitchen sink or laundry tub, in a wet basement or near a swimming
pool.
Avoid using a telephone (other than a cordless type) during an electrical
storm. There may be a remote risk of electric shock from lightning.
Do not use the telephone to report a gas leak in the vicinity of the leak.
Use only the power cord and batteries indicated in this manual. Do not
dispose of batteries in a fire. They may explode. Check with local codes
for possible special disposal instructions.
Do not place the handset in any charging cradle without the battery
installed and the battery cover securely in place.
SAVE THESE INSTRUCTIONS!
What's in the manual?
Installing Your Phone .......................... 1
Set Up the Base ......................................1
Test the Connection ...............................3
Set Up the Accessory Handset(s) ..........3
Getting to Know Your Phone.............. 5
Parts of the Base ....................................5
Parts of the Handset ...............................7
Reading the Displays .............................8
Using the Menus ................................ 10
The
Handset Setup
Menu ..................10
The
Base Setup
Menu ........................11
The
Ans. Setup
Menu .........................11
Day & Time
Setting .............................11
The
Global Setup
Menu .....................12
Register Handset
(Base Only) ............12
Entering Text on Your Phone ..............12
Using Your Phone .............................. 13
Using the Speakerphone .....................13
Changing the Volume ..........................14
Using the Redial List .............................14
Using Caller ID and Call Waiting ..........14
Using Seven-Digit Dialing ....................15
Using the Phonebook ...........................16
Chain Dialing ........................................17
Finding a Lost Handset ........................17
Using an Optional Headset ..................17
Using Multi-station Features ............ 18
Expanding Your Phone ........................18
Using Conference Calling ....................18
Using Privacy Mode .............................18
Using Call Transfer ...............................19
Using the Intercom ...............................19
Using Special Features ...................... 20
Using Your Phone During a Power
Failure .................................................20
Using Do Not Disturb ...........................20
Adjusting the Base Visual Ringer .......20
Using the Audio Boost .........................20
Using Text-To-Speech .........................21
Using Voice Message Notication.......21
Using the Answering System .......... 22
Setting Up Your Answering System ...22
Getting Your Messages ........................23
Screening Your Calls ............................24
Using the System While You're Away
from Home .........................................25
Solving Problems ............................... 26
Weak or Hard To Hear Audio ..............27
Noise or Static On The Line .................28
Resetting and Registering Handsets ...29
Handling Liquid Damage .....................30
Important Information ....................... 31
Terms Used In This Guide ...................31
Specications .......................................31
Battery Information ..............................31
Compliance information ......................32
One-year Limited Warranty .................34

1
Installing Your Phone
Set Up the Base
Attach the stand
Before you attach the stand, you have to decide if you want the phone to
rest on a desk or hang on a wall.
For desktop use
Turn the stand so the
word
DESK
is right side
up (it will be on the left).
Insert the tabs into the
notches at the top of
the base.
Press in on the latches
and slip them into the
notches marked
DESK
.
For wall mount use
Turn the stand so the
word
WALL
is right side
up (it will be on the left).
Insert the tabs into the
notches at the bottom
of the base.
Press in on the latches
and slip them into the
notches marked
WALL
.
To remove the stand
Press in on the latches and
slide them out of the notches.
Connect the corded handset
Use the coiled cord to connect the
corded handset to the connector
on the left side of the base.
1)
2)
3)
1)
2)
3)
DESK
WALL
DESK
WALL
DESK
WALL
DESK
WALL
DESK
WALL
DESK
WALL
DESK
WALL
DESK
WALL

2
For wall mount use only
On the front of the base, pull the clip
(that holds the corded handset in
place) out of its slot.
Rotate the clip 180 degrees.
Flip it from front to back and slide it back into the slot.
Connect the power and telephone cords
Connect the base AC adapter to the
AC IN 7.8V
jack and the telephone
cord to the
TEL LINE
jack. Route the cords as shown below:
For desktop use For wall mount use
Plug the AC adapter into a standard 120 V AC power outlet, and
connect the telephone cord to a standard telephone wall jack.
Place the phone on the wall
Place the mounting slots over the
pins on the wall plate, and slide the
base down to lock it into place.
1)
2)
3)
1)
2)

4
Line up the red and black wires on
the battery pack with the label
inside the handset.
Push the battery pack connector
in until it clicks into place. Tug
gently on the wires to make sure
the battery pack is securely
connected.
Place the cover over the battery
compartment and slide it up into place.
Connect the charger
Connect a charger AC adapter to each
charger's
AC IN 8V
jack and set the
plug into the notch as shown. (These
adapters might already be connected.)
Plug the other end of the adapter into
a standard 120V AC power outlet.
Place each handset in a charger with the display facing forward. The
CHARGE
light should turn on.
If... Try...
the
CHARGE
light doesn't
turn on
reseating the handset.
checking the AC adapter connection.
seeing if the outlet is controlled by a wall
switch.
-
-
-
Charge all handsets completely (about 15 hours)
before using them.
Test the connection
Pick up each handset and press
TALK
. You should hear a dial tone, and
the display should say
Talk
. (Press
TALK
again to hang up.)
If you can't get a dial tone or the handset display says
Unavailable
, try
moving the handset closer to the base or resetting it (see page 29).
2)
3)
4)
1)
2)
3)
Red
Black
Red
Black

6
Key name
(and icon) What it does
REDIAL/
PAUSE
In standby: open the redial list.
During a phone number entry: insert a two-second pause.
-
-
INTERCOM/
HOLD
In standby: page a handset using the intercom.
During a call: put the call on hold and start a call transfer.
-
-
DO NOT
DISTURB ( )
In standby: turn the Do Not Disturb feature on or off (see page
20).
-
PHONEBOOK/
LEFT
In standby or during a call: open the phonebook.
In the menu: go back to the previous screen.
During text entry: move the cursor to the left.
-
-
-
SELECT/
MENU
In standby: open the menu.
In the menu or any list: select the highlighted item.
-
-
CALLER ID/
RIGHT
In standby or during a call: open the Caller ID list.
During text entry: move the cursor to the right.
-
-
REPEAT ( )
In the first 2 seconds of a message: go to the previous message.
Anytime after that: go back to the beginning of this message.
-
-
PLAY/STOP
In standby: start playing new messages.
While a message is playing: stop playing messages.
-
-
SKIP ( )
While a message is playing: skip to the next message.
-
UP ( )
In standby: increase the ringer volume.
During a normal call: increase the earpiece volume.
During a speakerphone call or while a message is playing:
increase the speaker volume.
In the menu or any list: move the cursor up one line.
-
-
-
-
DOWN ( )
In standby: decrease the ringer volume.
During a normal call: decrease the earpiece volume.
During a speakerphone call or while a message is playing:
decrease the speaker volume.
In the menu or any list: move the cursor down one line.
-
-
-
-
DELETE
While a message is playing: delete this message.
In standby: delete all messages.
-
-
CLEAR/MUTE
While the phone is ringing: mute the ringer for this call only.
During a call: mute the microphone.
While entering text: delete the last character, or press and hold
to delete all the characters.
-
-
-
FLASH
During a call: switch to a waiting call.
-
TALK
In standby: start a speakerphone call (get a dial tone).
During a normal call: switch to the speakerphone.
During a speakerphone call: hang up.
-
-
-

7
Parts of the Handset
If the key name is spelled
out on the key itself, it's
not labeled in the
drawing below.
Handset keys and how they work
Key name
(and icon) What it does
PHONEBOOK/
LEFT (PHBK)
In standby or during a call: open the phonebook.
In the menu: go back to the previous screen.
During text entry: move the cursor to the left.
-
-
-
SPEAKER (SPKR)
Switch a normal call to the speakerphone (and back).
-
SELECT/MENU
In standby: open the menu.
In the menu or any list: select the highlighted item.
-
-
Microphone
Twelve-key
dial pad
Visual
ringer
Display
Charging
contacts
Earpiece
Headset
jack
UP
PHONEBOOK/
LEFT
SPEAKER
TONE
DOWN
CALLER ID/RIGHT
(Left side) (Right side)
BOOST
Microphone
Twelve-key
dial pad
Visual
ringer
Display
Charging
contacts
Earpiece
Headset
jack
UP
PHONEBOOK/
LEFT
SPEAKER
TONE
DOWN
CALLER ID/RIGHT
(Left side) (Right side)
BOOST
8
Key name
(and icon) What it does
CALLER ID/
RIGHT (CID)
In standby or during a call: open the Caller ID list.
During text entry: move the cursor to the right.
-
-
TALK
In standby: start a telephone call (get a dial tone).
During a call: hang up.
-
-
FLASH/EXIT
During a call: switch to a waiting call.
While the phone is ringing: mute the ringer for this call only.
In the menu or any list: exit the menu and go back to the
previous operation.
-
-
-
CLEAR/
INTERCOM
In standby: page another station using the intercom.
During a call: put the call on hold and start a call transfer.
While entering text: delete the last character, or press and
hold to delete all the characters.
-
-
-
REDIAL/PAUSE
In standby: open the redial list.
During a phone number entry: insert a two-second pause.
-
-
MUTE/
MESSAGES
In standby: access your answering system.
During a call: mute the microphone.
While the phone is ringing: mute the ringer for this call only.
-
-
-
BOOST
During a call: boost the volume of the earpiece (see page 20).
-
UP ( )
In standby: increase the ringer volume.
During a call: increase the call volume.
In the menu or any list: move the cursor up one line.
-
-
-
DOWN ( )
In standby: decrease the ringer volume.
During a call: decrease the call volume.
In the menu or any list: move the cursor down one line.
-
-
-
TONE
During a call: adjust the audio tone (see page 27).
-
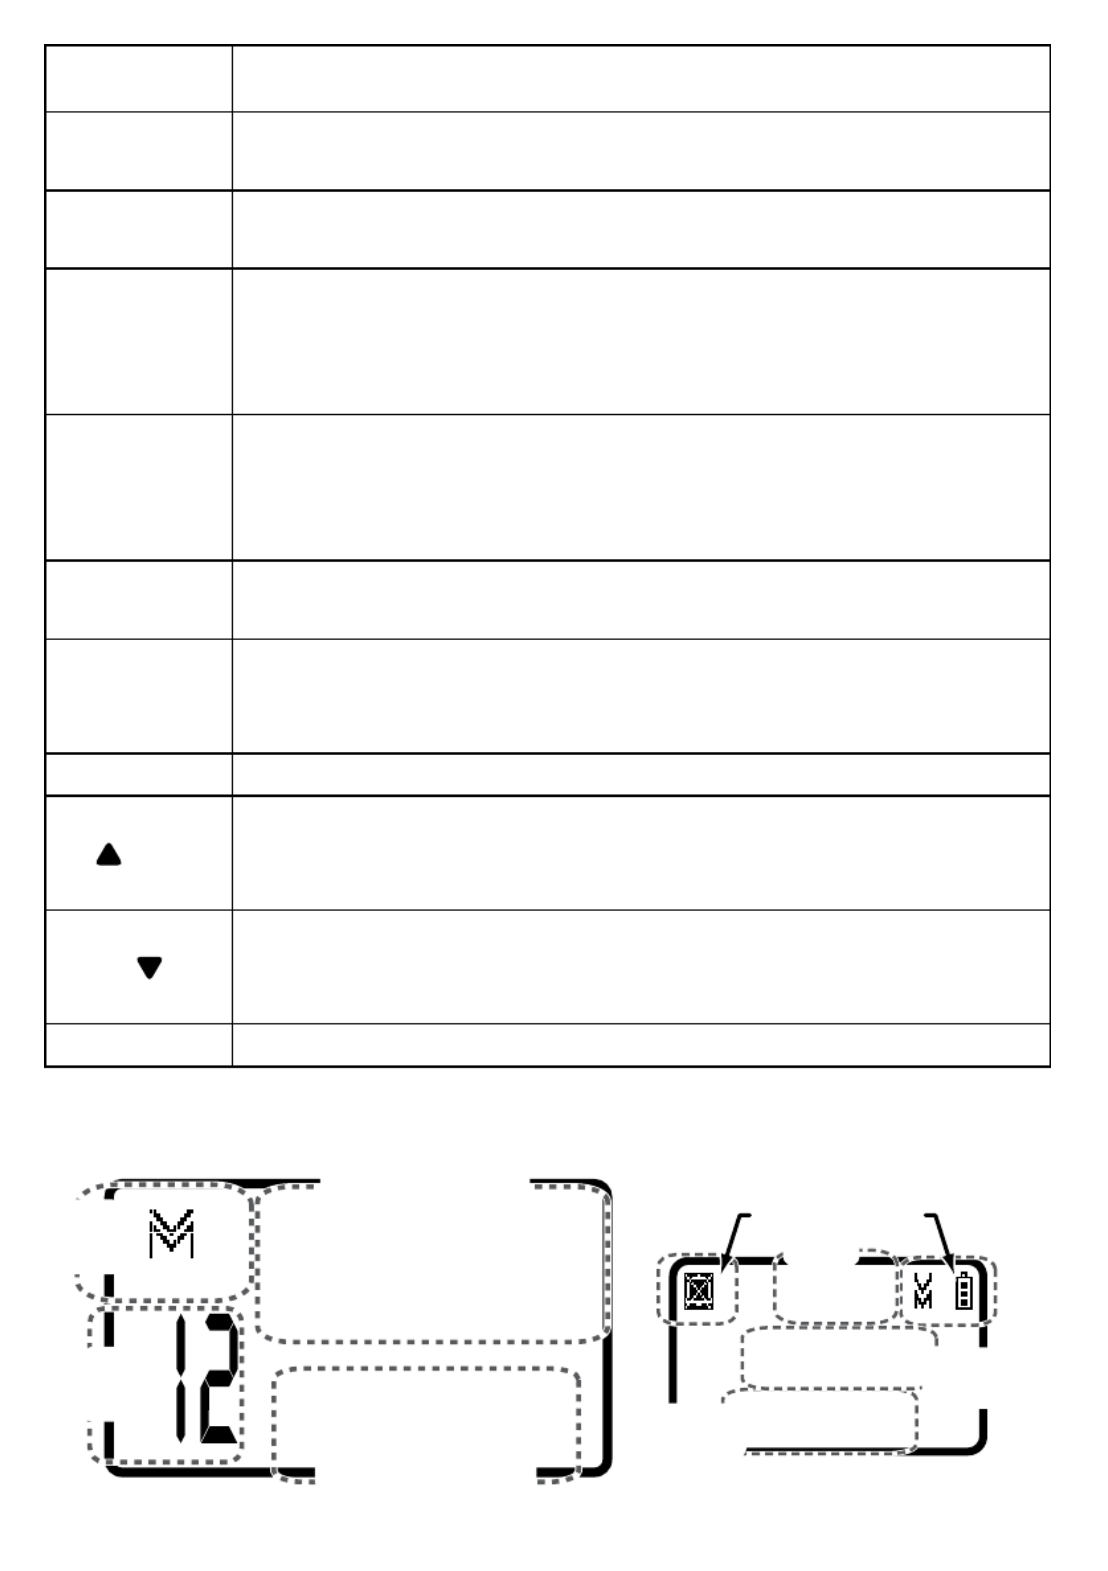
Reading the Displays
On the base On the handset
SUN 12:00 AM
New CID: 5
Message
counter
Status
icons
Caller ID count
Day and time
12:00A
Handset #1
New CID: 5
Handset
banner
Status icons
Caller ID
count
Time
9
The next three tables show the possible icons and what they mean. Since
the icons appear based on what you're doing with the phone, you won't
ever see all of these icons at the same time.
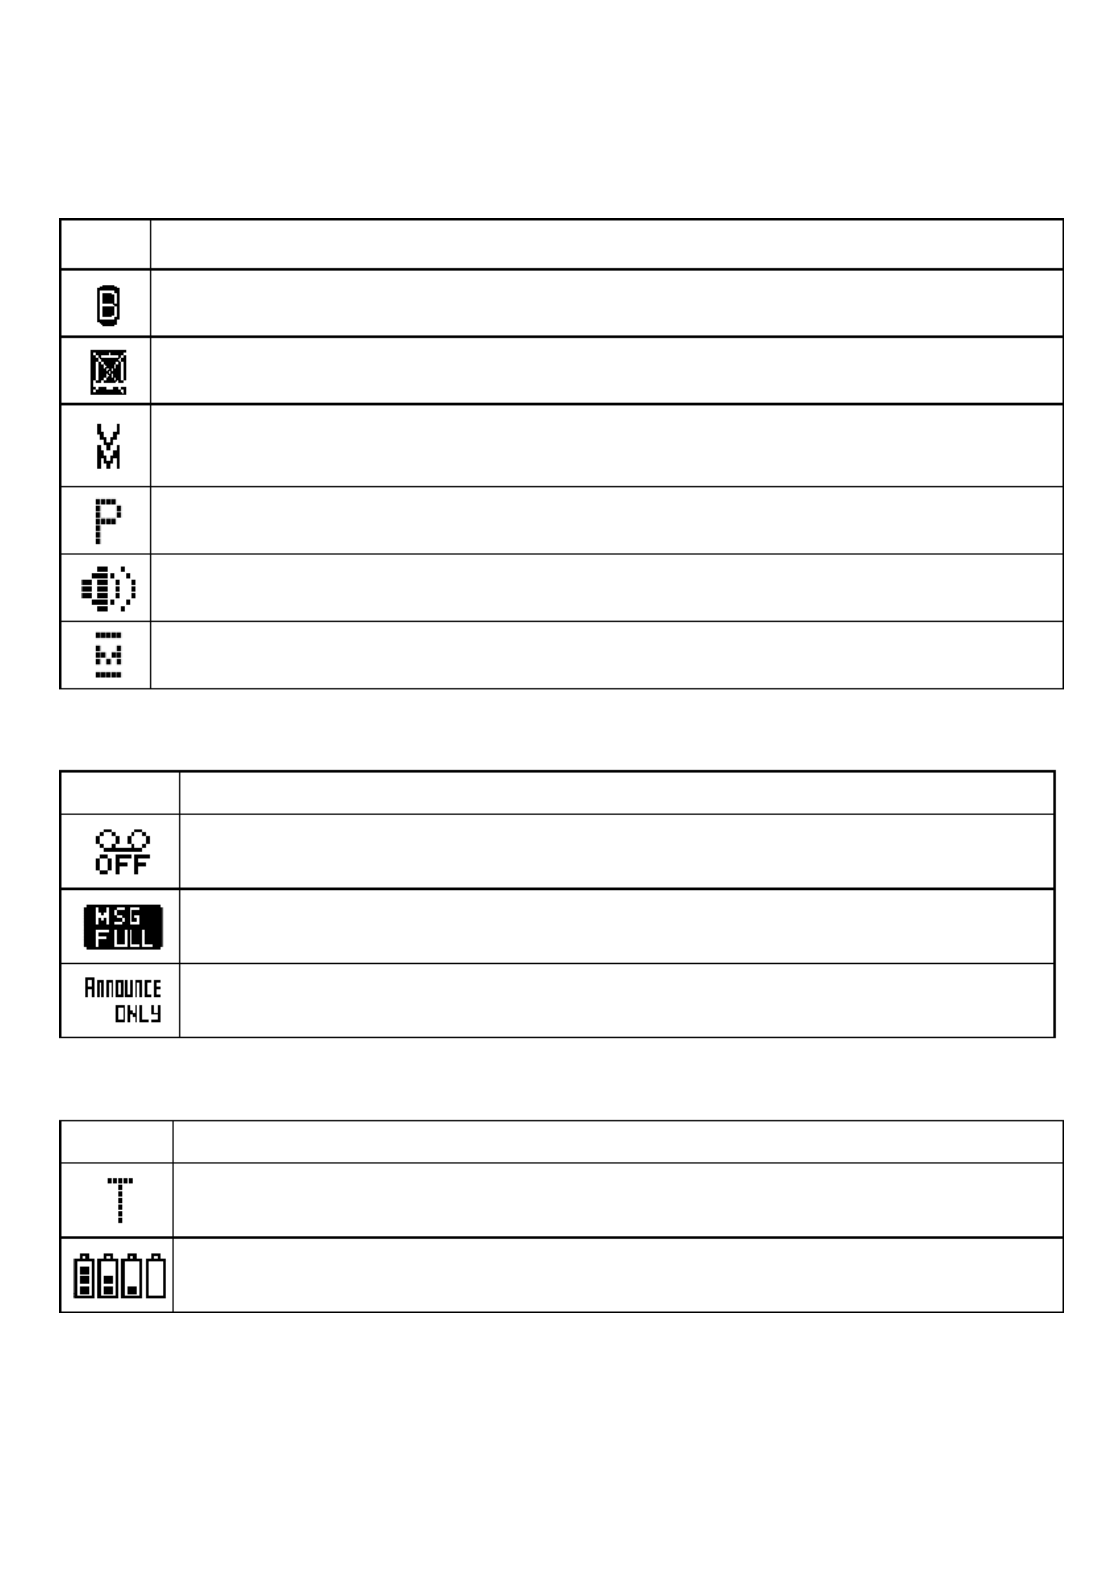
Icons you might see on both the base and handset
Icon What it means
The volume of the earpiece is boosted (see page 20).
The ringer is turned off: this station will not ring when a call comes in.
You have a voice message waiting (see the section titled "Using Voice
Message Notification" on page 21).
Privacy Mode is on: no other station can use the line or join your call.
The speakerphone is on.
The microphone is muted, and the caller can't hear you.
Icons you might see only on the base
Icon What it means
The answering system is turned off: the system will not answer the
phone or take messages.
The memory on the answering system is full: you need to delete
some messages before the system can record any new ones.
The answering system is set to Announce Only: the system will
answer the phone, but it will not let callers leave a message.
Icons you might see only on the handset
Icon What it means
T-coil mode is on. (See "Do you have a T-coil hearing aid?" on page
28.)
The battery is 1) fully charged, 2) half charged, 3) getting low, or 4)
empty.

10
Using the Menus
The menus are designed to be as easy as possible. Some users don't
even need the manual once they know how to perform these actions:
Open the menu Press
SELECT/MENU
.
Move the cursor
The arrow cursor on the left side of the line shows which
menu item is currently highlighted. Use
UP
to move the
cursor up and
doWN
to move it down.
Select an option Move the cursor to highlight the option, then press
SELECT/MENU
.
Go back to the
previous screen Press
PHoNEBooK/LEFT
.
Close the menu On the handset, press
FLASH/ExIT
.
On the base, press
PLAY/SToP
.
-
-
If you don’t press any keys for thirty seconds, the phone times out
and exits the menu. (When setting the day and time, the time-out
period is extended to two minutes.)
Using the handset menus Using the base menus
Handset Setup
Ans. Setup
Day & Time
Global Setup
To open the menu, press
SELECT/MENU.
To select the
highlighted
option, press
SELECT/
MENU.
To close the
menu, press
FLASH/EXIT.
OR
Use and UP DOWN
to move the cursor.
Base Setup
Ans. Setup
Day & Time
Global Setup
RegisterHandset
To open the menu, press
SELECT/MENU.
To select the
highlighted
option, press
SELECT/
MENU.
To close the
menu, press
PLAY/STOP
OR
Use and to UP DOWN
move the cursor.
The
Handset Setup
Menu
You have to change these settings separately for each cordless handset.
T-coil
Turn on T-coil mode to reduce noise on certain hearing
aids (see "Do you have a T-coil hearing aid?" on page 28).
Ringer Tones
Choose one of two melodies or five tones for the
handset's main ring tone. As you highlight each ring
tone, the phone plays a sample of the tone. When you
hear the tone you want, press
SELECT/MENU
.

11
Personal Ring
Turn on the personal ring feature. If you have Caller ID,
this feature lets you assign special ring tones to anyone
in your phonebook, and your phone uses the special ring
tone when that person calls.
Autotalk
Turn on Auto Talk so you can answer the phone just
by picking up the handset from the cradle (without to
pressing any buttons).
Any Key Answer
Turn on Any Key Answer so you can answer the phone
by pressing any key on the twelve-key dial pad.
Banner
Change the name used on the handset's display.
Handset Language
Change the display language to
Spanish
or
French
.
Key Touch Tone
Have your keypad sound a tone when you press a key.
LCD Contrast
Change the contract of the display to make it easier to
read. Choose one of ten different levels of contrast.
TTS On/Off
Turn on the Text-To-Speech (TTS) feature (see page 21).
The
Base Setup
Menu
These settings apply only to the base. These options work the same as
the
Handset Setup
menu options with the same name.
Ringer Tones
Choose one of four ring tones for the base. As you highlight
each ring tone, the base plays a sample of the tone. When
you hear the tone you want, press
SELECT/MENU
.
Base Language
Change the display language to
Spanish
or
French
.
Key Touch Tone
Have the keypad sound a tone when you press a key.
LCD Contrast
Change the contract of the display to make it easier to read.
Choose one of ten different levels of contrast.
TTS On/Off
Turn on the Text-To-Speech (TTS) feature (see page 21).
The
Ans. Setup
Menu
This menu controls the options and settings for your answering system (see
"Ans. Setup menu options" on page 23).
Day & Time
Setting
You need to set the day and time so messages get the correct time stamp.
Use
up
and
DOWN
to choose the day of the week; press
seLeCT/meNu
.
Use the number keypad to enter the hour and minutes.
Use
up
and
DOWN
to select
AM
or
PM
; press
seLeCT/meNu
.
1)
2)
3)

12
The
Global Setup
Menu
The settings on this menu apply to all the handsets and the base. Before
changing these settings, make sure the phone is in standby and all
handsets are within range of the base. (Only one station at a time can
change these settings.)
Area
Code
Enter your area code so the phone hides the area code on
incoming local calls (see "Using Seven-digit Dialing" on page 15).
Dial
Mode
Change the way your phone communicates with the telephone
network (see "Changing from Tone to Pulse Dialing" on page 3).
Set Line
Mode
Do not change this setting unless instructed to by customer
service.
VMWI
Reset
(Base only) Reset the voice message waiting indicator to bring it
back into sync with your voice mail service (see page 21).
Register Handset
(Base Only)
This menu lets you register additional handsets to this base or re-register
a handset that you had to reset for some reason (see "Resetting and
Registering Handsets" on page 29). If you want to use other accessory
handsets, visit our website or contact our Customer Care Line for
information on compatible handsets.
Entering Text on Your Phone
When you want to enter text into your phone (for example, a name in the
phonebook), use the twelve-key dial pad to enter the letters printed on the
number keys. Here's how it works:
The phone enters the letters in the order they appear on the key. For
example, if you press the number key
2
once, the phone enters the
letter
A
. Press
2
twice for
B
, and three times for
C
.
If you press the key again after the last letter, the phone starts the same
letter sequence with small letters. If you press
2
four times in a row, the
phone enters
a
(small letter). Press
2
five times for
b
, and six times for
c
.
If you see the icon
[Aa]
in the display, the phone enters capital letters
first (
A B C
), then small letters (
a b c
), then the number on the key (
2
).
The icon
[aA]
means the phone starts at the small letters, so it enters
small letters first, then the number on the key, then capital letters.
The phone automatically uses a capital letter for the first letter and any
letter directly after a space; all other times, it uses small letters.
If two letters in a row use the same number key, enter the first letter,
then use
CaLLer ID/rIGHT
to move the cursor to the next position to
enter the second letter.

14
To... From the base From a cordless handset
switch a call to the speakerphone Press
TALK
. Press
SPEAKER
.
switch back to the earpiece Pick up the
corded handset. Press
SPEAKER
.
hang up a speakerphone call Press
TALK
. Press
TALK
.
Changing the Volume
You can set the volume of the ringer, the earpiece, and the speakerphone
separately for the base and each cordless handset. For each item, just
press
UP
to make it louder or
DOWN
to make it softer.
The available volume levels and how change them are listed below:
Change the When On the base On a handset
ringer
volume the phone is in standby select
Off, Low,
Medium
,
or
High
select
Off, Low,
Medium
,
or
High
earpiece
volume
you are on a normal
call
choose one of 6
volume levels
choose one of 6
volume levels
speaker
volume
you are using the
speakerphone for a call
or getting messages
choose one of 10
volume levels
choose one of 6
volume levels
If you want to change the volume of Caller ID announcements,
change the ringer volume.
Using the Redial List
The phone saves the last 5 numbers you dial on each station. To open the
redial list, press
REDIAL/PAUSE
; use
UP
and
DOWN
to scroll through the list.
To close the list, press
PHONEBOOK/LEFT
. With the phone in standby, open
the list & find the number you want. Then:
to redial the selected number On the handset, press
TALK;
on the base, pick up the corded handset.
to delete the number Press
SELECT/MENU
and select
Delete Entry
.
to save it to the phonebook Press
SELECT/MENU
and select
Store Into Pb
.
Using Caller ID and Call Waiting
You have to subscribe to Caller ID, Call Waiting, and Caller ID on
Call Waiting services to use the features described in this section:
contact your telephone provider for more information.
When a call comes in, the phone displays the caller’s number & name (if
available); if you turned on Text-To-Speech, it also announces the name.

15
The phone saves the information for the last 30 received calls to the CID
list. When it's in standby, the phone displays how many new calls you've
received since the last time you checked the CID list.
Open the CID list Press
CALLEr Id/rIGHT
.
Scroll through the
CID list
Press
doWN
to scroll through the list from newest to
oldest. Press
UP
to scroll from oldest to newest.
Close the CID list Press
PHoNEBooK/LEFT
.
Dialing from the Caller ID list
Find the entry you want to dial.
If the number is a toll or long distance call, but there's no at the front 1
of the CID record, press to add the .1
On the handset, press
TaLk
to dial the number. On the base, pick up
the corded handset.
(You can also press
TaLk
or pick up the corded handset before opening
the CID list. Find the number you want to dial, then press
seLeCT/meNu
.)
Caller ID menu options
With the phone in standby, open the CID list and find the number you
want. Press
seLeCT/meNu
to open the Caller ID menu; choose one of these
options:
Delete Entry
Erase this Caller ID number.
Store Into Pb
Add this number to this station's phonebook. The station will
prompt you to enter the name and edit the phone number;
cordless handsets also prompt you to choose a personal ring.
Delete All
Erase this station's CID list. (This does not affect the CID lists
saved on any other stations.)
Using Call Waiting
If you get a Call Waiting call, the phone can sound a tone and display any
CID information received for the waiting call. Press
FLasH
(
FLasH/exIT
on
a cordless handset) to switch between your current call and the waiting
call; remember, each time you switch, there is a short pause before you're
connected to the other caller.
Using Seven-digit dialing
If you can make a local call by dialing only seven digits instead of ten, you
can tell the phone to hide your local area code in the Caller ID list.
1)
2)
3)

17
Phonebook entry options
With the phone in standby, open the phonebook and find the entry you
want. Press
seLeCT/meNu
to open the individual phonebook entry menu.
Choose one of these options:
Edit
Edit this entry. The phone will prompt you to enter the name
and phone number. (Cordless handsets will also prompt you to
choose a personal ring.)
Copy
Copy this entry to another station. (You must have at least one
accessory handset to use this multi-station feature.)
Delete
Erase this entry.
Chain Dialing
If you often have to enter a series of digits or a code number during a
call, you can save that code number to a phonebook entry and use the
phonebook to send the code number.
Enter the code number (up to 20 digits) into the phonebook just like a
regular phonebook entry. Be sure to enter the code number into the
phonebook exactly as you would enter it during a call.
When you hear the prompt that tells you to enter the number, open
the phonebook and find the entry that contains your code number.
Press
seLeCT/meNu
to transmit the code. The phone transmits the code
number exactly as you entered it in the phonebook.
Finding a Lost Handset
With the phone in standby, press
INTerCOm/HOLD
on the base. Select the
handset you want to find, or select
All
to page all handsets at the same
time. The paged handset(s) will beep for one minute, or until you press
INTerCOm/HOLD
again or press
TaLk
and then
FLasH
/
exIT
on the handset.
Using an Optional Headset
You can use a standard 2.5 mm telephone headset with your
cordless handsets. To purchase headsets, contact the
Parts Department (see the front cover).
To install a headset, remove the headset jack
cover and insert the headset plug into the jack.
Just make and receive calls as usual, and use your
headset to talk to the caller after the call connects.
When you connect a headset, the handset automatically mutes the
earpiece and speaker. To re-activate the earpiece or speaker, just
unplug the headset.
18
Using Multi-station Features
The expandable base works together with the accessory handsets to give
you some useful multi-station features. (A station can be any cordless
handset or the base.) You must have at least one accessory handset to
use the features in this section.
Expanding Your Phone
Your base supports a total of six EZX290 accessory handsets, including
any that were supplied with your phone.
Your phone may be compatible with other Uniden accessory handsets.
Please visit our website for a list of compatible handsets for your base.
Accessory handsets must be registered to the base before you can
use them. Handsets that have not been registered display a
Handset
not registered
message. See page 29 for instructions on registering
handsets to this base, or see the manual for the accessory handset.
Any accessory handsets that came packaged with the base are already
registered to that base for you.
If a handset was previously registered to a base, you have to reset it so
you can register it to a new base (see page 29 for EZX290 handsets).
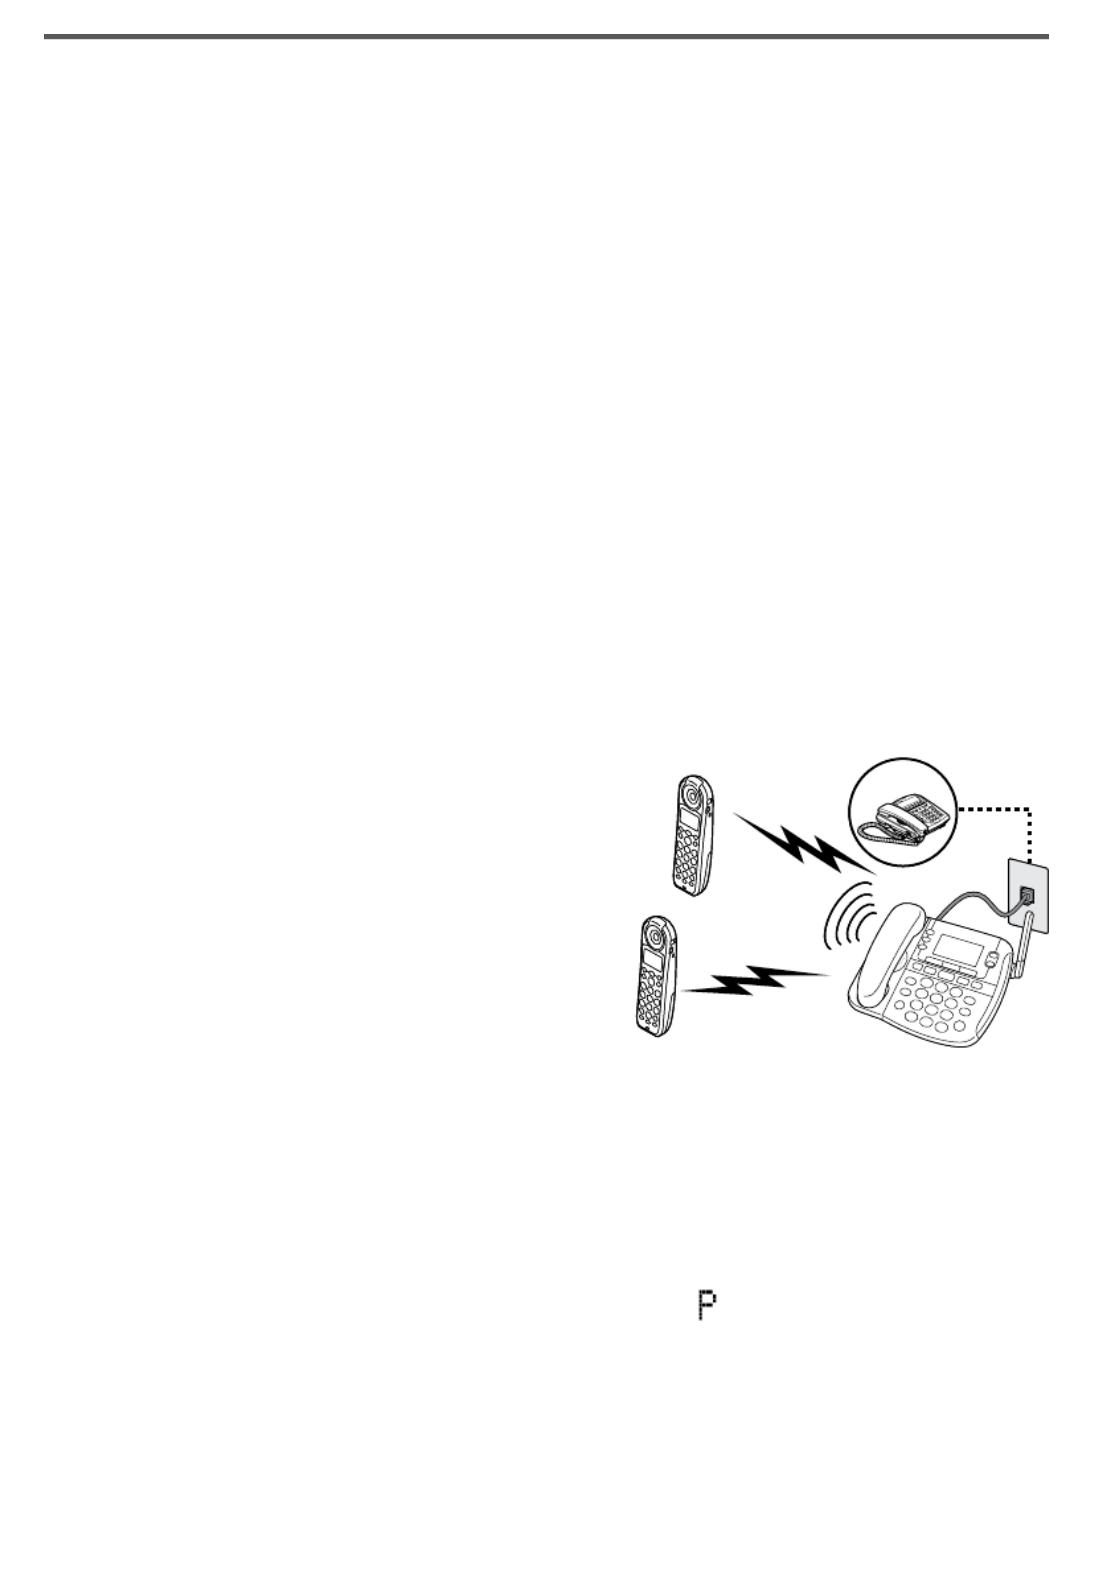
Using Conference Calling
When an outside call comes in, the base
and two cordless handsets can join in a
conference call with the outside caller. To
join the call, just pick up the corded
handset from the base or press
TaLk
on a
cordless handset. To leave the
conference call, hang up normally; the
other station remains connected to the
call. (You can also use the speakerphone
for a conference call, just like you can with a normal call.)
Using Privacy Mode
You can prevent other stations from joining a call. Start your call as usual,
then press
seLeCT/meNu
: the display shows
Call Privacy
. Press
seLeCT/
meNu
again to turn privacy mode on (you'll see a in the display). When
you hang up this call, privacy mode turns off automatically.
As long you have privacy mode on, no other stations can interrupt your
call. If you want to let another station join the call, turn privacy mode off.
To turn it off, just repeat the process above (press
seLeCT/meNu
twice).
Outside call
Handset #1
Handset #2
Base
speakerphone
or corded handset
Outside call
Handset #1
Handset #2
Base
speakerphone
or corded handset
19
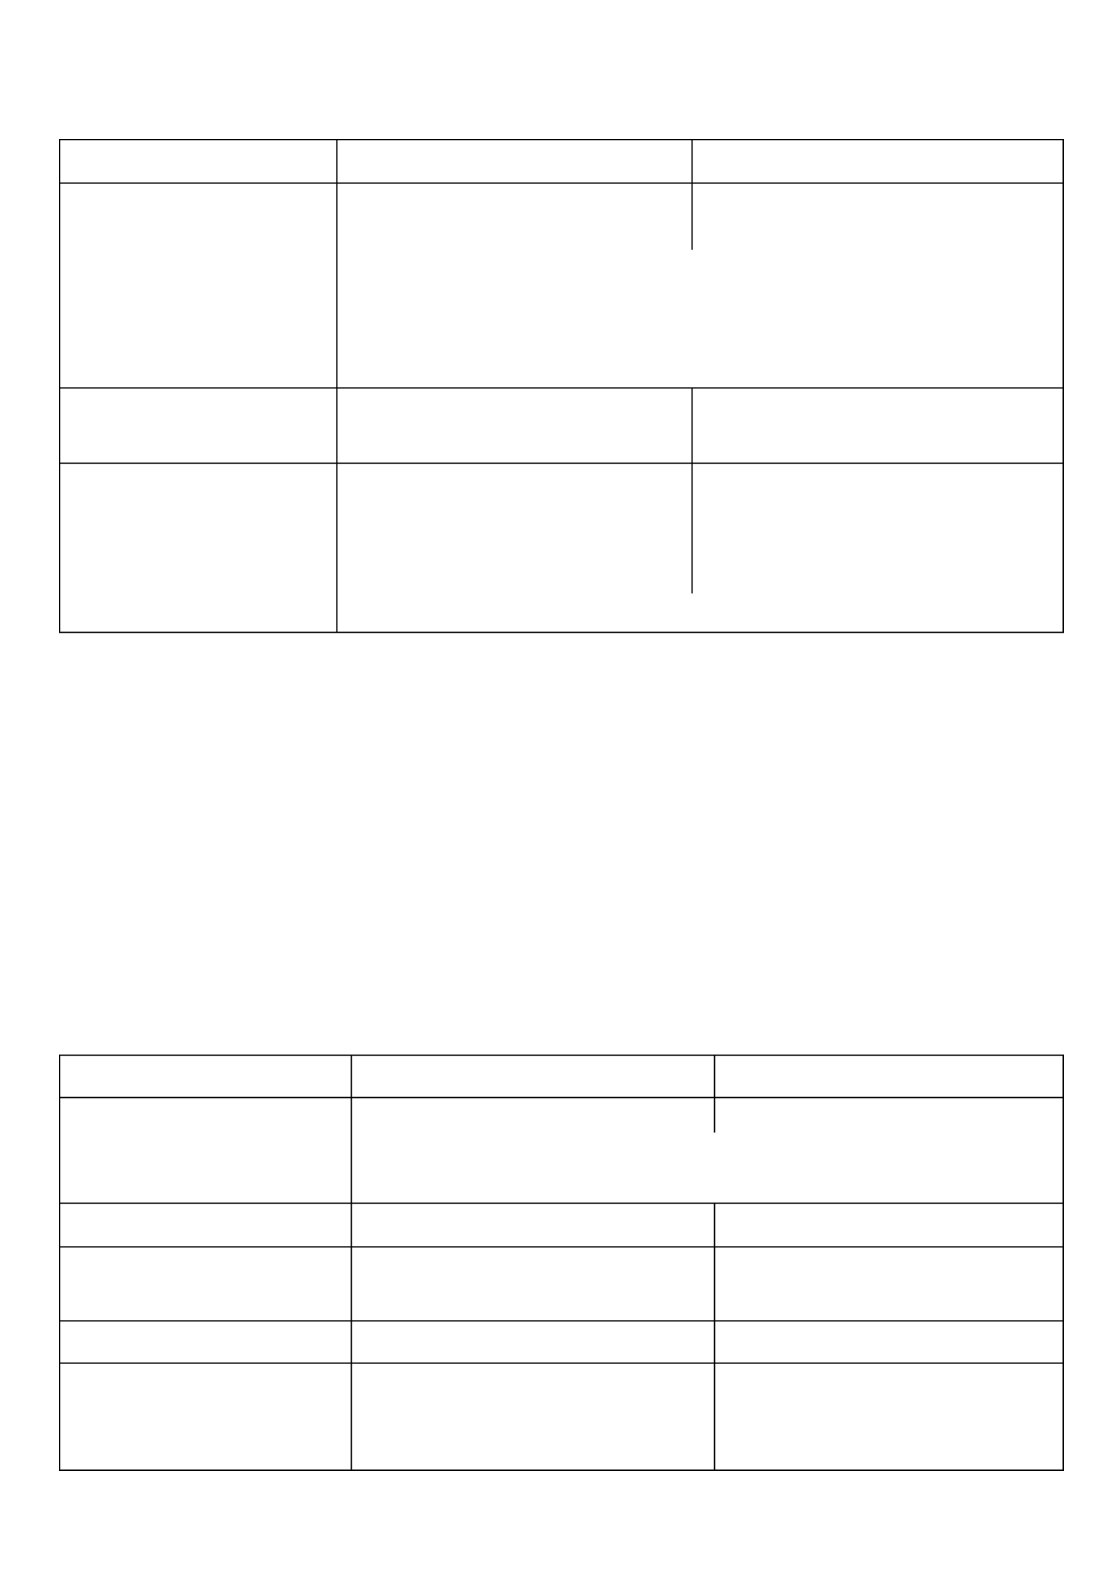
Using Call Transfer
You can transfer an outside call to any other station.
To... From the base From a cordless handset
transfer a call
Press
INTERCOM/HOLD
to
put the call on hold.
1. Press
CLEAR/INTERCOM
to
put the call on hold.
1.
Select the station you want to transfer the call to
(select
All
to page all the stations).
When the other station accepts the call, you'll be
disconnected, but you can join the call again.
2.
cancel a transfer and
return to the call Press
TALK
. Press
TALK
.
accept a transferred
call
Pick up the corded
handset to answer the
page and speak to the
transferring station.
1. Press
CLEAR/INTERCOM
to answer the page and
speak to the transferring
station.
1.
To accept the call, press
TALK
.2.
Using the Intercom
Here are some general things you need to know about using the intercom:
Whenever the phone is in standby, you can make an intercom call
between stations without using the phone line.
You can make an intercom call from any station, but only two stations
can be in an intercom call at any time.
If an outside call comes in during an intercom call, the phone displays
the Caller ID information. If the other station hasn't answered the page,
the phone cancels the page so you can answer the incoming call.
To... From the base From a cordless handset
make an intercom
page
Press
INTERCOM/HOLD
.1. Press
CLEAR/INTERCOM
.1.
Select the station you want to talk with (select
All
to
page all the stations).
2.
cancel a page Press
INTERCOM/HOLD.
Press
FLASH/EXIT
.
answer an intercom
page
Press
INTERCOM/HOLD
or pick
up the corded handset.
Press
CLEAR/INTERCOM
or
TALK
.
leave an intercom call Press
INTERCOM/HOLD.
Press
FLASH/EXIT
.
answer an outside call
during an intercom
call
Press
TALK
. Press
TALK
.
Produktspezifikationen
| Marke: | Uniden |
| Kategorie: | Telefon |
| Modell: | CEZAI 2998 |
Brauchst du Hilfe?
Wenn Sie Hilfe mit Uniden CEZAI 2998 benötigen, stellen Sie unten eine Frage und andere Benutzer werden Ihnen antworten
Bedienungsanleitung Telefon Uniden

13 Oktober 2024
11 Oktober 2024
2 Oktober 2024
28 September 2024
21 September 2024
20 September 2024
20 September 2024
18 September 2024
14 September 2024
14 September 2024
Bedienungsanleitung Telefon
- Telefon Samsung
- Telefon Infiniton
- Telefon Tristar
- Telefon Acer
- Telefon Anker
- Telefon Apple
- Telefon Asus
- Telefon BeeWi
- Telefon Hama
- Telefon Lexibook
- Telefon Logitech
- Telefon Medion
- Telefon Microsoft
- Telefon Philips
- Telefon SilverCrest
- Telefon Sony
- Telefon Sweex
- Telefon Tevion
- Telefon Trust
- Telefon Panasonic
- Telefon LG
- Telefon Roland
- Telefon ZyXEL
- Telefon Flex
- Telefon AEG
- Telefon Siemens
- Telefon Essentiel B
- Telefon Yamaha
- Telefon Yealink
- Telefon CSL
- Telefon Linksys
- Telefon XD Enjoy
- Telefon Netgear
- Telefon Denver
- Telefon Jacob Jensen
- Telefon MarQuant
- Telefon Renkforce
- Telefon Telefunken
- Telefon Thomson
- Telefon Trevi
- Telefon Blaupunkt
- Telefon Grundig
- Telefon Pyle
- Telefon GE
- Telefon Nordmende
- Telefon Fortinet
- Telefon Topcom
- Telefon ARCHOS
- Telefon Bang And Olufsen
- Telefon Pioneer
- Telefon Geemarc
- Telefon Jabra
- Telefon JBL
- Telefon Krüger And Matz
- Telefon Motorola
- Telefon Nokia
- Telefon PEAQ
- Telefon Sennheiser
- Telefon Xiaomi
- Telefon Olympia
- Telefon Switel
- Telefon Edenwood
- Telefon Hitachi
- Telefon ITT
- Telefon MT Logic
- Telefon Gigaset
- Telefon Toshiba
- Telefon Allview
- Telefon Cubot
- Telefon Fysic
- Telefon Lifetec
- Telefon Sencor
- Telefon Lindy
- Telefon Plantronics
- Telefon VXi
- Telefon Fenton
- Telefon Lenovo
- Telefon Marmitek
- Telefon Marshall
- Telefon Scosche
- Telefon TRENDnet
- Telefon Sagem
- Telefon AVM
- Telefon Parrot
- Telefon AVerMedia
- Telefon Zebra
- Telefon EnVivo
- Telefon Honor
- Telefon Aastra
- Telefon AGFEO
- Telefon Alcatel
- Telefon Amplicomms
- Telefon Audioline
- Telefon Auerswald
- Telefon Belgacom
- Telefon Binatone
- Telefon Brondi
- Telefon DeTeWe
- Telefon Doro
- Telefon Emporia
- Telefon Hagenuk
- Telefon Profoon
- Telefon Swatch
- Telefon Swissvoice
- Telefon Tiptel
- Telefon Vtech
- Telefon Logik
- Telefon Wiko
- Telefon Mackie
- Telefon Mitel
- Telefon NEC
- Telefon Overmax
- Telefon Airis
- Telefon Huawei
- Telefon Oricom
- Telefon Ranex
- Telefon Alcatel-Lucent
- Telefon Avaya
- Telefon Konftel
- Telefon Polycom
- Telefon Snom
- Telefon Wantec
- Telefon DrayTek
- Telefon Ascom
- Telefon Fanvil
- Telefon GPO
- Telefon Humantechnik
- Telefon Sagemcom
- Telefon RugGear
- Telefon D-Link
- Telefon T-Mobile
- Telefon Sylvania
- Telefon Kyocera
- Telefon EVOLVEO
- Telefon SPC
- Telefon Crosley
- Telefon Xblitz
- Telefon JPL
- Telefon HTC
- Telefon Prestigio
- Telefon Viking
- Telefon Auro
- Telefon BlackBerry
- Telefon Ericsson
- Telefon ZTE
- Telefon Cisco
- Telefon Grandstream
- Telefon Swisstone
- Telefon Unify
- Telefon OpenVox
- Telefon RCA
- Telefon OnePlus
- Telefon Bintec-elmeg
- Telefon Bogen
- Telefon Oppo
- Telefon Patton
- Telefon CAT
- Telefon Planet
- Telefon AT&T
- Telefon Realme
- Telefon Oregon Scientific
- Telefon EnGenius
- Telefon Mikrotik
- Telefon Davolink
- Telefon Gigaset Pro
- Telefon Innovaphone
- Telefon KPN
- Telefon Logicom
- Telefon Maxcom
- Telefon Oukitel
- Telefon Premier
- Telefon Proximus
- Telefon Sitecom
- Telefon SMC
- Telefon Spectralink
- Telefon Steren
- Telefon Sunstech
- Telefon Tecdesk
- Telefon Telstra
- Telefon Vimar
- Telefon British Telecom
- Telefon MXL
- Telefon AirLive
- Telefon Mitsai
- Telefon MyPhone
- Telefon BLU
- Telefon Audiocodes
- Telefon Legrand
- Telefon BT
- Telefon Amplicom
- Telefon Opel Mobile
- Telefon Digium
- Telefon Gamdias
- Telefon Chacon
- Telefon Clear Sounds
- Telefon On-Q
- Telefon Crestron
- Telefon 3Com
- Telefon Lewitt
- Telefon Teledex
- Telefon Tecno
- Telefon Sedna
- Telefon ALLO
- Telefon Hamlet
- Telefon Akuvox
- Telefon CyberData Systems
- Telefon CTA Digital
- Telefon Canyon
- Telefon Primare
- Telefon Dopod
- Telefon Neat
- Telefon Syco
- Telefon Tador
- Telefon 4family
- Telefon ArtDio
- Telefon Valcom
- Telefon Edge-Core
- Telefon Clarity
- Telefon Vogtec
- Telefon Olitech
- Telefon Cortelco
- Telefon Algo
- Telefon Future Call
- Telefon Dnake
- Telefon Liam&Daan
- Telefon FlyingVoice
Neueste Bedienungsanleitung für -Kategorien-

1 Dezember 2024
1 Dezember 2024

30 November 2024

15 Oktober 2024
15 Oktober 2024
14 Oktober 2024
9 Oktober 2024
7 Oktober 2024
7 Oktober 2024

6 Oktober 2024