Toyota Mirai 2015 Navigation Bedienungsanleitung
Lesen Sie kostenlos die 📖 deutsche Bedienungsanleitung für Toyota Mirai 2015 Navigation (252 Seiten) in der Kategorie Navigator. Dieser Bedienungsanleitung war für 27 Personen hilfreich und wurde von 2 Benutzern mit durchschnittlich 4.5 Sternen bewertet
Seite 1/252

1
MIRAI_Navi_EE_13CY (OM62009E)
1 9QUICK GUIDE
2AUDIO SYSTEM 21
3Bluetooth® HANDS-FREE SYSTEM 71
4
SPEECH COMMAND SYSTEM
105
5SETUP 109
6REAR VIEW MONITOR SYSTEM 137
7NAVIGATION SYSTEM 151
8APPLICATION 215
INDEX 243
For more information about the following items, see the “Owner’s Manual”.
Vehicle customization settings

2
MIRAI_Navi_EE_13CY (OM62009E)
Introduction
This manual explains the operation of the navigation system. Please read this
manual carefully to ensure proper use. Keep this manual in your vehicle at all
times.
The screen shots in this document and the actual screens of the navigation sys-
tem differ depending on whether the functions and/or a contract existed and the
map data available at the time of producing this document.
Please be aware that the content of this manual may be different from the nav-
igation system in some cases, such as when the system’s software is updated.
The Navigation System is one of the most technologically advanced vehicle ac-
cessories ever developed. The system receives satellite signals from the Global
Positioning System (GPS) operated by the U.S. Department of Defense. Using
these signals and other vehicle sensors, the system indicates your present po-
sition and assists in locating a desired destination.
The navigation system is designed to select efficient routes from your present
starting location to your destination. The system is also designed to direct you
to a destination that is unfamiliar to you in an efficient manner. The system is
developed by “Harman International” using “HERE” maps. The calculated
routes may not be the shortest nor the least traffic congested. Your own person-
al local knowledge or “short cut” may at times be faster than the calculated
routes.
The navigation system’s database includes Point of Interest categories to allow
you to easily select destinations such as restaurants and hotels. If a destination
is not in the database, you can enter the street address or a major intersection
close to it and the system will guide you there.
The system will provide both a visual map and audio instructions. The audio in-
structions will announce the distance remaining and the direction to turn in ap-
proaching an intersection. These voice instructions will help you keep your eyes
on the road and are timed to provide enough time to allow you to maneuver,
change lanes or slow down.
Please be aware that all current vehicle navigation systems have certain limita-
tions that may affect their ability to perform properly. The accuracy of the vehi-
cle’s position depends on the satellite condition, road configuration, vehicle
condition or other circumstances. For more information on the limitations of the
system, refer to page 212.
NAVIGATION SYSTEM OWNER’S MANUAL
NAVIGATION SYSTEM

3
MIRAI_Navi_EE_13CY (OM62009E)
For safety reasons, this manual indicates items requiring particular attention
with the following marks.
IMPORTANT INFORMATION ABOUT THIS MANUAL
WARNING
●This is a warning against anything which may cause injury to people if the warning is
ignored. You are informed about what you must or must not do in order to reduce the risk
of injury to yourself and others.
NOTICE
●This is a warning against anything which may cause damage to the vehicle or its equip-
ment if the warning is ignored. You are informed about what you must or must not do in
order to avoid or reduce the risk of damage to your vehicle and its equipment.
SYMBOLS USED IN ILLUSTRATIONS
Safety symbol
The symbol of a circle with a slash through it means “Do not”, “Do not
do this”, or “Do not let this happen”.
Arrows indicating operations
Indicates the action (pushing, turning, etc.)
used to operate switches and other
devices.

7
MIRAI_Navi_EE_13CY (OM62009E)
1
2
3
4
5
6
7
8
1. SETUP OPERATION .................... 110
QUICK REFERENCE .......................... 110
GENERAL SETTINGS......................... 111
DISPLAY SETTINGS........................... 114
CONNECTIVITY SETTINGS ............... 116
TELEPHONE SETTINGS .................... 132
AUDIO SETTINGS............................... 133
VEHICLE SETTINGS........................... 135
1. REAR VIEW MONITOR
SYSTEM ...................................... 138
REAR VIEW MONITOR SYSTEM ....... 138
REAR VIEW MONITOR SYSTEM
PRECAUTIONS ................................ 142
THINGS YOU SHOULD KNOW .......... 148
1. BASIC INFORMATION
BEFORE OPERATION................ 152
QUICK REFERENCE.......................... 152
DISPLAYING THE NAVIGATION
SCREEN........................................... 157
NAVIGATION SYSTEM
FUNCTION INDEX ........................... 159
2. MAP SCREEN OPERATION
AND MAP ICONS ........................ 161
MAP SCREEN OPERATION .............. 161
MAP ICONS ........................................ 164
3. DESTINATION SEARCH .............. 172
DESTINATION SEARCH INDEX ........ 172
SEARCH OPERATION ....................... 173
4. ROUTE GUIDANCE ...................... 180
STARTING ROUTE GUIDANCE......... 180
ROUTE GUIDANCE............................ 183
SETTING AND DELETING
THE ROUTE ..................................... 186
5. MY DESTINATIONS...................... 194
REGISTERING AN ENTRY ................ 194
DISPLAYING AND EDITING
THE ENTRY INFORMATION ........... 200
SENDING AND RESTORING
STORED CONTACTS USING
A USB MEMORY .............................. 203
6. NAVIGATION SETTING................ 205
MAP SETTINGS.................................. 205
ROUTE SETTINGS............................. 208
TRAFFIC MESSAGE SETTINGS ....... 209
7. NAVIGATION SYSTEM
INFORMATION............................ 212
LIMITATIONS OF THE NAVIGATION
SYSTEM ........................................... 212
NAVIGATION DATABASE
UPDATES......................................... 214
5SETUP
6REAR VIEW MONITOR
SYSTEM
7NAVIGATION SYSTEM

8
TABLE OF CONTENTS
MIRAI_Navi_EE_13CY (OM62009E)
1. APPLICATIONS OPERATION ...... 216
QUICK REFERENCE.......................... 216
PICTURE SLIDESHOW ...................... 218
E-MAIL ................................................ 220
CALENDAR......................................... 222
MirrorLink.......................................... 223
TOYOTA EUROCARE ........................ 224
2. CONNECTED SERVICE................ 226
CONNECTED SERVICE
OVERVIEW ...................................... 226
BEFORE USING CONNECTED
SERVICE .......................................... 230
ONLINE SEARCH ............................... 233
Street View .......................................... 237
Panoramio ........................................... 238
LOADING POIs*/ROUTE .................... 239
OPERATING AN APPLICATION
USING CONNECTED SERVICE...... 240
ALPHABETICAL INDEX ................... 244
8APPLICATION
INDEX
*: Point of Interest

1
9
MIRAI_Navi_EE_13CY (OM62009E)
1
2
3
4
5
6
7
8
1. SYSTEM FUNCTION INDEX......... 10
1. CONTROLS OVERVIEW............... 12
2. CAPACITIVE TOUCH
SWITCHES .................................. 14
3. TOUCH SCREEN GESTURES...... 15
4. TOUCH SCREEN OPERATION .... 16
ENTERING SCREEN OPERATION...... 17
LIST SCREEN OPERATION................. 18
1QUICK GUIDE
2CONTROLS AND FEATURES
QUICK GUIDE
10
MIRAI_Navi_EE_13CY (OM62009E)
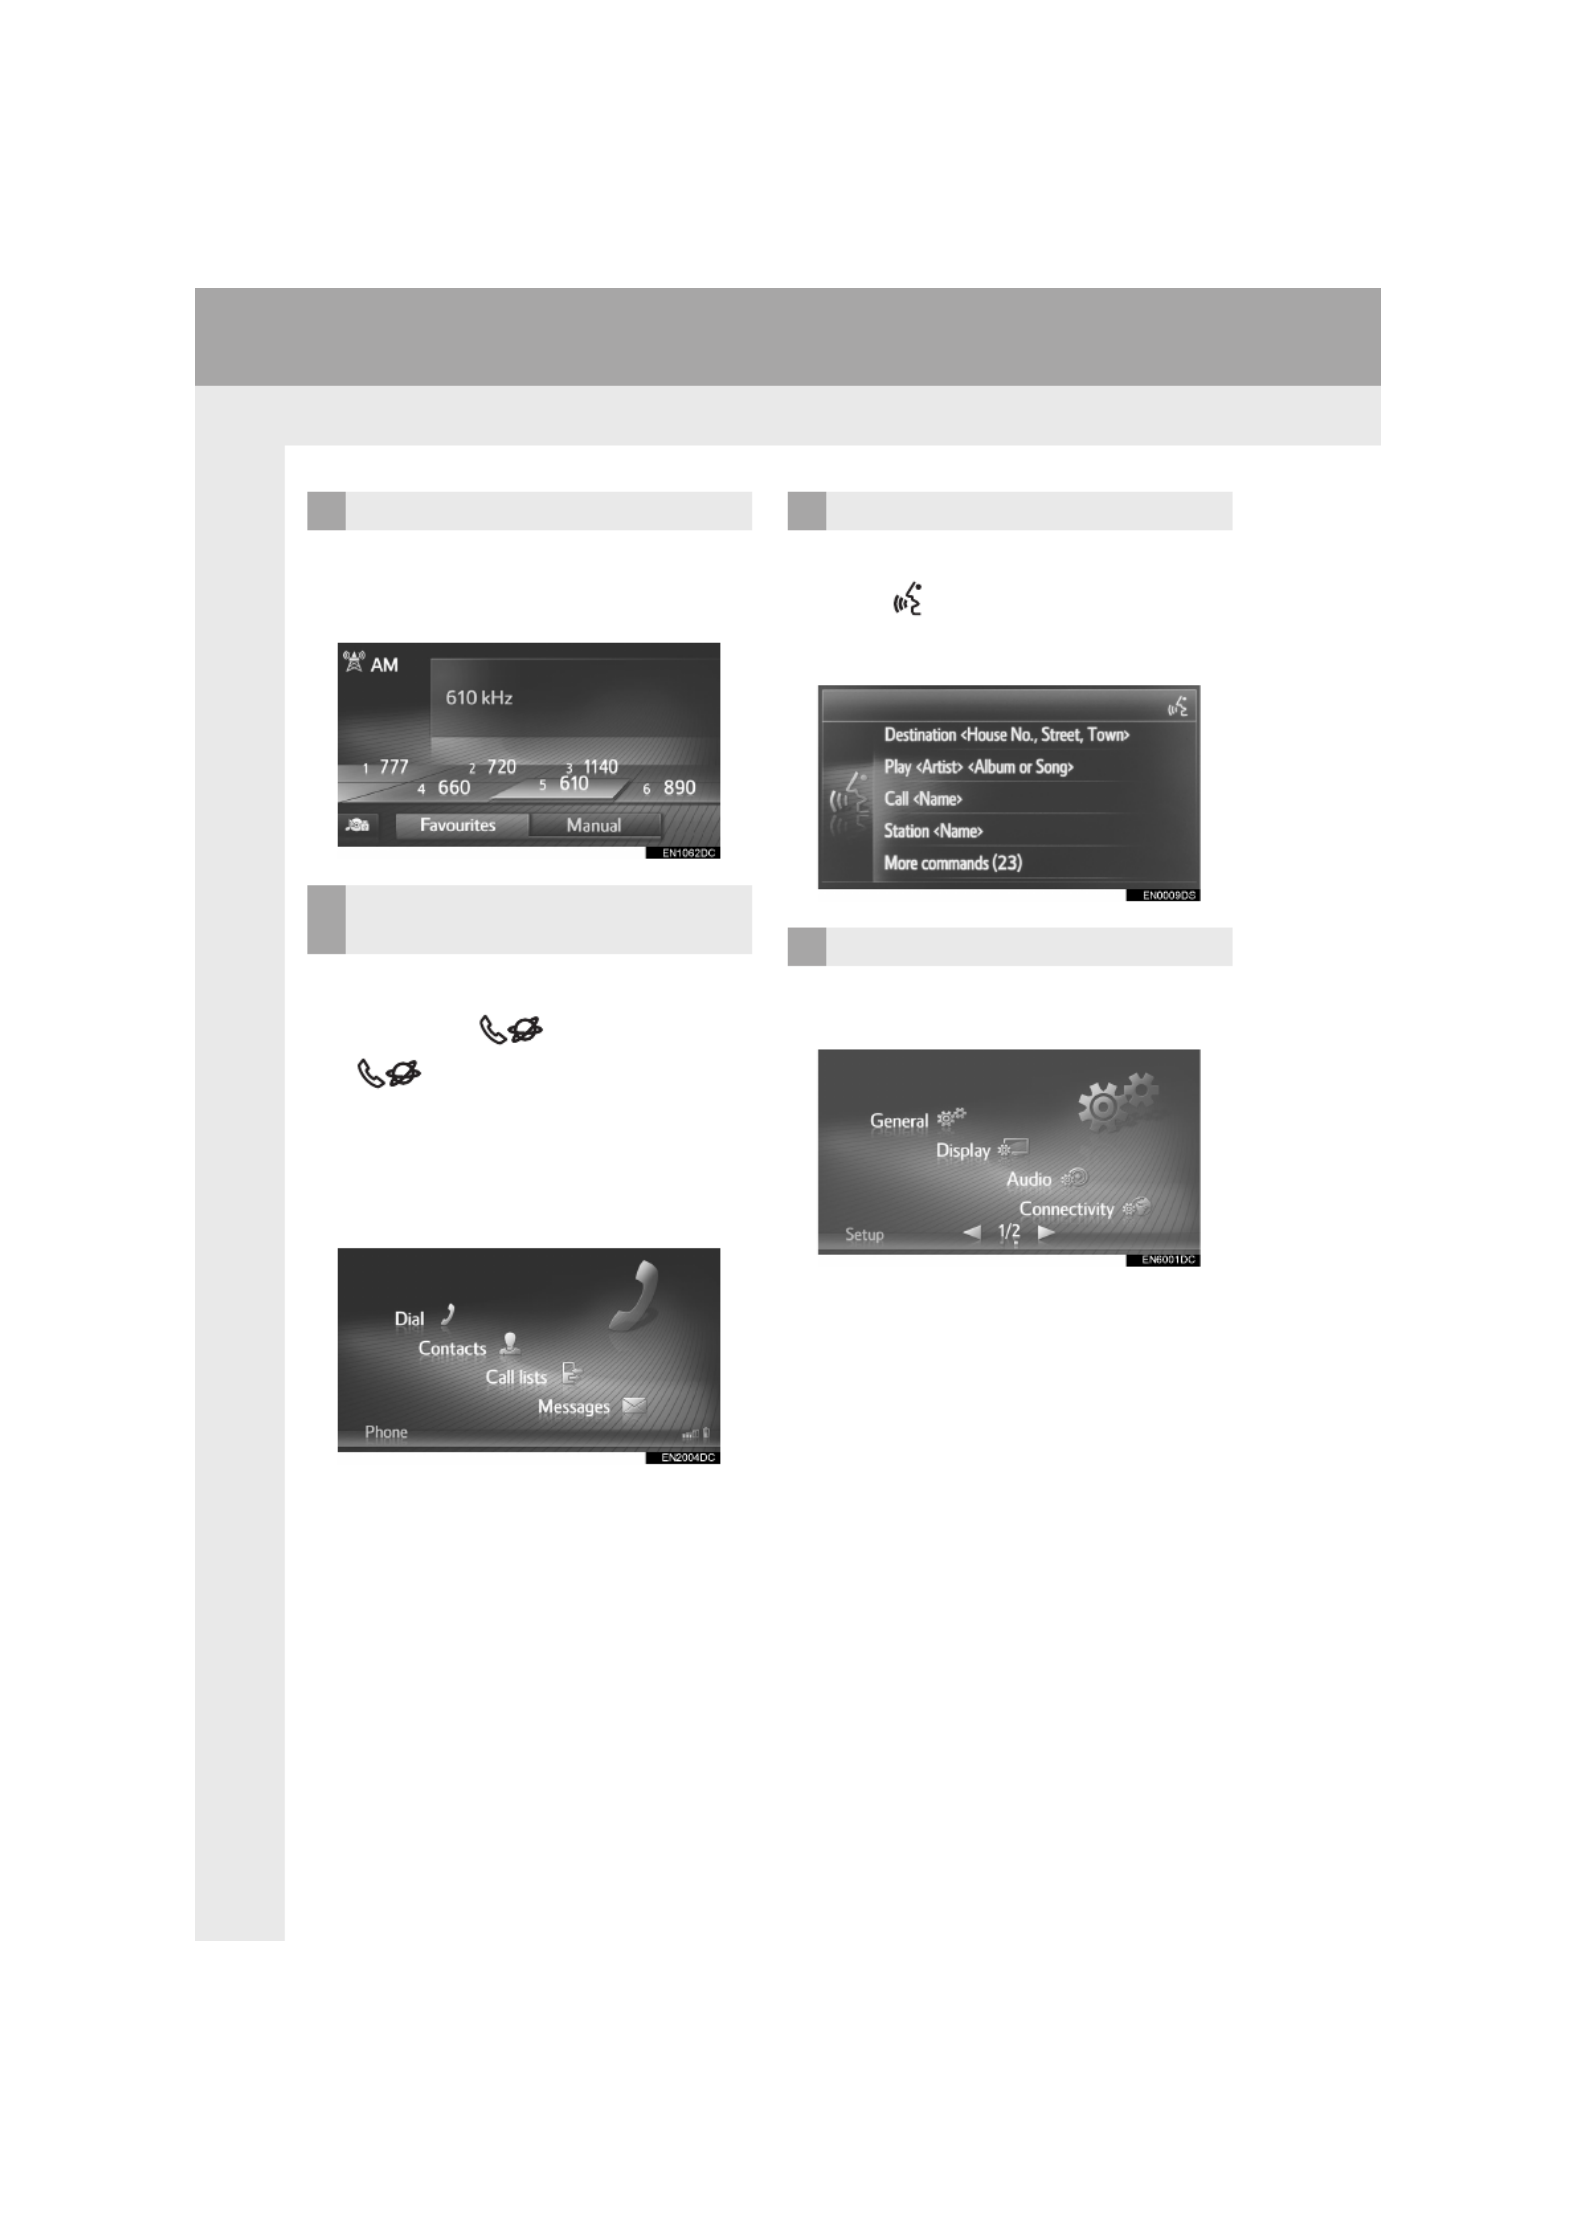
1. QUICK GUIDE
1. SYSTEM FUNCTION INDEX
To access the audio system, press the
“MEDIA” button. The audio control screen
will be displayed. (P.21)
To access the Bluetooth® hands-free sys-
tem, press the button. Each time
the button is pressed, the screen
will change between the “Phone” menu
screen and the “Toyota online” menu
screen. The driver can make or receive
phone calls without taking their hands off
the steering wheel. (P.71)
To access the speech command system,
press the switch on the steering wheel.
The driver can operate the system by giv-
ing a command. (P.105)
To customise the function settings, press
the “SETUP” button. (P.109)
AUDIO SYSTEM
Bluetooth® HANDS-FREE
SYSTEM
SPEECH COMMAND SYSTEM
SETUP

11
1. QUICK GUIDE
MIRAI_Navi_EE_13CY (OM62009E)
QUICK GUIDE
1
Shifting into the “R” position will automati-
cally show the view behind the rear of the
vehicle on the display screen. (P.137)
To access the navigation system, press
the “MAP/NAV” button. Each time the
“MAP/NAV” button is pressed, the screen
will change between the map screen and
“Navigation” menu screen. (P.151)
To access the application system, press
the button. Each time the
button is pressed, the screen will change
between the “Phone” menu screen and the
“Toyota online” menu screen. The driver
can use applications. (P.215)
REAR VIEW MONITOR SYSTEM
NAVIGATION SYSTEM
APPLICATION SYSTEM

12
MIRAI_Navi_EE_13CY (OM62009E)
2. CONTROLS AND FEATURES
1. CONTROLS OVERVIEW
No. Function Page
By touching the screen with your finger, you can control the selected
functions. 15
Insert a disc into this slot. The CD player turns on immediately. 33
Press to access the audio system. The audio system turns on in the last
mode used. 22, 2324
Press to seek up or down for a radio station or to access a desired track/
file.
26, 33, 38,
44, 53
Press to access the navigation system. 152
Press to access the Bluetooth® hands-free system and applications. 72, 216
This button is not functional.
2. CONTROLS AND FEATURES

13
2. CONTROLS AND FEATURES
MIRAI_Navi_EE_13CY (OM62009E)
QUICK GUIDE
1
Press to customise the function settings. 110
Press to adjust the audio volume.
Press to turn the audio system on and off. 23
Press to eject a disc. 25
INFORMATION
●This illustration is for left-hand drive vehicles.
●The button positions and shapes differ for right-hand drive vehicles.
No. Function Page

14
MIRAI_Navi_EE_13CY (OM62009E)
2. CONTROLS AND FEATURES
2. CAPACITIVE TOUCH SWITCHES
■HANDLING OF THE CONTROL
PANEL
If the operating section is dirty or has liq-
uid attached to it, incorrect operation or
non-response may occur.
If the operating section receives electro-
magnetic waves, incorrect operation or
non-response may occur.
If wearing gloves during operation, non-
response may occur.
If fingernails are used to operate the sys-
tem, non-response may occur.
If a touch pen is used to operate the sys-
tem, non-response may occur.
If the palm of your hand touches the oper-
ating section during operation, incorrect
operation may occur.
If the palm of your hand touches the oper-
ating section, incorrect operation may
occur.
If operations are performed quickly, non-
response may occur.
The control panel uses capacitive
touch sensors.
Capacitive touch switch sensor sensitiv-
ity can be adjusted. (P. 111 )
In the following cases, incorrect opera-
tion or non-response may occur.
INFORMATION
●Do not touch the control panel when the
system is turning on as the switches
may be unresponsive for a while.
However, after the system has been
turned on and a given amount of time
has passed, the control panel will return
to normal operation.

16
MIRAI_Navi_EE_13CY (OM62009E)
2. CONTROLS AND FEATURES
4. TOUCH SCREEN OPERATION
This system is operated mainly by the
screen buttons.
When a screen button is touched, a
beep sounds. (To set a beep sound,
P.111.)
NOTICE
●To prevent damaging the screen, lightly
touch the screen buttons with your fin-
ger.
●Do not use objects other than your finger
to touch the screen.
●Wipe off fingerprints using a glass clean-
ing cloth. Do not use chemical cleaners
to clean the screen, as they may dam-
age the touch screen.
●To prevent the battery from being dis-
charged, do not leave the system on
longer than necessary when the fuel cell
system is not operating.
INFORMATION
●If the system does not respond to a
touch on a screen button, move your fin-
ger away from the screen and then
touch it again.
●Dimmed screen buttons cannot be oper-
ated.
●The displayed image may become
darker and moving images may be
slightly distorted when the display is
cold.
●Under extremely cold conditions, the
screen may not be displayed and the
data input by a user may be deleted.
Also, the screen buttons may be harder
than usual to depress.
●When you look at the screen through
polarized material such as polarized
sunglasses, the screen may be dark and
hard to see. If so, look at the screen
from different angles, adjust the screen
settings (P.114), or take off your sun-
glasses.
●Select to return to the previous
screen.

17
2. CONTROLS AND FEATURES
MIRAI_Navi_EE_13CY (OM62009E)
QUICK GUIDE
1
1Select the keys directly to enter letters
or numbers.
2Select “OK”.
ENTERING SCREEN
OPERATION
When searching for a name, letters
and numbers, etc. can be entered via
the screen.
ENTERING LETTERS AND
NUMBERS
No. Function
Select to delete one letter. Select
and hold to continue deleting letters.
Select to enter symbols.
Select to select lower case or upper
case.
Select to change keyboard types.
INFORMATION
●When a character is entered, a hint will
appear displaying a possible match for
the word to be searched.
●Currently unavailable screen buttons will
be dimmed.
●When an entry is too long to be dis-
played in the enter field, the last section
of the enter text will be displayed with
the initial section displayed as “...”.
●In the following situations, the enter
mode will automatically change between
upper and lower case.
• When the keyboard layout is changed
to upper case input, the layout will
automatically change back to lower
case input after one letter has been
entered.
• When “/”, “&”, “.” “(” or is entered,
the keyboard layout will automatically
be changed to upper case input.
• When all characters are deleted, the
keyboard layout will automatically
change to upper case input.

19
2. CONTROLS AND FEATURES
MIRAI_Navi_EE_13CY (OM62009E)
QUICK GUIDE
1
■AUTOMATIC TEXT SCROLLING
1Select one of the character screen but-
tons.
Entries that are too long to fit in the cur-
rent field are scrolled automatically
from right to left.
This function is not available while driv-
ing.
INFORMATION
●This function can be changed to on or
off. (P.111)
CHARACTER JUMP BUTTONS
IN LISTS
Some lists contain character screen
buttons, “A-C”, “D-F” etc., which al-
low a direct jump to list entries that be-
gin with the same letter as the
character screen button.
INFORMATION
●Every time the same character screen
button is selected, the list starting with
the subsequent character is displayed.

20
MIRAI_Navi_EE_13CY (OM62009E)
1. QUICK REFERENCE .................... 22
2. SOME BASICS.............................. 23
TURNING THE AUDIO SYSTEM
ON OR OFF ........................................ 23
SELECTING AN AUDIO SOURCE........ 24
INSERTING OR EJECTING A DISC ..... 24
USB/AUX PORT .................................... 25
1. AM/FM/DAB RADIO...................... 26
OVERVIEW ........................................... 26
PRESETTING A STATION.................... 29
MANUAL TUNING ................................. 29
RDS (RADIO DATA SYSTEM).............. 30
TIME SHIFT OPERATION (DAB).......... 31
RADIO OPTIONS .................................. 32
1BASIC OPERATION
2RADIO OPERATION

2
21
MIRAI_Navi_EE_13CY (OM62009E)
1
2
3
4
5
6
7
8
1. CD.................................................. 33
OVERVIEW............................................ 33
PLAYING AN AUDIO CD....................... 36
PLAYING AN MP3/WMA/AAC DISC ..... 36
AUDIO CD OR MP3/WMA/AAC DISC
OPTIONS ............................................ 37
2. USB MEMORY .............................. 38
OVERVIEW............................................ 38
PLAYING A USB MEMORY .................. 42
USB MEMORY OPTIONS ..................... 43
3. iPod ............................................... 44
OVERVIEW............................................ 44
iPod AUDIO ........................................... 48
iPod AUDIO OPTIONS .......................... 49
4. AUX ............................................... 50
OVERVIEW............................................ 50
5. Bluetooth® AUDIO ....................... 53
OVERVIEW............................................ 53
CONNECTING Bluetooth® AUDIO ........ 57
LISTENING TO Bluetooth® AUDIO ....... 57
Bluetooth® AUDIO OPTIONS ................ 58
1. STEERING SWITCHES ................. 59
1. OPERATING INFORMATION ....... 61
RADIO RECEPTION ............................. 61
iPod ....................................................... 63
CARING FOR YOUR CD PLAYER
AND DISCS ........................................ 64
FILE INFORMATION............................. 66
CD-R AND CD-RW DISCS ................... 68
TERMS.................................................. 68
3MEDIA OPERATION 4AUDIO REMOTE CONTROLS
5TIPS FOR OPERATING
THE AUDIO SYSTEM
AUDIO SYSTEM
Some of the functions cannot be operated while driving.

89
2. PHONE OPERATION
MIRAI_Navi_EE_13CY (OM62009E)
Bluetooth® HANDS-FREE SYSTEM
3
3. TALKING ON A Bluetooth® PHONE
Single call
Call waiting
While you are talking on a Bluetooth®
phone, a telephone conversation
screen is displayed. The operations
outlined below can be performed on
this screen.
No. Function
Select to hang up the phone.
The switch on the steer-
ing wheel can also be pressed
to hang up the phone.
Select to dial a second number.
(P.91)
Select to send a tone. (P.90)
Select to put a call on hold. To
cancel this function, select “Con-
tinue”.
Select to transfer the call. Select
“Transfer” to change from a
hands-free call to a cellular
phone call. Select “Hands-free”
to change from cellular phone
call to hands-free call.
Displays the other party’s infor-
mation. The information shown
here may differ depending on the
information available from your
phone.
Displays a call duration.
Select to mute your voice to the
other party. The icon will be high-
lighted during mute mode. To
cancel muting your voice, select
this icon again.
Select to change parties.
Select to change to a conference
call.

90
2. PHONE OPERATION
MIRAI_Navi_EE_13CY (OM62009E)
1Select “Keypad”.
2Enter the numbers.
Select to return the previous
screen.
INFORMATION
●When you change from a cellular phone
call to a hands-free call, the hands-free
screen will be displayed and the call can
be operated on the screen.
●Depending on the cellular phone con-
nected, the Bluetooth® connection may
be canceled if and when a call is trans-
ferred to the cellular phone.
●Transferring methods will be different
depending on the type of cellular phone
which you have.
●For the operation of the cellular phone,
see the manual that comes with your
cellular phone.
SENDING TONES

92
2. PHONE OPERATION
MIRAI_Navi_EE_13CY (OM62009E)
■CHANGING PARTIES
1Select “Swap calls”.
Every time “Swap calls” is selected, the
party who is on hold will be switched.
The other party can also be switched by
selecting the picture of the desired party
or pressing the switch on the steer-
ing wheel.
■CHANGING TO A CONFERENCE
CALL
1Select “Link calls”.
1Press the volume button to adjust the
volume of the other party’s voice.
INFORMATION
●Interrupt call operation may differ
depending on your phone company and
cellular phone.
ADJUSTING THE RECEIVER
VOLUME
INFORMATION
●The receiver volume can also be
adjusted using the volume control switch
on the steering wheel.
93
MIRAI_Navi_EE_13CY (OM62009E)
Bluetooth ® HANDS-FREE SYSTEM
3
3. SHORT MESSAGE FUNCTION
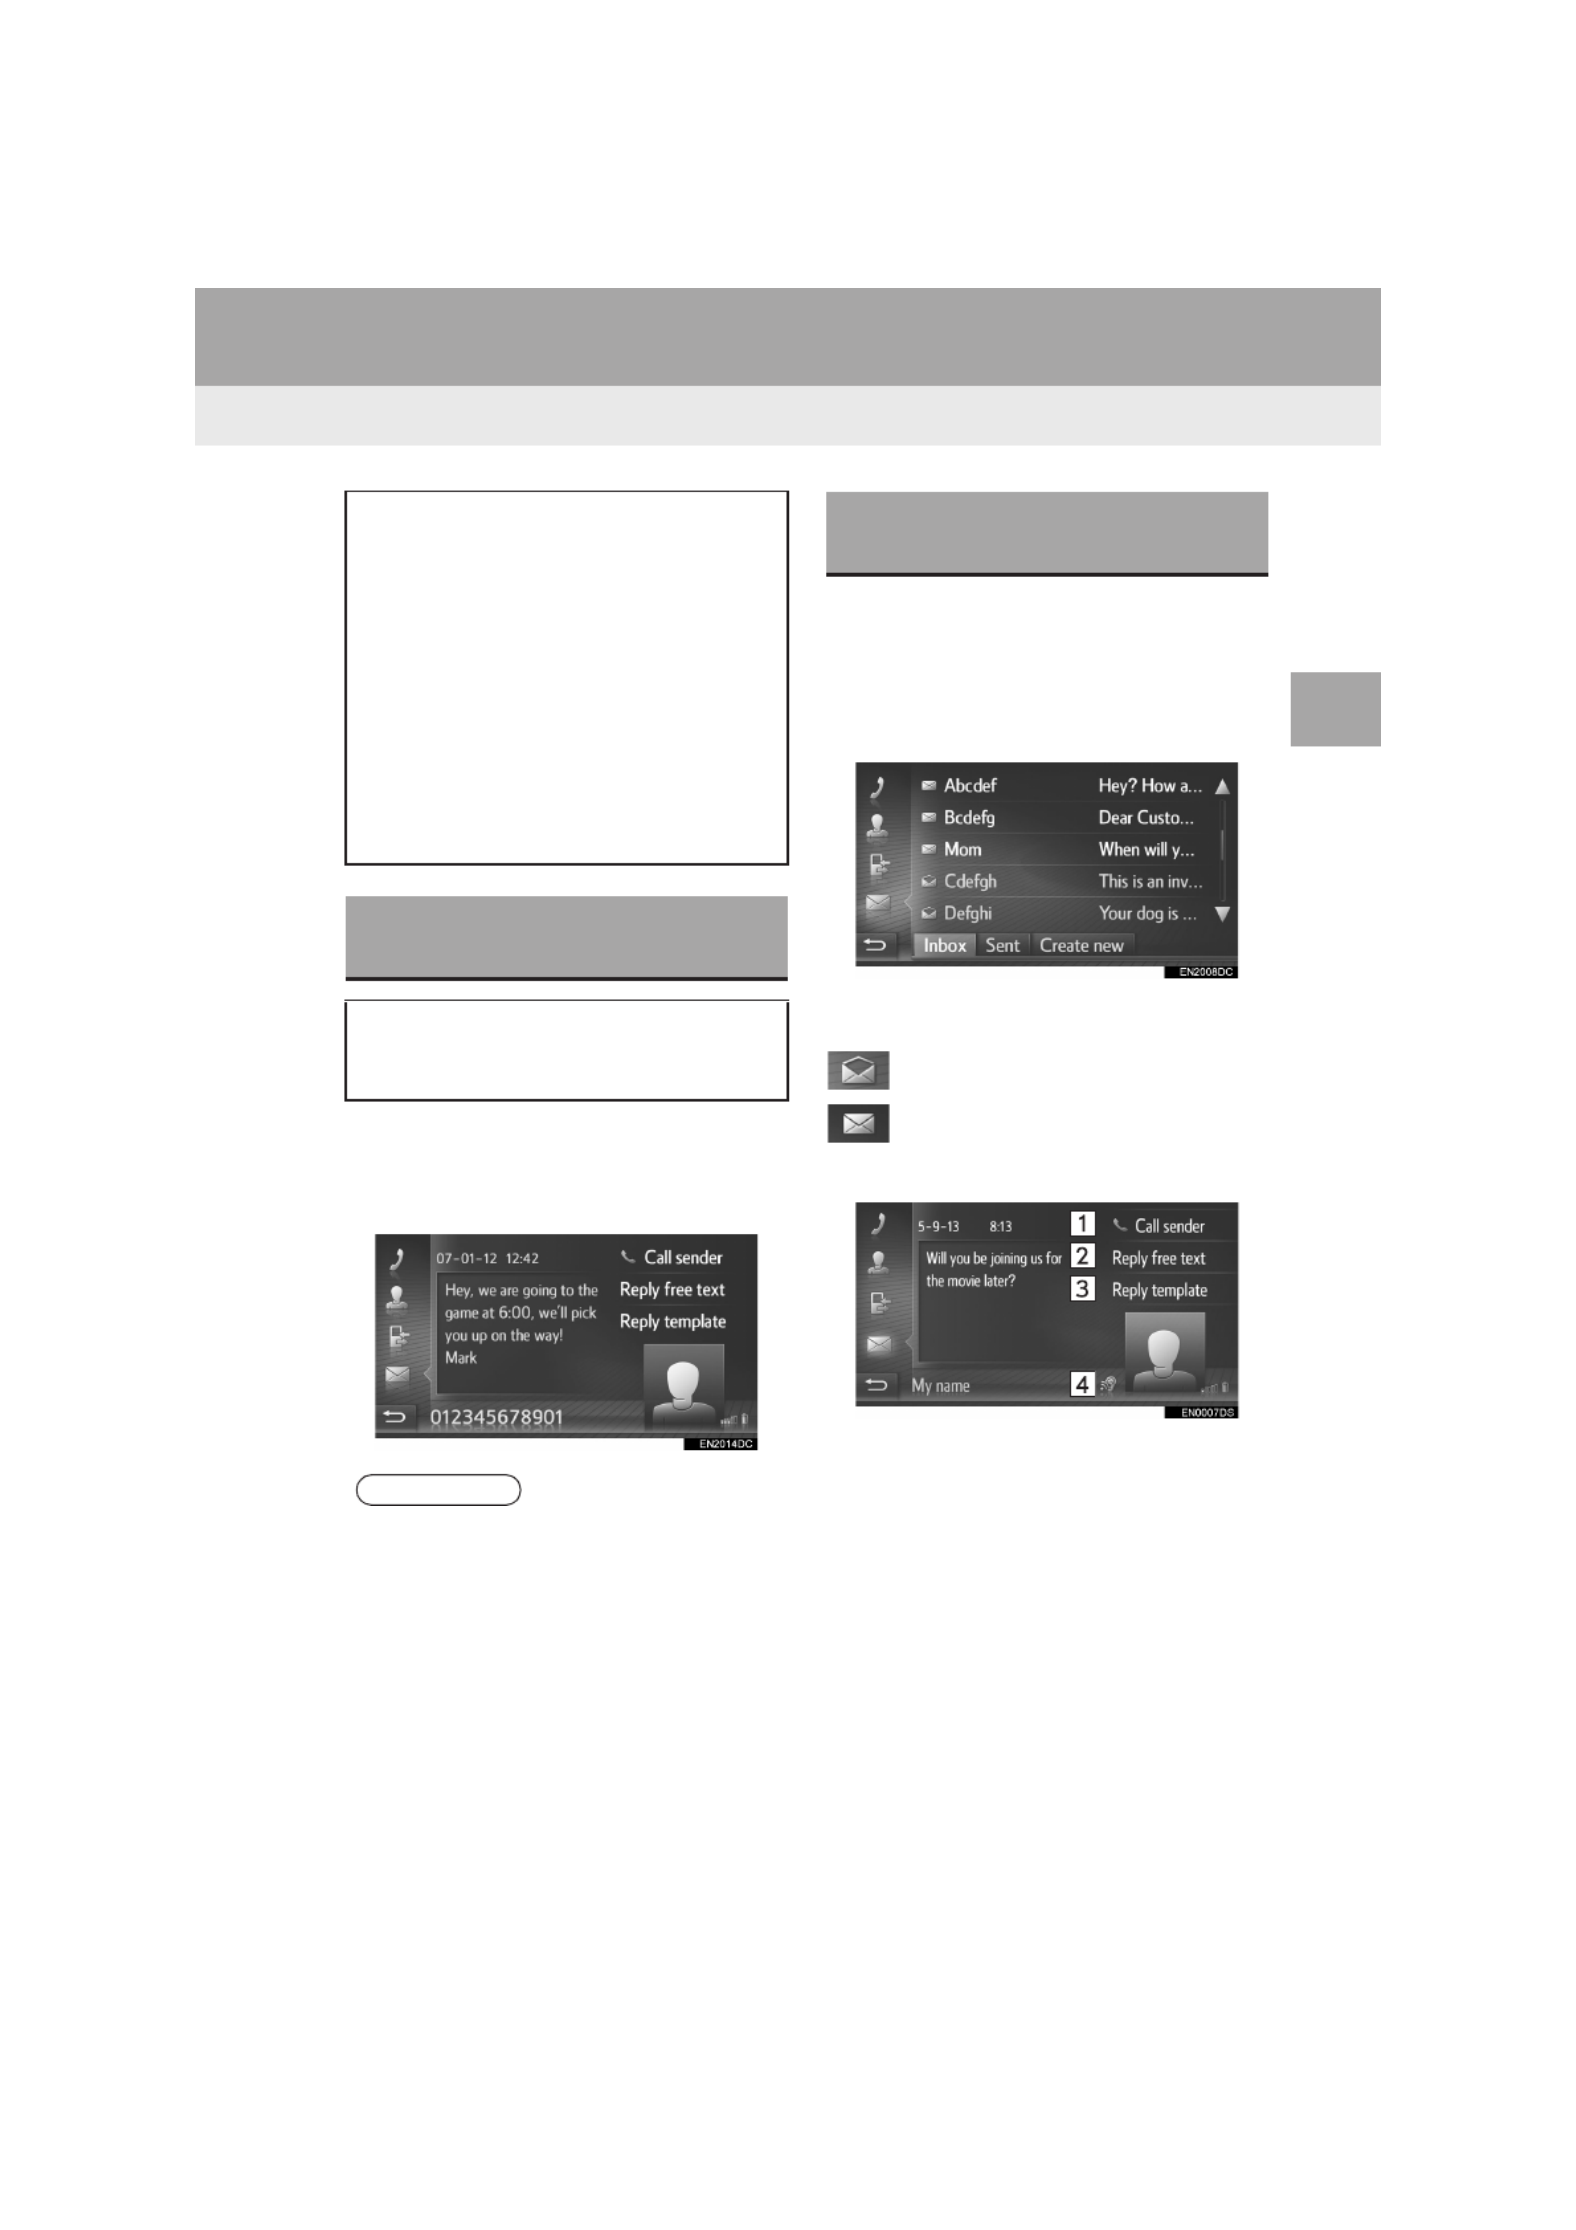
1. SHORT MESSAGE FUNCTION
1Select “Show” to check a received
short message.
2Check that the message is displayed.
1Display the “Phone” menu screen and
select “Messages”. (P.72)
2Select the “Inbox” tab.
3Select the desired short message.
The state of a message is shown by the
following icons.
: Read message
: Unread message
4Check that the message is displayed.
Received short messages can be for-
warded from the connected Bluetooth ®
phone, enabling checking and replying
using this system.
Depending on the type of Bluetooth ®
phone connected, received short mes-
sage may not be transferred to the
message inbox.
If the phone does not support the short
message function, this function cannot
be used.
RECEIVING A SHORT
MESSAGE
When a new short message is re-
ceived, a pop-up window is displayed
on the screen.
INFORMATION
●This function can be set to on or off.
(P.132)
CHECKING RECEIVED
SHORT MESSAGES

95
3. SHORT MESSAGE FUNCTION
MIRAI_Navi_EE_13CY (OM62009E)
Bluetooth ® HANDS-FREE SYSTEM
3
1Display the “Phone” menu screen and
select “Messages”. (P.72)
2Select the “Create new” tab.
3Select “Create message” or “Use
template”.
4Enter the message and then select
“OK”. (P.96)
5Select the desired number/contact to
whom the short message should be
sent.
When “New number” is selected
6Enter the number and then select
“OK”.
The short message will be sent.
When “Select contact” or “Select
from call lists” is selected
6Select the desired list.
7Select the desired contact.
If there are 2 or more phone numbers,
select the desired number in the list.
The short message will be sent.
SENDING A NEW SHORT
MESSAGE
INFORMATION
●The “Create message” and “Prepare
template message” functions are not
available while driving.

97
3. SHORT MESSAGE FUNCTION
MIRAI_Navi_EE_13CY (OM62009E)
Bluetooth ® HANDS-FREE SYSTEM
3
1Select “Prepare template message”.
2Enter the message and then select
“OK”.
The message is registered in the template
list.
REGISTER NEW TEMPLATES
New templates can be created. Up to
15 templates can be registered.

98
MIRAI_Navi_EE_13CY (OM62009E)
4. WHAT TO DO IF...
1. TROUBLESHOOTING
When using the hands-free system with a Bluetooth ® device
If there is a problem with the hands-free system or a Bluetooth ® device, first check
the table below.
Symptom Likely cause Solution
Page
Cellular
phone
This
system
The hands-free sys-
tem or Bluetooth ®
device does not
work.
The connected de-
vice may not be a
compatible
Bluetooth ® cellular
phone.
For a list of specific
devices which opera-
tion has been con-
firmed on this
system, check with
your Toyota dealer.
The Bluetooth ® ver-
sion of the connected
cellular phone may
be older than the
specified version.
Use a cellular phone
with Bluetooth ® ver-
sion 1.1 or higher
(recommended: Ver.
3.0 +EDR or higher).
122

99
4. WHAT TO DO IF...
MIRAI_Navi_EE_13CY (OM62009E)
Bluetooth ® HANDS-FREE SYSTEM
3
When pairing/connecting a cellular phone
Symptom Likely cause Solution
Page
Cellular
phone
This
system
A cellular phone can-
not be paired.
An incorrect pass-
code was entered on
the cellular phone.
Enter the correct
passcode on the cel-
lular phone.
The pairing operation
has not been com-
pleted on the cellular
phone side.
Complete the pairing
operation on the cel-
lular phone (approve
pairing on the tele-
phone).
Old pairing informa-
tion remains on ei-
ther this system or
the cellular phone.
Delete the existing
pairing information
from both this system
and the cellular
phone, then pair the
cellular phone you
wish to connect to
this system.
124

100
4. WHAT TO DO IF...
MIRAI_Navi_EE_13CY (OM62009E)
A Bluetooth ® con-
nection cannot be
made.
Another Bluetooth ®
device is already
connected.
Manually connect the
cellular phone you
wish to use to this
system.
124
Bluetooth ® function
is not enabled on the
cellular phone.
Enable the
Bluetooth ® function
on the cellular
phone.
Automatic
Bluetooth ® connec-
tion on this system is
set to off.
Set automatic
Bluetooth ®
connection on this
system to on when
the power switch is
turned to
ACCESSORY or ON
mode.
117
Old registration infor-
mation remains on
either this system or
the cellular phone.
Delete the existing
registration informa-
tion from both this
system and the cellu-
lar phone, then regis-
ter the cellular phone
you wish to connect
to this system.
124
Symptom Likely cause Solution
Page
Cellular
phone
This
system

101
4. WHAT TO DO IF...
MIRAI_Navi_EE_13CY (OM62009E)
Bluetooth ® HANDS-FREE SYSTEM
3
When making/receiving a call
When using the phone book
Symptom Likely cause Solution
Page
Cellular
phone
This
system
A call cannot be
made/received.
Your vehicle is in a
no service area.
Move to an area
where the service
signal appears on
the display.
Symptom Likely cause Solution
Page
Cellular
phone
This
system
Phone book data
cannot be trans-
ferred manually/au-
tomatically.
The profile version of
the connected cellu-
lar phone may not be
compatible with
transferring phone
book data.
For a list of specific
devices which opera-
tion has been con-
firmed on this
system, check with
your Toyota dealer.
Transfer operation
on the cellular phone
has not completed.
Complete transfer
operation on the cel-
lular phone (approve
transfer operation on
the phone).

102
4. WHAT TO DO IF...
MIRAI_Navi_EE_13CY (OM62009E)
When using the Bluetooth ® message function
Symptom Likely cause Solution
Page
Cellular
phone
This
system
Messages cannot be
viewed.
Message transfer is
not enabled on the
cellular phone.
Enable message
transfer on the cellu-
lar phone (approve
message transfer on
the telephone).
New message notifi-
cations are not dis-
played.
Notification of SMS/
E-mail reception on
this system is set to
off.
Set notification of
SMS/E-mail recep-
tion on this system to
on.
132

103
4. WHAT TO DO IF...
MIRAI_Navi_EE_13CY (OM62009E)
Bluetooth® HANDS-FREE SYSTEM
3
In other situations
: For details, refer to the owner’s manual that came with the cellular phone.
Symptom Likely cause Solution
Page
Cellular
phone
This
system
Even though all con-
ceivable measures
have been taken, the
symptom status does
not change.
The cellular phone is
not close enough to
this system.
Bring the cellular
phone closer to this
system.
Radio interference
has occurred.
Turn off Wi-Fi® de-
vices or other devic-
es that may emit
radio waves.
The cellular phone is
the most likely cause
of the symptom.
Turn the cellular
phone off, remove
and reinstall the bat-
tery pack, and then
restart the cellular
phone.
Enable the cellular
phone’s Bluetooth®
connection.
Disable the Wi-Fi®
connection of the cel-
lular phone.
Stop the cellular
phone’s security soft-
ware and close all
applications.
Before using an ap-
plication installed on
the cellular phone,
carefully check its
source and how its
operation might af-
fect this system.

121
1. SETUP OPERATION
MIRAI_Navi_EE_13CY (OM62009E)
SETUP
5
■RECONNECTING Bluetooth® DE-
VICE
If the Bluetooth ® device is disconnected
on purpose, such as it was turned off, this
does not happen. Reconnect it manually
using either of the following methods:
• Select a Bluetooth ® device again.
(P.124)
• Connect the audio profile/phone profile.
(P.124)
If a Bluetooth ® device is disconnected
due to poor reception from the
Bluetooth ® network when the power
switch is in ACCESSORY or ON mode,
the system automatically reconnect
the Bluetooth ® device.

122
1. SETUP OPERATION
MIRAI_Navi_EE_13CY (OM62009E)
■PROFILES
Bluetooth is a registered trademark of Bluetooth SIG, Inc.
This system supports the following services.
Bluetooth ®
device Specification Function Require-
ments
Recom-
menda-
tions
Bluetooth ®
Phone/
Bluetooth ®
Audio Play-
er
Bluetooth ® Specification
Registering a
Bluetooth ®
device
Ver. 1.1 Ver. 3.0
+EDR
Bluetooth ®
device Profile Function Require-
ments
Recom-
menda-
tions
Bluetooth ®
Phone
HFP (Hands-Free Profile) Hands-free
system Ver. 1.0 Ver. 1.6
PBAP (Phone Book Access
Profile)
Transferring the
contacts Ver. 1.0 Ver. 1.1
MAP (Message Access Profile) Bluetooth ®
phone message Ver. 1.0
DUN (Dial-up Networking
Profile) Connected
service
Ver. 1.1
PAN (Personal Area Networking) Ver. 1.0
Bluetooth ®
Audio Play-
er
A2DP (Advanced Audio
Distribution Profile) Bluetooth ®
audio system
Ver. 1.0 Ver. 1.2
AVRCP (Audio/Video Remote
Control Profile) Ver. 1.0 Ver. 1.4
INFORMATION
●If your cellular phone does not support HFP, registering the Bluetooth ® phone or using
PBAP, MAP, DUN or PAN profiles individually will not be possible.
●If the connected Bluetooth ® device version is older than recommended or incompatible,
the Bluetooth ® device function may not work properly.

123
1. SETUP OPERATION
MIRAI_Navi_EE_13CY (OM62009E)
SETUP
5
■STATUS DISPLAY
The condition of the Bluetooth ® con-
nection, as well as the level of recep-
tion and the amount of device battery
charge left, are displayed on the status
bar.
No. Function
Displays the charge level of the de-
vice’s battery
The amount displayed does not
always correspond with the
amount displayed on the device.
The amount of battery charge left
may not be displayed depending
on the device. This system does
not have a charging function.
If this information is not available
from the connected device, the
icon will be shown with a question
mark.
Displays the level of reception
The level of reception does not
always correspond with the level
displayed on the device.
The level of reception may not be
displayed depending on the
device.
If this information is not available
from the connected device, the
icon will be shown with a question
mark.
“R” is displayed when receiving in a
roaming area.
The receiving area may not be
displayed depending on the
phone.
INFORMATION
●An antenna for the Bluetooth ® connec-
tion is built into the instrument panel.
The system may not function when you
use the Bluetooth ® device in the follow-
ing conditions and places:
• When the device is obstructed by cer-
tain objects (such as when it is behind
the seat or in the glove box and con-
sole box).
• When the device touches or is covered
with metal materials.
124
1. SETUP OPERATION
MIRAI_Navi_EE_13CY (OM62009E)
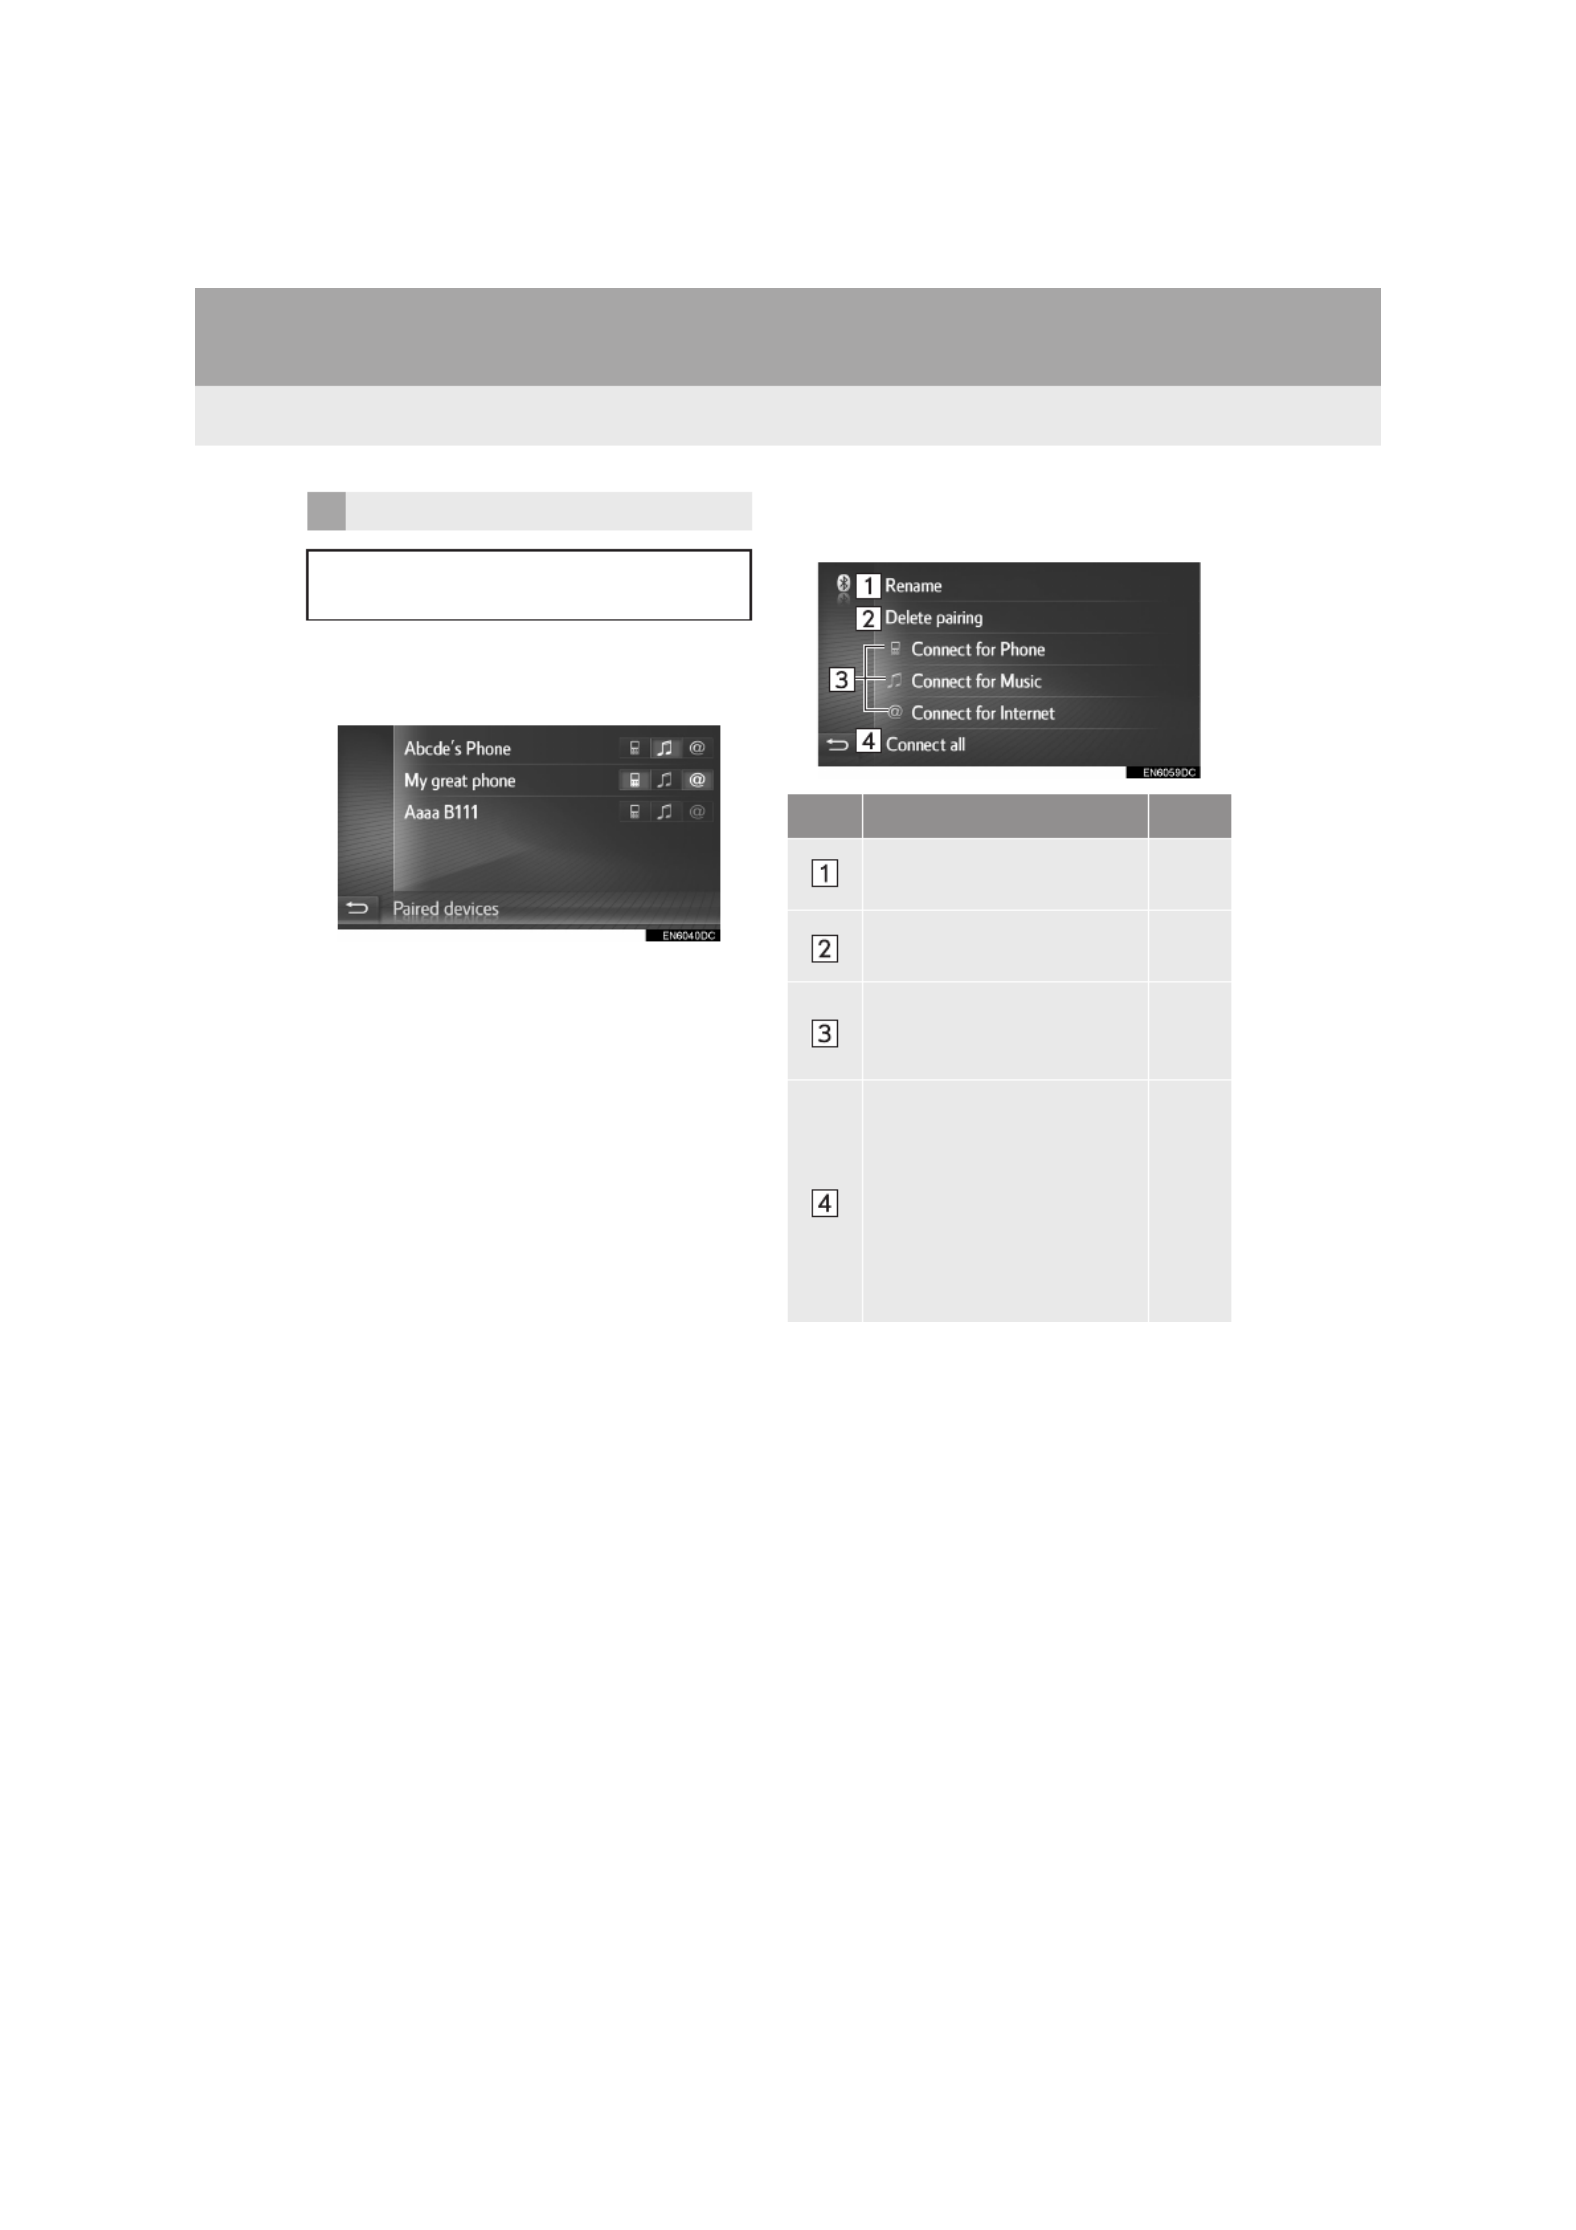
1Select “Paired device list”.
2Select the desired device.
Dimmed icons can be selected to connect
to the function directly.
The tone of the icons show which profiles
the device supports. (Dimmed icons are
not available.)
The device’s currently connected profiles
are highlighted.
3Check that the following screen is dis-
played.
■CHANGING THE DEVICE NAME
1Select “Rename”.
2Enter the device name and then select
“OK”.
■DELETING A PAIRED DEVICE
1Select “Delete pairing”.
2Select “Yes” when the confirmation
screen appears.
PAIRED DEVICE LIST
Each profile connection status can be
changed from the “Paired device list”.
No. Function Page
Select to change the de-
vice name. 124
Select to delete the paired
device. 124
Select to connect/discon-
nect individually a paired
device’s profiles.
When “Connect all”
displayed
Select to connect all sup-
portedprofiles.
When “Disconnect all”
displayed
Select to disconnect all
supported profiles.

125
1. SETUP OPERATION
MIRAI_Navi_EE_13CY (OM62009E)
SETUP
5
1Select “Charge warnings”.
2Select items to be set. 1Select “Set system name and PIN”.
2Select item to be set.
SETTING CHARGE WARNINGS
No. Function
Enable to set the cost warnings
function on/off. When set to on, a
pop-up window will be displayed.
Enable to set the roaming warning
function on/off.
SETTING THE SYSTEM NAME
AND PIN
No. Function
Select to enter a name. To confirm,
select “OK”.
Select to enter a desired number. To
confirm, select “OK”.
A PIN code must be 4 digits.
126
1. SETUP OPERATION
MIRAI_Navi_EE_13CY (OM62009E)
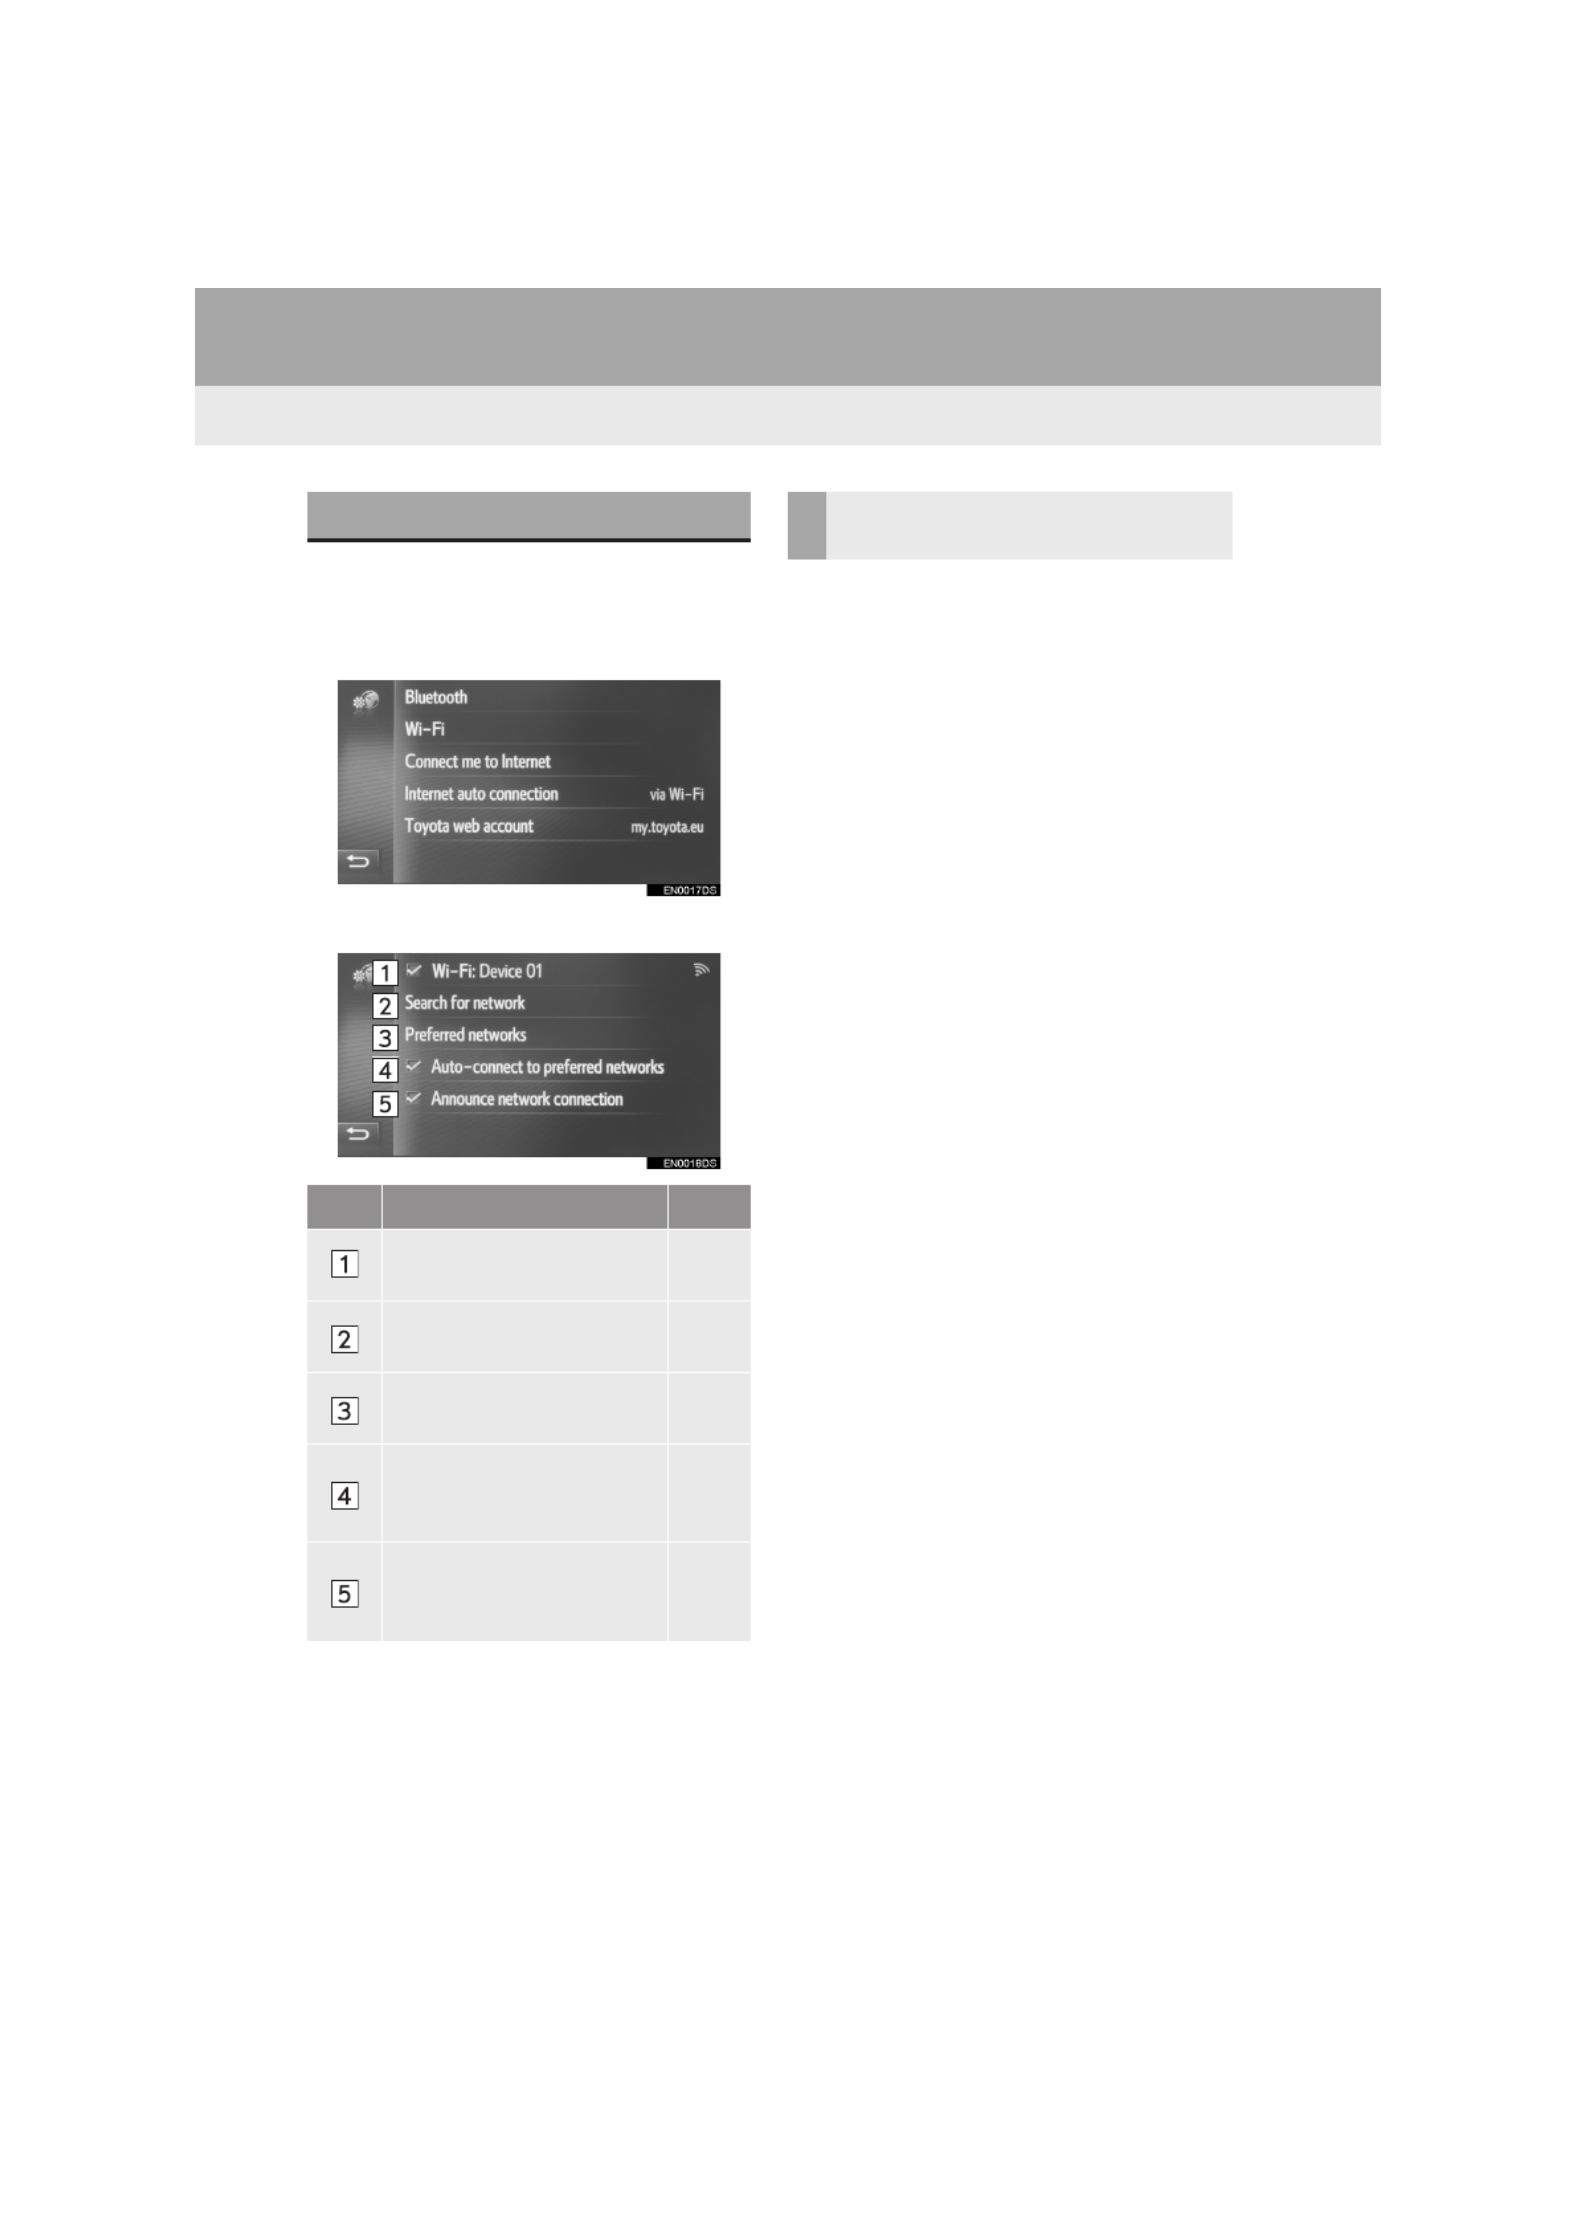
1Display the connectivity settings
screen. (P.116)
2Select “Wi-Fi”.
3Select the items to be set.
1Display the Wi-Fi ® settings screen.
(P.126)
2Select “Wi-Fi:”.
When set to on, the name of the con-
nected network is shown and the signal
strength is indicated by an icon.
Wi-Fi ® SETTINGS
No. Function Page
Select to turn the Wi-Fi ®
function on/off. 126
Select to start a search for
available Wi-Fi ® networks. 127
Select to edit the list of pre-
ferred networks. 128
Enable to automatically
connect to preferred net-
works.
Enable to display when a
network connection is
made.
TURNING Wi-Fi ® FUNCTION
ON/OFF

127
1. SETUP OPERATION
MIRAI_Navi_EE_13CY (OM62009E)
SETUP
5
1Display the Wi-Fi® settings screen.
(P.126)
2Select “Search for network”.
3Select the desired network.
Connection to the selected network is
established.
When a network with is selected and
the password entry screen is displayed,
enter the password then select “OK”
The networks, that were added to list of
preferred networks, are marked with .
Select to show details about the
network or add the selected network to
the list of preferred networks.
“Show details”: Select to display details
about the network.
“Add to preferred network”: Select to
add a Wi-Fi® network to the list of pre-
ferred networks.
■ADDING A Wi-Fi® NETWORK
1Select “Enter network name”.
2Enter the network name and select
“OK”.
3Select the security type.
4Enter the password and select “OK”.
CONNECTING TO A NETWORK
Available networks can be searched
for and connected to.
Available networks which are not dis-
played by searching can be added.

129
1. SETUP OPERATION
MIRAI_Navi_EE_13CY (OM62009E)
SETUP
5
■SPECIFICATIONS
1Display the connectivity settings
screen. (P.116)
2Select “Connect me to Internet”.
When an Internet connection is already
active, a popup window is displayed. To
return to the previous screen, select the
“OK”.
3Select the desired device.
The system search for devices which sup-
port the Internet profile.
4Select “Provider username”, “Pro-
vider password” or “APN” and enter
the name, password or APN.
5Select “Confirm provider informa-
tion”.
Wi-Fi® FUNCTION
OPERATING HINTS
WARNING
●Use Wi-Fi® devices only when safe and
legal to do so.
●Your audio unit is fitted with Wi-Fi®
antennas. People with implantable car-
diac pacemakers, cardiac resynchroni-
zation therapy-pacemakers or
implantable cardioverter defibrillators
should maintain a reasonable distance
between themselves and the Wi-Fi®
antennas.
The radio waves may affect the opera-
tion of such devices.
●Before using Wi-Fi® devices, users of
any electrical medical device other than
implantable cardiac pacemakers, car-
diac resynchronization therapy-pace-
makers or implantable cardioverter
defibrillators should consult the manu-
facturer of the device for information
about its operation under the influence
of radio waves.
Radio waves could have unexpected
effects on the operation of such medical
devices.
INFORMATION
●Communication standards
802.11b
802.11g
802.11n
●Security
WEP
WPA™
WPA2™
Wi-Fi Protected Setup™
• WPA, WPA2 and Wi-Fi Protected
Setup are registered mark of the Wi-Fi
Alliance®.
QUICK SETUP OF AN
INTERNET CONNECTION
This function is a shortcut for an inter-
net connection.

130
1. SETUP OPERATION
MIRAI_Navi_EE_13CY (OM62009E)
1Display the connectivity settings
screen. (P.116)
2Select “Toyota web account”.
3Select items to be set.
1Display the Toyota web account set-
tings screen. (P.130)
2Select “Change account”.
3Select “New account” or .
TOYOTA WEB ACCOUNT
SETTINGS
The following detailed Toyota web ac-
count settings can be set.
No. Function
Shows active account
Select to add a new account or
change to another account.
(P.130)
Select to receive the remotely cust-
omised vehicle settings data from
the Toyota portal site.
Select to send the vehicle’s settings
data that can be customised re-
motely to the Toyota portal site.
ADDING A NEW ACCOUNT OR
CHANGING AN ACCOUNT
DETAILS

131
1. SETUP OPERATION
MIRAI_Navi_EE_13CY (OM62009E)
SETUP
5
4Select items to be set. ■DELETING USER NAME AND
PASSWORD
1Select “Delete account”.
2Select “Yes” when the confirmation
screen appears.
No. Function
Select to enter a username. To con-
firm, select “OK”.
Select to enter a password. To con-
firm, select “OK”.
Select to turn the remember user lo-
gin information function on or off.
When this function is activated, the
entered user login information will
be remembered for every user login.
Select to turn the automatic down-
load of POIs and routes function on
or off. When this function is activat-
ed, the POIs and routes from the
server will be downloaded automati-
cally and saved in the “Stored” list
on the “My destinations” screen.
(P.194)
Select to delete your Toyota web ac-
count from the navigation system.
(P.131)

132
MIRAI_Navi_EE_13CY (OM62009E)
1. SETUP OPERATION
5. TELEPHONE SETTINGS
1Display the “Setup” screen. (P.110)
2Select “Phone”.
3Select items to be set.
Settings are available for ringtone se-
lection, announcing incoming short
messages and e-mails etc.
No. Function
Select to set the incoming short
message announcement function
on/off.
Select to set the incoming e-mail an-
nouncement function on/off.
Select to set the desired ringtone.
Select to update the phone book of
the connected phone manually. The
updating takes place by referring to
the phone book lists in the naviga-
tion system and phone. (P.79,
194)
INFORMATION
●The current setting of each item is dis-
played on its right.

134
1. SETUP OPERATION
MIRAI_Navi_EE_13CY (OM62009E)
1Display the audio settings screen.
(P.133)
2Select “Balance/Fader”.
3Adjust the balance or fader selecting
arrows.
BALANCE
A good balance of the left and right ste-
reo channels and of the front and rear
sound levels is also important.
Keep in mind that when listening to a
stereo recording or broadcast, chang-
ing the right/left balance will increase
the volume of one group of sounds
while decreasing the volume of anoth-
er.
No. Function
Fader Increases the volume to
the front side
Fader Increases the volume to
the rear side
Balance Increases the volume to
the left side
Balance Increases the volume to
the right side
INFORMATION
●Sound balance can also be adjusted by
touching and dragging the marker on the
screen with your finger or touching the
quadrants.
AUTOMATIC SOUND
LEVELIZER (ASL)
The system adjusts to the optimum vol-
ume and tone quality according to ve-
hicle speed to compensate for
increased vehicle noise.

135
MIRAI_Navi_EE_13CY (OM62009E)
1. SETUP OPERATION
SETUP
5
7. VEHICLE SETTINGS
1Display the “Setup” screen. (P.110)
2Select “Vehicle”.
3Select “Vehicle customisation”.
4Check that the “Vehicle customisation”
list is displayed.
5Select the desired item.
For a list of the settings that can be
changed, refer to “Owner’s manual”.
A message indicating that the settings are
being saved will appear. Do not perform
any other operations while this message is
displayed.
Vehicle customisation settings can be
changed.

6
137
MIRAI_Navi_EE_13CY (OM62009E)
1
2
3
4
5
6
7
8
1. REAR VIEW MONITOR
SYSTEM .................................... 138
DRIVING PRECAUTIONS .................. 138
SCREEN DESCRIPTION.................... 140
2. REAR VIEW MONITOR SYSTEM
PRECAUTIONS......................... 142
AREA DISPLAYED ON SCREEN ....... 142
THE CAMERA..................................... 143
DIFFERENCES BETWEEN THE
SCREEN AND THE ACTUAL
ROAD ............................................... 144
WHEN APPROACHING THREE-
DIMENSIONAL OBJECTS ............... 146
3. THINGS YOU SHOULD
KNOW........................................ 148
IF YOU NOTICE ANY SYMPTOMS .... 148
1REAR VIEW MONITOR
SYSTEM
REAR VIEW MONITOR SYSTEM
Some of the functions cannot be operated while driving.

138
MIRAI_Navi_EE_13CY (OM62009E)
1. REAR VIEW MONITOR SYSTEM
1. REAR VIEW MONITOR SYSTEM
The rear view monitor system assists
the driver by displaying an image of the
view behind the vehicle with fixed
guide lines on the screen while backing
up, for example while parking.
INFORMATION
●The screen illustrations used in this text
are intended as examples, and may dif-
fer from the image that is actually dis-
played on the screen.
DRIVING PRECAUTIONS
The rear view monitor system is a sup-
plemental device intended to assist the
driver when backing up. When backing
up, be sure to visually check all around
the vehicle both directly and using the
mirrors before proceeding. If you do
not, you may hit another vehicle, and
could possibly cause an accident.
Pay attention to the following precau-
tions when using the rear view monitor
system.

145
1. REAR VIEW MONITOR SYSTEM
MIRAI_Navi_EE_13CY (OM62009E)
REAR VIEW MONITOR SYSTEM
6
WHEN THE GROUND BEHIND
THE VEHICLE SLOPES DOWN
SHARPLY
The distance guide lines will appear to
be farther from the vehicle than the ac-
tual distance. Because of this, objects
will appear to be closer than they actu-
ally are. In the same way, there will be
a margin of error between the guide
lines and the actual distance/course on
the road.
WHEN ANY PART OF THE
VEHICLE SAGS
When any part of the vehicle sags due
to the number of passengers or the dis-
tribution of the load, there is a margin
of error between the fixed guide lines
on the screen and the actual distance/
course on the road.
A margin of error

150
MIRAI_Navi_EE_13CY (OM62009E)
1. QUICK REFERENCE................... 152
2. DISPLAYING THE NAVIGATION
SCREEN .................................... 157
DISPLAYING MAP SCREEN .............. 157
DISPLAYING THE NAVIGATION
MENU SCREEN ............................... 157
3. NAVIGATION SYSTEM
FUNCTION INDEX..................... 159
1. MAP SCREEN OPERATION ....... 161
CURRENT VEHICLE POSITION
DISPLAY........................................... 161
SCREEN SCROLL OPERATION........ 162
MAP CONFIGURATIONS ................... 162
2. MAP ICONS ................................. 164
DISPLAYING VARIOUS
INFORMATION ON THE MAP ......... 164
POI* ICONS ........................................ 165
TRAFFIC MESSAGES ........................ 169
1. DESTINATION SEARCH
INDEX........................................ 172
2. SEARCH OPERATION ............... 173
SEARCHING BY REGISTERED
POINTS............................................. 173
SEARCHING FROM PREVIOUS
DESTINATIONS................................ 173
SEARCHING BY PHONE BOOK ........ 174
SEARCHING BY ADDRESS ............... 174
SEARCHING BY POIs* ....................... 175
SEARCHING ON THE MAP................ 178
SEARCHING BY COORDINATES ...... 178
1. STARTING ROUTE
GUIDANCE ............................... 180
STARTING ROUTE GUIDANCE
SCREEN ........................................... 180
ADJUSTING THE ROUTE................... 181
2. ROUTE GUIDANCE .................... 183
ROUTE GUIDANCE SCREEN ............ 183
VOICE GUIDANCE.............................. 184
1BASIC INFORMATION
BEFORE OPERATION
2MAP SCREEN OPERATION
AND MAP ICONS
3DESTINATION SEARCH
4ROUTE GUIDANCE

155
1. BASIC INFORMATION BEFORE OPERATION
MIRAI_Navi_EE_13CY (OM62009E)
NAVIGATION SYSTEM
7
No. Function Page
Displays the distance, the estimated arrival time or remaining time to
the destination. 183
Displays the distance to the next turn with the arrow indicating the turn
direction. 183
Guidance route
Select to change the map scale. 162
This symbol indicates a map layout. Selecting this symbol changes the
map layout. 163
Select to change map modes between the normal map and traffic map. 169
Select to repeat the last navigation announcement. 184
Select to display the “Navigation” menu screen. 152
Select to display the options screen. 156
Current position 161
Displays the name of the current street or the next street. (when ap-
proaching a maneuver point)
Displays traffic message icon and traffic congestion.

163
2. MAP SCREEN OPERATION AND MAP ICONS
MIRAI_Navi_EE_13CY (OM62009E)
NAVIGATION SYSTEM
7
1Select the map layout button.
Each time the map layout button is
selected, the map layout changes as fol-
lows:
3D heading ( ) 2D heading
( ) 2D north ( )
3D heading
2D heading
2D north
CHANGING MAP LAYOUT
INFORMATION
●Map layout can be also changed by
selecting then “Map settings”.
(P.205)
178
3. DESTINATION SEARCH
MIRAI_Navi_EE_13CY (OM62009E)
1Display the “Navigation” menu screen
and select “Enter destination”.
(P.157)
2Select the “Advanced” tab.
3Select “Select point on map”.
4Select the desired point on the map.
5Select “Go”.
The route will be calculated.
1Display the “Navigation” menu screen
and select “Enter destination”.
(P.157)
2Select the “Advanced” tab.
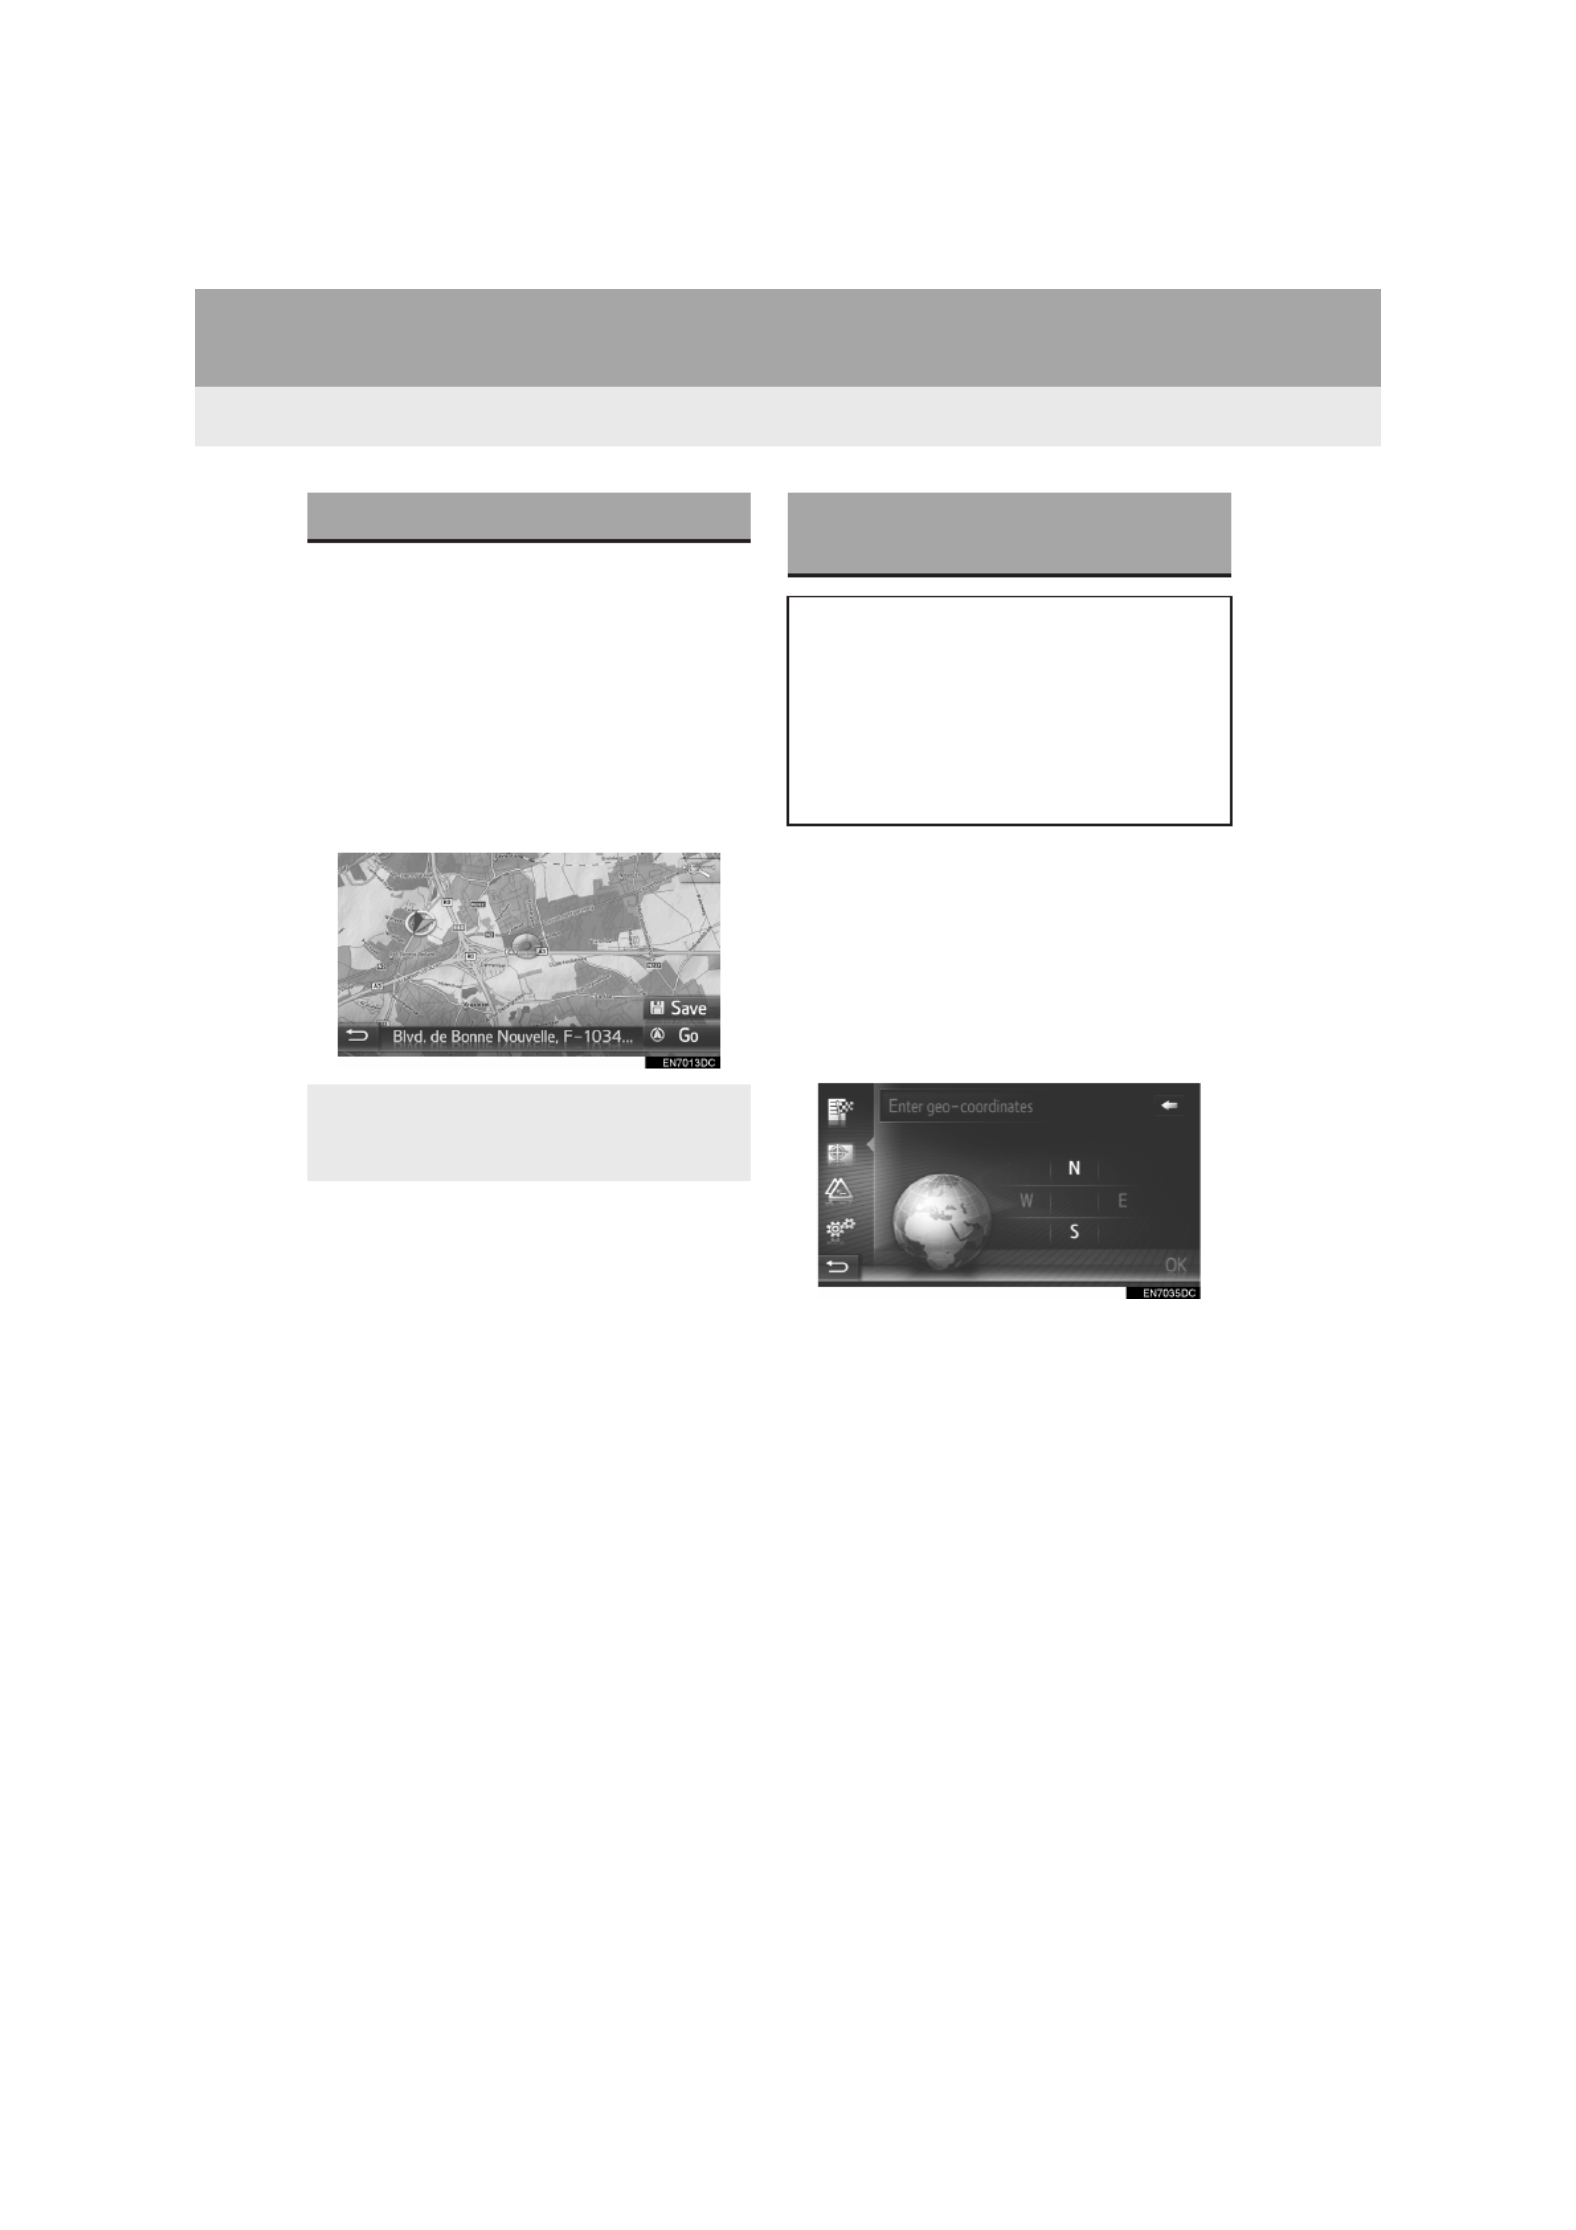
3Select “Enter geo-coordinates”.
4Select “N” or “S”.
5Enter the latitude.
6Select “W” or “E”.
7Enter the longitude.
8Select “OK”.
SEARCHING ON THE MAP
When “Save” is selected, the point is
registered in the “Stored” list on the “My
destinations” screen. (P.196)
SEARCHING BY
COORDINATES
Geo coordinates can be entered in
DMS format (Degrees, Minutes’, Sec-
onds”). Only coordinate values that
can potentially exist are able to be en-
tered. Impossible coordinate values
and their relevant screen buttons will
be dimmed.
Produktspezifikationen
| Marke: | Toyota |
| Kategorie: | Navigator |
| Modell: | Mirai 2015 Navigation |
Brauchst du Hilfe?
Wenn Sie Hilfe mit Toyota Mirai 2015 Navigation benötigen, stellen Sie unten eine Frage und andere Benutzer werden Ihnen antworten
Bedienungsanleitung Navigator Toyota

26 August 2024
24 Juli 2024
23 Juli 2024
17 Juli 2024
29 Mai 2024
15 Dezember 2023
13 November 2022
3 November 2022
Bedienungsanleitung Navigator
- Navigator Humminbird
- Navigator Clatronic
- Navigator Acer
- Navigator Asus
- Navigator Sanyo
- Navigator Medion
- Navigator Philips
- Navigator SilverCrest
- Navigator Sony
- Navigator Conrad
- Navigator MarQuant
- Navigator Thomson
- Navigator Blaupunkt
- Navigator Grundig
- Navigator Kenwood
- Navigator Pyle
- Navigator ARCHOS
- Navigator Caliber
- Navigator Pioneer
- Navigator JVC
- Navigator Motorola
- Navigator Nokia
- Navigator Dual
- Navigator Hitachi
- Navigator Skoda
- Navigator Garmin
- Navigator GOCLEVER
- Navigator Mio
- Navigator Bushnell
- Navigator Teasi
- Navigator Harman Kardon
- Navigator Scosche
- Navigator Furuno
- Navigator Lowrance
- Navigator Simrad
- Navigator BMW
- Navigator Honda
- Navigator Parrot
- Navigator Zebra
- Navigator Audi
- Navigator Midland
- Navigator Binatone
- Navigator Hagenuk
- Navigator Alpine
- Navigator Volkswagen
- Navigator Volvo
- Navigator Kia
- Navigator Overmax
- Navigator Kalkhoff
- Navigator Airis
- Navigator Packard Bell
- Navigator XZENT
- Navigator Uniden
- Navigator Clarion
- Navigator Sylvania
- Navigator Audiovox
- Navigator Becker
- Navigator CarTrek
- Navigator ESX
- Navigator Falk
- Navigator Magellan
- Navigator NAVIGON
- Navigator Navitel
- Navigator Navman
- Navigator TomTom
- Navigator ViaMichelin
- Navigator Zenec
- Navigator Cobra
- Navigator VDO
- Navigator Insignia
- Navigator Celestron
- Navigator Autovision
- Navigator Prestigio
- Navigator Boss
- Navigator Mazda
- Navigator Jensen
- Navigator Alfa Romeo
- Navigator GlobalSat
- Navigator Danew
- Navigator Dynavin
- Navigator Eagle
- Navigator Eclipse
- Navigator Igo
- Navigator Kapsys
- Navigator Lanzar
- Navigator Nav N Go
- Navigator Raymarine
- Navigator Route 66
- Navigator Seecode
- Navigator Soundstream
- Navigator Sungoo
- Navigator Sygic
- Navigator VDO Dayton
- Navigator Chrysler
- Navigator Rosen
- Navigator ModeCom
- Navigator Amparos
- Navigator Lark
- Navigator Pharos
- Navigator V7
- Navigator Izzo Golf
- Navigator Cheetah
- Navigator Dashmate
- Navigator Planet Audio
- Navigator Voice Caddie
- Navigator Coyote Systems
- Navigator Rand McNally
- Navigator Whistler
- Navigator Cydle
- Navigator LXNAV
- Navigator SkyCaddie
- Navigator TELE System
- Navigator Zoleo
Neueste Bedienungsanleitung für -Kategorien-

14 Oktober 2024

14 Oktober 2024
14 Oktober 2024
12 Oktober 2024
12 Oktober 2024

9 Oktober 2024
9 Oktober 2024
8 Oktober 2024

8 Oktober 2024
7 Oktober 2024