Taylor 1525 Bedienungsanleitung
Taylor
Wetterstation
1525
Lesen Sie kostenlos die 📖 deutsche Bedienungsanleitung für Taylor 1525 (16 Seiten) in der Kategorie Wetterstation. Dieser Bedienungsanleitung war für 13 Personen hilfreich und wurde von 2 Benutzern mit durchschnittlich 4.5 Sternen bewertet
Seite 1/16

by
1525
1
WeatherGuide™System with Remote Sensor
Instruction Manual

Welcome to theTaylor
®
WeatherGuide System. Simple, reliable,
accurate…it allows you to monitor indoor or outdoor locations from
one room.The base unit reads indoor conditions, while the remote
sensor wirelessly reports outdoor weather conditions back to the base
unit for an all-in-one weather display.
Plan your work day, play day, every day. Now that’s smart!
Table of Contents
Powering the WeatherGuide™..................................................................3
How to Set Up the WeatherGuide™ ......................................................3
How to Display the WeatherGuide™ ......................................................5
Clock Setting ..................................................................................................6
How to Read the WeatherGuide™ ..........................................................7
Temperature/Indoor Humidity Displays ................................8
Minimum/Maximum Records....................................................9
Temperature/Indoor Humidity Trends ................................10
Backlight ......................................................................................11
°F/°C Switch ..............................................................................11
Low Battery Display ................................................................11
TroubleShooting
Disconnected Signals................................................................12
Transmission Collision ............................................................13
Problem Solving ........................................................................13
Precautions ................................................................................14
2

To Power your WeatherGuide
™
Your WeatherGuide™ base unit is powered by 2 AAA batteries (not
included).
Remove the battery compartment cover on the back of the unit.
Install 2 AAA batteries. Replace the battery compartment cover.
Important:Power the base unit before installing batteries in the re-
mote sensor, or the units’ transmissions may not properly connect.
Remote Sensors
Unscrew the 4 screws securing the remote sensor’s battery compart-
ment cover located on the back of the unit. Install 2 AAA batteries.
(Tip: Lithium batteries are recommended in extremely cold or hot lo-
cations.)
How to Set up Your WeatherGuide™System
First, power up the base unit, using 2 AAA batteries.Next,install 2 AAA
batteries into the remote sensor. Place the base unit as close as possi-
ble to the remote unit.
There is a Channel switch in the remote
sensor battery compartment. Move the
switch to Channel 1.
Press the “TX” button located inside the
remote sensor battery compartment.This
will send a transmission signal to the base
unit.The red LED Indicator light will flash
when a signal is transmitted.
3
Move channel switch
to Channel 1
Press the Tx button to send
transmission signal to base unit

Transmission successful
4
If the transmission is successful,the remote
sensor readings and a icon will appear
on the base unit. If dashes are still displayed
on the receiver unit, press the Tx button
again.
Replace the remote’s battery compart-
ment cover.
The remote will automatically transmit readings to the base unit.
• The first remote registered will transmit every 53 seconds.
• If a second remote is registered, it will transmit every 56 seconds.
• If a third remote is registered, it will transmit every 59 seconds.
Note: A maximum of 3 remote sensor units can be registered.
Should you purchase one or two additional remote units (Model 1534,
sold separately) to expand your thermometer monitoring capabilities
to multiple locations, slide the CH switch to Channel 2 to register the
second sensor and select Channel 3 to register the third sensor.The
Channel number assigned will appear on the base unit’s LCD screen.

Keyhole
Table Stand
5
How to Display your WeatherGuide™
Table top – use the Table Stand on the back of the base and remote
sensor units
Wall – use the keyhole on the back of the base and remote sensor units.
Base Unit Remote Sensor
Base unit location –
Place the unit indoors in a well-ventilated location away from direct sunlight.
Remote sensor location –
The transmission range of the remote sensor is 100 feet.The effective
transmission range is vastly affected by obstacles such as walls, sheds,
trees, etc.Try various set ups for the best results. Shorten the distance
between receiver and remote units when necessary. Place indoor in a
well ventilated location away from direct sunlight. Place the sensor in
a dry, shaded area. Direct sunlight will heat the casing and inflate tem-
peratures readings.
Important: Though the remote unit is weather proof, it should be
placed away from direct sunlight, rain, snow and should never be sub-
merged in water.
A maximum of 3 remote sensor units can be registered. One
remote sensor is included.To purchase additional Remote
Sensors (Taylor model 1534), please visit www.partshelf.com.

How to Set the Clock Manually
To manually set the clock:
Your WeatherGuide™ has a 12 hour
clock function.To set the clock:
1. Press and hold the “Set” button lo-
cated on the back of the base unit.
The hour digits will flash.
2. Press “+C/F” to change the hours.
Press “SET” to enter.
3. Press “+C/F” to change the minutes.
Press “SET” to enter.
4. Press “+C/F” to change the month.
Press “SET” to enter.
5. Press“+C/F” to change the day.Press
“SET” to enter.
6. Press “+C/F” to change the year.
Press “SET” to enter.
7. The clock is now set.
Tip:Hold down the“C/F” button to ad-
vance the digits quickly.
Press and hold SET to star t
clock setting.
Press +C/F to change time digits
and then SET to enter.
Repeat for all settings.
Press SET after setting year.
The clock is set.
6

How to Read Your WeatherGuide™
The base unit displays indoor conditions from its location.
The remote unit will transmit weather readings from its location back
to the base unit.
Alternately, the remote sensor’s probe cord may be used. Plug the
probe cord into the rubber plug on the remote sensor.Allow the end
to hang where you wish to measure temperatures (out of a window,
aquariums, swimming pools, etc.)
If more than one remote sensor is in use,
press the “CHANNEL” button on the back
of the base unit to toggle between sensor
displays.
A Channel icon on the base unit indicates
which remote sensor readings are dis-
played.
Base unit – Indoor and Outdoor readings Remote unit – outdoor readings
Press Channel to see different
remote sensor readings
Channel icon indicates which
channel is displayed.
7

To View Minimum/Maximum tem-
perature / indoor humidity readings
Your WeatherGuide™ will store the last
recorded high and low temperatures and in-
door humidity over a 24 hour period.The
24 hour period starts when the batteries
are installed.
1. Press the “Min/Max” button once to see
the highest temperature/indoor humidity
of the day.
2. Press the “Min/Max” button again to see
the lowest temperature/indoor humidity of
the day.
3.Press the “Min/Max” button a third time
to see current temperature/indoor humid-
ity again.
To Clear the minimum or maximum read-
ings, press and hold the “Min/Max” button
while those readings are on the screen.The
reading will reset to the current tempera-
ture and indoor hu-
midity.
Current reading
9
Press MIN/MAX to see high
and low daily temperature &
humidity
Minimum or Maximum readings
Back to current readings
Minimum or Maximum
readings on screen
Min/Max readings are
cleared.
Press and hold Min/Max to
reset high/low temperature &
indoor humidity when they are
on the screen
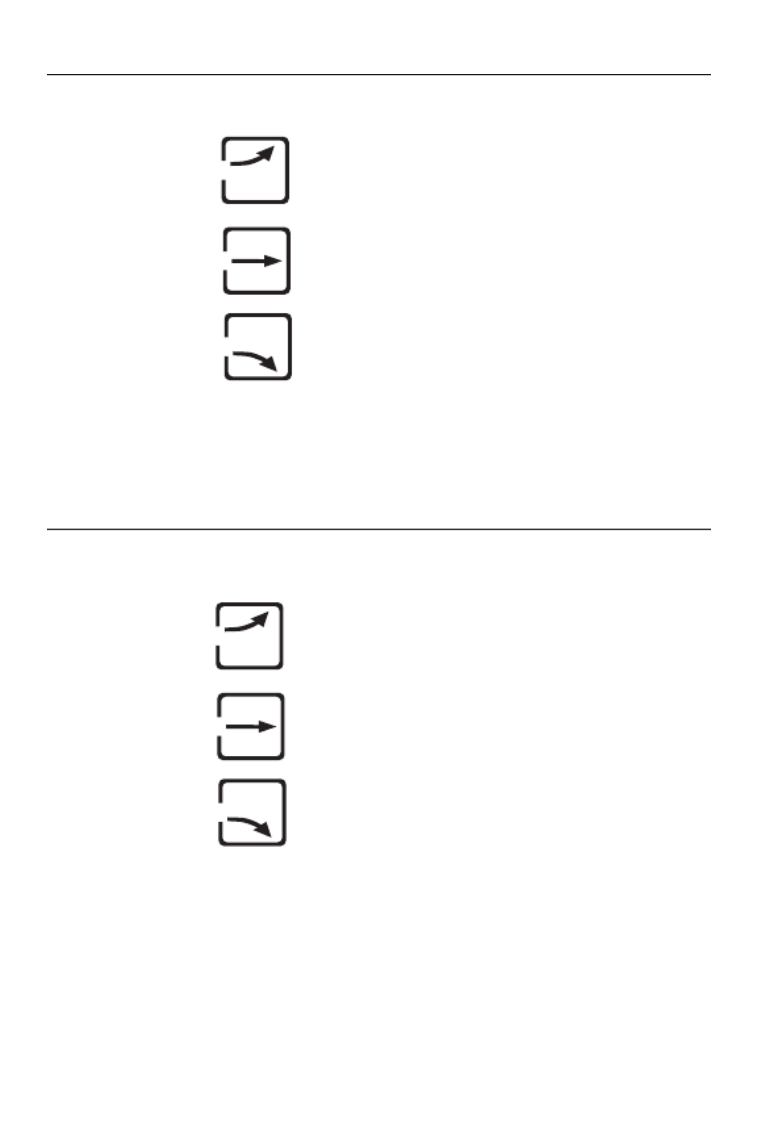
Temperature Trend Indicators
Your WeatherGuide™ will indicate if temperatures are rising, falling,
or steady.
indicates Rising Temperatures readings
(temperatures have gone up more than 2
degrees in an hour)
indicates Steady Temperature readings
indicates Falling Temperatures (tempera-
tures have gone down more than 2 degrees
in an hour)
Indoor Humidity Trend Indicators
Your WeatherGuide™ will indicate if indoor humidity levels are rising,
falling, or steady.
indicates Rising Indoor Humidity readings
(humidity has gone up more than 2 degrees
in an hour)
indicates Steady Indoor Humidity readings
indicates Falling Indoor Humidity (humid-
ity has gone down more than 2 degrees in
an hour)
10

12
Trouble-Shooting
Disconnected Signals
If the receiver unit does not receive a transmission from a remote chan-
nel for 1 hour, the display will show dashes.To correct this problem:
1. Check that the remote is properly positioned, within the appro-
priate transmission range. Transmissions are vastly affected by
building materials and where the receiver and remote units are
positioned.Try various set ups for the best results. Shorten the
distance between receiver and remote units when necessary.
2. Check to make sure the transmission path is clear of obstacles
and interference.
3. If new batteries are faulty on the initial installation, install fresh
batteries. If you did not notice the Low Battery icon warning and
the product performed correctly after initial set up, the batteries
have lost their charge. Replace batteries (see the Power Sources
section of this manual.)
4. Press the “Tx” button in the battery compartment of the remote
to send a transmission signal to the base unit.
5. Press and hold the “Channel” button on the back of the base unit.
This will clear the channel setting and the base unit will begin
searching for remote sensor transmissions.Press the “Tx” button
in the battery compartment of the remote to send a transmis-
sion signal to the base unit.
6. Press the “RESET” button in the remote sensor’s battery com-
partment to reset all sensor settings.

13
Transmission Collision
Signals from other household devices, such as doorbells, home security
systems and entry controls, may interfere.This is normal and does not
affect the general performance of this product.The transmission will
resume once the interference recedes.
Note: This equipment has been tested and found to comply with the
limits for a Class B digital device, pursuant to Part 15 of the FCC Rules.
These limits are designed to provide reasonable protection against
harmful interference in a residential installation. This equipment gen-
erates, uses and can radiate radio frequency energy and, if not installed
and used in accordance with the instructions, may cause harmful in-
terference to radio communications. However, there is no guarantee
that interference will not occur in a particular installation.If this equip-
ment does cause harmful interference to radio or television reception,
which can be determined by turning the equipment off and on, the user
is encouraged to try to correct the interference by one or more of the
following measures:
--Reorient or relocate the receiving antenna.
--Increase the separation between the equipment and receiver.
Modifications not authorized by the manufacturer may void users
authority to operate this device.
Problem Solving
1. If the LCD readout is faint, replace the batteries.
2. If outdoor temperature does not display on the base unit:
a) Remove and reinstall all batteries;
b) Use fresh batteries ;
c) Place the remote sensor closer to the base unit;
d) Position the base and remote so that the transmission
path is free of any obstacles, such as buildings, trees, etc.Try to
have no more than 2 or 3 walls between the units.
3. The temperature sensors are manufactured to the accurate within
plus or minus one degree, so 2 units placed next to each other
may report different readings.This is a normal occurrence with
digital sensors and should not be considered a defect.
Produktspezifikationen
| Marke: | Taylor |
| Kategorie: | Wetterstation |
| Modell: | 1525 |
Brauchst du Hilfe?
Wenn Sie Hilfe mit Taylor 1525 benötigen, stellen Sie unten eine Frage und andere Benutzer werden Ihnen antworten
Bedienungsanleitung Wetterstation Taylor

25 August 2024
24 August 2024
24 August 2024
24 August 2024
24 August 2024
24 August 2024
24 August 2024
24 August 2024
24 August 2024
24 August 2024
Bedienungsanleitung Wetterstation
- Wetterstation Clatronic
- Wetterstation Hama
- Wetterstation Lexibook
- Wetterstation Nedis
- Wetterstation Tchibo
- Wetterstation Clas Ohlson
- Wetterstation Cotech
- Wetterstation Profile
- Wetterstation Adler
- Wetterstation Camry
- Wetterstation Velleman
- Wetterstation ADE
- Wetterstation Alecto
- Wetterstation Auriol
- Wetterstation Beurer
- Wetterstation Bresser
- Wetterstation Cresta
- Wetterstation Day
- Wetterstation Denver
- Wetterstation Dexford
- Wetterstation Durabase
- Wetterstation ECG
- Wetterstation EMOS
- Wetterstation Eurochron
- Wetterstation Gira
- Wetterstation HomeMatic
- Wetterstation Irox
- Wetterstation Jacob Jensen
- Wetterstation Kemot
- Wetterstation König
- Wetterstation MarQuant
- Wetterstation Mebus
- Wetterstation Medisana
- Wetterstation Mesko
- Wetterstation National Geographic
- Wetterstation Prologue
- Wetterstation Renkforce
- Wetterstation Sempre
- Wetterstation Techno Line
- Wetterstation Technoline
- Wetterstation Telefunken
- Wetterstation TFA
- Wetterstation ThinkGizmos
- Wetterstation Thomson
- Wetterstation Trevi
- Wetterstation Ventus
- Wetterstation Weinberger
- Wetterstation Ytora
- Wetterstation Trotec
- Wetterstation Blaupunkt
- Wetterstation Braun
- Wetterstation Rocktrail
- Wetterstation Daewoo
- Wetterstation Pyle
- Wetterstation Muse
- Wetterstation Avidsen
- Wetterstation Elro
- Wetterstation GoGEN
- Wetterstation Hyundai
- Wetterstation Orion
- Wetterstation Livoo
- Wetterstation Perel
- Wetterstation Soehnle
- Wetterstation Balance
- Wetterstation Fysic
- Wetterstation Sencor
- Wetterstation Krontaler
- Wetterstation Honeywell
- Wetterstation MINOX
- Wetterstation Lowrance
- Wetterstation Globaltronics
- Wetterstation ELV
- Wetterstation Guardo
- Wetterstation Unitec
- Wetterstation Netatmo
- Wetterstation Ascot
- Wetterstation Theben
- Wetterstation Brandson
- Wetterstation Tanita
- Wetterstation JUNG
- Wetterstation Johnson
- Wetterstation OBH Nordica
- Wetterstation Optex
- Wetterstation Davis
- Wetterstation Levenhuk
- Wetterstation Vitek
- Wetterstation Prestigio
- Wetterstation EQ-3
- Wetterstation EVE
- Wetterstation Extech
- Wetterstation Daikin
- Wetterstation Fluke
- Wetterstation La Crosse Technology
- Wetterstation Oregon Scientific
- Wetterstation Homematic IP
- Wetterstation EQ3
- Wetterstation Elgato
- Wetterstation Digi-tech
- Wetterstation DMV Electronics
- Wetterstation Ea2 LABS
- Wetterstation EMOS SELECT
- Wetterstation Garni
- Wetterstation Hesdo
- Wetterstation Inovalley
- Wetterstation IT
- Wetterstation Kaindle
- Wetterstation La Crosse
- Wetterstation Meade
- Wetterstation Nasa
- Wetterstation Nor-tec
- Wetterstation Otio
- Wetterstation Paget Trading
- Wetterstation PCE Instruments
- Wetterstation Saphir
- Wetterstation Saxon
- Wetterstation Thierry Mugler
- Wetterstation UPM
- Wetterstation Uzoli
- Wetterstation Waldbeck
- Wetterstation Xeecom ApS
- Wetterstation TFA Dostmann
- Wetterstation Vimar
- Wetterstation PeakTech
- Wetterstation AcuRite
- Wetterstation Ease Electronicz
- Wetterstation Chauvin Arnoux
- Wetterstation YONO
- Wetterstation Brigmton
- Wetterstation Chacon
- Wetterstation Baldr
- Wetterstation Garin
- Wetterstation ChiliTec
- Wetterstation Global Water
- Wetterstation Greisinger
- Wetterstation Marathon
- Wetterstation Majestic
- Wetterstation Gewiss
- Wetterstation ClimeMET
- Wetterstation Buienradar
- Wetterstation Balance Meteo
- Wetterstation Rebel
- Wetterstation JDC
- Wetterstation Greenure
- Wetterstation Browin
- Wetterstation Setti+
- Wetterstation Bearware
Neueste Bedienungsanleitung für -Kategorien-

15 Oktober 2024
8 Oktober 2024
5 Oktober 2024
3 Oktober 2024
2 Oktober 2024
30 September 2024
29 September 2024
29 September 2024
24 September 2024
24 September 2024