Primera PTLink Bedienungsanleitung
Lies die bedienungsanleitung für Primera PTLink (8 Seiten) kostenlos online; sie gehört zur Kategorie Drucker. Dieses Handbuch wurde von 62 Personen als hilfreich bewertet und erhielt im Schnitt 4.4 Sterne aus 2 Bewertungen. Hast du eine Frage zu Primera PTLink oder möchtest du andere Nutzer dieses Produkts befragen? Stelle eine Frage
Seite 1/8
1
Secon 1: Overview
The PTLink IP60 wireless print module is a print server that allows the Primera IP60 Photo
Printer to receive prints from IPhone/IPad devices. It features two separate network modes:
1.Hotspot network mode (default) allows the iPhone/iPad to connect and print directly to
the IP60 with no other network present. This is great for events where you will not
necessarily have access to a wi network.
2.Wi network mode allows users to connect the IP60 to their own wireless network,
making it accessible throughout their personal network infrastructure.This is ideal for
an oce where you want easy access to print to the IP60 just by connecng your device
to the same wi network.
Secon 2: First Time Setup
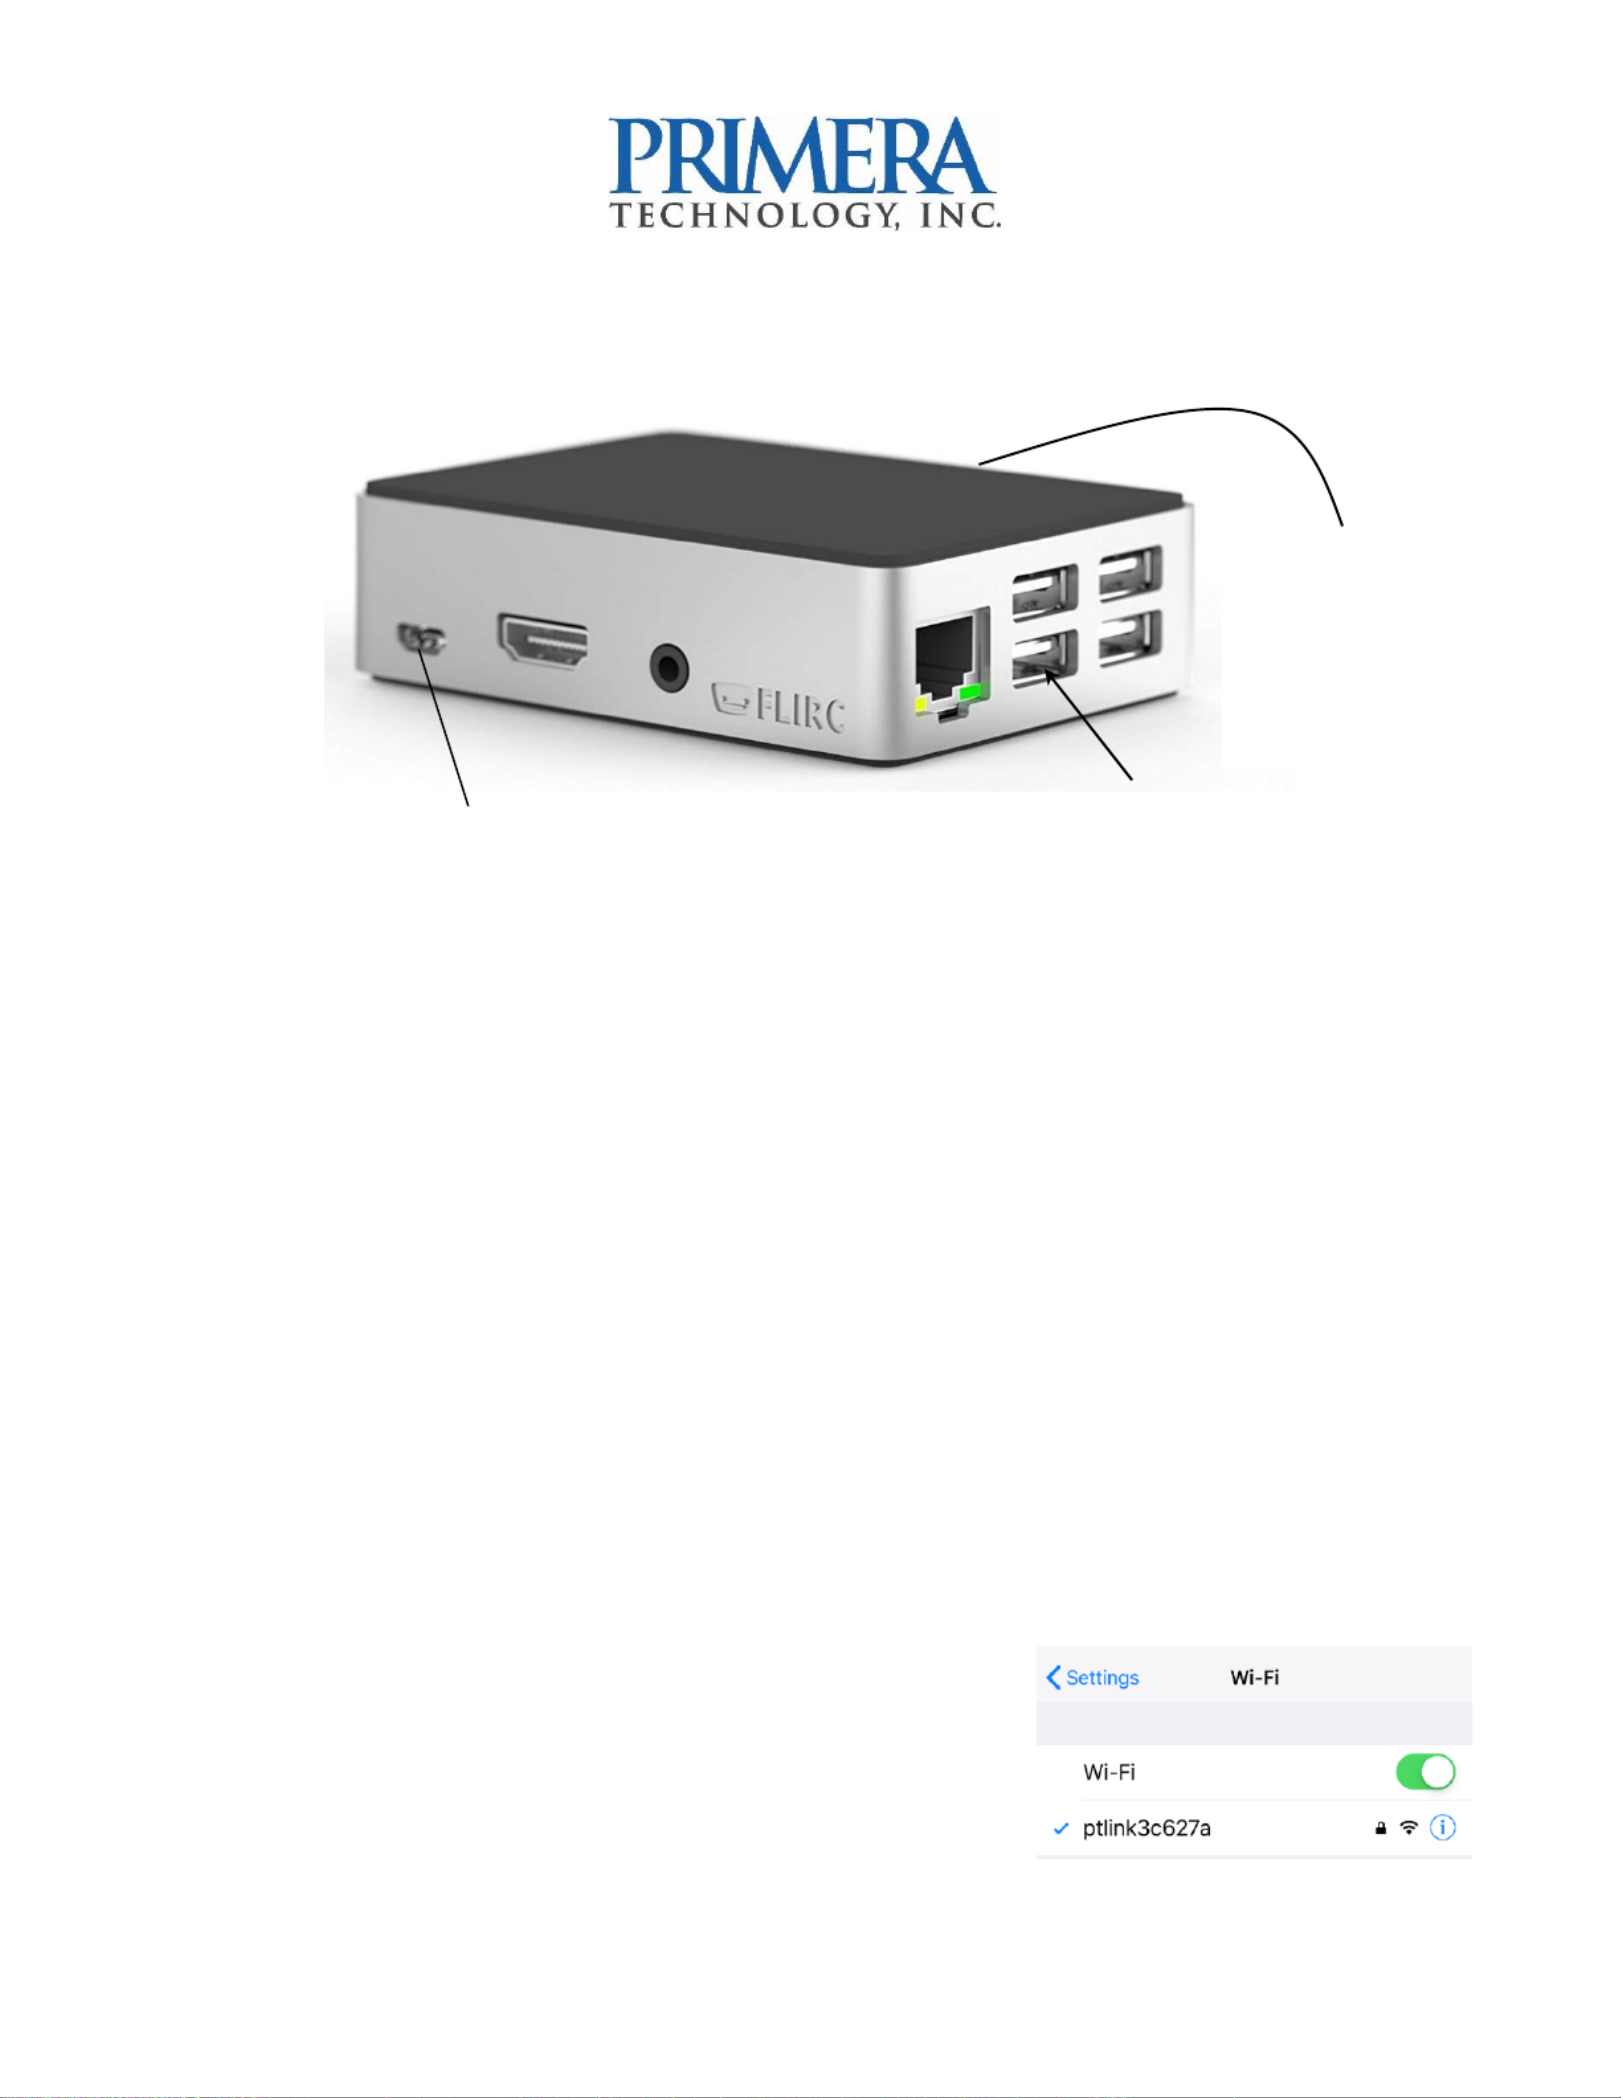
1.Connect PTLink to power using the included micro USB power supply.
2.Connect the IP60 printer to the PTLink module using the included USB cable - (ab).
3.The hotspot network will be acvated and PTLink will
create its own - network. WiFi
4.Go to Sengs Wi on your iPhone/iPad. Choose the –
new network name that appears in the following
format: (The Network Name = ptlink-xxxxxx
Micro USB Power
Quick Start: PTLink for IP60 Print Server –
USB (Connect cable from
Primera IP60 here)
Network Name is
printed on a label
found on the back
Produktspezifikationen
| Marke: | Primera |
| Kategorie: | Drucker |
| Modell: | PTLink |
Brauchst du Hilfe?
Wenn Sie Hilfe mit Primera PTLink benötigen, stellen Sie unten eine Frage und andere Benutzer werden Ihnen antworten
Bedienungsanleitung Drucker Primera

20 August 2024
16 August 2024
16 August 2024
15 August 2024
15 August 2024
15 August 2024
13 August 2024
13 August 2024
12 August 2024
28 November 2023
Bedienungsanleitung Drucker
Neueste Bedienungsanleitung für -Kategorien-
31 März 2026
30 März 2026
30 März 2026
29 März 2026
25 März 2026
23 März 2026
16 März 2026
16 März 2026
15 März 2026
15 März 2026