MeldaProduction MLimiterX Bedienungsanleitung
MeldaProduction
Audiosoftware
MLimiterX
Lesen Sie kostenlos die 📖 deutsche Bedienungsanleitung für MeldaProduction MLimiterX (13 Seiten) in der Kategorie Audiosoftware. Dieser Bedienungsanleitung war für 21 Personen hilfreich und wurde von 2 Benutzern mit durchschnittlich 4.5 Sternen bewertet
Seite 1/13

MLimiterX
Overview
MLimiter is a state-of-the-art mastering brickwall limiter that makes your recordings sound louder with minimum distortion and artifacts and
best of all, you do not need to be a scientist to use it!
MLimiter is built on top of our MDynamics kernel, and its highly simplified user interface provides all the features you need to perform high-
quality limiting quickly and easily.
Introduction
A brickwall limiter increases loudness by reducing the ratio between the average and peaks in the signal, however the dynamics of the audio
material is always sacrificed. MLimiter is simple to use. Watch the ("R") to the right, and manipulate the .
gain reduction meter Threshold
Decreasing the threshold increases the output gain and allows limiting up to 0dB. Care is needed as this can cause severe distortions if not
used correctly. In most cases you don't need to worry about the edit screen, just simply focus on the easy screen, with its simplified 4-knob
interface.
Easy screen vs. Edit screen
The plugin provides 2 user interfaces - an and an . Use the Edit button to switch between the two. easy screen edit screen
By default most plugins open on the easy screen (edit button released). This screen is a simplified view of the plugin which provides just a
few controls. On the left hand side of the plugin you can see the list of available devices / instruments (previously called 'active presets'),
that is, presets with controls. These controls are actually nothing more than multiparameters (single knobs that can control one or more of
the plug-in's parameters and sometimes known as Macro controls in other plug-ins) and are described in more detail later. Each device may
provide different controls and usually is intended for a specific purpose. The easy screen is designed for you to be able to perform common
tasks, quickly and easily, without the need to use the advanced settings (that is, those available on the Edit screen).
In most cases the devices are highlighted using different text colors. In some cases the colors only mark different types of processing, but in
most cases the general rule is that are the essential ones designed for general use. are designed forblack/white devices Green devices
a specific task or audio materials, e.g. de-essing or processing vocals in a compressor plugin. usually provide some veryRed devices
special processing or some extreme or creative settings. In a distortion plugin, for example, these may produce an extremely distorted
output. require an additional input, a side-chain or MIDI input usually. Without these additional inputs these presets
Blue devices Blue
usually do not function as intended. Please check your host's documentation about routing side-chain and MIDI into an effect plugin.
To the right of the controls are the meters or time-graphs for the plugin; the standard plugin Toolbar may be to the right of these or at the
bottom of the plugin.
By clicking the you can switch the plugin to (edit button pushed). This mode provides all the of the features thatEdit button edit mode
the plugin offers. You lose no settings by toggling between edit mode and the easy screen unless you actually change something. This way
you can easily check what is "under the hood" for each device, or start with an device and then tweak the plugin settings further.
Devices are factory specified and cannot be modified directly by users, however you can still make your own and store them as normal

presets. To do so, configure the plugin as desired, then define each multiparameter and specify its name in its settings. You can then switch
to the easy screen and check the user interface that you have created. Once you are satisfied with it, save it as a normal preset while you
are on the easy screen. Although your preset will not be displayed or selected in the list of available devices, the functionality will be exactly
the same. For more information about multiparameters and devices please check the online video tutorials.
If you are an advanced designer, you can also view both the easy and edit screens at the same time. To do that, hold key and pressCtrl
the Edit button.
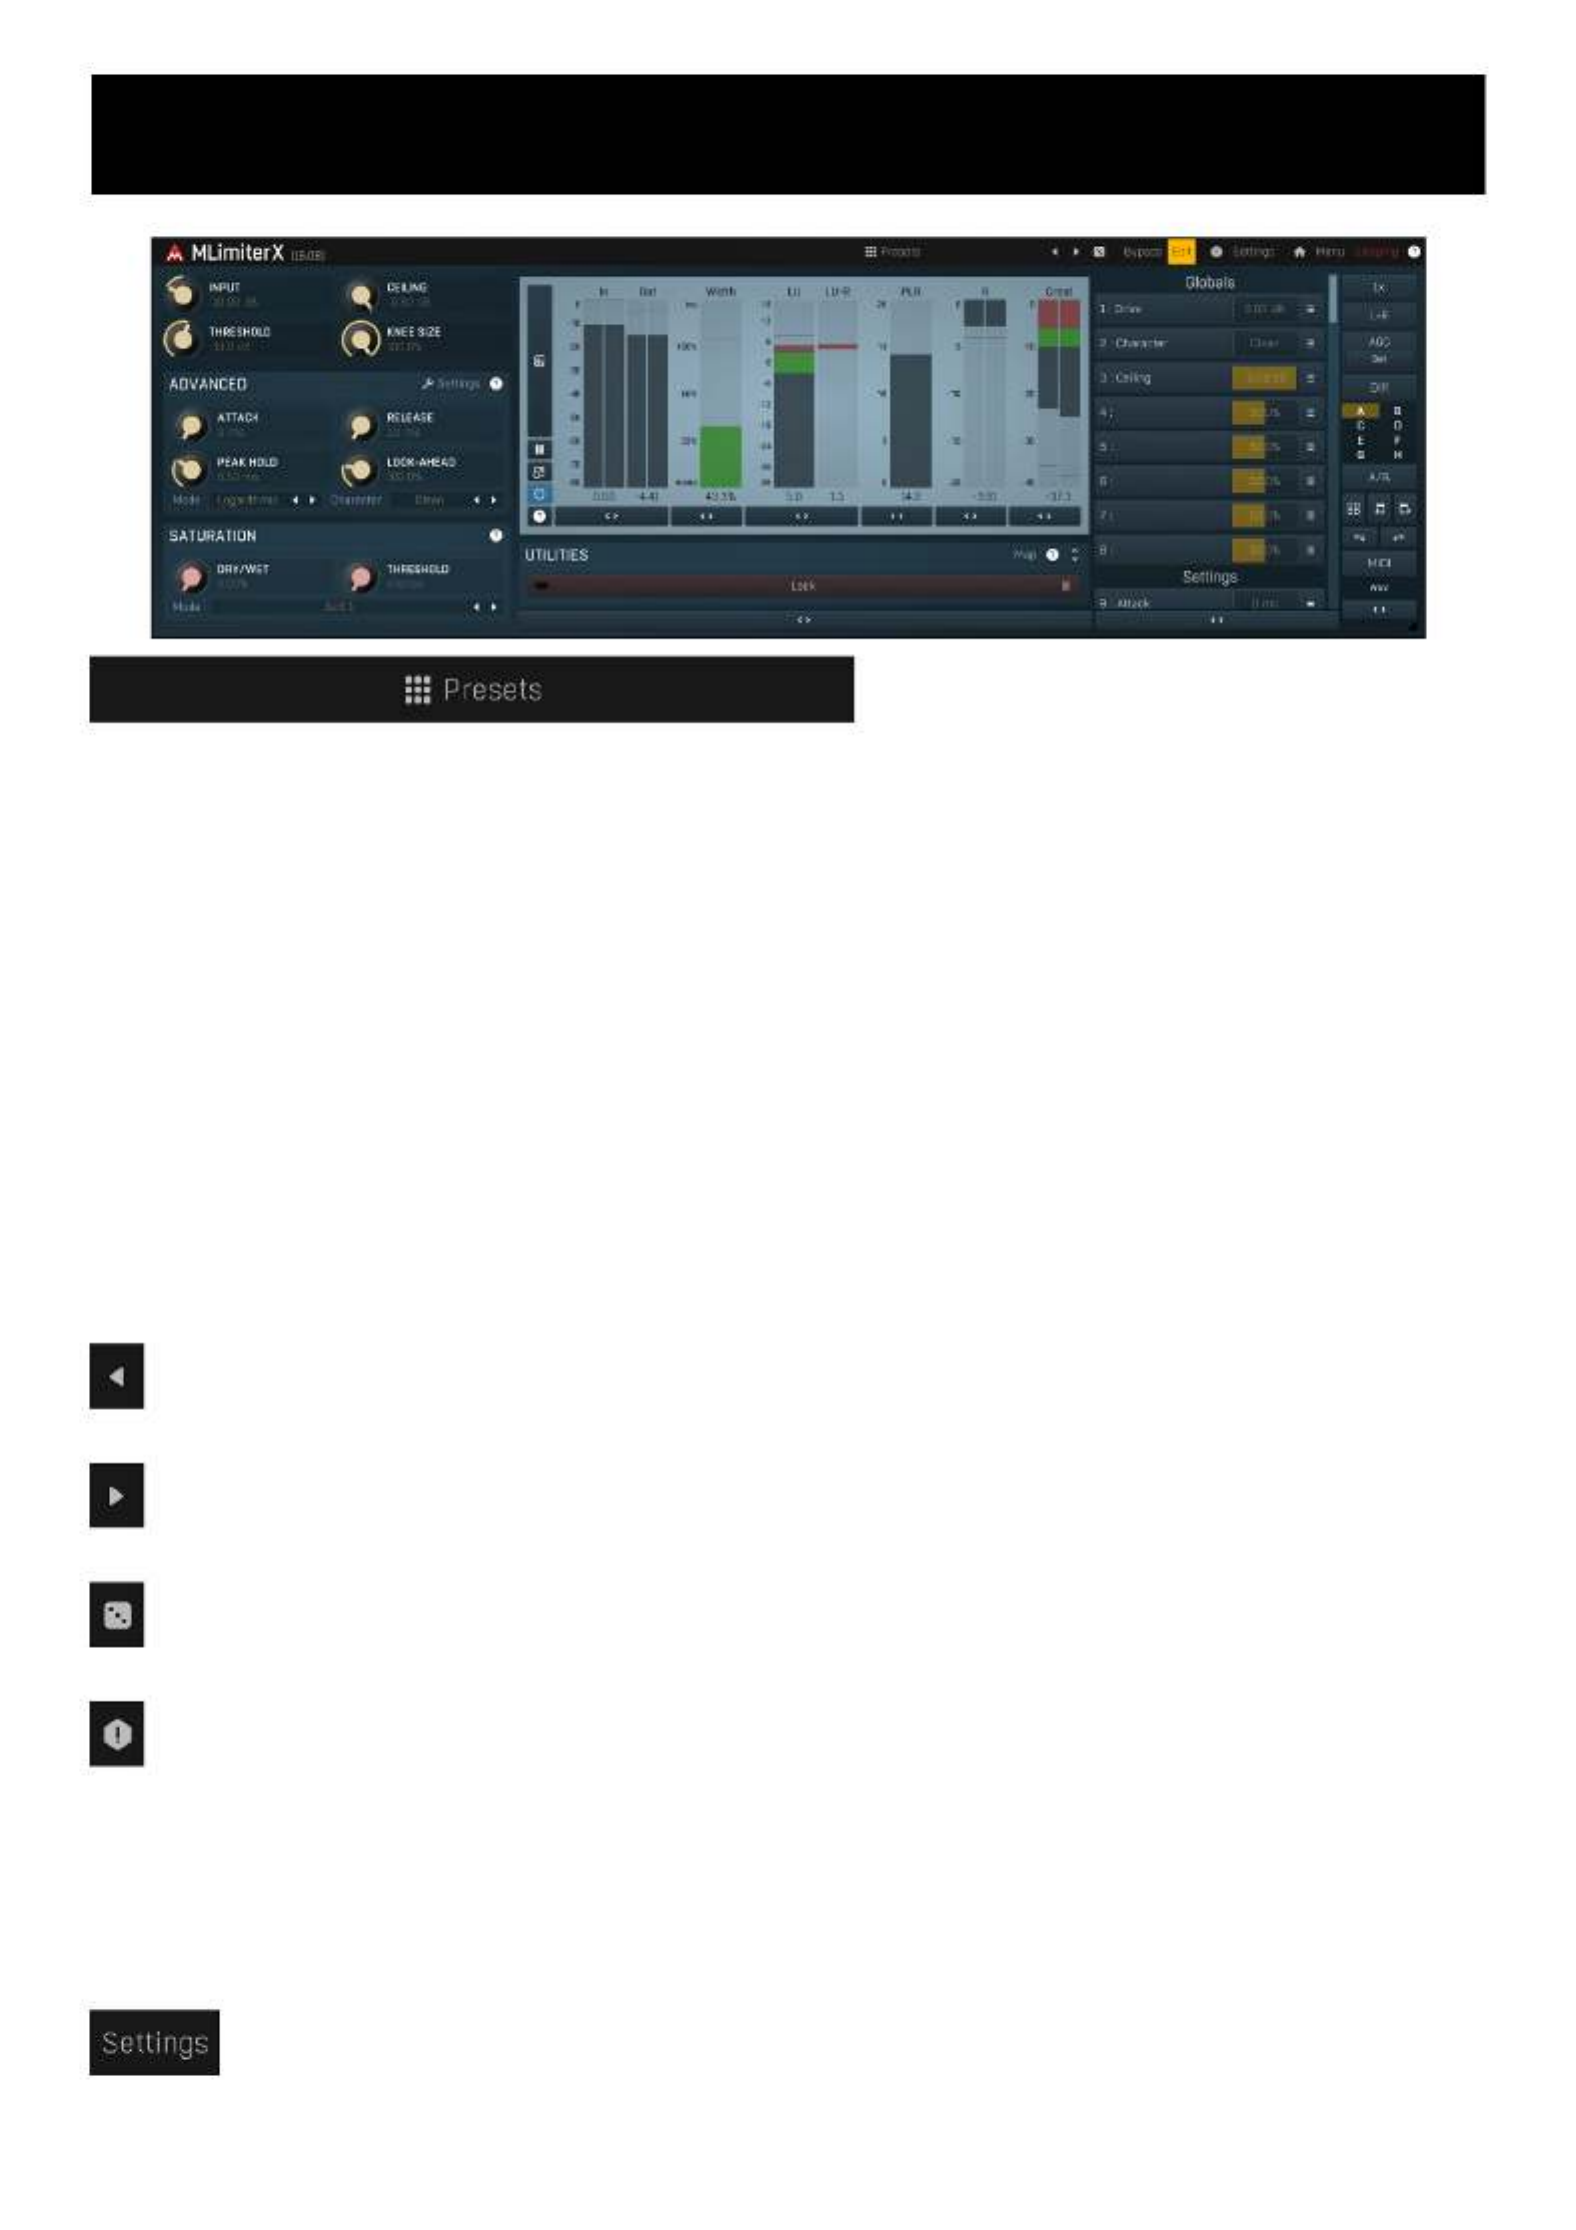
Edit mode
Presets
Presets button shows a window with all available presets. A preset can be loaded from the preset window by double-clicking on it, selecting
via the buttons or by using your keyboard. You can also manage the directory structure, store new presets, replace existing ones etc.
Presets are global, so a preset saved from one project, can easily be used in another. The arrow buttons next to the preset button can be
used to switch between presets easily.
Holding while pressing the button loads a random preset. There must be some presets for this feature to work of course.
Ctrl
Presets can be backed up by 3 different methods:
A) Using "Backup" and "Restore" buttons in each preset window, which produces a single archive of all presets on the computer.
B) Using "Export/Import" buttons, which export a single folder of presets for one plugin.
C) By saving the actual preset files, which are found in the following directories (not recommended):
Windows: C:\Users\{username}\AppData\Roaming\MeldaProduction
Mac OS X: /Library/Application support/MeldaProduction
Files are named based on the name of the plugin like this: "{pluginname}.presets", so for example MAutopan.presets or MDynamics.presets.
If the directory cannot be found on your computer for some reason, you can just search for the particular file.
Please note that prior to version 16 a different format was used and the naming was "{pluginname}presets.xml".
The plugin also supports
an online preset exchange. If the computer is connected to the internet, the plugin connects to our server once a week, submits your
presets and downloads new ones if available. This feature is manually maintained in order to remove generally unusable presets, so it may
take some time before any submitted presets become available. This feature relies on each user so we strongly advise that any submitted
presets be named and organised in the same way as the factory presets, otherwise they will be removed.
Left arrow
Left arrow button loads the previous preset.
Right arrow
Right arrow button loads the next preset.
Randomize
Randomize button loads a random preset.
Panic
Panic button resets the plugin state. You can use it to force the plugin to report latency to the host again and to avoid any audio problems.
For example, some plugins, having a look-ahead feature, report the size of the look-ahead delay as latency, but it is inconvenient to do that
every time the look-ahead changes as it usually causes the playback to stop. After you tweak the latency to the correct value, just click this
button to sync the track in time with the others, minimizing phasing artifacts caused by the look-ahead delay mixing with undelayed audio
signals in your host. It may also be necessary to restart playback in your host.
Another example is if some malfunctioning plugin generates extremely high values for the input of this plugin. A potential filter may start
generating very high values as well and as a result the playback will stop. You can just click this button to reset the plugin and the playback
will start again.
Settings
Settings button shows a menu with additional settings of the plugin. Here is a brief description of the separate items.
Produktspezifikationen
| Marke: | MeldaProduction |
| Kategorie: | Audiosoftware |
| Modell: | MLimiterX |
Brauchst du Hilfe?
Wenn Sie Hilfe mit MeldaProduction MLimiterX benötigen, stellen Sie unten eine Frage und andere Benutzer werden Ihnen antworten
Bedienungsanleitung Audiosoftware MeldaProduction

5 September 2024
1 September 2024
1 September 2024
1 September 2024
1 September 2024
1 September 2024
1 September 2024
1 September 2024
1 September 2024
1 September 2024
Bedienungsanleitung Audiosoftware
- Audiosoftware Nomad
- Audiosoftware Waves
- Audiosoftware IK Multimedia
- Audiosoftware Steinberg
- Audiosoftware Eventide
- Audiosoftware Atomix
- Audiosoftware Metric Halo
- Audiosoftware Best Service
- Audiosoftware MixVibes
- Audiosoftware Xils Lab
- Audiosoftware Audified
- Audiosoftware MIA Laboratories
- Audiosoftware Blue Cat Audio
- Audiosoftware Antares
- Audiosoftware PSP Audioware
- Audiosoftware Slate Digital
- Audiosoftware IZotope
- Audiosoftware Cherry Audio
- Audiosoftware Kuassa
- Audiosoftware Sonible
- Audiosoftware Air
- Audiosoftware SONORIS
- Audiosoftware Overloud
- Audiosoftware FabFilter
- Audiosoftware Audiomodern
- Audiosoftware Chocolate Audio
- Audiosoftware Sound Particles
- Audiosoftware Playfair Audio
- Audiosoftware Dear Reality
- Audiosoftware Tek'it Audio
- Audiosoftware MAAT
- Audiosoftware Audio Modeling
- Audiosoftware Nugen Audio
- Audiosoftware TAL Software
Neueste Bedienungsanleitung für -Kategorien-
6 September 2024
6 September 2024
6 September 2024
6 September 2024
6 September 2024
6 September 2024
6 September 2024
6 September 2024
6 September 2024
6 September 2024