TP-Link Archer AX3000 Pro Bedienungsanleitung
Lesen Sie kostenlos die 📖 deutsche Bedienungsanleitung für TP-Link Archer AX3000 Pro (125 Seiten) in der Kategorie Router. Dieser Bedienungsanleitung war für 18 Personen hilfreich und wurde von 2 Benutzern mit durchschnittlich 4.5 Sternen bewertet
Seite 1/125

© 2022 TP-Link 1910013193 REV1.0.0
User Guide
AX3000 Gigabit Wi-Fi 6 Router
Archer AX3000 Pro

Contents
About This Guide . . . . . . . . . . . . . . . . . . . . . . . . . . . . . . . . . . . . . . . . . . . . . . . . . . . . .1
Chapter 1. Get to Know About Your Router . . . . . . . . . . . . . . . . . . . . . . . . . . .3
1. 1. Product Overview. . . . . . . . . . . . . . . . . . . . . . . . . . . . . . . . . . . . . . . . . . . . . . . . . . . . . . . . . . . . 4
1. 2. Appearance . . . . . . . . . . . . . . . . . . . . . . . . . . . . . . . . . . . . . . . . . . . . . . . . . . . . . . . . . . . . . . . . . 4
1. 2. 1. Top Panel . . . . . . . . . . . . . . . . . . . . . . . . . . . . . . . . . . . . . . . . . . . . . . . . . . . . . . . . . . . . . 4
1. 2. 2. Back Panel . . . . . . . . . . . . . . . . . . . . . . . . . . . . . . . . . . . . . . . . . . . . . . . . . . . . . . . . . . . . 5
Chapter 2. Connect the Hardware . . . . . . . . . . . . . . . . . . . . . . . . . . . . . . . . . . . .7
2. 1. Position Your Router . . . . . . . . . . . . . . . . . . . . . . . . . . . . . . . . . . . . . . . . . . . . . . . . . . . . . . . . . 8
2. 2. Connect Your Router. . . . . . . . . . . . . . . . . . . . . . . . . . . . . . . . . . . . . . . . . . . . . . . . . . . . . . . . . 8
Chapter 3. Log In to Your Router. . . . . . . . . . . . . . . . . . . . . . . . . . . . . . . . . . . . 11
Chapter 4. Set Up Internet Connection . . . . . . . . . . . . . . . . . . . . . . . . . . . . . 13
4. 1. Use Quick Setup Wizard . . . . . . . . . . . . . . . . . . . . . . . . . . . . . . . . . . . . . . . . . . . . . . . . . . . . 14
4. 2. Quick Setup Via TP-Link Tether App. . . . . . . . . . . . . . . . . . . . . . . . . . . . . . . . . . . . . . . . . 14
4. 3. Manually Set Up Your Internet Connection . . . . . . . . . . . . . . . . . . . . . . . . . . . . . . . . . . 15
4. 4. Set Up the Router as an Access Point . . . . . . . . . . . . . . . . . . . . . . . . . . . . . . . . . . . . . . . 18
4. 5. Set Up an IPv6 Internet Connection . . . . . . . . . . . . . . . . . . . . . . . . . . . . . . . . . . . . . . . . . 18
Chapter 5. TP-Link Cloud Service . . . . . . . . . . . . . . . . . . . . . . . . . . . . . . . . . . 22
5. 1. Register a TP-Link ID. . . . . . . . . . . . . . . . . . . . . . . . . . . . . . . . . . . . . . . . . . . . . . . . . . . . . . . . 23
5. 2. Change Your TP-Link ID Information. . . . . . . . . . . . . . . . . . . . . . . . . . . . . . . . . . . . . . . . . 23
5. 3. Manage the User TP-Link IDs . . . . . . . . . . . . . . . . . . . . . . . . . . . . . . . . . . . . . . . . . . . . . . . 24
5. 3. 1. Add TP-Link ID to Manage the Router. . . . . . . . . . . . . . . . . . . . . . . . . . . . . . . . . 25
5. 3. 2. Remove TP-Link ID(s) from Managing the Router. . . . . . . . . . . . . . . . . . . . . . 25
5. 4. Manage the Router via the TP-Link Tether App . . . . . . . . . . . . . . . . . . . . . . . . . . . . . . 26
Chapter 6. Wireless Settings . . . . . . . . . . . . . . . . . . . . . . . . . . . . . . . . . . . . . . . 27
6. 1. Specify Wireless Settings . . . . . . . . . . . . . . . . . . . . . . . . . . . . . . . . . . . . . . . . . . . . . . . . . . 28
6. 2. Schedule Your Wireless Function . . . . . . . . . . . . . . . . . . . . . . . . . . . . . . . . . . . . . . . . . . . 30
6. 3. Use WPS for Wireless Connection . . . . . . . . . . . . . . . . . . . . . . . . . . . . . . . . . . . . . . . . . . 31
6. 3. 1. Connect via the Client’s PIN . . . . . . . . . . . . . . . . . . . . . . . . . . . . . . . . . . . . . . . . . . 31
6. 3. 2. Connect via the Router’s PIN . . . . . . . . . . . . . . . . . . . . . . . . . . . . . . . . . . . . . . . . . 31

6. 3. 3. Push the WPS Button. . . . . . . . . . . . . . . . . . . . . . . . . . . . . . . . . . . . . . . . . . . . . . . . . 32
6. 4. Advanced Wireless Settings . . . . . . . . . . . . . . . . . . . . . . . . . . . . . . . . . . . . . . . . . . . . . . . . 32
Chapter 7. Guest Network. . . . . . . . . . . . . . . . . . . . . . . . . . . . . . . . . . . . . . . . . . 34
7. 1. Create a Network for Guests . . . . . . . . . . . . . . . . . . . . . . . . . . . . . . . . . . . . . . . . . . . . . . . 35
7. 2. Customize Guest Network Options. . . . . . . . . . . . . . . . . . . . . . . . . . . . . . . . . . . . . . . . . . 36
Chapter 8. USB Settings. . . . . . . . . . . . . . . . . . . . . . . . . . . . . . . . . . . . . . . . . . . . 37
8. 1. Access the USB Storage Device . . . . . . . . . . . . . . . . . . . . . . . . . . . . . . . . . . . . . . . . . . . . 38
8. 1. 1. Access the USB Device Locally . . . . . . . . . . . . . . . . . . . . . . . . . . . . . . . . . . . . . . . 38
8. 1. 2. Access the USB Device Remotely . . . . . . . . . . . . . . . . . . . . . . . . . . . . . . . . . . . . 39
8. 1. 3. Customize the Access Settings. . . . . . . . . . . . . . . . . . . . . . . . . . . . . . . . . . . . . . . 41
8. 2. Media Sharing . . . . . . . . . . . . . . . . . . . . . . . . . . . . . . . . . . . . . . . . . . . . . . . . . . . . . . . . . . . . . . 43
8. 3. Time Machine . . . . . . . . . . . . . . . . . . . . . . . . . . . . . . . . . . . . . . . . . . . . . . . . . . . . . . . . . . . . . . 44
Chapter 9. HomeShield . . . . . . . . . . . . . . . . . . . . . . . . . . . . . . . . . . . . . . . . . . . . 46
9. 1. Network Security . . . . . . . . . . . . . . . . . . . . . . . . . . . . . . . . . . . . . . . . . . . . . . . . . . . . . . . . . . . 47
9. 2. Parental Controls . . . . . . . . . . . . . . . . . . . . . . . . . . . . . . . . . . . . . . . . . . . . . . . . . . . . . . . . . . . 47
9. 3. Network Analysis & Optimization. . . . . . . . . . . . . . . . . . . . . . . . . . . . . . . . . . . . . . . . . . . . 48
Chapter 10. OneMesh with Seamless Roaming . . . . . . . . . . . . . . . . . . . . . . 50
10. 1. Set Up a OneMesh Network. . . . . . . . . . . . . . . . . . . . . . . . . . . . . . . . . . . . . . . . . . . . . . . . . 51
10. 2. Manage Devices in the OneMesh Network . . . . . . . . . . . . . . . . . . . . . . . . . . . . . . . . . . 53
Chapter 11. Network Security . . . . . . . . . . . . . . . . . . . . . . . . . . . . . . . . . . . . . . . 55
11. 1. Protect the Network from Cyber Attacks . . . . . . . . . . . . . . . . . . . . . . . . . . . . . . . . . . . . 56
11. 2. Access Control . . . . . . . . . . . . . . . . . . . . . . . . . . . . . . . . . . . . . . . . . . . . . . . . . . . . . . . . . . . . . 56
11. 3. IP & MAC Binding . . . . . . . . . . . . . . . . . . . . . . . . . . . . . . . . . . . . . . . . . . . . . . . . . . . . . . . . . . . 58
11. 4. ALG . . . . . . . . . . . . . . . . . . . . . . . . . . . . . . . . . . . . . . . . . . . . . . . . . . . . . . . . . . . . . . . . . . . . . . . . 60
Chapter 12. NAT Forwarding. . . . . . . . . . . . . . . . . . . . . . . . . . . . . . . . . . . . . . . . . 62
12. 1. Share Local Resources on the Internet by Port Forwarding . . . . . . . . . . . . . . . . . . 63
12. 2. Open Ports Dynamically by Port Triggering. . . . . . . . . . . . . . . . . . . . . . . . . . . . . . . . . . 65
12. 3. Make Applications Free from Port Restriction by DMZ . . . . . . . . . . . . . . . . . . . . . . . 66
12. 4. Make Xbox Online Games Run Smoothly by UPnP . . . . . . . . . . . . . . . . . . . . . . . . . . . 67
Chapter 13. VPN Server . . . . . . . . . . . . . . . . . . . . . . . . . . . . . . . . . . . . . . . . . . . . . 69
13. 1. Use OpenVPN to Access Your Home Network . . . . . . . . . . . . . . . . . . . . . . . . . . . . . . . 70
13. 2. Use PPTP VPN to Access Your Home Network . . . . . . . . . . . . . . . . . . . . . . . . . . . . . . 71

Chapter 14. Customize Your Network Settings. . . . . . . . . . . . . . . . . . . . . . . 77
14. 1. Change the LAN Settings . . . . . . . . . . . . . . . . . . . . . . . . . . . . . . . . . . . . . . . . . . . . . . . . . . . 78
14. 2. Configure to Support IPTV Service. . . . . . . . . . . . . . . . . . . . . . . . . . . . . . . . . . . . . . . . . . 78
14. 3. Specify DHCP Server Settings . . . . . . . . . . . . . . . . . . . . . . . . . . . . . . . . . . . . . . . . . . . . . . 80
14. 4. Set Up a Dynamic DNS Service Account . . . . . . . . . . . . . . . . . . . . . . . . . . . . . . . . . . . . 81
14. 5. Create Static Routes. . . . . . . . . . . . . . . . . . . . . . . . . . . . . . . . . . . . . . . . . . . . . . . . . . . . . . . . 82
Chapter 15. Manage the Router . . . . . . . . . . . . . . . . . . . . . . . . . . . . . . . . . . . . . 85
15. 1. Upgrade the Firmware . . . . . . . . . . . . . . . . . . . . . . . . . . . . . . . . . . . . . . . . . . . . . . . . . . . . . . 86
15. 1. 1. Auto Update . . . . . . . . . . . . . . . . . . . . . . . . . . . . . . . . . . . . . . . . . . . . . . . . . . . . . . . . 86
15. 1. 2. Online Upgrade . . . . . . . . . . . . . . . . . . . . . . . . . . . . . . . . . . . . . . . . . . . . . . . . . . . . . 86
15. 1. 3. Local Upgrade . . . . . . . . . . . . . . . . . . . . . . . . . . . . . . . . . . . . . . . . . . . . . . . . . . . . . . 87
15. 2. Backup and Restore Configuration Settings . . . . . . . . . . . . . . . . . . . . . . . . . . . . . . . . . 88
15. 3. Change the Login Password . . . . . . . . . . . . . . . . . . . . . . . . . . . . . . . . . . . . . . . . . . . . . . . . 89
15. 4. Password Recovery. . . . . . . . . . . . . . . . . . . . . . . . . . . . . . . . . . . . . . . . . . . . . . . . . . . . . . . . . 90
15. 5. Local Management . . . . . . . . . . . . . . . . . . . . . . . . . . . . . . . . . . . . . . . . . . . . . . . . . . . . . . . . . 91
15. 6. Remote Management . . . . . . . . . . . . . . . . . . . . . . . . . . . . . . . . . . . . . . . . . . . . . . . . . . . . . . . 92
15. 7. System Log. . . . . . . . . . . . . . . . . . . . . . . . . . . . . . . . . . . . . . . . . . . . . . . . . . . . . . . . . . . . . . . . . 94
15. 8. Test the Network Connectivity . . . . . . . . . . . . . . . . . . . . . . . . . . . . . . . . . . . . . . . . . . . . . . 96
15. 9. Set System Time and Language . . . . . . . . . . . . . . . . . . . . . . . . . . . . . . . . . . . . . . . . . . . . 98
15. 10. Set the Router to Reboot Regularly. . . . . . . . . . . . . . . . . . . . . . . . . . . . . . . . . . . . . . . . .100
15. 11. Control the LED. . . . . . . . . . . . . . . . . . . . . . . . . . . . . . . . . . . . . . . . . . . . . . . . . . . . . . . . . . . .101
FAQ. . . . . . . . . . . . . . . . . . . . . . . . . . . . . . . . . . . . . . . . . . . . . . . . . . . . . . . . . . . . . . . . 103

1
About This Guide
This guide is a complement of Quick Installation Guide. The Quick Installation Guide
instructs you on quick internet setup, and this guide provides details of each function
and shows you the way to configure these functions appropriate to your needs.
Note: Features available in the router may vary by model and software version. Router
availability may also vary by region or ISP. All images, steps, and descriptions in this
guide are only examples and may not reflect your actual Router experience.
Conventions
In this guide the following conventions are used:
Convention Description
Underlined Underlined words or phrases are hyperlinks. You can click to redirect to a
website or a specific section.
Teal Contents to be emphasized and texts on the web page are in teal, including the
menus, items, buttons, etc.
>
The menu structures to show the path to load the corresponding page. For
example, Advanced > Wireless WDS > means the WDS function page is under
the Wireless menu that is located in the Advanced tab.
Note: Ignoring this type of note might result in a malfunction or damage to the device.
Tips: Indicates important information that helps you make better use of your device.
symbols on the web
page
• Click to edit the corresponding entry.
• Click to delete the corresponding entry.
• click to enable or disable the corresponding entry.
• Click to view more information about items on the page.
More Info
The latest software, management app and utility can be found at Download Center at
https://www.tp-link.com/support/download/.
The Quick Installation Guide can be found where you find this guide or inside the
package of the router.
Specifications can be found on the product page at https://www.tp-link.com.
TP-Link Community is provided for you to discuss our products and share knowledge at
https://community.tp-link.com.
Our Technical Support contact information can be found at the Contact Technical
Support https://www.tp-link.com/support/ page at .

2
*Maximum wireless signal rates are the physical rates derived from IEEE Standard
802.11 specifications. Actual wireless data throughput and wireless coverage are
not guaranteed and will vary as a result of 1) environmental factors, including building
materials, physical objects, and obstacles, 2) network conditions, including local
interference, volume and density of traffic, product location, network complexity, and
network overhead, and 3) client limitations, including rated performance, location,
connection, quality, and client condition.
*Use of Wi-Fi 6 (802.11ax), and features including OFDMA, MU-MIMO, 1024-QAM, and
HT160 require clients to also support the corresponding features.
*Saving clients’ battery power requires clients to also support the 802.11ax Wi-Fi
standard. Actual power reduction may vary as a result of network conditions, client
limitations, and environmental factors.
*Use of WPA3 requires clients to also support the corresponding feature.
*This router may not support all the mandatory features as ratified in Draft 3.0 of IEEE
802.11ax specification.
*Further software upgrades for feature availability may be required.

Chapter 1
Get to Know About Your
Router
This chapter introduces what the router can do and shows its appearance.
It chapter contains the following sections:
• Product Overview
• Appearance

4
Chapter 1 Get to Know About Your Router
1. 1. Product Overview
TP-Link AX router, with next-generation 802.11ax Wi-Fi Technology, achieves Wi-
Fi performance at its ultimate level. The revolutionary combination of OFDMA and
1024QAM improve throughput by 4 times and dramatically increase the whole network
capacity and efficiency. It’s also backwards compatible with 802.11a/b/g/n/ac.
Moreover, it is simple and convenient to set up and use the TP-Link router due to its
intuitive web interface and the powerful Tether app.
1. 2. Appearance
1. 2. 1. Top Panel
The router’s LEDs (view from left to right) are located on the front. You can check the
router’s working status by following the LED Explanation table.

5
Chapter 1 Get to Know About Your Router
LED Explanation
LED Status Indication
(Power)
On The system has started up successfully.
Flashing
slowly
The system is starting up or the firmware is being upgraded. Do
not disconnect or power off your router.
Flashing
quickly WPS connection is in process.
Off Power is off.
(2.4GHz Wireless)
On The 2.4GHz wireless band is enabled.
Off The 2.4GHz wireless band is disabled.
(5GHz Wireless)
On The 5GHz wireless band is enabled.
Off The 5GHz wireless band is disabled.
(Internet)
Green On Internet service is available.
Orange On The router’s WAN port is connected, but the internet service is
not available.
Off The router’s WAN port is unplugged.
(Ethernet)
On At least one powered-on device is connected to the router’s LAN
port.
Off No powered-on device is connected to the router’s LAN port.
(USB)
On The USB device is identified and ready to use.
Off No USB device is plugged in to the USB port.
1. 2. 2. The Back Panel
The following parts (view from left to right) are located on the back panel.

6
Chapter 1 Get to Know About Your Router
Button and Port Explanation
Item Description
Power Port For connecting the router to a power socket via the provided power adapter.
Power On/Off Button Press this button to power on or off the router.
2.5 Gbps WAN/LAN
Port For connecting to a DSL/Cable modem, or an Ethernet jack.
1 Gbps WAN/LAN Port For connecting to a DSL/Cable modem, or an Ethernet jack.
LAN Ports (1/2/3) For connecting your PC or other wired devices to the router.
USB Port For connecting to a USB storage device.
WPS/Wi-Fi Button
Press the button for 1 second, and immediately press the WPS button on
your client to start the WPS process.
Press and hold the button for 2 seconds to turn on or off the wireless
function of your router.
Reset Button Press and hold the button until all LEDs turn on to reset the router to its
factory default settings.
LED Button Press the button for 1 second to turn on or off the LEDs of your router.
Antennas Used for wireless operation and data transmit. Upright them for the best
Wi-Fi performance.

Chapter 2
Connect the Hardware
This chapter contains the following sections:
• Position Your Router
• Connect Your Router

8
Chapter 2 Connect the Hardware
2. 1. Position Your Router
• The product should not be located in a place where it will be exposed to moisture or
excessive heat.
• Place the router in a location where it can be connected to multiple devices as well as
to a power source.
• Make sure the cables and power cord are safely placed out of the way so they do not
create a tripping hazard.
• The router can be placed on a shelf or desktop.
• Keep the router away from devices with strong electromagnetic interference, such as
Bluetooth devices, cordless phones and microwaves.
• Generally, the router is placed on a horizontal surface, such as on a shelf or desktop.
The device also can be mounted on the wall as shown in the following figure.
16.42
∅8.1
211
1.2
3
Note:
The diameter of the screw head, 4.67mm<D<9.85mm, and the distance of two screws is 211 mm. The screw that project
from the wall need around 5mm based, and the length of the screw need to be at least 20mm to withstand the weight
of the product.
2. 2. Connect Your Router
Before you start, turn off your modem, if any, and remove the backup battery if it has
one. And place the router horizontally and orient the antennas vertically.
Follow the steps below to connect your router.
If your internet comes from an Ethernet outlet instead of a DSL / Cable / Satellite
modem, connect the router’s 2.5 Gbps WAN/LAN port to it, then follow steps 3 and 4 to
complete the hardware connection.

9
Chapter 2 Connect the Hardware
Internet
1
23
1. Connect the modem to the router’s WAN port with an Ethernet cable.
2. Turn on the modem, and then wait about for it to restart.2 minutes
3. Connect the power adapter to the router and turn on the router.
4. Verify that the hardware connection is correct by checking the following LEDs.
2.4G
On
5G
On On
InternetPower
On
Note:
Note: If the 2.4GHz LED and 5GHz LED are off, press and hold the WPS/Wi-Fi button on the back for more than 2 seconds.
Both the LEDs should turn solid on.
5. Connect your computer to the router.
• Method 1: Wired
Turn off the Wi-Fi on your computer and connect the devices as shown below.
Ethernet cable
• Method 2: Wirelessly
1 ) Find the SSID (Network Name) and Wireless Password printed on the label at
the bottom of the router.
2 ) Click the network icon of your computer or go to Wi-Fi Settings of your smart
device, and then select the SSID to join the network.

10
Chapter 2 Connect the Hardware
TP-Link_XXXX
TP-Link_XXXX_5G
Connect automatically Connect
Wi-Fi
Wi-Fi
TP-Link_XXXX
TP-Link_XXXX_5G
CHOOSE A NETWORK...
Other...
< Settings
OR
Smart DeviceComputer
• Method 3: Use the WPS button
Wireless devices that support WPS, including Android phones, tablets, and most USB
network cards, can be connected to your router through this method.
Note:
• WPS is not supported by iOS devices.
• The WPS function cannot be configured if the wireless function of the router is disabled. Also, the WPS function will be
disabled if your wireless encryption is WEP. Please make sure the wireless function is enabled and is configured with
the appropriate encryption before configuring the WPS.
1 ) Tab the WPS icon on the device’s screen. Here we take an Android phone for
instance.
2 ) Within two minutes, press the WPS button on your router.

Chapter 3
Log In to Your Router

12
Chapter 3 Log In to Your Router
With a web-based utility, it is easy to configure and manage the router. The web-based
utility can be used on any Windows, Mac OS or UNIX OS with a Web browser, such as
Microsoft Internet Explorer, Mozilla Firefox or Apple Safari.
Follow the steps below to log in to your router.
1. Set up the TCP/IP Protocol in Obtain an IP address automatically mode on your
computer.
2. Visit http://tplinkwifi.net, and create a login password for secure management
purposes. Then click Let’s Get Started to log in.
Note:
• If the login window does not appear, please refer to the Section.FAQ

Chapter 4
Set Up Internet Connection
This chapter introduces how to connect your router to the internet. The router is
equipped with a web-based Quick Setup wizard. It has necessary ISP information built
in, automates many of the steps and verifies that those steps have been successfully
completed. Furthermore, you can also set up an IPv6 connection if your ISP provides
IPv6 service.
It contains the following sections:
• Use Quick Setup Wizard
• Quick Setup Via TP-Link Tether App
• Manually Set Up Your Internet Connection
• Set Up the Router as an Access Point
• Set Up an IPv6 Internet Connection

16
Chapter 4 Set Up Internet Connection
2 ) If you choose Static IP, enter the information provided by your ISP in the
corresponding fields.
3 ) If you choose PPPoE username password, enter the and provided by your ISP.
PPPoE users usually have DSL cable modems.

17
Chapter 4 Set Up Internet Connection
4 ) If you choose L2TP, enter the username password and and choose the
Secondary Connection provided by your ISP. Different parameters are needed
according to the Secondary Connection you have chosen.
5 ) If you choose PPTP, enter the username password and , and choose the
Secondary Connection provided by your ISP. Different parameters are needed
according to the Secondary Connection you have chosen.
5. Click .Save
Tips:
• If you use and and you are provided with any other parameters that are not required on the page, Dynamic IP PPPoE
please go to Advanced Network Internet > > to complete the configuration.
• If you still cannot access the internet, refer to the section for further instructions.FAQ

18
Chapter 4 Set Up Internet Connection
4. 4. Set Up the Router as an Access Point
The router can work as an access point, transforming your existing wired network to a
wireless one.
1. Visit http://tplinkwifi.net, and log in with your TP-Link ID or the password you set for
the router.
2. Go to Advanced System > > Operation Mode, select Access Point and click Save. The
router will reboot and switch to Access Point mode.
3. After rebooting, connect the router to your existing wired router via an Ethernet cable.
4. Log in again to the web management page , and go to http://tplinkwifi.net Advanced
> . Quick Setup
5. Configure your wireless settings and click .Next
6. Confirm the information and click . Now, you can enjoy Wi-Fi.Save
Tips:
• Functions, such as Parental Controls, QoS and NAT Forwarding, are not supported in the Access Point mode.
• Functions, such as Guest Network, are the same as those in the Router mode.
4. 5. Set Up an IPv6 Internet Connection
Your ISP provides information about one of the following IPv6 internet connection types:
PPPoE, Dynamic IP(SLAAC/DHCPv6), Static IP, 6to4 tunnel, Pass-Through (Bridge).
1. Visit http://tplinkwifi.net, and log in with your TP-Link ID or the password you set for
the router.

19
Chapter 4 Set Up Internet Connection
2. Go to Advanced IPv6 > .
3. Enable IPv6 and select the internet connection type provided by your ISP.
Tips:
If you do not know what your internet connection type is, contact your ISP or judge according to the already known
information provided by your ISP.
4. Fill in information as required by different connection types.
1 ) Fill in blanks and click .Static IP: Save
2 ) Dynamic IP(SLAAC/DHCPv6): Click Advanced to input further information if
your ISP requires. Click and then click Save Renew.
3 ) PPPoE: By default, the router uses the IPv4 account to connect to the IPv6
server. Click Advanced to input further information if your ISP requires. Click
Save and then click .Connect

20
Chapter 4 Set Up Internet Connection
Note:
If your ISP provides two separate accounts for the IPv4 and IPv6 connections, manually enter the username and
password for the IPv6 connection.
4 ) 6to4 Tunnel: An IPv4 internet connection type is a prerequisite for this
connection type (Manually Set Up Your Internet Connection). Click Advanced to
input further information if your ISP requires. Click and then click Save Connect.
5 ) Pass-Through (Bridge): Click Save and skip to Step 6.

21
Chapter 4 Set Up Internet Connection
5. Configure LAN ports. Windows users are recommended to choose from the first two
types. Fill in Address Prefix provided by your ISP, and click .Save
6. Click to check whether you have successfully set up an IPv6 connection.Status
Tips:
Visit the section if there is no internet connection.FAQ

Chapter 5
TP-Link Cloud Service
TP-Link Cloud service provides a better way to manage your cloud devices. Log in to
your router with a TP-Link ID, and you can easily monitor and manage your home network
when you are out and about via the Tether app. To ensure that your router stays new and
gets better over time, the TP-Link Cloud will notify you when an important firmware
upgrade is available. Surely you can also manage multiple TP-Link Cloud devices with a
single TP-Link ID.
This chapter introduces how to register a new TP-Link ID, bind or unbind TP-Link IDs
to manage your router, and the Tether app with which you can manage your home
network no matter where you may find yourself.
It contains the following sections:
• Register a TP-Link ID
• Change Your TP-Link ID Information
• Manage the User TP-Link IDs
• Manage the Router via the TP-Link Tether App

24
Chapter 5 TP-Link Cloud Service
• To change your password:
1. Click behind the Password.
2. Enter the current password, then a new password twice. And click .Save
5. 3. Manage the User TP-Link IDs
The TP-Link ID used to log in to the router for the first time will be automatically bound
as the account. An admin account can add or remove other TP-Link IDs to or Admin

25
Chapter 5 TP-Link Cloud Service
from the same router as Users. All accounts can monitor and manage the router locally
or remotely, but user accounts cannot:
• Reset the router to its factory default settings either on the web management page
or in the Tether app.
• Add/remove other TP-Link IDs to/from the router.
5. 3. 1. Add TP-Link ID to Manage the Router
1. Visit http://tplinkwifi.net, and log in with your TP-Link ID.
2. Go to Advanced TP-Link ID > , and focus on the Bound Accounts section.
3. Click , enter another TP-Link ID as needed and click .Save
Note: If you need another TP-Link ID, please register a new one via the Tether app. Refer to Manage the Router via the
TP-Link Tether App to install the app and register a new TP-Link ID.
4. The new TP-Link ID will be displayed in the Bound Accounts table as a User.
5. 3. 2. Remove TP-Link ID(s) from Managing the Router
1. Visit http://tplinkwifi.net, and log in with your TP-Link ID.
2. Go to Advanced TP-Link ID > , and focus on the Bound Accounts section.
3. Tick the checkbox(es) of the TP-Link ID(s) you want to remove and click .Unbind
28
Chapter 6 Wireless Settings
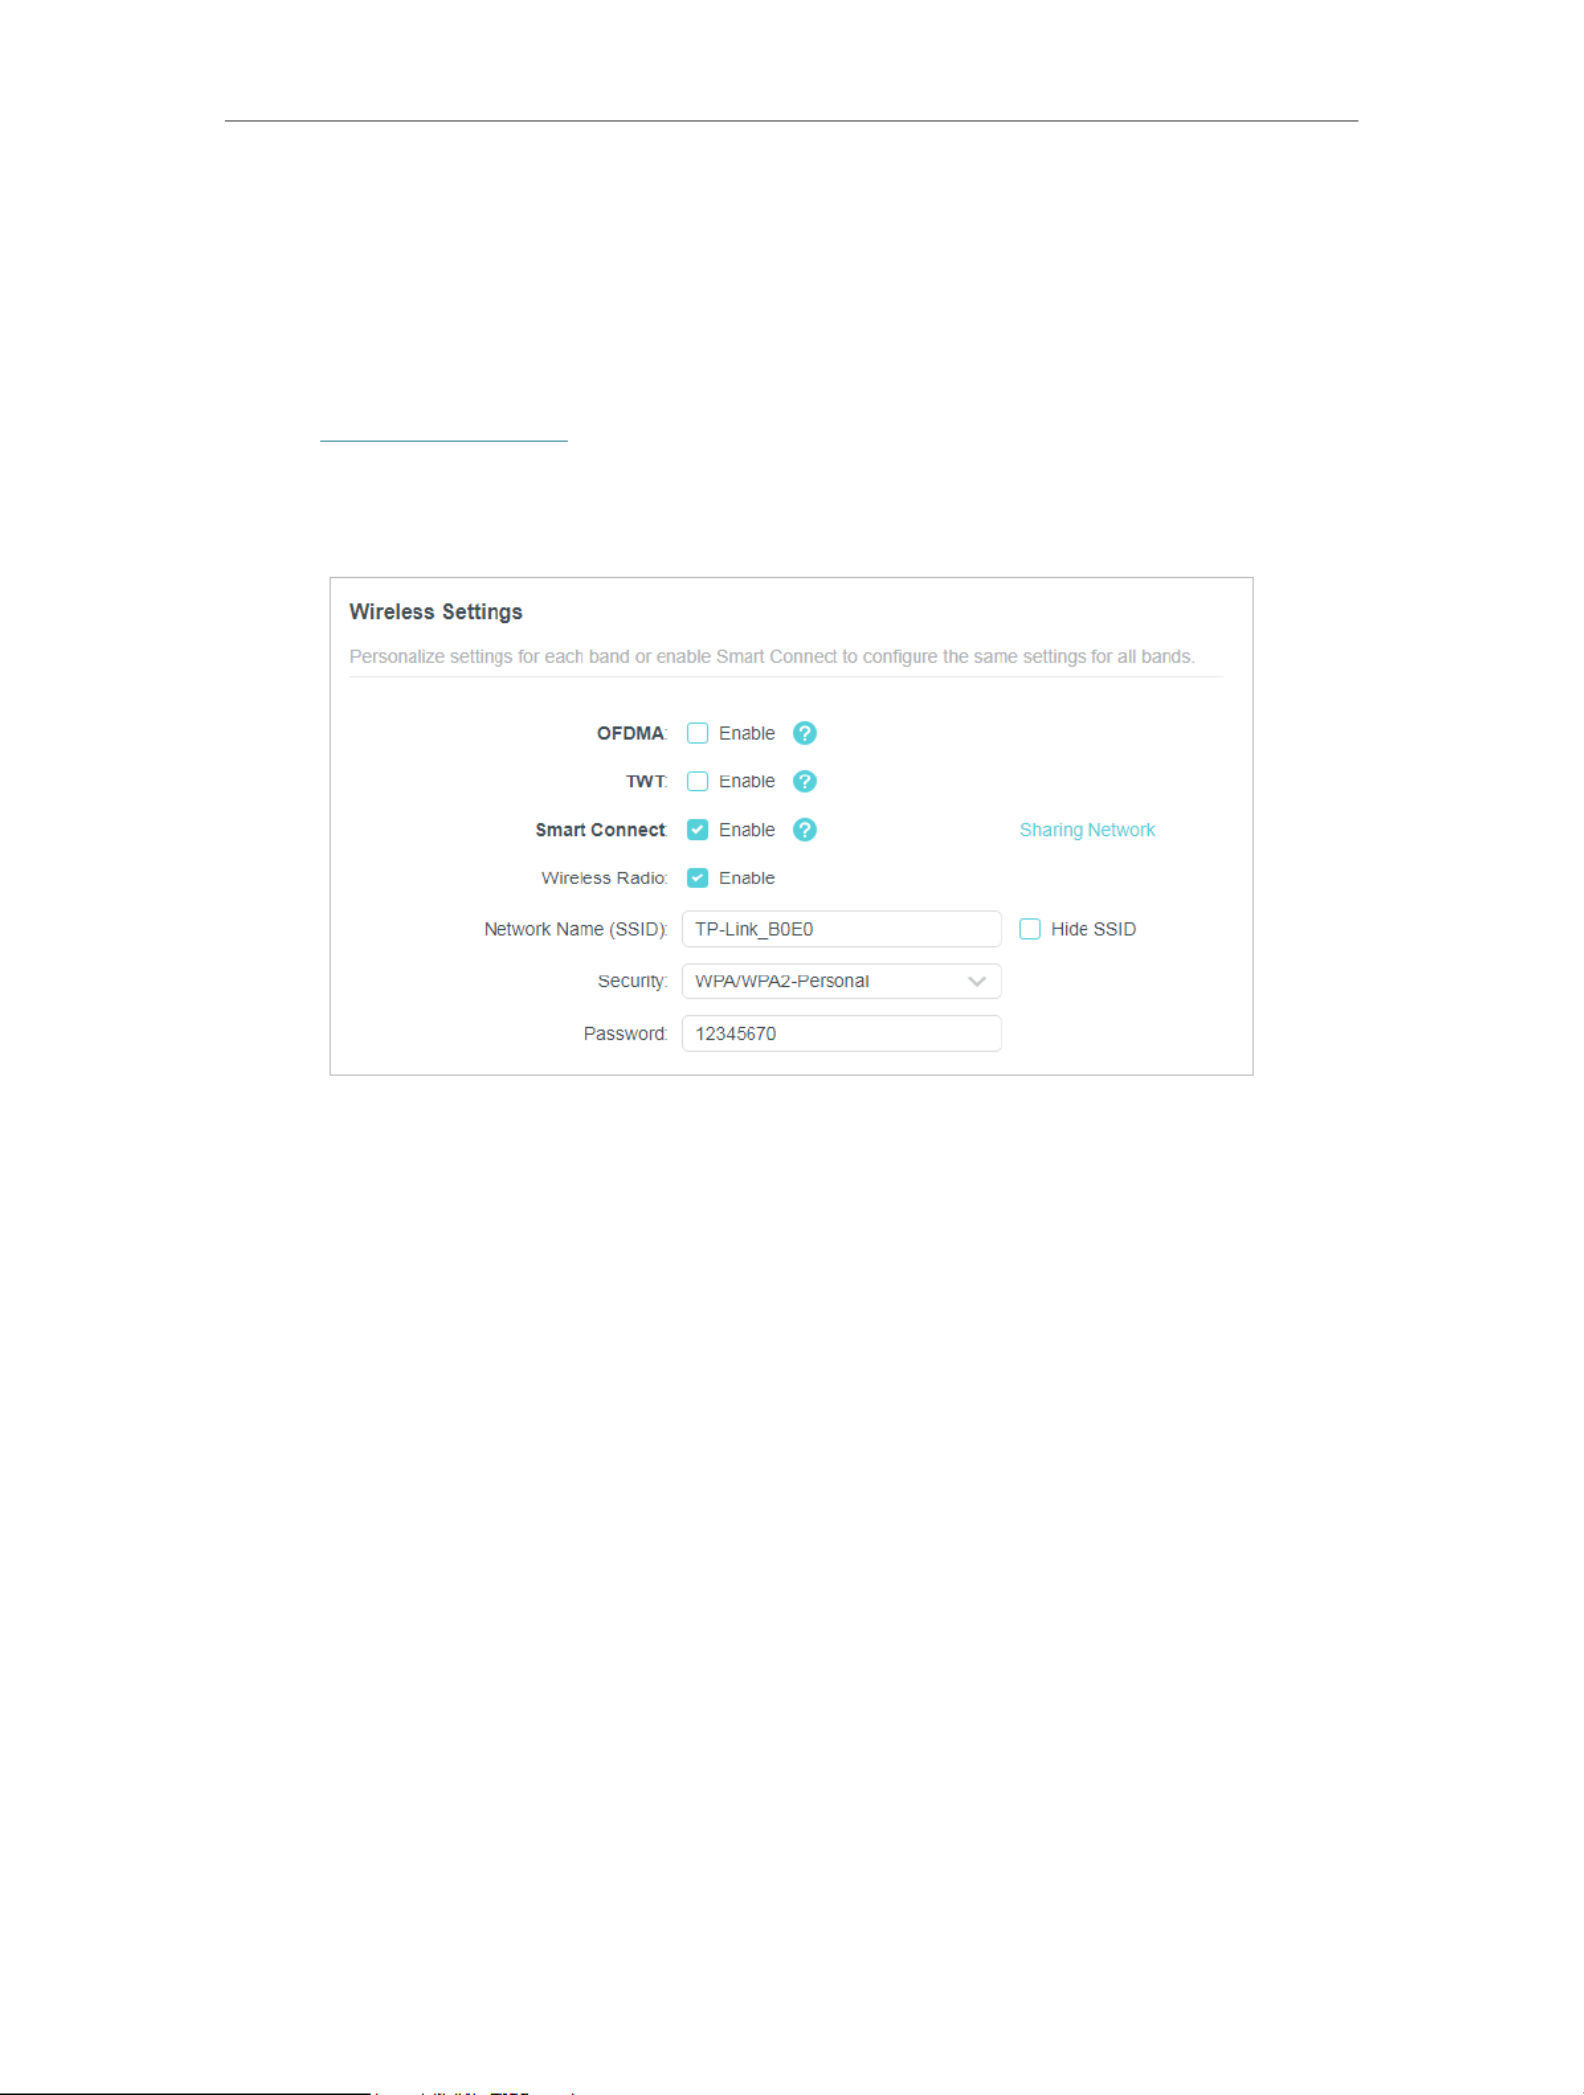
6. 1. Specify Wireless Settings
The router’s wireless network name (SSID) and password, and security option are preset
in the factory. The preset SSID and password can be found on the label of the router.
You can customize the wireless settings according to your needs.
1. Visit http://tplinkwifi.net, and log in with your TP-Link ID or the password you set for
the router.
2. Go to Wireless Advanced Wireless Wireless Settings or > > .
• To enable or disable OFDMA:
OFDMA enables multiple users to transmit data simultaneously, and thus greatly
improves speed and efficiency. Noted that only when your clients also support OFDMA,
can you fully enjoy the benefits. It is disabled by default.
1. Go to Advanced Wireless Wireless Settings> > .
2. Enable .OFDMA
• To enable or disable TWT:
TWT (Target Wake Time) allows 802.11ax routers and clients to negotiate their periods
to transmit and receive data packets. Clients only wake up at TWT sessions and remain
in sleep mode for the rest of the time, which significantly extend their battery life. It is
disabled by default.
1. Go to Advanced Wireless Wireless Settings> > .
2. Enable TWT.
• To use the Smart Connect function:
The Smart Connect function lets you enjoy a more high-speed network by assigning
your devices to best wireless bands based on actual conditions to balance network
demands.

29
Chapter 6 Wireless Settings
1. Go to Advanced Wireless Wireless Settings> > .
2. Enable .Smart Connect
3. Keep the default values or set a new SSID and password, and click . This SSID SAVE
and password will be applied for the 2.4GHz and 5GHz wireless networks. If you want
to configure the wireless settings separately for each band, untick the checkbox to
disable this feature.
• To enable or disable the wireless function:
1. Go to Wireless Advanced Wireless Wireless Settings or > > .
2. The wireless function is enabled by default. If you want to disable the wireless function
of the router, just untick the checkbox of each wireless network. In this case, Enable
all the wireless settings will be invalid.
• To change the wireless network name (SSID) and wireless password:
1. Go to Wireless Advanced Wireless Wireless Settingsor > > .
2. Create a new SSID in and customize the password for the Network Name (SSID)
network in Password. The value is case-sensitive.
Note: If you change the wireless settings with a wireless device, you will be disconnected when the settings are
effective. Please write down the new SSID and password for future use.
• To hide SSID:
1. Go to Wireless Advanced Wireless Wireless Settingsor > > .
2. Select Hide SSID, and your SSID won’t display when you scan for local wireless
networks on your wireless device and you need to manually join the network.
• To change the security option:
1. Go to Advanced Wireless Wireless Settings > > .
2. Select an option from the drop-down list:Security None, WPA/WPA2-Personal,
WPA2/WPA3-Personal, WPA/WPA2-Enterprise. We recommend you don’t change
the default settings unless necessary.
• To change the transmit power and channel settings:
1. Go to Advanced Wireless Wireless Settings > > .
2. Select an option from the Transmit Power drop-down list: High, Middle or Low. The
default and recommended setting is High.
3. If Smart Connect is disabled, you can also change the following settings:
• - Select a channel width (bandwidth) for the wireless network.Channel Width

30
Chapter 6 Wireless Settings
• Channel - Select an operating channel for the wireless network. It is
recommended to leave the channel to Auto, if you are not experiencing the
intermittent wireless connection issue.
• Mode - Select a transmission mode according to your wireless client devices. It
is recommended to just leave it as default.
6. 2. Schedule Your Wireless Function
The wireless network can be automatically off at a specific time when you do not need
the wireless connection.
1. Visit http://tplinkwifi.net, and log in with your TP-Link ID or the password you set for
the router.
2. Go to Advanced Wireless Wireless Schedule > > .
3. Enable the Wireless Schedule feature.
4. Click Add to specify a wireless off period during which you need the wireless off
automatically, and click .SAVE
Note:
• The Effective Time Schedule is based on the time of the router. Make sure the System settings are correct. You can
go to Advanced System Time & Language > > to modify the time.
• The wireless network will be automatically turned on after the time period you set.
6. 3. Use WPS for Wireless Connection
Wi-Fi Protected Setup (WPS) provides an easier approach to set up a security-protected
Wi-Fi connection.

31
Chapter 6 Wireless Settings
1. Visit http://tplinkwifi.net, and log in with your TP-Link ID or the password you set for
the router.
2. Make sure the Wi-Fi of your router is on and go to Advanced Wireless WPS> > .
6. 3. 1. Connect via the Client’s PIN
Enter the PIN of your device and click . Then your device will get connected to Connect
the router.
6. 3. 2. Connect via the Router’s PIN
Select Router’s PIN Method 1 in to enable Router’s PIN. You can use the default PIN or
generate a new one.
Note:
PIN (Personal Identification Number) is an eight-character identification number preset to each router. WPS supported
devices can connect to your router with the PIN. The default PIN is printed on the label of the router.
6. 3. 3. Push the WPS Button
Click Start on the screen or directly press the router’s WPS button. Within two minutes,
enable WPS on your personal device. will appear on the screen and the WPS Success
LED of the router should change from flashing to solid on, indicating successful WPS
connection.

32
Chapter 6 Wireless Settings
6. 4. Advanced Wireless Settings
Check advanced wireless settings for your device.
1. Visit http://tplinkwifi.net, and log in with your TP-Link ID or the password you set for
the router.
2. Go to Advanced Wireless Additional Settings> > .
3. Configure advanced wireless settings.
• WMM - WMM function can guarantee the packets with high-priority messages being
transmitted preferentially.

33
Chapter 6 Wireless Settings
• AP Isolation - This function isolates all connected wireless stations so that wireless
stations cannot access each other through WLAN.
• Airtime Fairness - This function can improve the overall network performance by
sacrificing a little bit of network time on your slow devices.
• Beacon Interval - Enter a value between 40 and 1000 in milliseconds to determine the
duration between beacon packets that are broadcasted by the router to synchronize
the wireless network. The default value is 100 milliseconds.
• RTS Threshold- Enter a value between 1 and 2346 to determine the packet size of
data transmission through the router. By default, the RTS (Request to Send) Threshold
size is 2346. If the packet size is greater than the preset threshold, the router will send
RTS frames to a particular receiving station and negotiate the sending of a data frame.
• DTIM Interval - The value determines the interval of DTIM (Delivery Traffic Indication
Message). Enter a value between 1 and 15 intervals. The default value is 1, which
indicates the DTIM Interval is the same as Beacon Interval.
• Group Key Update Period - Enter a number of seconds (minimum 30) to control the
time interval for the encryption key automatic renewal. The default value is 0, meaning
no key renewal.

Chapter 7
Guest Network
This function allows you to provide Wi-Fi access for guests without disclosing your
main network. When you have guests in your house, apartment, or workplace, you can
create a guest network for them. In addition, you can customize guest network options
to ensure network security and privacy.
It contains the following sections:
• Create a Network for Guests
• Customize Guest Network Options

35
Chapter 7 Guest Network
7. 1. Create a Network for Guests
1. Visit http://tplinkwifi.net, and log in with your TP-Link ID or the password you set for
the router.
2. Go to Advanced > Wireless > Guest Network or click Wireless on the top page. Locate
the section.Guest Network
3. Create a guest network as needed.
1 ) Tick the Enable checkbox for the 2.4GHz or 5GHz wireless network.
2 ) Customize the SSID. Don‘t select unless you want your guests to Hide SSID
manually input the SSID for guest network access.
3 ) Select the Security type and customize your own password. If No security is
selected, no password is needed to access your guest network.
4. Click Save. Now your guests can access your guest network using the SSID and
password you set!
5. You can also click to share the SSID and password to your guests.Sharing Network
Tips:
To view guest network information, go to and locate the section. You can turn on or off the Network Map Guest Network
guest network function conveniently.

Chapter 8
USB Settings
This chapter describes how to use the USB ports to share files and media from the USB
storage devices over your home network locally, or remotely through the internet.
The router supports USB external flash drives and hard drives.
It contains the following sections:
• Access the USB Storage Device
• Media Sharing
• Time Machine

39
Chapter 8 USB Settings
Windows
computer
• Method 2:
Open the Windows Explorer (or go to Computer) and type the server
address \\tplinkwifi.net ftp://tplinkwifi.net or in the address bar, then
press Enter.
Mac
1 ) Select > Go Connect to Server.
2 ) Type the server address .smb://tplinkwifi.net
3 ) Click .Connect
4 ) When prompted, select the radio box. (If you have set up a Guest
username and a password to deny anonymous access to the USB
disks, you should select the Registered User radio box. To learn how
to set up an account for the access, refer to To Set Up Authentication
for Data Security.)
Tablet Use a third-party app for network files management.
Tips:
You can also access your USB storage device by using your Network/Media Server Name as the server address. Refer
to To Customize the Address of the USB Storage Device to learn more.
8. 1. 2. Access the USB Device Remotely
You can access your USB disk outside the local area network. For example, you can:

40
Chapter 8 USB Settings
• Share photos and other large files with your friends without logging in to (and paying
for) a photo-sharing site or email system.
• Get a safe backup for the materials for a presentation.
• Remove the files on your camera’s memory card from time to time during the journey.
Note:
If your ISP assigns a private WAN IP address (such as 192.168.x.x or 10.x.x.x), you cannot use this feature because
private addresses are not routed on the internet.
Follow the steps below to configure remote access settings.
1. Visit http://tplinkwifi.net, and log in with your TP-Link ID or the password you set for
the router.
2. Go to Advanced USB USB Storage Device > > .
3. Tick the checkbox, and then click . Internet FTP Save
4. Refer to the following table to access your USB disk remotely.

41
Chapter 8 USB Settings
Computer
1 ) Open the Windows Explorer (or go to Computer, only for Windows
users) or open a web browser.
2 ) Type the server address in the address bar:
Type in ftp://<WAN IP address of the router port number>:< > (such
as ftp://59.40.2.243:21). If you have specified the domain name
of the router, you can also type in ftp://< >:<port domain name
number> ftp://MyDomainName:21 (such as )
3 ) Press on the keyboard.Enter
4 ) Access with the username and password you set in To Set Up
Authentication for Data Security.
Tips:
You can also access the USB disk via a third-party app for network files management, which can
resume broken file transfers.
Tablet Use a third-party app for network files management.
Tips:
Click to learn how to set up a domain name for you router.Set Up a Dynamic DNS Service Account
8. 1. 3. Customize the Access Settings
By default, all the network clients can access all folders on your USB disk. You can
customize your sharing settings by setting a sharing account, sharing specific contents
and setting a new sharing address on the router’s web management page.
1. Visit http://tplinkwifi.net, and log in with your TP-Link ID or the password you set for
the router.
2. Go to Advanced USB USB Storage Device > > .
• To Customize the Address of the USB Storage Device
You can customize the server name and use the name to access your USB storage
device.
1. In the Access Method session, make sure Samba for Windows is ticked, and enter a
Network/Media Server Name as you like, such as MyShare, then click Save.

42
Chapter 8 USB Settings
2. Now you can access the USB storage device by visiting \\MyShare (for Windows) or
smb://MyShare (for Mac).
• To Only Share Specific Content
Focus on the File Sharing section. Specify sharing folders that you want to share and
click .Save
• To Set Up Authentication for Data Security
You can set up authentication for your USB storage device so that network clients will
be required to enter username and password when accessing the USB storage device.
1. In the section, enable File Sharing Secure Sharing.

43
Chapter 8 USB Settings
2. Click to modify the access account. The username and password are both
admin for default administrator account, and both for default visitor account. visit
Accessing as an administrator can read and modify the shared folders while visitors
can only read the shared folders.
Note:
1. For Windows users, do not set the sharing username the same as the Windows username. Otherwise, Windows
credential mechanism may cause the following problems:
• If the sharing password is also the same as the Windows password, authentication will not work since the Windows
will automatically use its account information for USB access.
• If the sharing password is different from the Windows password, the Windows will be unable to remember your
credentials and you will always be required to enter the sharing password for USB access.
2. Due to Windows credential mechanism, you might be unable to access the USB disk after changing Authentication
settings. Please log out from the Windows and try to access again. Or you can change the address of the USB disk
by referring to To Customize the Address of the USB Storage Device.
8. 2. Media Sharing
The feature of allows you to view photos, play music and watch movies Media Sharing
stored on the USB storage device directly from DLNA-supported devices, such as your
computer, tablet and PS2/3/4.
1. Visit http://tplinkwifi.net, and log in with your TP-Link ID or the password you set for
the router.
2. Go to Advanced USB USB Storage Device > > .
3. Enable .Media Sharing
4. When your USB storage device is inserted into the router, your DLNA-supported
devices (such as your computer and pad) connected to the router can detect and
play the media files on the USB storage devices.
5. Refer to the following table for detailed instructions.

44
Chapter 8 USB Settings
Windows
Computer
• Go to Computer Network Model > , then click the Media Server Name (
number-share by default) in the Media Devices section.
Note:
Here we take Windows 7 as an example.
Tablet • Use a third-party DLNA-supported player.
8. 3. Time Machine
Time Machine backs up all files on your Mac computer to a USB storage device
connected to your router.
1. Visit http://tplinkwifi.net, and log in with your TP-Link ID or the password you set for
the router.
2. Go to Advanced USB Time Machine > > .

Chapter 9
HomeShield
Customize your home network with enhanced security using a kit of features built in
TP-Link HomeShield. Whether protecting your sensitive data or limiting the access of
kids and guests, TP-Link HomeShield provides you the tools you need to fully manage
your network.
It contains the following sections:
• Network Security
• Parental Controls
• Network Analysis & Optimization

49
Chapter 9 HomeShield
2. Launch the Tether app and log in with your TP-Link ID. If you don’t have an account,
create one first.
3. Log in to your router and tap the HomeShield tab to use this feature.

Chapter 10
OneMesh with Seamless
Roaming
This chapter introduces the TP-Link OneMeshTM feature.
It contains the following sections:
• Set Up a OneMesh Network
• Manage Devices in the OneMesh Network

52
Chapter 10 OneMesh with Seamless Roaming
3. Connect a OneMesh extender to this router by following the setup instructions in the
extender’s manual. The extender will be listed on the router’s page.OneMesh
Note: To check full list of TP-Link OneMesh devices, visit https://www.tp-link.com/onemesh/compatibility.
4. If you have set up the extender to join the OneMesh network, it will be listed on the
router’s page.OneMesh
Otherwise, you need to find it in the Available OneMesh Devices list and click Add to
add it to the OneMesh network.
Done! Now your router and extender successfully form a OneMesh network!

54
Chapter 10 OneMesh with Seamless Roaming
4. Manage the OneMesh device as needed. You can:
• Change device information.
• Click Manage Device to redirect to the web management page of this device.
• Click Leave OneMesh to delete this device from the OneMesh network.

Chapter 11
Network Security
This chapter guides you on how to protect your home network from cyber attacks and
unauthorized users by implementing these three network security functions. You can
protect your home network from cyber attacks, block or allow specific client devices to
access your network using Access Control, or you can prevent ARP spoofing and ARP
attacks using IP & MAC Binding. It contains the following sections:
• Protect the Network from Cyber Attacks
• Access Control
• IP & MAC Binding
• ALG
*For a more comprehensive home network protection system, refer to the TP-Link
HomeShield chapter.

56
Chapter 11 Network Security
11. 1. Protect the Network from Cyber Attacks
The SPI (Stateful Packet Inspection) Firewall protects the router from cyber attacks
and validate the traffic that is passing through the router based on the protocol. This
function is enabled by default.
1. Visit http://tplinkwifi.net, and log in with your TP-Link ID or the password you set for
the router.
2. Go to Advanced Security Firewall > > . It’s recommended to keep the default settings.
11. 2. Access Control
Access Control is used to block or allow specific client devices to access your network
(via wired or wireless) based on a list of blocked devices (Blacklist) or a list of allowed
devices (Whitelist).
I want to:
Block or allow specific client devices to access my network (via wired or wireless).
How can I do that?
1. Visit http://tplinkwifi.net, and log in with your TP-Link ID or the password you set for
the router.
2. Go to Advanced Security Access Control > > .
3. Toggle on to enable Access Control.
4. Select the access mode to either block (recommended) or allow the device(s) in the
list.
To block specific device(s):
1 ) Select .Blacklist

57
Chapter 11 Network Security
2 ) Click and select devices you want to be blocked and Click ADD.
3 ) The Operation Succeeded message will appear on the screen, which means the
selected devices have been successfully added to the blacklist.
To allow specific device(s):
1 ) Select and click .Whitelist SAVE
2 ) Your own device is in the whitelist by default and cannot be deleted. Click
to add other devices to the whitelist.
• Add connected devices
1 ) Click Select From Device List.
2 ) Select the devices you want to be allowed and click ADD.

58
Chapter 11 Network Security
3 ) The Operation Succeeded message will appear on the screen, which means the
selected devices have been successfully added to the whitelist.
• Add unconnected devices
1 ) Click Add Manually.
2 ) Enter the Device Name MAC Address and of the device you want to be allowed
and click ADD.
3 ) The Operation Succeeded message will appear on the screen, which means the
device has been successfully added to the whitelist.
Done!
Now you can block or allow specific client devices to access your network (via wired or
wireless) using the or .Blacklist Whitelist
11. 3. IP & MAC Binding
IP & MAC Binding, namely, ARP (Address Resolution Protocol) Binding, is used to bind
network device’s IP address to its MAC address. This will prevent ARP Spoofing and
other ARP attacks by denying network access to an device with matching IP address in
the Binding list, but unrecognized MAC address.

59
Chapter 11 Network Security
I want to:
Prevent ARP spoofing and ARP attacks.
How can I do that?
1. Visit http://tplinkwifi.net, and log in with your TP-Link ID or the password you set for
the router.
2. Go to Advanced Security IP & MAC Binding > > .
3. Enable IP & MAC Binding.
4. Bind your device(s) according to your need.
To bind the connected device(s):
1 ) Click in the section.Binding List
2 ) Click VIEW CONNECTED DEVICES and select the device you want to bind. The
MAC Address IP Address and fields will be automatically filled in.
3 ) Click .SAVE

60
Chapter 11 Network Security
To bind the unconnected device:
1 ) Click in the section.Binding List
2 ) Enter the MAC Address IP Address and that you want to bind.
3 ) Click .SAVE
Done!
Now you don’t need to worry about ARP spoofing and ARP attacks!
11. 4. ALG
ALG allows customized Network Address Translation (NAT) traversal filters to be plugged
into the gateway to support address and port translation for certain application layer
“control/data” protocols such as FTP, TFTP, H323 etc. It is recommended to keep the
default settings.
You may need to disable SIP ALG when you are using voice and video applications to
create and accept a call through the router, since some voice and video communication
applications do not work well with SIP ALG.
Visit http://tplinkwifi.net, and log in with your TP-Link ID or the password you set for the
router. Go to Advanced Security > > ALG.

61
Chapter 11 Network Security

Chapter 12
NAT Forwarding
The router’s NAT (Network Address Translation) feature makes devices on the LAN use
the same public IP address to communicate with devices on the internet, which protects
the local network by hiding IP addresses of the devices. However, it also brings about
the problem that an external host cannot initiatively communicate with a specified
device on the local network.
With the forwarding feature the router can penetrate the isolation of NAT and allows
devices on the internet to initiatively communicate with devices on the local network,
thus realizing some special functions.
The TP-Link router supports four forwarding rules. If two or more rules are set, the
priority of implementation from high to low is Port Forwarding, Port Triggering, UPNP
and DMZ.
It contains the following sections:
• Share Local Resources on the Internet by Port Forwarding
• Open Ports Dynamically by Port Triggering
• Make Applications Free from Port Restriction by DMZ
• Make Xbox Online Games Run Smoothly by UPnP
63
Chapter 12 NAT Forwarding
12. 1. Share Local Resources on the Internet by Port
Forwarding
When you build up a server on the local network and want to share it on the internet,
Port Forwarding can realize the service and provide it to internet users. At the same
time Port Forwarding can keep the local network safe as other services are still invisible
from the internet.
Port Forwarding can be used for setting up public services on your local network,
such as HTTP, FTP, DNS, POP3/SMTP and Telnet. Different services use different
service ports. Port 80 is used in HTTP service, port 21 in FTP service, port 25 in SMTP
service and port 110 in POP3 service. Please verify the service port number before the
configuration.
I want to:
Share my personal website I’ve built in local network with my friends through the internet.
For example, the personal website has been built on my home PC (192.168.0.100). I hope
that my friends on the internet can visit my website in some way. The PC is connected
to the router with the WAN IP address 218.18.232.154.
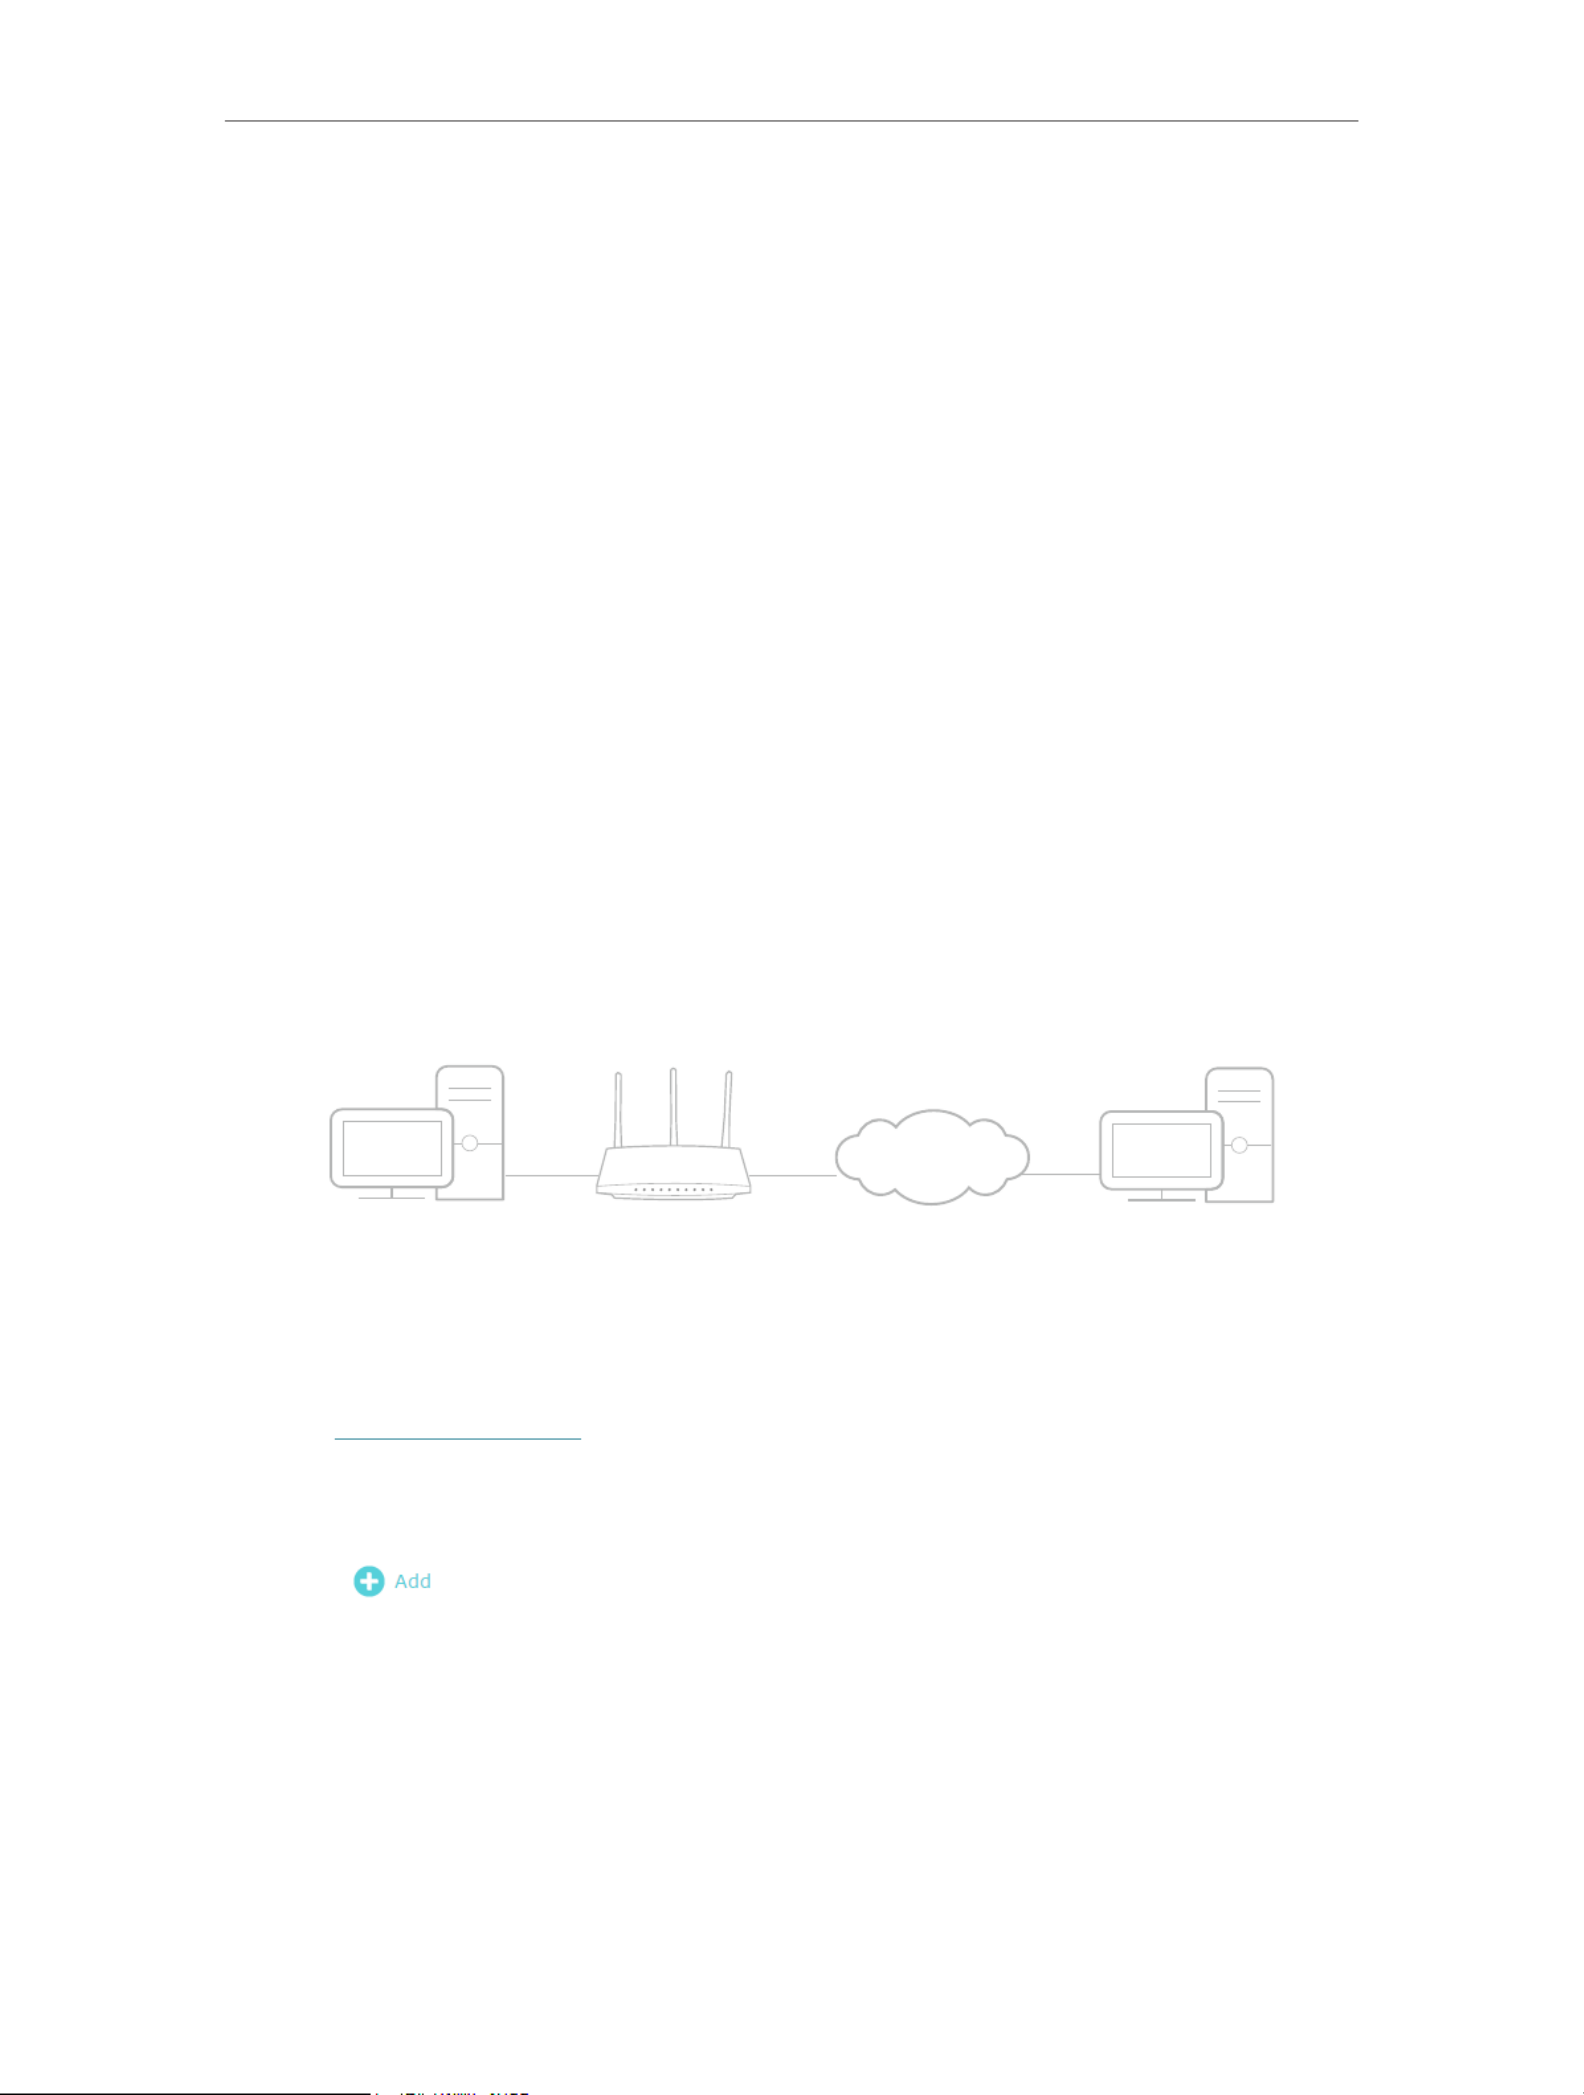
INTERNET
WAN: 218.18.232.154LANHome
Personal Website
Router
How can I do that?
1. Assign a static IP address to your PC, for example 192.168.0.100.
2. Visit http://tplinkwifi.net, and log in with your TP-Link ID or the password you set for
the router.
3. Go to Advanced NAT Forwarding Port Forwarding > > .
4. Click .

64
Chapter 12 NAT Forwarding
5. Click VIEW COMMON SERVICES and select HTTP. The External Port Internal Port,
and Protocol will be automatically filled in.
6. Click and select your home PC. The VIEW CONNECTED DEVICES Device IP
Address will be automatically filled in. Or enter the PC’s IP address 192.168.0.100
manually in the Device IP Address field.
7. Click .SAVE
Tips:
• It is recommended to keep the default settings of Internal Port and Protocol if you are not clear about which port and
protocol to use.
• If the service you want to use is not in the common services list, you can enter the corresponding parameters
manually. You should verify the port number that the service needs.
• You can add multiple port forwarding rules if you want to provide several services in a router. Please note that the
External Port should not be overlapped.
Done!
Users on the internet can enter http:// WAN IP (in this example: http:// 218.18.232.154)
to visit your personal website.

65
Chapter 12 NAT Forwarding
Tips:
• The WAN IP should be a public IP address. For the WAN IP is assigned dynamically by the ISP, it is recommended
to apply and register a domain name for the WAN referring to . Then users Set Up a Dynamic DNS Service Account
on the internet can use to visit the website.http:// domain name
• If you have changed the default External Port http:// WAN IP: External Port http:// domain name: , you should use or
External Port to visit the website.
12. 2. Open Ports Dynamically by Port Triggering
Port Triggering can specify a triggering port and its corresponding external ports.
When a host on the local network initiates a connection to the triggering port, all the
external ports will be opened for subsequent connections. The router can record the
IP address of the host. When the data from the internet return to the external ports, the
router can forward them to the corresponding host. Port Triggering is mainly applied to
online games, VoIPs, video players and common applications including MSN Gaming
Zone, Dialpad and Quick Time 4 players, etc.
Follow the steps below to configure the Port Triggering rules:
1. Visit http://tplinkwifi.net, and log in with your TP-Link ID or the password you set for
the router.
2. Go to Advanced NAT Forwarding Port Triggering> > and click .
3. Click VIEW COMMON SERVICES, and select the desired application. The Triggering
Port, Triggering Protocol External Port and will be automatically filled in. The following
picture takes application as an example.MSN Gaming Zone

66
Chapter 12 NAT Forwarding
4. Click .SAVE
Tips:
• You can add multiple port triggering rules according to your network need.
• The triggering ports can not be overlapped.
• If the application you need is not listed in the Existing Applications list, please enter the parameters manually. You
should verify the external ports the application uses first and enter them into External Port field according to the
format the page displays.
12. 3. Make Applications Free from Port Restriction
by DMZ
When a PC is set to be a DMZ (Demilitarized Zone) host on the local network, it is totally
exposed to the internet, which can realize the unlimited bidirectional communication
between internal hosts and external hosts. The DMZ host becomes a virtual server with
all ports opened. When you are not clear about which ports to open in some special
applications, such as IP camera and database software, you can set the PC to be a DMZ
host.
Note:
When DMZ is enabled, the DMZ host is totally exposed to the internet, which may bring some potential safety hazards. If
DMZ is not in use, please disable it in time.
I want to:
Make the home PC join the internet online game without port restriction.
For example, due to some port restriction, when playing the online games, you can log
in normally but cannot join a team with other players. To solve this problem, set your PC
as a DMZ host with all ports open.

67
Chapter 12 NAT Forwarding
How can I do that?
1. Assign a static IP address to your PC, for example 192.168.0.100.
2. Visit http://tplinkwifi.net, and log in with your TP-Link ID or the password you set for
the router.
3. Go to Advanced NAT Forwarding DMZ > > and tick to enable DMZ.
4. Click VIEW CONNECTED DEVICES and select your PC. The Device IP
Address will be automatically filled in. Or enter the PC’s IP address 192.168.0.100
manually in the DMZ Host IP Address field.
5. Click .SAVE
Done!
The configuration is completed. You’ve set your PC to a DMZ host and now you can
make a team to game with other players.
12. 4. Make Xbox Online Games Run Smoothly by
UPnP
The UPnP (Universal Plug and Play) protocol allows applications or host devices
to automatically find the front-end NAT device and send request to it to open the
corresponding ports. With UPnP enabled, the applications or host devices on the
local network and the internet can freely communicate with each other thus realizing
the seamless connection of the network. You may need to enable the UPnP if you
want to use applications for multiplayer gaming, peer-to-peer connections, real-time
communication (such as VoIP or telephone conference) or remote assistance, etc.
Tips:
• UPnP is enabled by default in this router.
• Only the application supporting UPnP protocol can use this feature.
• UPnP feature needs the support of operating system (e.g. Windows Vista/ Windows 7/ Windows 8, etc. Some of
operating system need to install the UPnP components).
For example, when you connect your Xbox to the router which has connected to
the internet to play online games, UPnP will send request to the router to open the

68
Chapter 12 NAT Forwarding
corresponding ports allowing the following data penetrating the NAT to transmit.
Therefore, you can play Xbox online games without a hitch.
INTERNET
If necessary, you can follow the steps to change the status of UPnP.
1. Visit http://tplinkwifi.net, and log in with your TP-Link ID or the password you set for
the router.
2. Go to Advanced > NAT Forwarding > UPnP and toggle on or off according to your
needs.

Chapter 13
VPN Server&Client
The router offers several ways to set up VPN connections:
VPN Server allows remote devices to access your home network in a secured way
through the internet. The router supports three types of VPN Server:
OpenVPN is somewhat complex but with higher security and more stability, suitable for
restricted environments such as campus network and company intranet.
PPTP VPN is easy to use with the built-in VPN software of computers and mobile
devices, but it is vulnerable and may be blocked by some ISPs.
L2TP/IPSec VPN is more secure but slower than PPTP VPN, and may have trouble
getting around firewalls.
VPN Client allows devices in your home network to access remote VPN servers,
without the need to install VPN software on each device.
This chapter contains the following sections:
• Use OpenVPN to Access Your Home Network
• Use PPTP VPN to Access Your Home Network
• Use L2TP/IPSec VPN to Access Your Home Network
• Use VPN Client to Access a Remote VPN Server

70
Chapter 13 VPN Server&Client
13. 1. Use OpenVPN to Access Your Home Network
OpenVPN Server is used to create an OpenVPN connection for remote devices to
access your home network.
To use the VPN feature, you need to enable OpenVPN Server on your router, and install
and run VPN client software on remote devices. Please follow the steps below to set up
an OpenVPN connection.
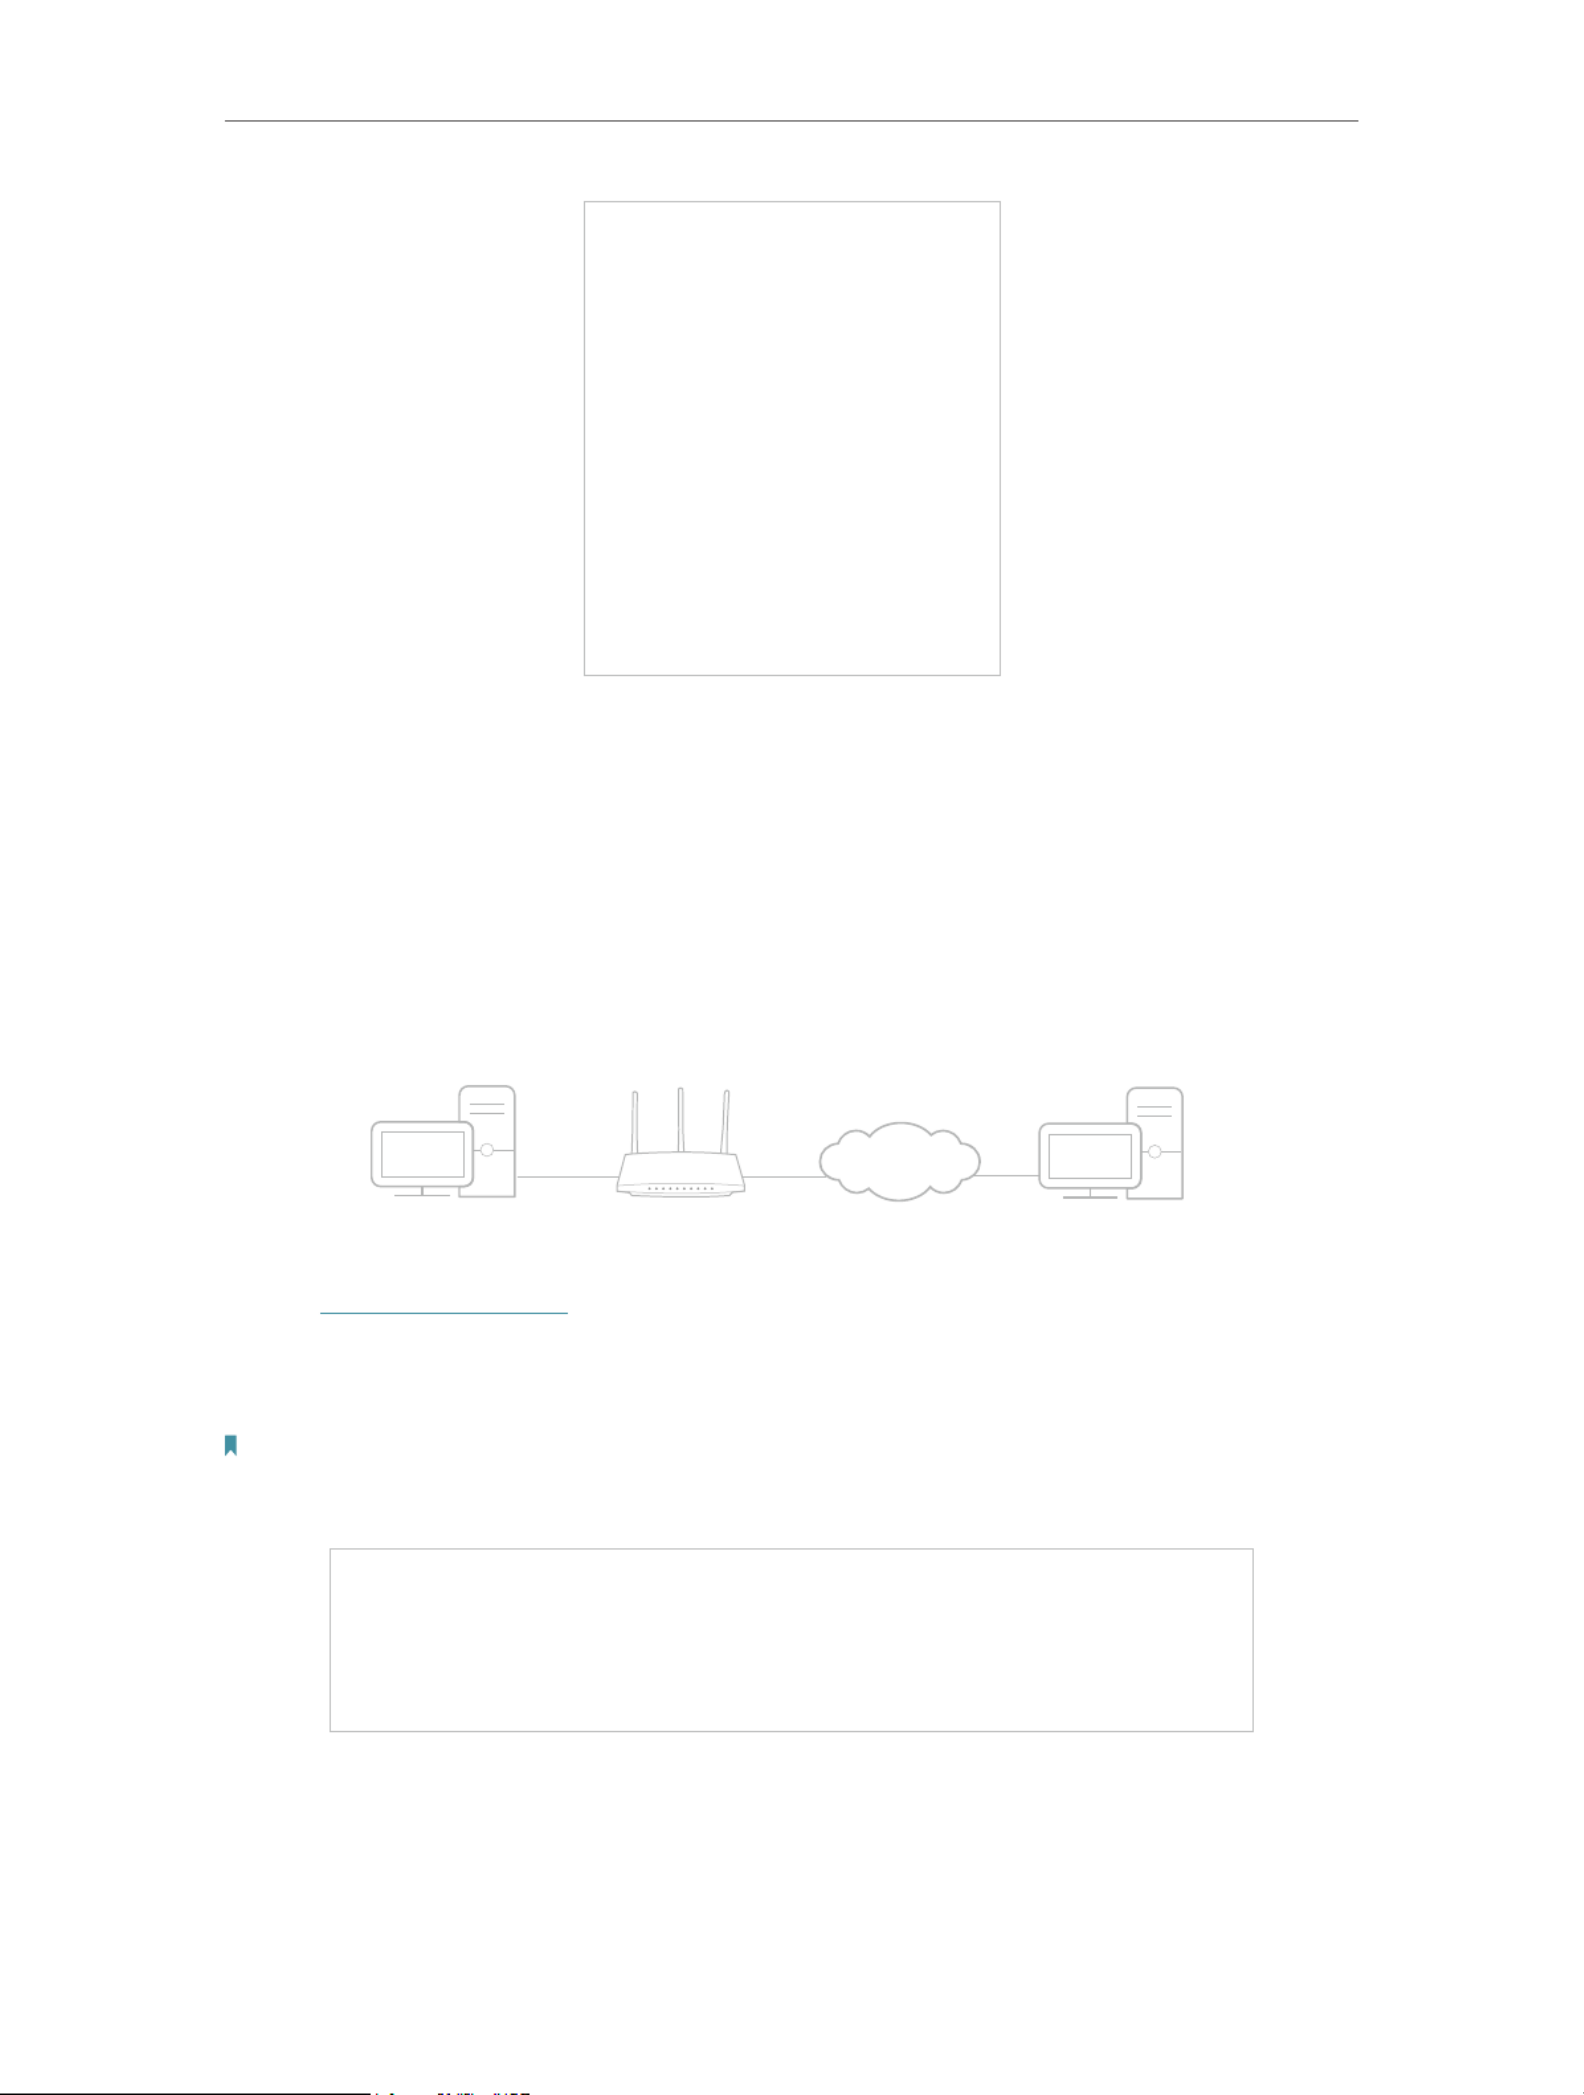
INTERNET
Home Network Router (VPN Server) Remote Devices
Step1. Set up OpenVPN Server on Your Router
1. Visit http://tplinkwifi.net, and log in with your TP-Link ID or the password you set for
the router.
2. Go to Advanced VPN Server OpenVPN Enable > > , and tick the box of .OpenVPN
Note:
• Before you enable VPN Server, we recommend you configure Dynamic DNS Service (recommended) or assign a
static IP address for router’s WAN port and synchronize your System Time with internet.
• The first time you configure the OpenVPN Server, you may need to generate a certificate before you enable the VPN
Server.
3. Select the Service Type (communication protocol) for OpenVPN Server: UDP, TCP.
4. Enter a VPN Service Port to which a VPN device connects, and the port number
should be between 1024 and 65535.
5. In the fields, enter the range of IP addresses that can be leased VPN Subnet/Netmask
to the device by the OpenVPN server.

71
Chapter 13 VPN Server&Client
6. Select your Client Access Home Network Only type. Select if you only want the
remote device to access your home network; select Internet and Home Network if
you also want the remote device to access internet through the VPN Server.
7. Click .SAVE
8. Click GENERATE to get a new certificate.
Note: If you have already generated one, please skip this step, or click GENERATE to update the certificate.
9. Click EXPORT to save the OpenVPN configuration file which will be used by the
remote device to access your router.
Step 2. Configure OpenVPN Connection on Your Remote Device
1. Visit http://openvpn.net/index.php/download/community-downloads.html to
download the OpenVPN software, and install it on your device where you want to
run the OpenVPN client utility.
Note: You need to install the client utility on each device that you plan to apply the VPN function to access OpenVPN
your router. Mobile devices should download a third-party app from Google Play or Apple App Store.
2. After the installation, copy the file exported from your router to the OpenVPN client
utility’s “config” folder (for example, C:\Program Files\OpenVPN\config on Windows).
The path depends on where the OpenVPN client utility is installed.
3. Run the OpenVPN client utility and connect it to OpenVPN Server.
13. 2. Use PPTP VPN to Access Your Home Network
PPTP VPN Server is used to create a PPTP VPN connection for remote devices to
access your home network.
To use the VPN feature, you need to set up PPTP VPN Server on your router, and
configure the PPTP connection on remote devices. Please follow the steps below to
set up a PPTP VPN connection.
Step 1. Set up PPTP VPN Server on Your Router

72
Chapter 13 VPN Server&Client
1. Visit http://tplinkwifi.net, and log in with your TP-Link ID or the password you set for
the router.
2. Go to Advanced VPN Server PPTP > > , and tick the box ofEnable PPTP.
Note: Before you enable VPN Server, we recommend you configure Dynamic DNS Service (recommended) or assign a
static IP address for router’s WAN port and synchronize your with internet.System Time
3. In the Client IP Address field, enter the range of IP addresses (up to 10) that can be
leased to the devices by the PPTP VPN server.
4. Set the PPTP connection permission according to your needs.
• Select Allow Samba (Network Place) access to allow your VPN device to access
your local Samba server.
• Select Allow NetBIOS passthrough to allow your VPN device to access your
Samba server using NetBIOS name.
• Select Allow Unencrypted connections to allow unencrypted connections to
your VPN server.
5. Click .SAVE
6. Configure the PPTP VPN connection account for the remote device. You can create
up to 16 accounts.
1 ) Click .Add
2 ) Enter the Username Password and to authenticate devices to the PPTP VPN
Server.

73
Chapter 13 VPN Server&Client
3 ) Click ADD.
Step 2. Configure PPTP VPN Connection on Your Remote Device
The remote device can use the Windows built-in PPTP software or a third-party PPTP
software to connect to PPTP Server. Here we use the Windows built-in PPTP software
as an example.
1. Go to > Start Control Panel Network and Internet Network and Sharing Center > > .
2. Select Set up a new connection or network.
3. Select Connect to a workplace and click Next.

74
Chapter 13 VPN Server&Client
4. Select Use my Internet connection (VPN).
5. Enter the internet IP address of the router (for example: 218.18.1.73) in the Internet
address field. Click Next.

75
Chapter 13 VPN Server&Client
6. Enter the and User name Password you have set for the PPTP VPN server on your
router, and click .Connect
7. Click when the VPN connection is ready to use.Connect Now

76
Chapter 13 VPN Server&Client
13. 3. Use L2TP/IPSec VPN to Access Your Home
Network
L2TP/IPSec VPN Server is used to create a L2TP/IPSec VPN connection for remote
devices to access your home network.
To use the VPN feature, you need to set up L2TP/IPSec VPN Server on your router, and
configure the L2TP/IPSec connection on remote devices. Please follow the steps below
to set up the L2TP/IPSec VPN connection.
INTERNET
Home Network Router (VPN Server) Remote Devices
Step 1. Set up L2TP/IPSec VPN Server on Your Router
1. Visit http://tplinkwifi.net, and log in with your TP-Link ID or the password you set for
the router.
2. Go to Advanced VPN Server L2TP/IPSec > > , and enable L2TP/IPSec.
Note:
• Firmware update may be required to support L2TP/IPSec VPN Server.
• Before you enable VPN Server, we recommend you configure Dynamic DNS Service (recommended) or assign a
static IP address for router’s WAN port and synchronize your with internet.System Time

79
Chapter 13 VPN Server&Client
4. Select Use my Internet connection (VPN).
5. Enter the internet IP address of the router (for example: 218.18.1.73) in the Internet
address field, and select the checkbox Don’t connect now; just set it up so I can
connect later. Click .Next
6. Enter the and User name Password you have set for the L2TP/IPSec VPN server on
your router, and click .Connect

81
Chapter 13 VPN Server&Client
9. Find the VPN connection you created, then double-click it.
10. Enter the User name and Password you have set for the L2TP/IPSec VPN server on
your router, and click Properties.

82
Chapter 13 VPN Server&Client
11. Switch to the Security tab, select Layer 2 Tunneling Protocol with IPsec (L2TP/
IPSec) Advanced settings and click .
12. Select Use preshared key for authentication and enter the IPSec Pre-Shared Key
you have set for the L2TP/IPSec VPN server on your router. Then click .OK
Done! Click to start VPN connection.Connect
83
Chapter 13 VPN Server&Client
13. 4. Use VPN Client to Access a Remote VPN Server
VPN Client is used to create VPN connections for devices in your home network to
access a remote VPN server.
To use the VPN feature, simply configure a VPN connection and choose your desired
devices on your router, then these devices can access the remote VPN server. Please
follow the steps below:
INTERNET
Home Devices Router (VPN Client) VPN Servers
1. Visit http://tplinkwifi.net, and log in with your TP-Link ID or the password you set for
the router.
2. Go to Advanced VPN Client > .
Note: Firmware update may be required to support VPN Client.
3. Enable , then save the settings. VPN Client
4. Add VPN servers, and enable the one you need.
1 ) In the section, click .Server List Add
2 ) Specify a description for the VPN, and choose the VPN type.

84
Chapter 13 VPN Server&Client
3 ) Enter the VPN information provided by your VPN provider.
• OpenVPN: Enter the VPN username and password if required by your VPN
provider, otherwise simply leave them empty. Then import the configuration
file provided by your VPN provider.
• PPTP: Enter the VPN server address (for example: 218.18.1.73) and the VPN
username and password provided by your VPN provider.

85
Chapter 13 VPN Server&Client
• L2TP/IPSec VPN: Enter the VPN server address (for example: 218.18.1.73),
VPN username and password, and IPSec pre-shared key provided by your VPN
provider.
4 ) Save the settings.
5 ) In the server list, enable the one you need.

87
Chapter 13 VPN Server&Client
Done! Now the devices you specified can access the VPN server you enabled.

Chapter 14
Customize Your Network
Settings
This chapter guides you on how to configure advanced network features.
It contains the following sections:
• Change the LAN Settings
• Configure to Support IPTV Service
• Specify DHCP Server Settings
• Set Up a Dynamic DNS Service Account
• Create Static Routes

89
Chapter 14 Customize Your Network Settings
14. 1. Change the LAN Settings
The router is preset with a default LAN IP 192.168.0.1, which you can use to log in to
its web management page. The LAN IP address together with the Subnet Mask also
defines the subnet that the connected devices are on. If the IP address conflicts with
another device on your local network or your network requires a specific IP subnet, you
can change it.
1. Visit http://tplinkwifi.net, and log in with your TP-Link ID or the password you set for
the router.
2. Go to Advanced Network LAN > > .
3. Type in a new IP Address appropriate to your needs. And leave the Subnet Mask as
the default settings.
4. Click . SAVE
Note: If you have set the Port Forwarding, DMZ or DHCP address reservation, and the new LAN IP address is not in the
same subnet with the old one, then you should reconfigure these features.
14. 2. Configure to Support IPTV Service
I want to:
Configure IPTV setup to enable Internet/IPTV/Phone service provided by my internet
service provider (ISP).
How can I do that?
1. Visit http://tplinkwifi.net, and log in with your TP-Link ID or the password you set for
the router.
2. Go to Advanced Network IPTV/VLAN > > .
3. If your ISP provides the networking service based on IGMP technology, e.g., British
Telecom(BT) and Talk Talk in UK:
1 ) Tick the IGMP Proxy and IGMP Snooping checkbox, then select the IGMP Version,
either V2 or V3, as required by your ISP.

90
Chapter 14 Customize Your Network Settings
2 ) Click .SAVE
3 ) After configuring IGMP proxy, IPTV can work behind your router now. You can
connect your set-top box to any of the router’s Ethernet port.
If IGMP is not the technology your ISP applies to provide IPTV service:
1 ) Tick Enable IPTV/VLAN.
2 ) Select the appropriate according to your ISP.Mode
• Select if your ISP is not listed and no other parameters are required.Bridge
• Select if your ISP is not listed but provides necessary parameters.Custom
3 ) After you have selected a mode, the necessary parameters, including the LAN
port for IPTV connection, are predetermined. If not, select the LAN type to
determine which port is used to support IPTV service.
4 ) Click .SAVE
5 ) Connect the set-top box to the corresponding LAN port which is predetermined
or you have specified in Step 3.
Done!
Your IPTV setup is done now! You may need to configure your set-top box before
enjoying your TV.

91
Chapter 14 Customize Your Network Settings
14. 3. Specify DHCP Server Settings
By default, the DHCP (Dynamic Host Configuration Protocol) Server is enabled and
the router acts as a DHCP server; it dynamically assigns TCP/IP parameters to client
devices from the IP Address Pool. You can change the settings of the DHCP Server if
necessary, and you can reserve LAN IP addresses for specified client devices.
1. Visit http://tplinkwifi.net, and log in with your TP-Link ID or the password you set for
the router.
2. Go to Advanced Network DHCP Server > > .
• To specify the IP address that the router assigns:
1. Tick the checkbox.Enable
2. Enter the starting and ending IP addresses in the IP Address Pool.
3. Enter other parameters if the ISP offers. The Default Gateway is automatically filled in
and is the same as the LAN IP address of the router.
4. Click .SAVE
• To reserve an IP address for a specified client device:
1. Click in the Add Address Reservation section.

92
Chapter 14 Customize Your Network Settings
2. Click VIEW CONNECTED DEVICES and select the you device you want to reserve an
IP for. Then the MAC Address will be automatically filled in. Or enter the MAC address
of the client device manually.
3. Enter the IP address to reserve for the client device.
4. Click . SAVE
14. 4. Set Up a Dynamic DNS Service Account
Most ISPs assign a dynamic IP address to the router and you can use this IP address
to access your router remotely. However, the IP address can change from time to time
and you don’t know when it changes. In this case, you might apply the DDNS (Dynamic
Domain Name Server) feature on the router to allow you and your friends to access your
router and local servers (FTP, HTTP, etc.) using a domain name without checking and
remembering the IP address.
Note: DDNS does not work if the ISP assigns a private WAN IP address (such as 192.168.1.x) to the router.
1. Visit http://tplinkwifi.net, and log in with your TP-Link ID or the password you set for
the router.
2. Go to Advanced Network Dynamic DNS> > .
3. Select the DDNS Service Provider: TP-Link, NO-IP or DynDNS. It is recommended
to select TP-Link so that you can enjoy TP-Link’s superior DDNS service. Otherwise,
please select NO-IP or DynDNS. If you don’t have a DDNS account, you have to
register first by clicking Register Now.
Note: To enjoy TP-Link’s DDNS service, you have to log in with a TP-Link ID. If you have not logged in with one, click
log in.
4. Click Register in the if you have selected TP-Link, and enter the Domain Name List
Domain Name as needed.

93
Chapter 14 Customize Your Network Settings
If you have selected NO-IP or DynDNS, enter the username, password and domain
name of your account.
5. Click LOGIN AND SAVE.
Tips: If you want to use a new DDNS account, please click first, and then log in with a new account.Logout
14. 5. Create Static Routes
Static routing is a form of routing that is configured manually by a network administrator
or a user by adding entries into a routing table. The manually-configured routing
information guides the router in forwarding data packets to the specific destination.

94
Chapter 14 Customize Your Network Settings
I want to:
Visit multiple networks and servers at the same time.
For example, in a small office, my PC can surf the internet through Router A, but I also
want to visit my company’s network. Now I have a switch and Router B. I connect the
devices as shown in the following figure so that the physical connection between my
PC and my company’s server is established. To surf the internet and visit my company’s
network at the same time, I need to configure the static routing.
Company’s server
PC
Router B
Router A
Switch
LAN: 192.168.0.1
192.168.0.100
LAN: 192.168.0.2
WAN: 172.30.30.100
172.30.30.1
How can I do that?
1. Change the routers’ LAN IP addresses to two different IP addresses on the same
subnet. Disable Router B’s DHCP function.
2. Visit http://tplinkwifi.net, and log in with your TP-Link ID or the password you set for
Router A.
3. Go to Advanced Network Routing> > .
4. Click and finish the settings according to the following explanations:Add

95
Chapter 14 Customize Your Network Settings
Network Destination: The destination IP address that you want to assign to a static
route. This IP address cannot be on the same subnet with the WAN IP or LAN IP of
Router A. In the example, the IP address of the company network is the destination
IP address, so here enter 172.30.30.1.
Subnet Mask: Determines the destination network with the destination IP address.
If the destination is a single IP address, enter 255.255.255.255; otherwise, enter
the subnet mask of the corresponding network IP. In the example, the destination
network is a single IP, so here enter 255.255.255.255.
Default Gateway: The IP address of the gateway device to which the data packets
will be sent. This IP address must be on the same subnet with the router’s IP which
sends out data. In the example, the data packets will be sent to the LAN port of
Router B and then to the Server, so the default gateway should be 192.168.0.2.
Interface: Determined by the port (WAN/LAN) that sends out data packets. In the
example, the data are sent to the gateway through the LAN port of Router A, so LAN/
WLAN should be selected.
Description: Enter a description for this static routing entry.
5. Click .SAVE
6. Check the Routing Table below. If you can find the entry you’ve set, the static routing
is set successfully.
Done!
Open a web browser on your PC. Enter the company server’s IP address to visit the
company network.

Chapter 15
Manage the Router
This chapter will show you the configuration for managing and maintaining your router.
It contains the following sections:
• Upgrade the Firmware
• Backup and Restore Configuration Settings
• Change the Login Password
• Password Recovery
• Local Management
• Remote Management
• System Log
• Test the Network Connectivity
• Set System Time and Language
• Set the Router to Reboot Regularly
• Control the LED
Produktspezifikationen
| Marke: | TP-Link |
| Kategorie: | Router |
| Modell: | Archer AX3000 Pro |
Brauchst du Hilfe?
Wenn Sie Hilfe mit TP-Link Archer AX3000 Pro benötigen, stellen Sie unten eine Frage und andere Benutzer werden Ihnen antworten
Bedienungsanleitung Router TP-Link

7 Oktober 2024
5 Oktober 2024
5 Oktober 2024
4 Oktober 2024
15 September 2024
12 September 2024
11 September 2024
11 September 2024
11 September 2024
11 September 2024
Bedienungsanleitung Router
- Router Acer
- Router Anker
- Router Apple
- Router Approx
- Router Asus
- Router Belkin
- Router BenQ
- Router Exibel
- Router Gembird
- Router Gigabyte
- Router Hama
- Router HP
- Router LogiLink
- Router Manhattan
- Router Medion
- Router Sweex
- Router Trust
- Router Clas Ohlson
- Router Cotech
- Router Makita
- Router Roland
- Router ZyXEL
- Router Bosch
- Router Alfa
- Router Siemens
- Router Buffalo
- Router TechniSat
- Router Allnet
- Router Devolo
- Router Eminent
- Router Linksys
- Router Netgear
- Router Telekom
- Router König
- Router Renkforce
- Router Thomson
- Router Black And Decker
- Router Skil
- Router Kenwood
- Router Schneider
- Router DeWalt
- Router Einhell
- Router Festool
- Router Topcom
- Router Nilox
- Router Motorola
- Router Nokia
- Router Vivanco
- Router Xiaomi
- Router EZVIZ
- Router Hikoki
- Router Hitachi
- Router Strong
- Router TCL
- Router Metabo
- Router Zoom
- Router Güde
- Router Netis
- Router Aruba
- Router Lindy
- Router Thrustmaster
- Router MSI
- Router Mercusys
- Router Razer
- Router TRENDnet
- Router Sagem
- Router Sigma
- Router Western Digital
- Router AVM
- Router Milan
- Router Zebra
- Router EnVivo
- Router Kathrein
- Router Silverline
- Router Holzmann
- Router Alcatel
- Router Vtech
- Router Black Box
- Router Techly
- Router Barco
- Router Hercules
- Router Milwaukee
- Router Toolcraft
- Router Huawei
- Router JUNG
- Router Nest
- Router Edimax
- Router DrayTek
- Router Eumex
- Router Technicolor
- Router Totolink
- Router Kogan
- Router Peak
- Router Sagemcom
- Router Conceptronic
- Router D-Link
- Router T-Mobile
- Router I-Tec
- Router QNAP
- Router Icidu
- Router Vodafone
- Router Powerplus
- Router Digitus
- Router Lancom
- Router LevelOne
- Router Beafon
- Router Phicomm
- Router ZTE
- Router Cisco
- Router Sonos
- Router Tenda
- Router Kasda
- Router Foscam
- Router Ubiquiti Networks
- Router Synology
- Router Kopul
- Router Kramer
- Router Intellinet
- Router Asrock
- Router AJA
- Router Hikvision
- Router Patton
- Router Nexxt
- Router Planet
- Router AT&T
- Router EnGenius
- Router Mikrotik
- Router Teltonika
- Router Porter-Cable
- Router Google
- Router Comtrend
- Router Davolink
- Router Digi
- Router Digiconnect
- Router KPN
- Router Leoxsys
- Router Media-tech
- Router Mercku
- Router On Networks
- Router PENTAGRAM
- Router Proximus
- Router Sitecom
- Router SMC
- Router T-com
- Router Tele 2
- Router Telstra
- Router Ubee
- Router United Telecom
- Router UPC
- Router Verizon
- Router Wintec
- Router Wisetiger
- Router Zolid
- Router Vimar
- Router Cudy
- Router Siig
- Router Moxa
- Router RGBlink
- Router Iogear
- Router StarTech.com
- Router Kraun
- Router AirLive
- Router Smart-AVI
- Router Dahua Technology
- Router ModeCom
- Router Gefen
- Router Atlantis Land
- Router BT
- Router Cradlepoint
- Router Multitech
- Router Arris
- Router ATen
- Router KanexPro
- Router SPL
- Router Advantech
- Router RAVPower
- Router Digicom
- Router Juniper
- Router BZBGear
- Router Brickcom
- Router 3Com
- Router Kiloview
- Router B&B Electronics
- Router Eero
- Router Atlona
- Router Xantech
- Router WyreStorm
- Router AVMATRIX
- Router Alfatron
- Router Key Digital
- Router Rosewill
- Router HiRO
- Router Ocean Matrix
- Router Hamlet
- Router AVPro Edge
- Router Blustream
- Router Dovado
- Router Readynet
- Router Accelerated
- Router Mach Power
- Router ComNet
- Router MuxLab
- Router EXSYS
- Router Avenview
- Router Netcomm
- Router Allied Telesis
- Router A-NeuVideo
- Router Sixnet
- Router OneAccess
- Router Hawking Technologies
- Router Cambium Networks
- Router Lantronix
- Router Sabrent
- Router F-Secure
- Router Keewifi
- Router Shinybow
- Router Starlink
- Router Keenetic
- Router Lumantek
- Router Actiontec
- Router Billion
- Router LTS
- Router Intelix
- Router Arcadyan
- Router 7inova
- Router Nexaira
- Router FSR
- Router Amped Wireless
- Router Ruckus Wireless
- Router Premiertek
- Router GL.iNet
- Router Edgewater
- Router Milesight
- Router PulseAudio
- Router Predator
- Router Comprehensive
- Router Digitalinx
- Router Luxul
- Router Silentwind
- Router Keezel
Neueste Bedienungsanleitung für -Kategorien-

3 Dezember 2024

2 Dezember 2024
2 Dezember 2024
2 Dezember 2024
2 Dezember 2024

1 Dezember 2024
1 Dezember 2024
30 November 2024
29 November 2024
26 November 2024