Samsung Haven U320 Bedienungsanleitung
Samsung
Smartphone
Haven U320
Lesen Sie kostenlos die 📖 deutsche Bedienungsanleitung für Samsung Haven U320 (174 Seiten) in der Kategorie Smartphone. Dieser Bedienungsanleitung war für 6 Personen hilfreich und wurde von 2 Benutzern mit durchschnittlich 4.5 Sternen bewertet
Seite 1/174

User Manual

P O R T A B L E A L L D I G I T A L
M O B I L E P H O N E
User Manual
Please read this manual before operating your
phone, and keep it for future reference.

Intellectual Property
All Intellectual Property, as defined below, owned by or which is otherwise the property of Samsung or its respective suppliers
relating to the SAMSUNG Phone, including but not limited to, accessories, parts, or software relating there to (the “Phone
System”), is proprietary to Samsung and protected under federal laws, state laws, and international treaty provisions. Intellectual
Property includes, but is not limited to, inventions (patentable or unpatentable), patents, trade secrets, copyrights, software,
computer programs, and related documentation and other works of authorship. You may not infringe or otherwise violate the
rights secured by the Intellectual Property. Moreover, you agree that you will not (and will not attempt to) modify, prepare
derivative works of, reverse engineer, decompile, disassemble, or otherwise attempt to create source code from the software. No
title to or ownership in the Intellectual Property is transferred to you. All applicable rights of the Intellectual Property shall remain
with SAMSUNG and its suppliers.
Samsung Telecommunications America (STA), LLC
Headquarters: Customer Care Center:
1301 E. Lookout Drive 1000 Klein Rd.
Richardson, TX 75082 Plano, TX 75074
Toll Free Tel: 1.888.987.HELP (4357)
Internet Address: http://www.samsungusa.com
©
2010 Samsung Telecommunications America, LLC is a registered trademark of Samsung Electronics America, Inc. and its
related entities.
Do you have questions about your Samsung Mobile Phone?
For 24 hour information and assistance, we offer a new FAQ/ARS System (Automated Response System) at:
www.samsungwireless.com/support

VZW_SCH-U320_Haven_English_UM_DC13_TE_040910_F12
GH68-27689A
Printed in Korea
HavenTM is a trademark of Verizon Wireless.
Nuance®
, VSuiteTM, T9® Text Input, and the Nuance logo are trademarks or registered trademarks of Nuance Communications, Inc., or its
affiliates in the United States or other countries.
Openwave® is a registered trademark of Openwave, Inc.
RSA® is a registered trademark of RSA Security, Inc.
Some software components of this product incorporate source code covered under GNU General Public License (GPL), GNU Lesser General
Public License (LGPL), OpenSSL License, BSD License and other open source licenses. To obtain the source code covered under the open
source licenses, please visit:
http://opensource.samsungmobile.com/index.jsp
.
Disclaimer of Warranties; Exclusion of Liability
EXCEPT AS SET FORTH IN THE EXPRESS WARRANTY CONTAINED ON THE WARRANTY PAGE ENCLOSED WITH THE PRODUCT, THE
PURCHASER TAKES THE PRODUCT "AS IS", AND SAMSUNG MAKES NO EXPRESS OR IMPLIED WARRANTY OF ANY KIND WHATSOEVER
WITH RESPECT TO THE PRODUCT, INCLUDING BUT NOT LIMITED TO THE MERCHANTABILITY OF THE PRODUCT OR ITS FITNESS FOR ANY
PARTICULAR PURPOSE OR USE; THE DESIGN, CONDITION OR QUALITY OF THE PRODUCT; THE PERFORMANCE OF THE PRODUCT; THE
WORKMANSHIP OF THE PRODUCT OR THE COMPONENTS CONTAINED THEREIN; OR COMPLIANCE OF THE PRODUCT WITH THE
REQUIREMENTS OF ANY LAW, RULE, SPECIFICATION OR CONTRACT PERTAINING THERETO. NOTHING CONTAINED IN THE INSTRUCTION
MANUAL SHALL BE CONSTRUED TO CREATE AN EXPRESS OR IMPLIED WARRANTY OF ANY KIND WHATSOEVER WITH RESPECT TO THE
PRODUCT. IN ADDITION, SAMSUNG SHALL NOT BE LIABLE FOR ANY DAMAGES OF ANY KIND RESULTING FROM THE PURCHASE OR USE OF
THE PRODUCT OR ARISING FROM THE BREACH OF THE EXPRESS WARRANTY, INCLUDING INCIDENTAL, SPECIAL OR CONSEQUENTIAL
DAMAGES, OR LOSS OF ANTICIPATED PROFITS OR BENEFITS.

1
Table of Contents
Section 1: Getting Started ............................4
Understanding this User Manual . . . . . . . . .4
Using the Battery . . . . . . . . . . . . . . . . . . . .5
Turning Your Phone On and Off . . . . . . . . .12
Set-up Wizard . . . . . . . . . . . . . . . . . . . . . .13
Finding My Phone Number . . . . . . . . . . . .13
Voicemail . . . . . . . . . . . . . . . . . . . . . . . . .13
Section 2: Understanding Your Phone ......16
Features of Your Phone . . . . . . . . . . . . . . .16
Open View of Your Phone . . . . . . . . . . . . .17
Closed View of Your Phone . . . . . . . . . . . .19
Feature Keys . . . . . . . . . . . . . . . . . . . . . . .20
Command Keys . . . . . . . . . . . . . . . . . . . . .21
Understanding the Display . . . . . . . . . . . .24
Section 3: Menu Navigation ......................28
Menu Navigation . . . . . . . . . . . . . . . . . . . .28
Menu Outline . . . . . . . . . . . . . . . . . . . . . .29
Section 4: Call Functions ...........................34
Making a Call . . . . . . . . . . . . . . . . . . . . . .34
Answering a Call . . . . . . . . . . . . . . . . . . . .34
Recent Calls . . . . . . . . . . . . . . . . . . . . . . .36
Voice Commands . . . . . . . . . . . . . . . . . . .40
Section 5: Entering Text ............................45
Changing the Text Entry Mode . . . . . . . . .45
Entering Text Using Word or Palabra Mode 46
Entering Text using Abc/ABC/abc Mode . .47
Entering Symbols . . . . . . . . . . . . . . . . . . .48
Entering Numbers . . . . . . . . . . . . . . . . . . .48
Section 6: Understanding Your Contacts ..49
Accessing Contacts . . . . . . . . . . . . . . . . .49
Contacts Fields . . . . . . . . . . . . . . . . . . . . .49
Adding and Editing Contacts . . . . . . . . . . .50
Deleting Contacts . . . . . . . . . . . . . . . . . . .55
Finding Contacts . . . . . . . . . . . . . . . . . . . .56

2
Speed Dial . . . . . . . . . . . . . . . . . . . . . . . . 56
Making Calls Using Contacts . . . . . . . . . . 58
Emergency Contacts . . . . . . . . . . . . . . . . 58
Making an Emergency Call . . . . . . . . . . . 61
My Name Card . . . . . . . . . . . . . . . . . . . . 61
Section 7: Messaging ............................... 62
Creating and Sending Text Messages . . . 62
Message Folders . . . . . . . . . . . . . . . . . . . 65
Changing Message Settings . . . . . . . . . . 71
Section 8: Pictures & Sounds .................... 73
My Pictures . . . . . . . . . . . . . . . . . . . . . . . 73
My Sounds . . . . . . . . . . . . . . . . . . . . . . . 74
Section 9: Tools ......................................... 75
Calendar . . . . . . . . . . . . . . . . . . . . . . . . . 75
Alarm Clock . . . . . . . . . . . . . . . . . . . . . . . 79
Calculator . . . . . . . . . . . . . . . . . . . . . . . . 81
World Clock . . . . . . . . . . . . . . . . . . . . . . . 83
Stop Watch . . . . . . . . . . . . . . . . . . . . . . . 84
Section 10: Changing Your Settings ..........85
Sound Settings . . . . . . . . . . . . . . . . . . . . .85
Phone Settings . . . . . . . . . . . . . . . . . . . . .89
Key Tutorial . . . . . . . . . . . . . . . . . . . . . . . .97
Set-up Wizard . . . . . . . . . . . . . . . . . . . . . .98
Section 11: Phone Info ...............................99
My Number . . . . . . . . . . . . . . . . . . . . . . . .99
Phone Status . . . . . . . . . . . . . . . . . . . . . . .99
Icon List . . . . . . . . . . . . . . . . . . . . . . . . . .99
Software Version . . . . . . . . . . . . . . . . . . . .99
Section 12: Wellbeing & Health ...............100
Reminder . . . . . . . . . . . . . . . . . . . . . . . .100
Fitness Trainer . . . . . . . . . . . . . . . . . . . .101
Healing Music . . . . . . . . . . . . . . . . . . . . .102
Medical Info . . . . . . . . . . . . . . . . . . . . . .103
Section 13: My Verizon ............................104

3
Section 14: Health and Safety Information ...
105
Health and Safety Information . . . . . . . . .105
Please Note the Following
Information When Using Your Handset .108
Samsung Mobile Products
and Recycling . . . . . . . . . . . . . . . . . . .109
UL Certified Travel Adapter . . . . . . . . . . .109
Consumer Information on
Wireless Phones . . . . . . . . . . . . . . . . .110
Road Safety . . . . . . . . . . . . . . . . . . . . . .123
Responsible Listening . . . . . . . . . . . . . . .126
Operating Environment . . . . . . . . . . . . . .129
Using Your Phone Near Other
Electronic Devices . . . . . . . . . . . . . . . .130
FCC Hearing-Aid Compatibility (HAC)
Regulations for Wireless Devices . . . . .131
Potentially Explosive Environments . . . . .135
Emergency Calls . . . . . . . . . . . . . . . . . . .136
FCC Notice and Cautions . . . . . . . . . . . . .137
Other Important Safety Information . . . . .138
Product Performance . . . . . . . . . . . . . . .139
Availability of Various Features/
Ring Tones . . . . . . . . . . . . . . . . . . . . .141
Battery Standby and Talk Time . . . . . . . .142
Battery Precautions . . . . . . . . . . . . . . . .142
Care and Maintenance . . . . . . . . . . . . . .145
Section 15: Warranty Information ........... 148
Standard Limited Warranty . . . . . . . . . . .148
End User License Agreement
for Software . . . . . . . . . . . . . . . . . . . . .155
Index ..........................................................165

Getting Started 4
Section 1: Getting Started
This section helps you to start using your
phone by activating your service, setting
up your voicemail, contacting customer
support, and getting an understanding of
how this manual is put together.
Understanding this User Manual
The chapters of this manual generally
follow the order of your phone’s menus.
You can find a robust index on page 165.
Also included is important safety
information that you should know before
using your phone. Most of this
information is near the back of the
manual, beginning on page 105.
Note:
All screen images in this manual
are simulated. Actual displays may
vary. Instructions to perform tasks
in this manual may change
depending on the software version
on your phone.
Note:
Unless otherwise specified, all
instructions in this manual assume
that you are starting from the Home
screen, with the flip open.

5
Throughout this manual you will find text
set apart from the rest, to identify key
information. The definitions for these
methods are as follows:
• Note
: Provides additional information about
the current feature, menu, or action.
• Tip
: Explains quick or innovative methods
related to the current subject.
• Important
: Points out information about the
current topic that could affect performance,
or even damage your phone.
Using the Battery
Your phone comes packaged with a
partially-charged rechargeable Li-ion
battery, a wall charger and a cradle
charger.
You must fully charge the battery before
using your phone for the first time.
Note:
A fully discharged battery requires
up to 4 hours of charge time.
Important!:
Although the phone can be
used while the battery is
charging, the battery must be
fully charged before first use,
otherwise you could damage
the battery.

Getting Started 6
The battery indicator in the upper-right
corner of the display indicates battery
power level. Four bars means a full
charge, while an empty icon means
an almost-empty battery. Two to three
minutes before the battery becomes too
low to operate, the empty battery icon
blinks, a tone sounds, and “
BATTERY
LOW
” appears on the display. If you
continue to operate the phone without
charging, it will shut down.
Samsung handsets do not support the
use of a non-supported battery.
Important!:
Using a non-supported
battery may cause damage to
your phone. Use a Samsung
supported battery only.
When using a non-supported battery you
will hear a series of beeps and you will
see a warning message that indicates
“
NON SUPPORTED BATTERY. SEE USER
MANUAL
” If you receive this warning,
battery charging has been disabled.

7
Samsung charging accessories (wall
charger, charging cradle and cigarette
lighter adapter) will only charge a
Samsung approved battery. To continue
using your handset, press .
Note:
When using a non-supported
battery, the handset can only be
used for the duration of the life of
the battery and cannot be
recharged.
The battery is located under the battery
cover on the back of the phone
䊳
Press down on the arrow while sliding
back, then lift the cover up and off the
phone.
Model:SCH-U320
Date :2009 -11-16 Phase:
MEID:A00000177FB58F
MEI D
(Dec) :268435458308369551

Getting Started 8
䊳
Press and slide the cover down and up
until it snaps onto the phone.
1.
Remove the battery cover. See
“Removing the Battery Cover” on
page 7.
2.
Insert the end of the battery into the
phone (1), aligning the gold contacts
on the battery with the contacts on
the phone. Push the bottom of the
battery down until it snaps into
place (2).
3.
Replace the battery cover as shown
at left.
Mode l:SCH-U320
Date :2009 -11-16 Phase:
MEID:A00000177FB58F
MEID
(Dec) :268435458308369551
Mode l:SCH-U320
Date :2009 -11- 16 Phase:
MEID:A00000177FB58F
MEI D (Dec):268435458308369551
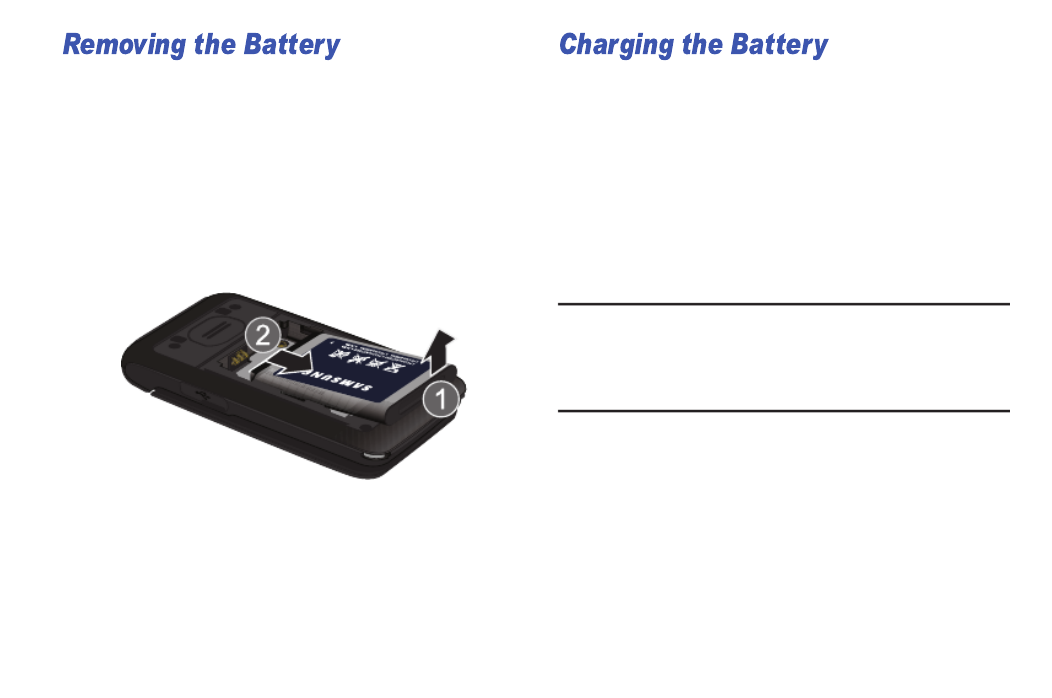
9
1.
Remove the battery cover. See
“Removing the Battery Cover” on
page 7.
2.
Lift the battery from the bottom
end (1), pulling it up and out of the
phone (2).
3.
Replace the battery cover. See
“Replacing the Battery Cover” on
page 8.
Use only Samsung-approved charging
devices and accessories with your
Samsung phone. Samsung accessories
are designed to maximize battery life.
Using other accessories may invalidate
your warranty and may cause damage.
Note:
You can use the phone while
charging, but the battery will
charge faster if the phone is off.
Model:SCH-U320
Dat e :2009 -11-16 Phas e:
MEID:A00000177FB58F
ME ID (Dec):268435458308369551

Getting Started 10
Wall Charger
The convenient light-weight wall charger
rapidly charges your battery from any
120/ 220 VAC outlet.
1.
Pull the connector cover out and turn
to expose the connector. Insert the
wall charger adapter end, with the
arrow up, into the connector.
2.
Plug the wall charger into a standard
AC wall outlet.
3.
When the phone is completely
charged (the battery icon is still),
unplug the charger from the power
outlet. Remove the adapter from the
connector and replace the connector
cover.
Incorrect
Correct

11
Cradle Charger
The cradle charger rapidly charges your
phone from any 120/ 220 VAC outlet.
Note:
The cradle charger must be
connected to a 120/220 VAC outlet
to charge the phone.
1.
Plug the wall charger into a standard
AC wall outlet.
2.
Insert the other end of the wall
charger into the cradle charger.
3.
Insert the phone into the cradle
charger until it seats at the bottom
contacts.

Getting Started 12
4.
When the battery is completely
charged (the battery icon is still),
unplug the charger from the power
outlet and remove the phone from
the cradle.
Turning Your Phone On and Off
Turning Your Phone On
1.
Open the flip, then press .
The phone turns on.
2.
Once the phone finds a signal, the
time, day, and date appear in the
display. You’re now ready to place
and receive calls.
Note:
If the phone is outside the Verizon
Wireless coverage area, the
roaming icon appears at the top
of the display.
Turning Your Phone Off
䊳
Open the flip, then press and hold
for two seconds. The phone turns off.
Note:
Your phone has an internal antenna,
located on the bottom back of the
phone. As with any other radio-
transmitting device, touching the
internal antenna affects call quality
and may cause the phone to
operate at a higher power level
than is necessary.
POWER
/
POWER
/

13
Set-up Wizard
Use the Set-up Wizard to personalize
your phone.
1.
From the home screen, press the
Left Soft Key
Menu
➔
Settings
➔
Set-up Wizard
.
2.
At the prompt “
Do you want to
personalize your phone now?
”,
press
the Left Soft Key
Yes
, then
follow the prompts to set:
•Font Size
•Wallpaper
•Ringer Volume
•Ringtone
Finding My Phone Number
䊳
From the home screen, press the Left
Soft Key
Menu
➔
Contacts
➔
My Name Card
.
Voicemail
Voicemail allows callers to leave voice
messages. Since all unanswered calls
are sent to voicemail, you’ll want to set
up your voicemail as soon as you
activate your phone.
Note:
Calling minutes do not apply when
setting up or listening to Voicemail.
Getting Started 14
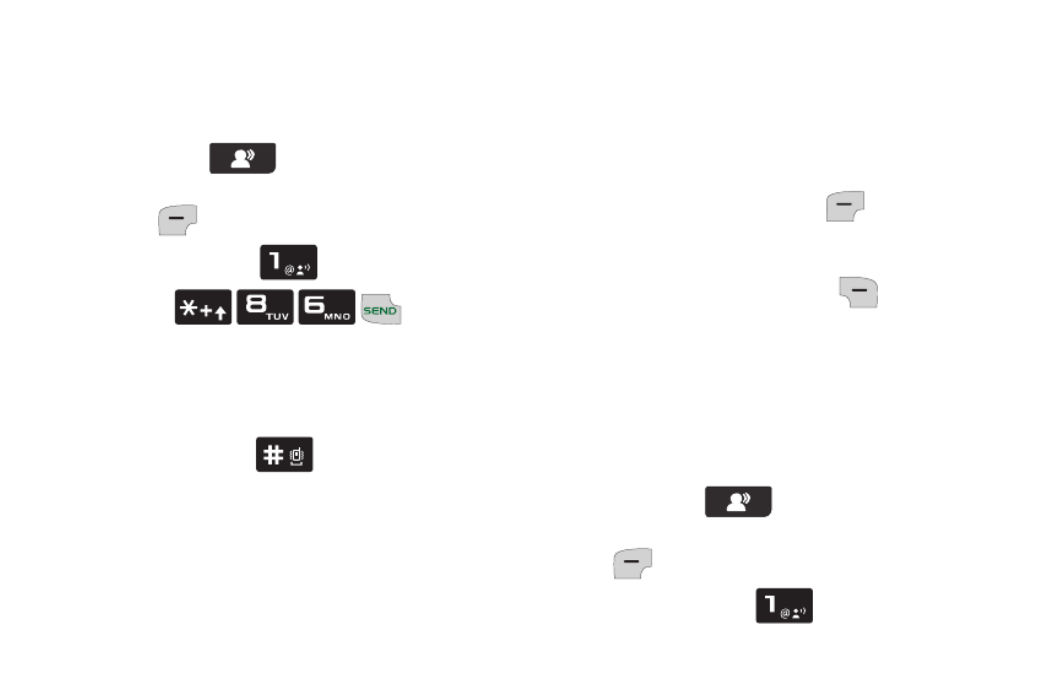
Setting up Voicemail
1.
To access Voicemail, use one of
these methods:
•
Press the
Voicemail
Key
(below
the main display), then press the Left Soft
Key
Call
.
•
Press and hold .
•
Press .
•
Dial your mobile phone number from any
touch-tone phone.
2.
When the recorded announcement
begins, press to interrupt (if
applicable). Follow the instructions
in the setup tutorial to create a
password and record a greeting.
Voicemail Alerts
When you receive a new voicemail
message, your phone plays a tone and
displays an alert on the screen.
䊳
Press the Left Soft Key
Listen
to
dial
Voicemail
to listen to voicemail, or
press the Right Soft Key
Later
to
dismiss the alert.
Listening to Voicemail
1.
To access Voicemail, use one of
these methods:
•
Press the
Voicemail
Key
(below
the main display)
➔
the Left Soft Key
Call
.
•
Press and hold .

15
•
Press .
•
Dial your wireless phone number from any
touch-tone phone.
2.
At the prompt, enter your password
followed by . Follow the
prompts to listen to messages,
change administrative options, etc.

Understanding Your Phone 16
Section 2: Understanding Your Phone
This section outlines features of your
phone, as well as screens and icons that
display when the phone is in use.
Features of Your Phone
•
All Digital CDMA 1x Technology
•
Global Positioning (GPS) Technology
•
Text Messaging
•
Voice Commands Advanced Speech
Recognition
•
Dedicated Feature Keys:
–
911
–
In Case of Emergency (ICE)
–
Speakerphone
–
Voice Commands
–
Picture Gallery
–
Voicemail
•
Personal Organization Tools:
–
Calendar
–
Alarm Clock
–
Calculator
–
Tip Calculator
–
World Clock
–
Stop Watch
•
Wellbeing & Health
–
Reminder
–
Fitness Trainer
–
Healing Music
–
Medical Info

17
Open View of Your Phone
Features
1. Internal LCD
: Displays information
needed to operate your phone.
2. Voice Commands Key
: Press to
activate Voice Commands.
3. My Pictures Key
: Press to open My
Pictures.
4. Voicemail Key
: Press for voicemail.
5. 911 Key
: Press to call 911.
6. Left Soft Key
: Press to select the
choice on the lower left corner of the
display.
7. ICE (In Case of Emergency) Key
: Press
to open the ICE contacts screen.
1
2
3
4
5
6
7
8
9
10 11
12
13
14
15
16
17
18

Understanding Your Phone 18
8. Send Key
: Press to place or answer a
call. From the home screen, press
once to open the All Calls log, or
twice to call the last number.
9. Alphanumeric Keypad
: Press to enter
numbers, letters and characters.
10. Special Function Keys
: Press to enter
special characters or perform
various functions.
11. Microphone
: Picks up your voice so
the other caller can hear you clearly
when you are speaking to them.
12. Clear Key
: Press to delete characters
when you entering text. Press to
return to the previous menu or
screen when navigating.
13. Power/End Key
: Press to end a call.
Press to turn the phone On. Press
and hold to turn the phone Off. Press
to send incoming call to voicemail.
14. Speakerphone Key
: Press to turn the
speakerphone On or Off.
15. Right Soft Key
: Press to select the
choice on the lower right corner of
the display.
16. OK Key
: Press to accept the
highlighted choice in a menu, or
perform an action in a feature.
17. Navigation Key
: Press to scroll
through menus or features.
18. Earpiece
: Listen to callers or
prompts.

19
Closed View of Your Phone
Features (Closed view)
1. Strap Holder
: Attach a carrying strap.
(Strap not included.)
2. 2.5mm Headset Jack
: Plug in an
optional headset for safe, convenient
conversations.
3. Volume Key
: Adjust the master
volume, or voice volume during a
call. Press to mute the ringer for an
incoming call. Press and hold to turn
Sound Off mode Off or On.
4. External LCD
: Shows signal strength,
battery strength and time. Also
displays incoming calls or new
message notifications.
5. Power/Accessory Connector
: Connect
charging accessories.
6. Speaker
(on back of phone): When
Speakerphone is active, listen to
callers or prompts.
1
2
34
5
6

Understanding Your Phone 20
Feature Keys
Feature keys provide one-touch access
to your phone’s important features.
Voice Commands Key
Press the
Voice Commands
Key
(below the main display)
to launch
Voice
Commands
. For more information, see
“Voice Commands” on page 40.
My Pictures Key
Press the
My Pictures
Key
(below the main display)
to open
My
Pictures
. For more information, see “My
Pictures” on page 73.
Voicemail Key
Press the
Voicemail
Key
(below the main display)
to call
Voicemail
.
For information about setting up and
listening to Voicemail, see “Voicemail”
on page 13.
911 Key
Press the
911 Key
to make an
emergency call to 911.
•
Press
.
The prompt “
CALL 911?
”
displays, press the Left Soft Key
Yes
or
the Right Soft Key
No
, to cancel.

21
ICE Key
The
ICE
Key
opens the
In Case of
Emergency
screen to display your list of
emergency contacts and Medical Info.
Speakerphone Key
Use the
Speakerphone
Key
to
switch between the earpiece and the
speakerphone before or during a call.
•
To turn speakerphone on or off, press
Speakerphone
. Use the volume keys
(on the left side of the phone) to adjust the
volume.
•
During a call, press
Speakerphone
at any time to turn the speakerphone on or
off.
•
When you end the call, the speakerphone
turns off automatically.
Command Keys
Left Soft Key
The Left Soft Key activates the
function in the bottom left corner of the
display, including:
•
From the home screen, press the Left Soft
Key
Menu
to open the
Menu
.
•
In menus, some Left Soft Key functions are:
View
,
Set
,
Save
and
Select
.
•
When creating Text messages, some Left
Soft Key functions are:
Edit
,
Next
and
Send
.
I
SP
SP
SP
SP
SP
K
K
K
KK
SP
SP
SP
SP
SP
K
K
K
KK
SP
SP
SP
SP
SP
K
K
K
KK
23
Navigation Key
Use the
Up
,
Down
,
Left
and
Right
Navigation
Keys
to browse menus
and lists. From the home screen, each
key also acts as a shortcut to launch
applications:
• Up
: My Verizon
• Down
: Calendar
• Left
: Inbox
• Right
: Alarm Clock
Power/End Key
Use the
Power/End
Key
for call
functions, or to navigate menus or tools.
•
Press to turn the phone On.
•
Press and hold to turn the phone Off.
•
Press to end a call.
•
Press to return to the home screen
from any menu, or to cancel the last input.
•
Press to send an incoming call
directly to Voicemail.
POWER
/
POWER
/
POWER
/
POWER
/
POWER
/
POWER
/
Understanding Your Phone 24
Send Key
Use the
Send
Key
for call functions,
and to send messages.
•
Press to answer calls.
•
To make a call, enter the phone number
and press .
•
From the home screen:
–
Press to display a list of all calls to
and from your phone.
–
Press twice to call the last dialed,
received, or missed number.
•
During a call, press to answer a
waiting call. To switch back to the first call,
press again.
•
After composing a message, press to
send the message.
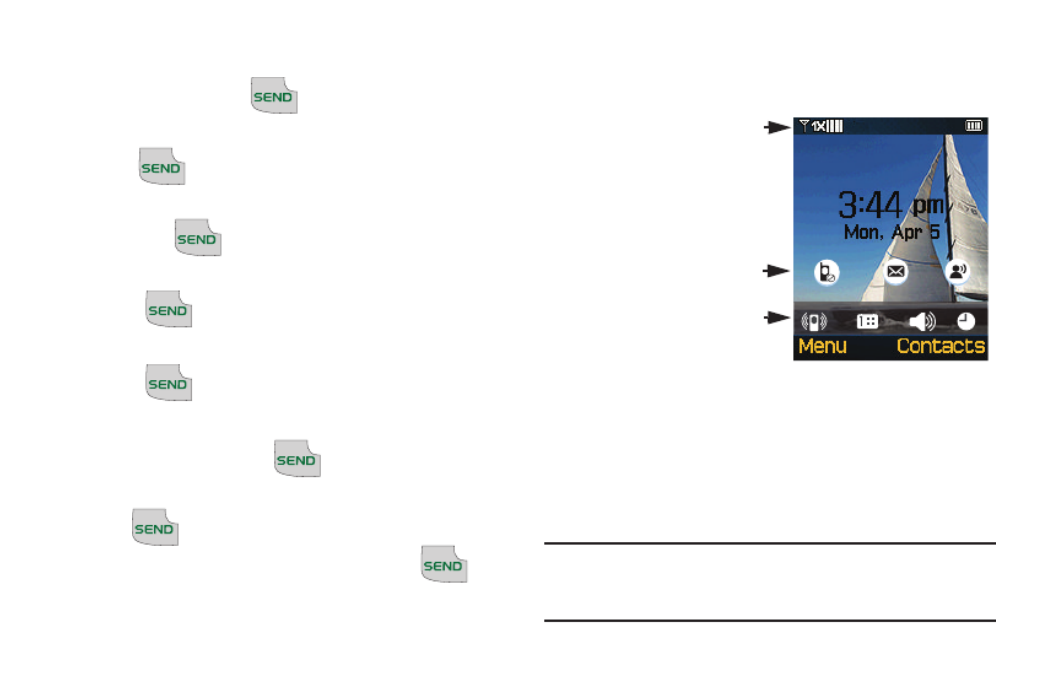
Understanding the Display
The top line of
your phone’s
display contains
icons to indicate
network status,
battery power,
signal strength,
and connection
type. The middle
area displays missed calls, new
messages and voicemail alerts. The
bottom line of the home screen shows
status icons.
Note:
This default home screen image is
simulated. Actual display may vary.
Verizon Wireless
Default Home Screen

25
Top Line icons
Signal strength
: Current signal
strength. More bars indicate a
stronger signal.
Roaming
: Your phone is outside
your home network area. While
roaming, another wireless
provider may be handling your
call. The service rate for the call
may be higher than those made
from within your home area.
Please refer to Verizon Wireless
for roaming rates.
TTY
: The TTY feature is active.
No service
: Your phone cannot
find a signal because you’re
outside a service area. You
cannot make or receive calls.
Wait for a signal or move to
another area to find a signal. May
appear when you first turn on
your phone and disappear when
your phone finds service.
Voice Call
: A call is in progress.
Battery Level
: More bars indicate
a greater charge. When the
battery is low, an empty battery
icon flashes and the phone
sounds an alert, which indicates
your phone is about to shut down.

Understanding Your Phone 26
Middle Display Icons Bottom Display Icons
Missed Calls
: You have missed
call(s).
New Msgs
: You have new
message(s). You’re also notified
of a new message by animations
and sound.
Voicemail
: You have one or more
unread voicemail messages in
your voicemail box. (Only
applicable on the Verizon
Wireless Network.)
All Sounds Off
: The ringer is
silenced for all alerts, and
incoming calls and messages.
Alarm Only
: Your phone will only
ring when the set alarm sounds.
Vibrate Only
: Your phone will
vibrate when you receive a call.
Speakerphone
: Speakerphone is
in use.
Calendar Appt
: A calendar
appointment is scheduled.
Alarm On
: An alarm is set.

27
Prompts
While using your phone, you will receive
prompts to alert you. Examples include:
• Choice
: “SAVE MESSAGE?”
• Confirmation
: “ERASE ALL
MESSAGES?”
• Performing
: “SENDING...” or
“CONNECTING...”
• Completed
: “MESSAGE SENT”
• Information
: “NEW MESSAGE”
• Error
: “SYSTEM ERROR!”
• Warning
: “BATTERY LOW” or
“MEMORY FULL!”

Menu Navigation 28
Section 3: Menu Navigation
Menu Navigation
Navigation Key and Soft Keys
You can navigate menus using the
Navigation
Keys
and Soft Keys
and .
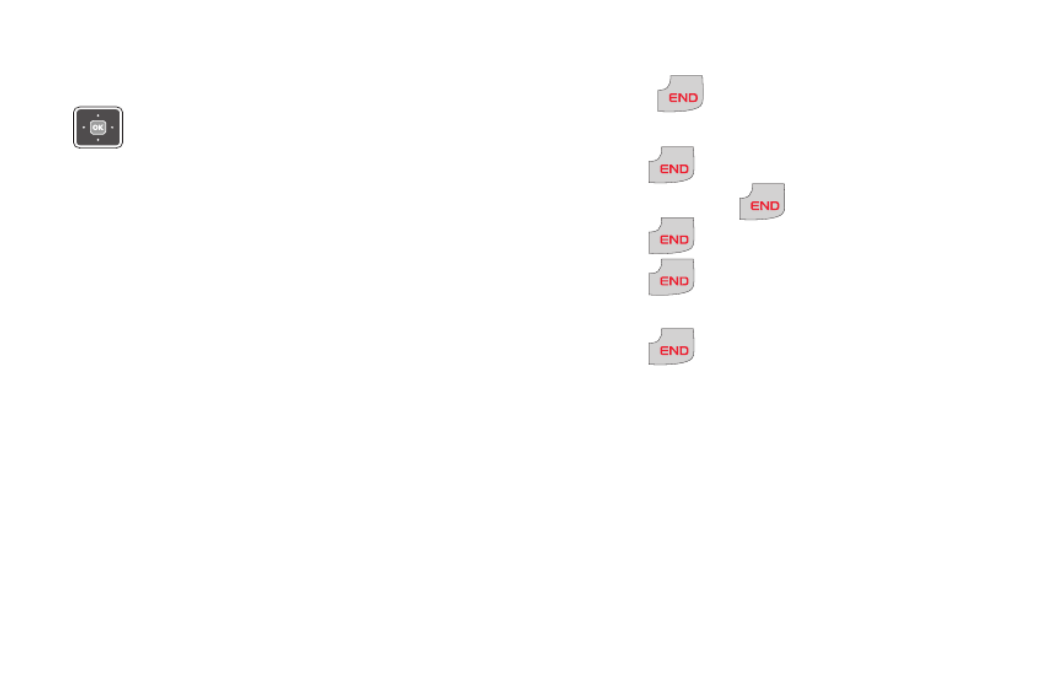
For example, to launch Alarm Clock:
1.
From the home screen, press the
Left Soft Key
Menu
to display
the
Menu
.
2.
Press the
Down
Navigation
Key
to highlight
5. Tools
, then press .
3.
Press the
Down
Navigation
Key
to highlight
2. Alarm Clock
, then
press .
Return to the Previous Menu
Press to return to the previous
menu.
Menu Number Accelerators
Use menu numbers as accelerators to
navigate menus faster and with fewer
key presses.
For example, to launch Alarm Clock:
1.
From the home screen, press the
Left Soft Key
Menu
to display
the
Menu
.
2.
Press
Tools
➔
Alarm
Clock
.

29
Navigation Key Shortcuts
From the home screen, press a
Navigation
Key
to launch its
corresponding application.
Menu Outline
This outline shows the menu structure,
including the accelerator number for
each menu item.
1: Contacts
1. Contact List
2. New Contact
3. Edit Contact
4. Erase Contact
5. Speed Dials
6. In Case of Emergency
7. My Name Card
2: Recent Calls
1. Missed Calls
2. Dialed Calls
3. Answered Calls
Calendar
My Verizon
Alarm ClockInbox

Menu Navigation 30
4. All Calls
5. Call Timers
3: Messaging
1. Voicemail
2. Send Message
1. Contacts
2. Enter Number
3. Recent Calls
3. Inbox
4. Drafts
5. Sent
6. Settings
1. Voicemail Alert
1. Alert Tone
2. Reminder
2. Voicemail #
3. Message Alert
1. Alert Tone
2. Reminder
4. Entry Mode
5. Auto Erase Inbox
6. Auto Receive
4: Pictures & Sounds
1. My Pictures
2. My Sounds
5: Tools
1. Calendar
2. Alarm Clock
3. Calculator
4. Voice Commands
5. Tip Calculator
6. World Clock
7. Stop Watch

31
6: Settings
1. Sound Settings
1. Ringtone
2. Volume Level
3. Vibrate Mode
4. Keypad Volume
5. Voice Commands
1. Menu Readout
2. Digit Readout
3. Alert Readout
4. Flip Open & Talk
5. TXT Message Readout
6. Full Readout
6. Voicemail Alert Tone
7. Message Alert Tone
8. Advanced Settings
1. Attach Accessory
2. Power On/Off
3. Roam Tone
4. Minute Beep
5. Call Disconnect
6. Emergency Tone
2. Phone Settings
1. Wallpaper
2. Banner
1. Personal
2. Network
3. Backlight
4. Font Size
5. Display Themes
6. Language
7. Advanced Settings
1. Answer Call Options
2. One Touch Dial

Menu Navigation 32
3. TTY
4. DTMF Tones
5. Auto Retry
6. Reset Phone
3. Key Tutorial
4. Set-up Wizard
7: Phone Info
1. My Number
2. Phone Status
3. Icon List
4. Software Version
8: Wellbeing & Health
1. Reminder
1. Reminder 1
2. Reminder 2
3. Reminder 3
4. Reminder 4
5. Reminder 5
2. Fitness Trainer
1. Ankle Exercise
2. Leg Exercise
3. Arm Stretch
4. Calf Exercise
5. Buttocks Exercise
6. Back of Thigh Exercise
7. Shoulder Exercise
8. Spine Stretch
9. Side Exercise
10. Back Exercise
11. Thigh Exercise
12. Neck Exercise
13. Knee Exercise
14. Wrist Exercise

33
15. Pelvic Exercise
3. Healing Music
1. Sky
2. Leaf
3. Cloth
4. Rain
4. Medical Info
9: My Verizon

Call Functions 34
Section 4: Call Functions
This section describes making and
answering calls, and the features and
functionality associated with calls.
Making a Call
䊳
From the home screen, enter the
phone number using the numeric
keypad and press .
Tip:
You have other options for making
calls. For more information, see
“Making Calls Using Recent Calls” on
page 37 or see “Making Calls Using
Contacts” on page 58.
Answering a Call
To answer a call when the phone is
closed:
䊳
Flip the phone open.
To answer a call when the phone is
already open:
䊳
Press the Left Soft Key
Answer
.
- or -
䊳
Press .

37
Tip:
You can also launch Recent Calls
from the home screen. Press ,
then press
Navigation
Key
to
scroll between Missed Calls, Dialed
Calls and Answered Calls.
Recent Calls Icons
In Recent Calls, an icon indicates the
type of call:
Making Calls Using Recent Calls
1.
From the home screen, press .
2.
Press the
Navigation
Key
to
highlight the desired call, then press
to call the highlighted number.
Viewing Call Information
1.
From the home screen, press .
2.
Press the
Navigation
Key
to
highlight the desired call, then press
the Left Soft Key
View
.
3.
The call’s information displays:
•Call Type
: Missed, Dialed, or Answered.
•Name
: If the telephone number is in your
Contacts list, the contact name is shown,
with the icon to indicate Mobile 1, Mobil
Missed Call
Dialed Call
Answered Call

Call Functions 38
2, Home or Work. If the caller is not in
your Contacts list, No Name displays.
•Number
: The telephone number.
•Time
: The time of the call.
•Date
: The date of the call.
•Duration
: The duration of the call, for
Dialed or Answered calls.
4.
If the telephone number is stored in
your Contacts list, press the Left Soft
Key
Details
to view the Contact
entry.
5.
If the telephone number is not stored
in your Contacts, press the Left Soft
Key
Save
to save the
information as a
New Contact
or to
Update
Existing
contact information.
6.
Press the Right Soft Key
Message
to send a text message
to the telephone number.
Creating or Editing Contacts Using
Recent Calls
1.
From the home screen, press .
2.
Press the
Navigation
Key
to
highlight the desired call, then press
the Right Soft Key
Options.
3.
Highlight
Save
, then press .
4.
Press the
Navigation
Key
to
highlight
New Contact
or
Update
Existing
, and press .

39
5.
Continue entering information for the
Contact entry. For more information,
see “Adding and Editing Contacts”
on page 50.
Deleting a Recent Call Record
1.
From the home screen, press .
2.
Press the
Navigation
Key
to
highlight a call.
3.
Press the Right Soft Key
Options
,
then highlight
Erase
and press .
4.
At the “
ERASE CALL?
” prompt, press
the Left Soft Key
Yes
to erase
the call record.
Deleting All Call Records
1.
From the home screen, press .
2.
Press the Right Soft Key
Options
,
then highlight
Erase All
and press
.
3.
At the “
ERASE ALL <Call Type>?
”
prompt, press the Left Soft Key
Yes
or the Right Soft Key
No
at the pop-up screen, where call
type specifies the type of call history
you are viewing: all calls, missed
calls, dialed calls or answered calls.

Call Functions 40
Voice Commands
Voice Commands is advanced speech
recognition software that recognizes
your spoken commands to dial phone
numbers, send text messages, and
launch phone features such as Contacts,
New Text Message, and Calendar.
To use Voice Commands, speak naturally
into your phone, at a distance of 3-12
inches. There is no pre-recording or
training needed.
To launch Voice Commands:
䊳
Press the
Voice Commands Key
(below the main display).
Tip:
With the
Flip Open & Talk
setting, you
set Voice Commands to launch when
you flip open the phone in idle mode.
For more information, see"Voice
Commands" on page 87.
The following is a list of functions that
you can perform with Voice Commands:
• Call <Name>
: Place a call to a saved contact,
or to a telephone number, or to voicemail.
• Send Text <Name>
: Create a text message to
a saved contact.
• Check <Item>
: Listen to phone information,
including Status, Voicemail, Messages, Missed
Calls, Time, Signal Strength, Battery, Volume,
Balance, Minutes, Payment and My Number.

41
Call <Name>
1.
Press the
Voice Commands
Key
(below the main display). The
audio prompt sounds, “Please say a
command” and the Voice
Commands options display.
2.
Say “Call” followed by a contact
name, a telephone number, or
“Voicemail”.
3.
If Voice Commands recognizes the
contact name, it prompts, “Did you
say <name>?” Say “Yes” or “No”
to confirm or reject the name. If
confirmed, the voice commands
system says “Calling” and dials the
number.
4.
If the contact has more than one
phone number, Voice Commands
prompts “Which location?” and
displays the contact’s numbers. Say
the location (for example, “Mobile
1”, “Home”, “Work”, or “Mobile 2”).
5.
Say Yes to confirm the number and
place the call, or No to try again.
Note:
If Voice Commands does not
recognize your command, it will
prompt you to confirm.

Call Functions 42
Send Text <Name>
1.
Press the
Voice Commands
Key
(below the main display). An
audio prompt sounds, “Please say a
command” and the Voice
Commands options display.
2.
Say “Send Text”, followed by a
contact name.
3.
If the contact has more than one
phone number, Voice Commands
prompts “Which location?” and
displays the contact’s numbers. Say
the location (for example, “Mobile
1”, “Home”, “Work”, or “Mobile 2”).
4.
If Voice Commands recognizes your
input, the Send To: screen opens
with your recipient shown. Press the
Left Soft Key
Next
to continue.
5.
On the
Message
screen, enter your
text message. For more information,
see “Creating and Sending Text
Messages” on page 62.
6.
To send your message, press the
Left Soft Key Send.
Note:
If at any time Voice Commands
does not recognize your command,
it will ask you to confirm by
repeating the command.

Call Functions 44
–
Always Confirm
: The system always
prompts you to confirm your selection.
–
Never Confirm
: The system selects the
best match.
•Prompts
: Configure the audio guidance
provided by the system:
–
Mode
: Choose
Prompts
(default) to have
your phone give audio prompts for required
information,
Readout
to have your phone
read out all screen prompts as well as
audio prompts, or by
Tones Only
to have
your phone only use tones to prompt you.
Tip:
With
Readout
prompt mode, your
phone can read out options as you
scroll through them using the
Navigation Keys
, or read out the text
of
Info
screens (available by pressing
the Left Soft Key
Info
.)
–
Audio playback
: Hear audio playback on
the
Speakerphone
or through the
Earpiece
.
–
Timeout
: The length of time the system
listens before timing out:
5 seconds
or
10
seconds
.
•About
: Displays information about Voice
Commands, including version number,
build number, and device.

45
Section 5: Entering Text
This section outlines how to select the
desired text input mode when entering
characters.
Your phone offers five text entry modes:
• Word
: English predictive text
• Palabra
: Spanish predictive text
• Abc/ABC/abc
: Standard text entry
• 123
: Numeric characters
• Symbols
: Common text symbols
Changing the Text Entry Mode
When entering text, you can change the
Text Entry Mode to your preference.
䊳
While entering text, press the Right
Soft Key
Options
➔
Entry
Mode
, then select a text entry mode.
Tip:
When you are entering text into a
field, the Right Soft Key shows
the current text entry mode.
Tip:
While entering text, press and hold
the key to toggle between
Abc
,
123, Word
and
Palabra
entry modes.
Then, briefly press the key to
change to initial case, upper case or
lower case within the entry mode.

Entering Text 46
Entering Text Using Word or
Palabra Mode
Word
and
Palabra
text entry recognizes
the most commonly used word for any
sequence of key presses and inserts that
word into your message. It’s much faster
than the traditional method of text entry
and requires only one key press per
letter of the word.
Follow this example to enter the English
word “
Hello
”:
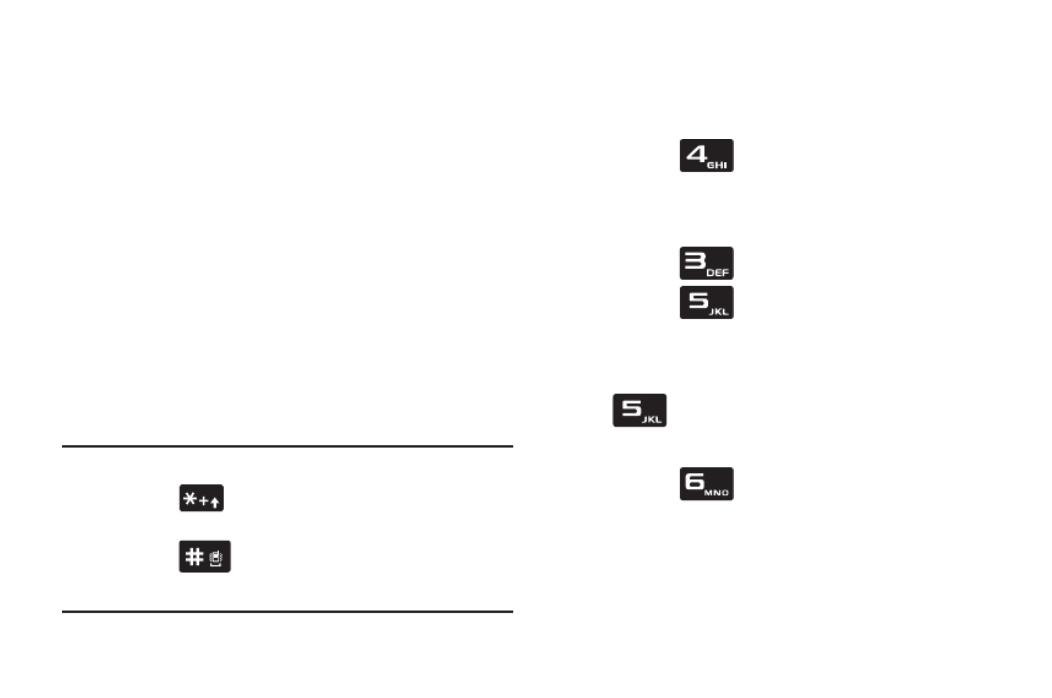
1.
Press .
Word
recognizes that the most
common English word for this
sequence of numbers is “
HELLO
.” If
more than one word shares the
same sequence, Word provides the
most common of the two.
2.
After a word is entered, if it is not the
word you intended, press the
key to select an alternate word, if
needed.
Note:
Press to enter spaces
between words.
47
Entering Text using Abc/ABC/
abc Mode
With standard text entry mode, press the
key for each letter multiple times, equal
to the letter’s position on the key.
Standard text entry modes include:
• Abc
: Initial case. The first letter of the first
word is capitalized, then the mode defaults
to abc.
• ABC
: Upper case. All letters are capitalized.
• abc
: Lower case. All letters are lower case.
Tip:
To change case while entering text,
press briefly.
Press to enter spaces between
words.
With the text entry mode set to
Abc
,
follow this example to enter the English
word “Hello”:
1.
Press twice to enter “H”. The
text entry mode automatically
defaults to
abc
.
2.
Press twice to enter “e”.
3.
Press three times to enter “l”.
4.
Wait a moment for the cursor to
move to the next position. Press
three times to enter the
second “l”.
5.
Press three times to enter “o”.

51
“Adding Pauses and Waits”
on
page 54.
•
Home
: Enter a home phone number
(optional).
•
Work
: Enter a business phone
number (optional).
•
Mobile 2:
Enter a secondary phone
number (optional).
•
Ringtone
: Press the Right Soft Key
Assign
to assign a ringtone, to play
when the contact calls (optional).
•
Picture
: Press the Right Soft Key
Assign
to assign a picture from My
Pictures to identify the contact.
4.
When finished, press the Left Soft
Key
Save
.
You can add a contact by entering the
telephone number from the home
screen, then saving it to Contacts.
1.
From the home screen, enter a
telephone number using the keypad,
then press the Left Soft Key
Save
.
2.
Press
New Contact
.
3.
Press the
Navigation
Key
to
choose the number type:
• Mobile 1
• Home
• Work
Understanding Your Contacts 52
• Mobile 2
4.
Press the
Navigation
Key
to
highlight fields and continue
entering information.
Note:
The Name field is required for all
Contacts. All other fields are
optional.
5.
When you finish entering
information, press the Left Soft Key
Save
.
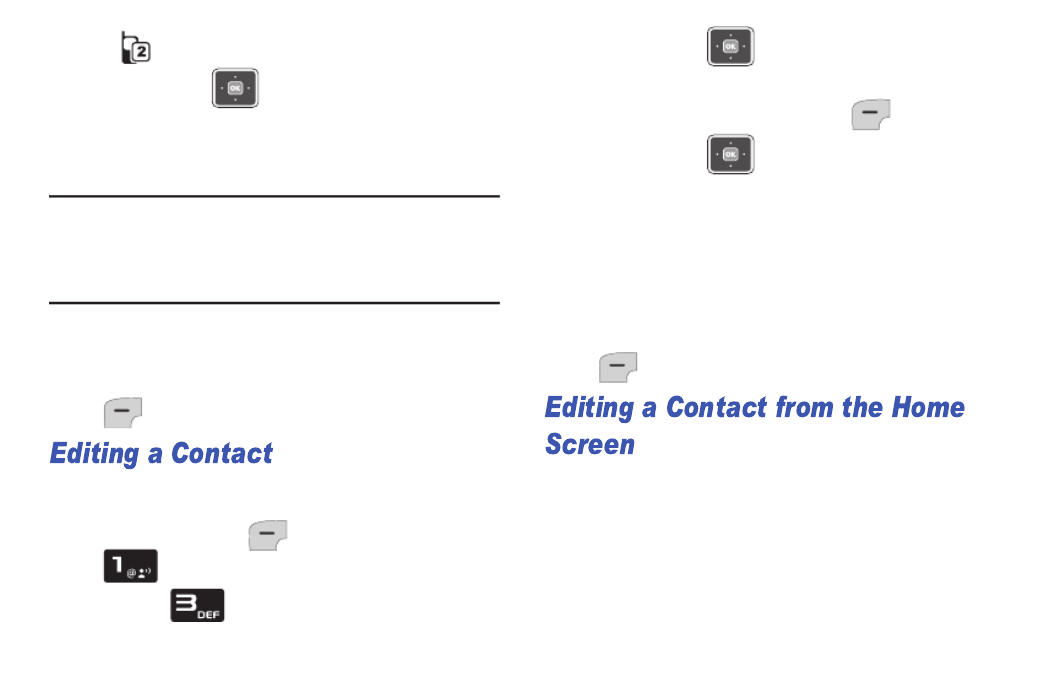
1.
From the home screen, press the
Left Soft Key Menu ➔
.Contacts
2.
Press
Edit Contact
.
3.
Press the
Navigation
Key
to
choose a contact for editing, then
press the Left Soft Key
Edit
.
4.
Press the
Navigation
Key
to
highlight fields and edit information.
For more information about entering
text, see “Entering Text” on page 45.
5.
When you finish entering
information, press the Left Soft Key
Save
.
You can edit a contact by entering a new
telephone number from the home
screen, then saving it to Contacts.

55
Deleting Contacts
1.
From the home screen, press the
Right Soft Key
Contacts
.
2.
Press the
Navigation
Key
to
highlight the contact entry.
3.
Press the Right Soft Key
Options
➔
Erase Contact
.
4.
At the prompt “
ERASE CONTACT?
”
press the Left Soft Key
Yes
to
delete the contact.
1.
From the home screen, press the
Left Soft Key Menu ➔
.Contacts
2.
Press
Erase Contact
.
3.
Press the Right Soft Key
Options
➔
Erase All
.
4.
At the prompt “
ERASE ALL
CONTACTS?
” press the Left Soft Key
Yes
.

Understanding Your Contacts 58
Contact name and number appear and
the number dials. For example, press
and hold to dial the number
assigned to Speed Dial 2.
Making Calls Using Contacts
You can dial the contacts directly from
your Contacts list.
1.
From the home screen, press the
Right Soft Key
Contacts
.
2.
Press the
Navigation
Key
to
highlight a contact, then press the
Left Soft Key
View
.
Note:
To find a contact, enter the first few
letters of the name in the Find field.
3.
The contact details display. If the
entry contains more than one
number, press the
Navigation
Key
to highlight the desired number.
4.
Press to call the number.
Emergency Contacts
1.
From the home screen, press the
In Case of Emergency Key
.
2.
The first time you access ICE, the
screen displays: “ICE stands for “In
Case of Emergency.” You can add
three numbers you would like
notified if anything should happen
to you.” Press .
I
Produktspezifikationen
| Marke: | Samsung |
| Kategorie: | Smartphone |
| Modell: | Haven U320 |
Brauchst du Hilfe?
Wenn Sie Hilfe mit Samsung Haven U320 benötigen, stellen Sie unten eine Frage und andere Benutzer werden Ihnen antworten
Bedienungsanleitung Smartphone Samsung

9 Oktober 2024
1 Oktober 2024
22 September 2024
19 September 2024
11 September 2024
3 September 2024
31 August 2024
29 August 2024
26 August 2024
25 August 2024
Bedienungsanleitung Smartphone
- Smartphone Infiniton
- Smartphone Acer
- Smartphone Apple
- Smartphone Asus
- Smartphone Sanyo
- Smartphone BenQ
- Smartphone Gigabyte
- Smartphone HP
- Smartphone Lexibook
- Smartphone Manta
- Smartphone Medion
- Smartphone Microsoft
- Smartphone Nedis
- Smartphone NGS
- Smartphone Philips
- Smartphone SilverCrest
- Smartphone Sony
- Smartphone Panasonic
- Smartphone LG
- Smartphone AEG
- Smartphone Siemens
- Smartphone OK
- Smartphone CSL
- Smartphone Alecto
- Smartphone Denver
- Smartphone Bush
- Smartphone Telefunken
- Smartphone Thomson
- Smartphone Trevi
- Smartphone Blaupunkt
- Smartphone Sharp
- Smartphone Mitsubishi
- Smartphone Haier
- Smartphone Hisense
- Smartphone Nordmende
- Smartphone Vestel
- Smartphone Aiwa
- Smartphone ARCHOS
- Smartphone Mpman
- Smartphone Geemarc
- Smartphone Polaroid
- Smartphone TrekStor
- Smartphone Krüger And Matz
- Smartphone Motorola
- Smartphone Nokia
- Smartphone Umidigi
- Smartphone Xiaomi
- Smartphone Olympia
- Smartphone Switel
- Smartphone Fero
- Smartphone Hannspree
- Smartphone Hyundai
- Smartphone ITT
- Smartphone Gigaset
- Smartphone TCL
- Smartphone Tesla
- Smartphone Toshiba
- Smartphone Allview
- Smartphone Cubot
- Smartphone GOCLEVER
- Smartphone Mio
- Smartphone Fysic
- Smartphone Sencor
- Smartphone Sony Ericsson
- Smartphone Estar
- Smartphone Dell
- Smartphone Lenovo
- Smartphone Razer
- Smartphone Honeywell
- Smartphone Lava
- Smartphone Sagem
- Smartphone TELME
- Smartphone Intermec
- Smartphone TP-Link
- Smartphone Honor
- Smartphone Midland
- Smartphone Alcatel
- Smartphone Amplicomms
- Smartphone Audioline
- Smartphone Binatone
- Smartphone Brondi
- Smartphone Doro
- Smartphone Emporia
- Smartphone Profoon
- Smartphone Swissvoice
- Smartphone Tiptel
- Smartphone Kodak
- Smartphone Hammer
- Smartphone Facom
- Smartphone Easypix
- Smartphone IGet
- Smartphone Wiko
- Smartphone XD
- Smartphone InFocus
- Smartphone NEC
- Smartphone Overmax
- Smartphone Huawei
- Smartphone Aplic
- Smartphone Alcatel-Lucent
- Smartphone Vivax
- Smartphone Intex
- Smartphone Albrecht
- Smartphone Kogan
- Smartphone Energy Sistem
- Smartphone Kurio
- Smartphone Plum
- Smartphone RugGear
- Smartphone Ulefone
- Smartphone NGM
- Smartphone T-Mobile
- Smartphone Kyocera
- Smartphone EVOLVEO
- Smartphone Amazon
- Smartphone Mustang
- Smartphone Vodafone
- Smartphone Yota
- Smartphone SPC
- Smartphone HTC
- Smartphone Billow
- Smartphone Prestigio
- Smartphone Aligator
- Smartphone AT Telecom
- Smartphone Auro
- Smartphone Avus
- Smartphone Beafon
- Smartphone BlackBerry
- Smartphone Bq
- Smartphone Crosscall
- Smartphone Cyrus
- Smartphone Echo
- Smartphone Fairphone
- Smartphone General Mobile
- Smartphone Kazam
- Smartphone Konrow
- Smartphone Mediacom
- Smartphone Meizu
- Smartphone Mobistel
- Smartphone MTT
- Smartphone Nubia
- Smartphone Phicomm
- Smartphone Sonim
- Smartphone Wileyfox
- Smartphone Yezz
- Smartphone ZTE
- Smartphone Swisstone
- Smartphone RCA
- Smartphone OnePlus
- Smartphone Pantech
- Smartphone Oppo
- Smartphone Vivo
- Smartphone CAT
- Smartphone Aspera
- Smartphone TAG Heuer
- Smartphone AT&T
- Smartphone Realme
- Smartphone Infinix
- Smartphone Google
- Smartphone Alba
- Smartphone Danew
- Smartphone Doogee
- Smartphone Ecom
- Smartphone Energizer
- Smartphone Garmin-Asus
- Smartphone Gionee
- Smartphone GreatCall
- Smartphone Handheld
- Smartphone HomTom
- Smartphone Itel
- Smartphone Klipad
- Smartphone KPN
- Smartphone Leagoo
- Smartphone Leotec
- Smartphone Logicom
- Smartphone Lumigon
- Smartphone Maxcom
- Smartphone Maxx
- Smartphone Media-tech
- Smartphone Micromax
- Smartphone Neffos
- Smartphone NTech
- Smartphone NUU Mobile
- Smartphone O2
- Smartphone Oukitel
- Smartphone PENTAGRAM
- Smartphone Senifone
- Smartphone Spice
- Smartphone STK
- Smartphone Storex
- Smartphone Sunny
- Smartphone Sunstech
- Smartphone Tecdesk
- Smartphone Telstra
- Smartphone UMi
- Smartphone UTStarcom
- Smartphone Wolder
- Smartphone Wolfgang
- Smartphone Xtreamer
- Smartphone Zipy
- Smartphone Best Buy
- Smartphone Benefon
- Smartphone Primux
- Smartphone Keneksi
- Smartphone M3 Mobile
- Smartphone Coolpad
- Smartphone TIM
- Smartphone MyPhone
- Smartphone Freeman
- Smartphone Nevir
- Smartphone BLU
- Smartphone CRUX
- Smartphone Amplicom
- Smartphone NGM-Mobile
- Smartphone JCB
- Smartphone THL
- Smartphone Brigmton
- Smartphone Lark
- Smartphone Posh Mobile
- Smartphone ToughGear
- Smartphone ORA
- Smartphone GSmart
- Smartphone Tremay
- Smartphone Bea-fon
- Smartphone ITTM
- Smartphone Pharos
- Smartphone Karbonn
- Smartphone Tecno
- Smartphone Piranha
- Smartphone Growing
- Smartphone Majestic
- Smartphone Unnecto
- Smartphone Verykool
- Smartphone Bluebird
- Smartphone Nothing
- Smartphone Saiet
- Smartphone Syco
- Smartphone AQISTON
- Smartphone Androidtech
- Smartphone Casper
- Smartphone BGH
- Smartphone Olitech
- Smartphone Mobiola
- Smartphone LeEco
- Smartphone Jitterbug
- Smartphone Custom
- Smartphone POCO
- Smartphone HMD
- Smartphone Opis
Neueste Bedienungsanleitung für -Kategorien-

15 Oktober 2024

14 Oktober 2024

12 Oktober 2024
10 Oktober 2024

9 Oktober 2024

9 Oktober 2024
8 Oktober 2024
8 Oktober 2024

7 Oktober 2024

5 Oktober 2024