Lexmark XM7163x Bedienungsanleitung
Lies die bedienungsanleitung für Lexmark XM7163x (60 Seiten) kostenlos online; sie gehört zur Kategorie Drucker. Dieses Handbuch wurde von 50 Personen als hilfreich bewertet und erhielt im Schnitt 4.4 Sterne aus 2 Bewertungen. Hast du eine Frage zu Lexmark XM7163x oder möchtest du andere Nutzer dieses Produkts befragen? Stelle eine Frage
Seite 1/60
Lexmark XM7100 Quick
Reference
Learning about the printer
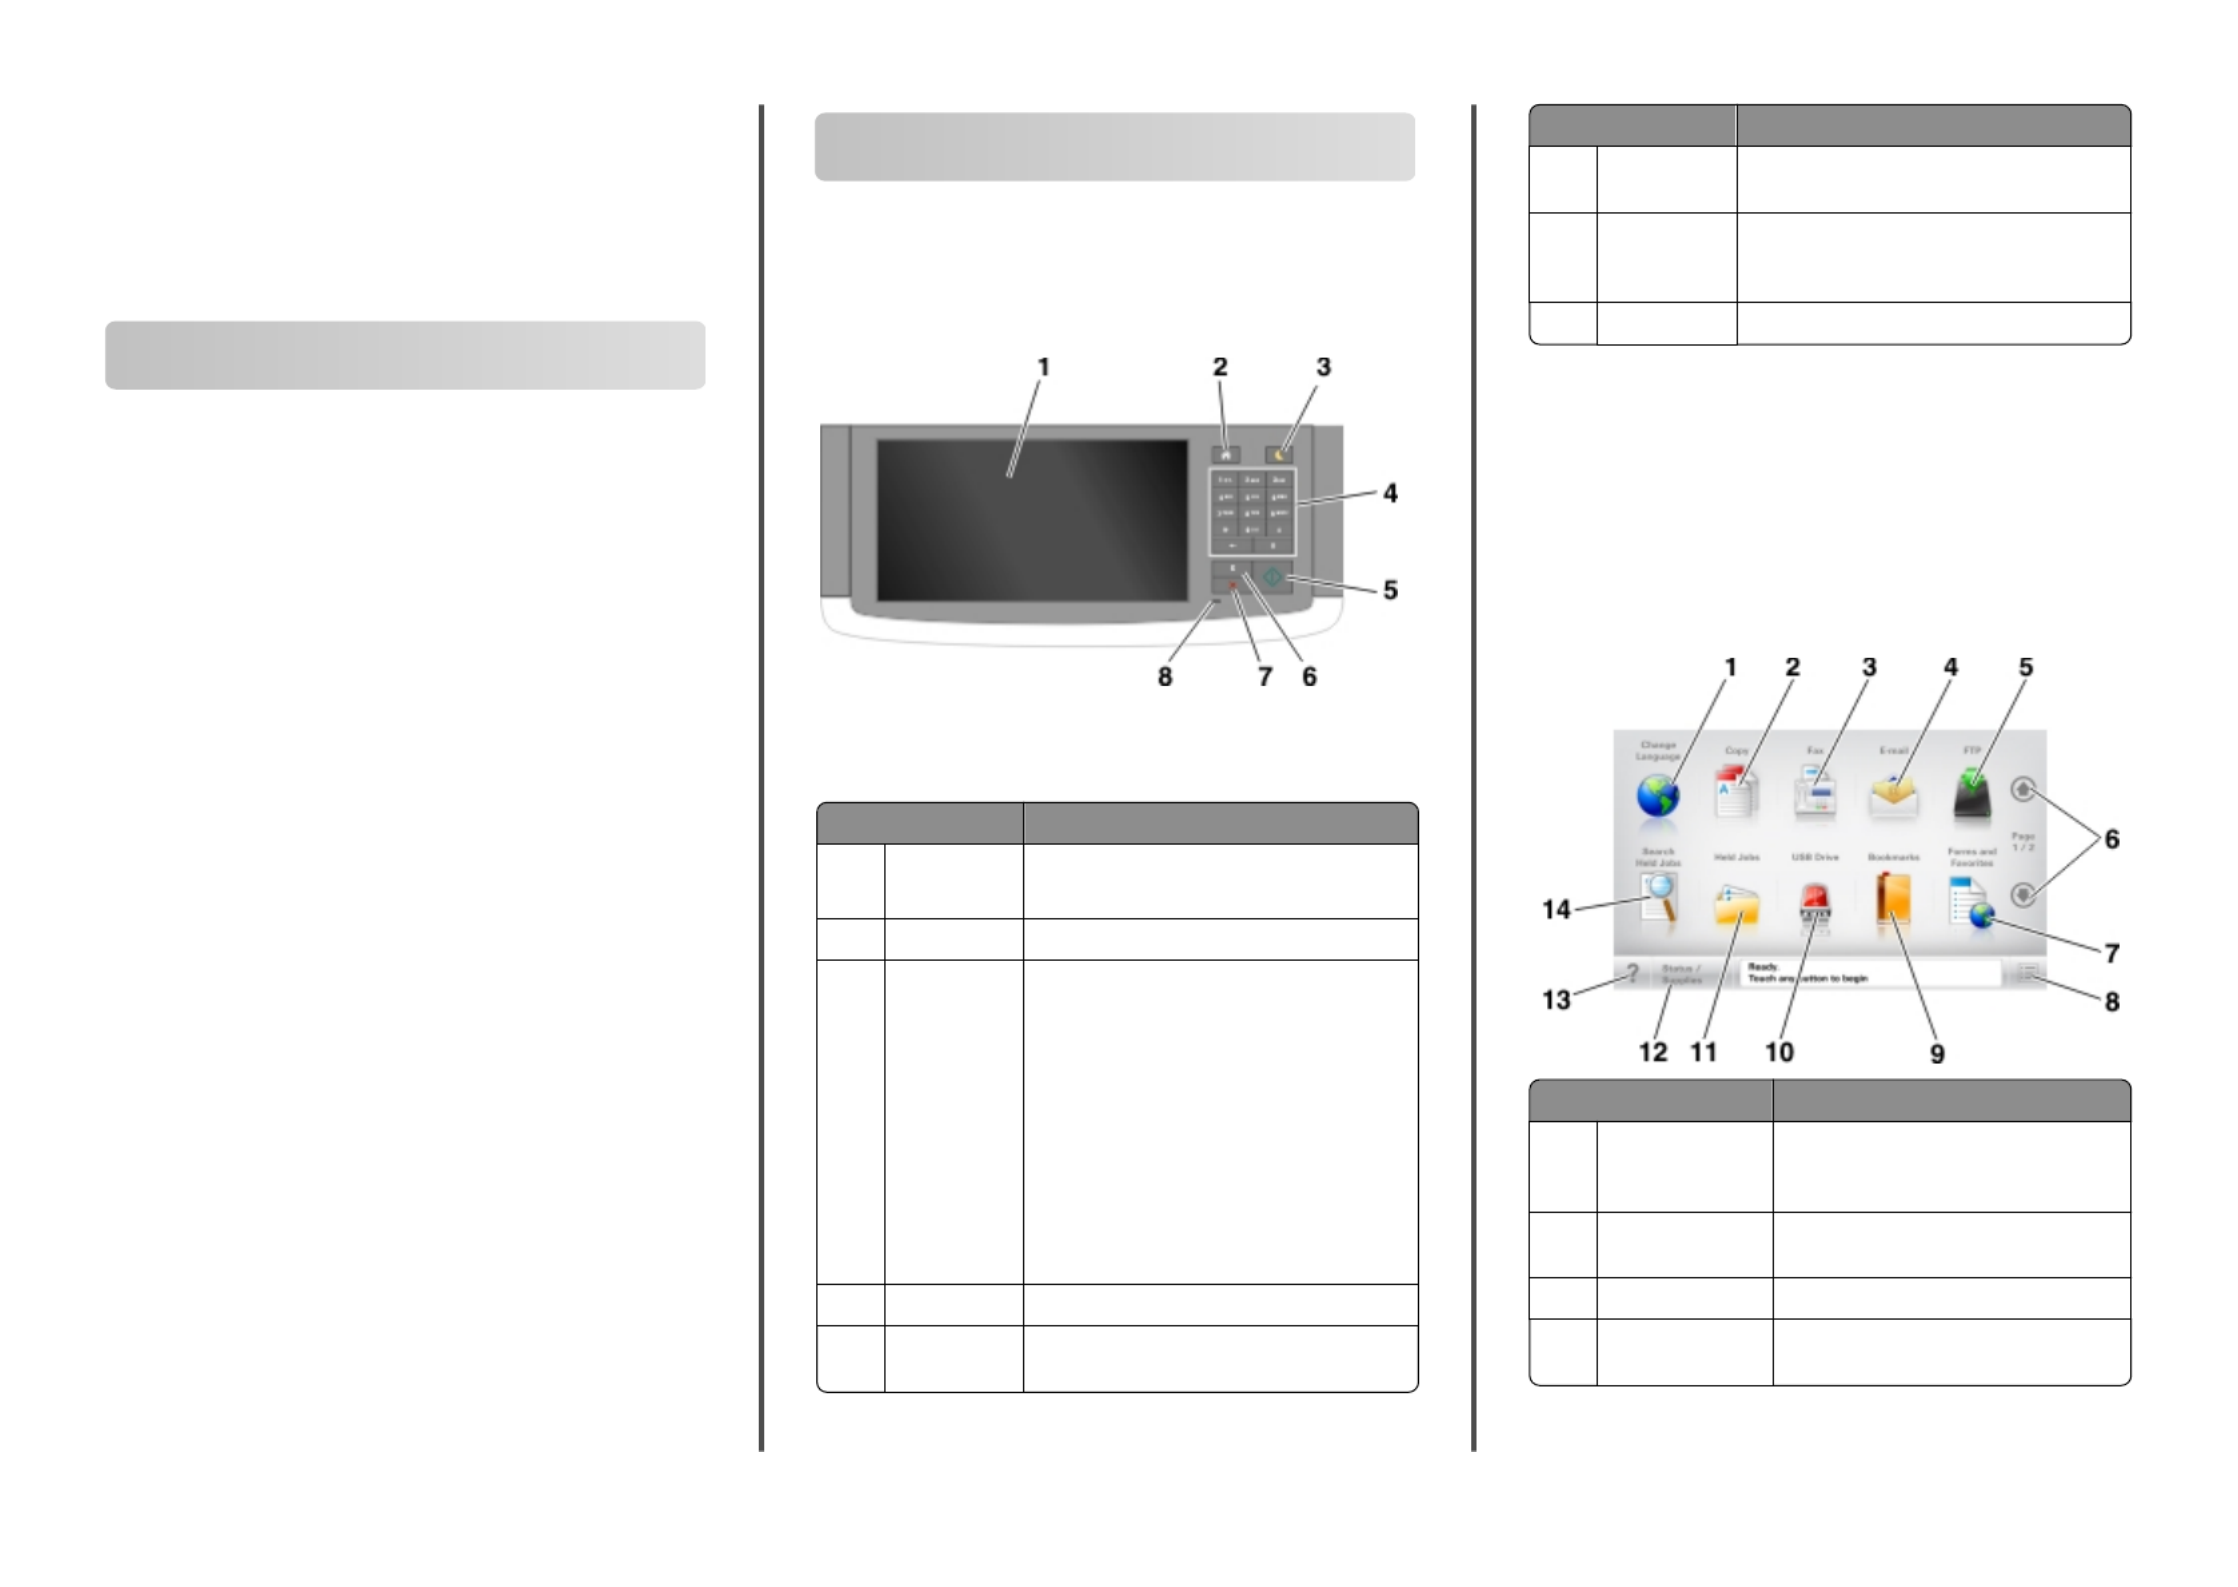
Using the printer control panel
Use theTo
1Display •View the printer status and messages.
•Set up and operate the printer.
2Home buttonGo to the home screen.
3Sleep buttonEnable Sleep mode or Hibernate mode.
Do the following to wake the printer from
Sleep mode:
•Touch the screen or press any hard
button.
•Open a door or cover.
•Send a print job from the computer.
•Perform a poweron reset (POR) with the ‑
main power switch.
•Attach a device to the USB port on the
printer.
4KeypadEnter numbers, letters, or symbols.
5Start buttonStart a job, depending on which mode is
selected.
Use theTo
6Clear all /
Reset button
Reset the default settings of a function,
such as copying, faxing, or scanning.
7Stop or
Cancel
button
Stop all printer activity.
8Indicator lightCheck the status of the printer.
Understanding the home screen
When the printer is turned on, the display shows a basic screen,
referred to as the home screen. Touch the home screen buttons
and icons to initiate an action such as copying, faxing, or scanning;
to open the menu screen; or to respond to messages.
Note: Your home screen may vary depending on your home
screen customization settings, administrative setup, and active
embedded solutions.
Touch To
1Change
Language
Launch the Change Language popup ‑
window that lets you change the
primary language of the printer.
2CopyAccess the Copy menus and make
copies.
3FaxAccess the Fax menus and send fax.
4E-mailAccess the E-mail menus and send
e mails.‑
Learning about the printer
1
Learning about the printer...................
Contents
Setting up and using the home
screen applications............................
Loading paper and specialty media....
Printing ...................................................
Copying...................................................
E-mailing..................................................
Faxing......................................................
Scanning ................................................
Clearing jams .........................................
1
22
20
19
18
18
16
6
3
Produktspezifikationen
| Marke: | Lexmark |
| Kategorie: | Drucker |
| Modell: | XM7163x |
Brauchst du Hilfe?
Wenn Sie Hilfe mit Lexmark XM7163x benötigen, stellen Sie unten eine Frage und andere Benutzer werden Ihnen antworten
Bedienungsanleitung Drucker Lexmark

1 Dezember 2025
12 Oktober 2025
12 Oktober 2025
8 Oktober 2025
28 September 2025
24 September 2025
24 September 2025
24 September 2025
24 September 2025
24 September 2025
Bedienungsanleitung Drucker
Neueste Bedienungsanleitung für -Kategorien-
31 März 2026
30 März 2026
30 März 2026
29 März 2026
25 März 2026
23 März 2026
16 März 2026
16 März 2026
15 März 2026
15 März 2026