Huawei P60 Pro Bedienungsanleitung
Lesen Sie kostenlos die 📖 deutsche Bedienungsanleitung für Huawei P60 Pro (136 Seiten) in der Kategorie Telefon. Dieser Bedienungsanleitung war für 43 Personen hilfreich und wurde von 2 Benutzern mit durchschnittlich 4.5 Sternen bewertet
Seite 1/136

P60 Pro
User Guide

Contents
Essentials
Basic Gestures 1
Phone Clone 4
Lock and Unlock Your Screen 5
Get Familiar with the Home Screen 6
Control Panel 14
Screenshots & Screen Recording 26
Enter Text 34
Multi-Window 35
Show Date and Time When the Screen Is O 44
Charging 46
Smart Features
AI Touch 47
Super Device 47
Easy Projection 51
Multi-screen Collaboration 56
Huawei Share 66
Camera and Gallery
Take Photos 68
Portrait Mode 71
Night Mode 71
Aperture Mode 72
Master AI 73
Take Photos with Various Zoom Settings 74
Macro 75
Monochrome Photography 76
Moving Pictures 77
Pro Mode 79
Record Videos 83
Slow-Mo Recording 85
Time-Lapse Photography 86
Dual-View Mode 87
Story Creator 88
Multi-cam 89
Adjust Camera Settings 92
Manage Gallery 94
Edit Pictures and Videos 98
Golden Snap 100
Highlights 101
i

Apps
Notepad 104
Compass 110
Optimizer 110
Settings
More Connections 112
Display & Brightness 116
Notications & status bar 117
Biometrics & Password 120
Storage 123
Security 123
Privacy 125
Accessibility Features 127
About Phone 131
Contents
ii
Essentials
Basic Gestures
Basic Gestures and Shortcuts
System Navigation Gestures
Go to Settings > > and make sure that System & updates System navigation Gestures is
selected.
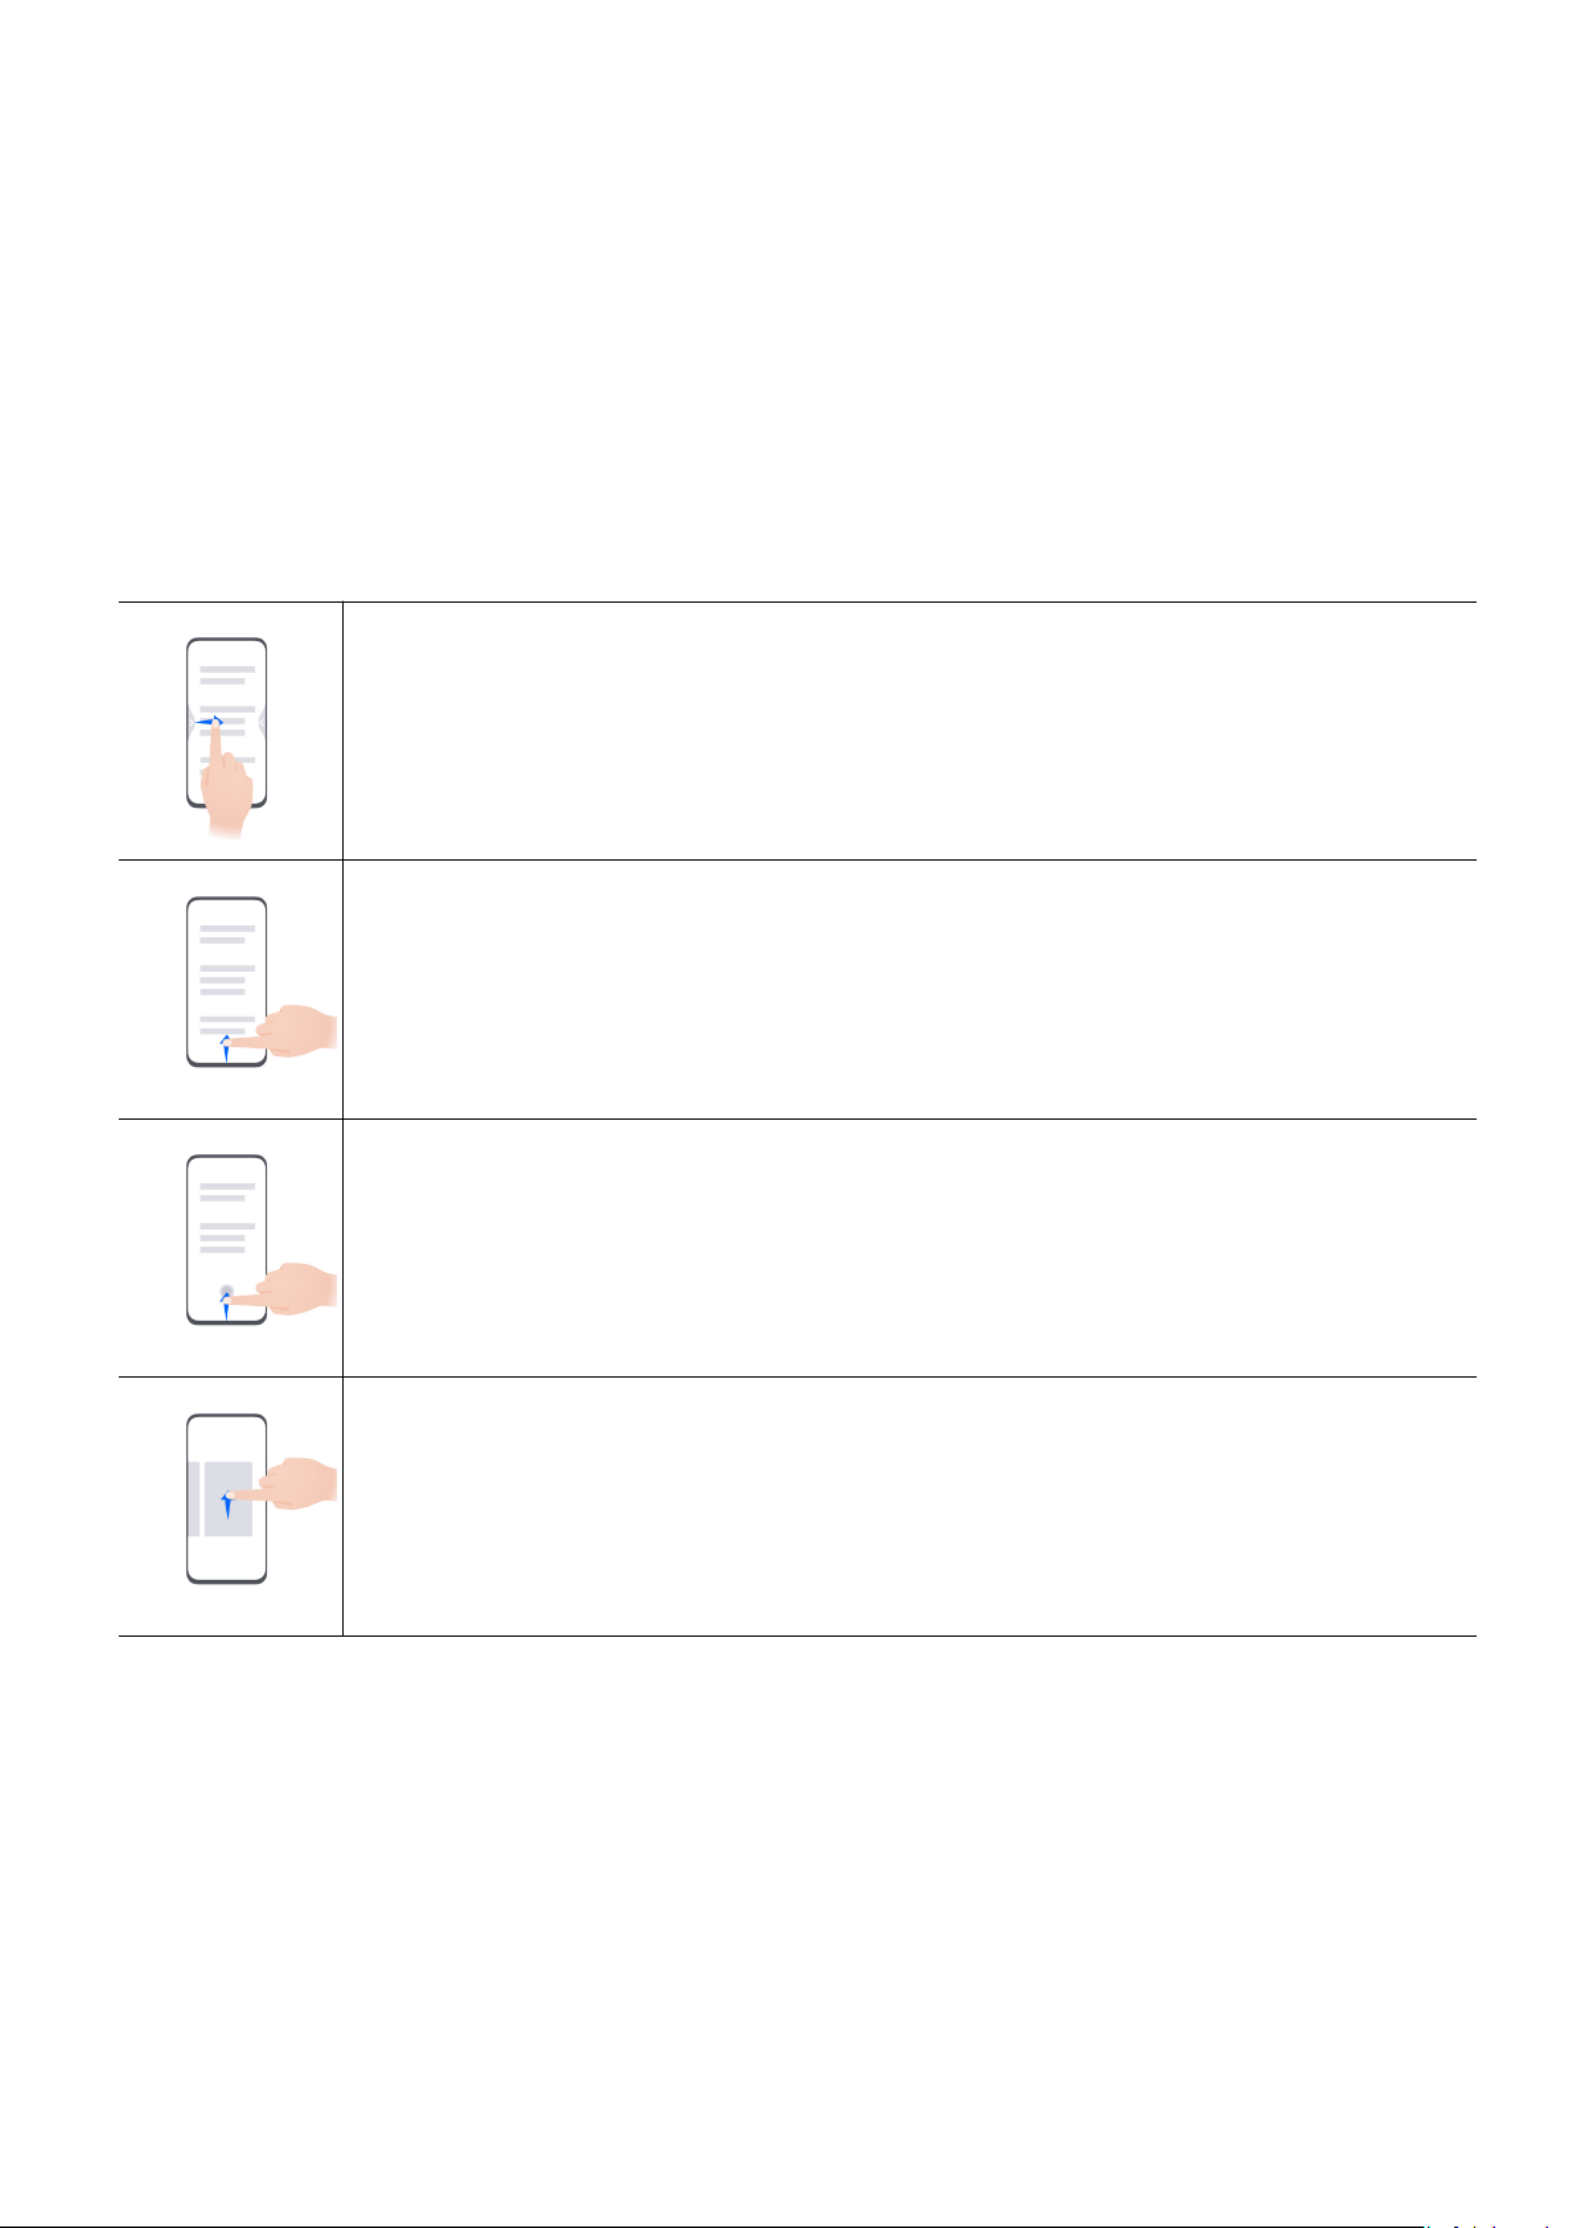
Return to the previous screen
Swipe in from the left or right edges to return to the previous screen.
Back to home screen
Swipe up from the bottom to go to the home screen.
Recent tasks
Swipe up from the bottom of the screen and hold to view recent tasks.
Close an app
When viewing recent tasks, swipe up on an app preview to close the app.
1

Switch between apps
•Slide across the bottom edge of the screen to switch between apps.
Before using this gesture, touch Settings System navigation on the
screen, and ensure that Slide across bottom to switch apps is enabled.
•Swipe across the bottom of the screen in an arc to switch between apps.
If your device does not have the Slide across bottom to switch apps switch, it indicates
that the corresponding feature is not supported.
Knuckle Gestures
Before using knuckle gestures, use either of the following methods to make sure that all
necessary features are enabled (depending on your device model):
•Go to Settings Accessibility features Shortcuts & gestures Take > > , and enable
screenshot Record screen and .
•Go to Settings Accessibility features Motion control Take screenshot > > > , and enable
Smart screenshot.
Take a screenshot
Knock twice on the screen with a knuckle to take a screenshot.
Take a scrollshot
Knock on the screen with a knuckle and draw an "S" to take a scrolling
screenshot.
Capture part of the screen
Knock and draw an enclosed area with a knuckle to capture part of the
screen.
Essentials
2

Record screen
Knock twice on the screen with two knuckles to start or end a screen
recording.
More Gestures
Access Home screen editing mode
Pinch two together on the home screen.ngers
Display the shortcut panel on the lock screen
Turn on the screen and swipe up from the bottom of the lock screen.
Display the search bar
Swipe down from the middle of the home screen.
Display the panelnotication
Swipe down from the upper left edge of the screen.
Turn on a shortcut switch
Swipe down from the upper right edge of the screen to display Control
Panel and touch to expand the shortcut switches panel.
Essentials
3

Button Shortcuts
Power and restarto
Press and hold the Power button until your phone displays the Power o
and menus.Restart
Turn up the volume
Press the Volume up button.
Turn down the volume
Press the Volume down button.
Take a screenshot
Press the Volume down and Power buttons simultaneously.
Some products do not have volume buttons.
Phone Clone
Use Phone Clone to Move Data to Your New Device
Phone Clone lets you quickly and seamlessly move all the basic data (including contacts,
calendar, images, and videos) from your old phone to your new phone.
Migrate Data from a Huawei/Android Device
1On your new phone, open the app, or go to Phone Clone Settings System & updates > >
Phone Clone This is the new device Huawei Other Android, touch , and select or .
2On your old device, follow the onscreen instructions to download and install .Phone Clone
•For Huawei devices: You can download from .Phone Clone AppGallery
•For Android devices: You can download from the Huawei Phone Clone ocial website.
3On the old device, open the app, touch Phone Clone This is the old device, and follow
the onscreen instructions to connect the old device with your new phone manually, or by
scanning a code.
Essentials
4

4On your old device, select the data you wish to clone, and touch > toNEXT TRANSFER
complete the data cloning.
Migrate Data from an iPhone or iPad
1On your new phone, open the app, or go to Phone Clone Settings System & updates > >
Phone Clone This is the new device iPhone/iPad, touch , and select .
2On the old device, download and install from the Huawei website.Phone Clone ocial
3On the old device, open the app, touch Phone Clone Transfer data to a Huawei phone,
and follow the onscreen instructions to connect the old device with your new phone by
scanning the code.
4On your old device, select the data you wish to clone, and follow the onscreen instructions
to complete the data cloning.
Lock and Unlock Your Screen
Lock and Unlock Your Screen
Lock the screen
Auto-lock:
Your phone screen will be automatically locked if you haven't performed any operations on it
for a period of time.
You can go to Settings Display & brightness Sleep > > , and set the screen timeout duration.
Manually lock the screen:
You can manually lock the screen using either of the following methods:
•Press the Power button.
•Pinch two ngers together on the home screen, touch , swipe down to theService widgets
bottom, touch , touch and hold down on the Widgets Screen Lock Add to icon, and touch
home screen. Then touch the icon to lock the screen.Screen Lock
Please make sure your device has been updated to the latest system version.
Keep the Screen On While Looking
You can set the screen to stay on while you are looking at it, such as when you are reading.
Go to Settings Accessibility features Smart Sensing > > , and ensure that Keep screen on
while looking is enabled.
Turn On the Screen
You can turn on the screen in any of the following ways :
•Press the Power button.
•Go to Settings Accessibility features Shortcuts & gestures Wake screen > > > , and
enable and use Raise to wake Double-tap to wake Show palm to wake, , or .
Essentials
5

If your phone does not have this option, it indicates that this feature is not supported.
Unlock Your Screen
Password unlock: Once the screen is turned on, swipe up from the middle of the screen to
display a panel where you can enter your lock screen password.
Face unlock: Once the screen is turned on, bring your face in front of the screen. Your phone
will unlock automatically after recognizing your face.
Fingerprint unlock: Touch the sensor zone with a that you have enrolled.ngerprint nger
Be sure to wake the screen, if your device has an in-screen sensor.rst ngerprint
Get Familiar with the Home Screen
Use Service Widgets
Service widgets allow you to:
•Preview or access apps, such as to view the weather forecast, or play music.
•Select from a range of service widget styles and layouts to customize your home screen.
•Stack and combine multiple service widgets to save home screen space, streamline your
home screen, and navigate with greater ease.
Apps with a widget bar at the bottom support service widgets.
To remove the widget bar, go to Settings Home screen & wallpaper Home screen > >
settings Show widget bars > .
This feature is not supported in certain scenarios. Actual usage shall prevail.
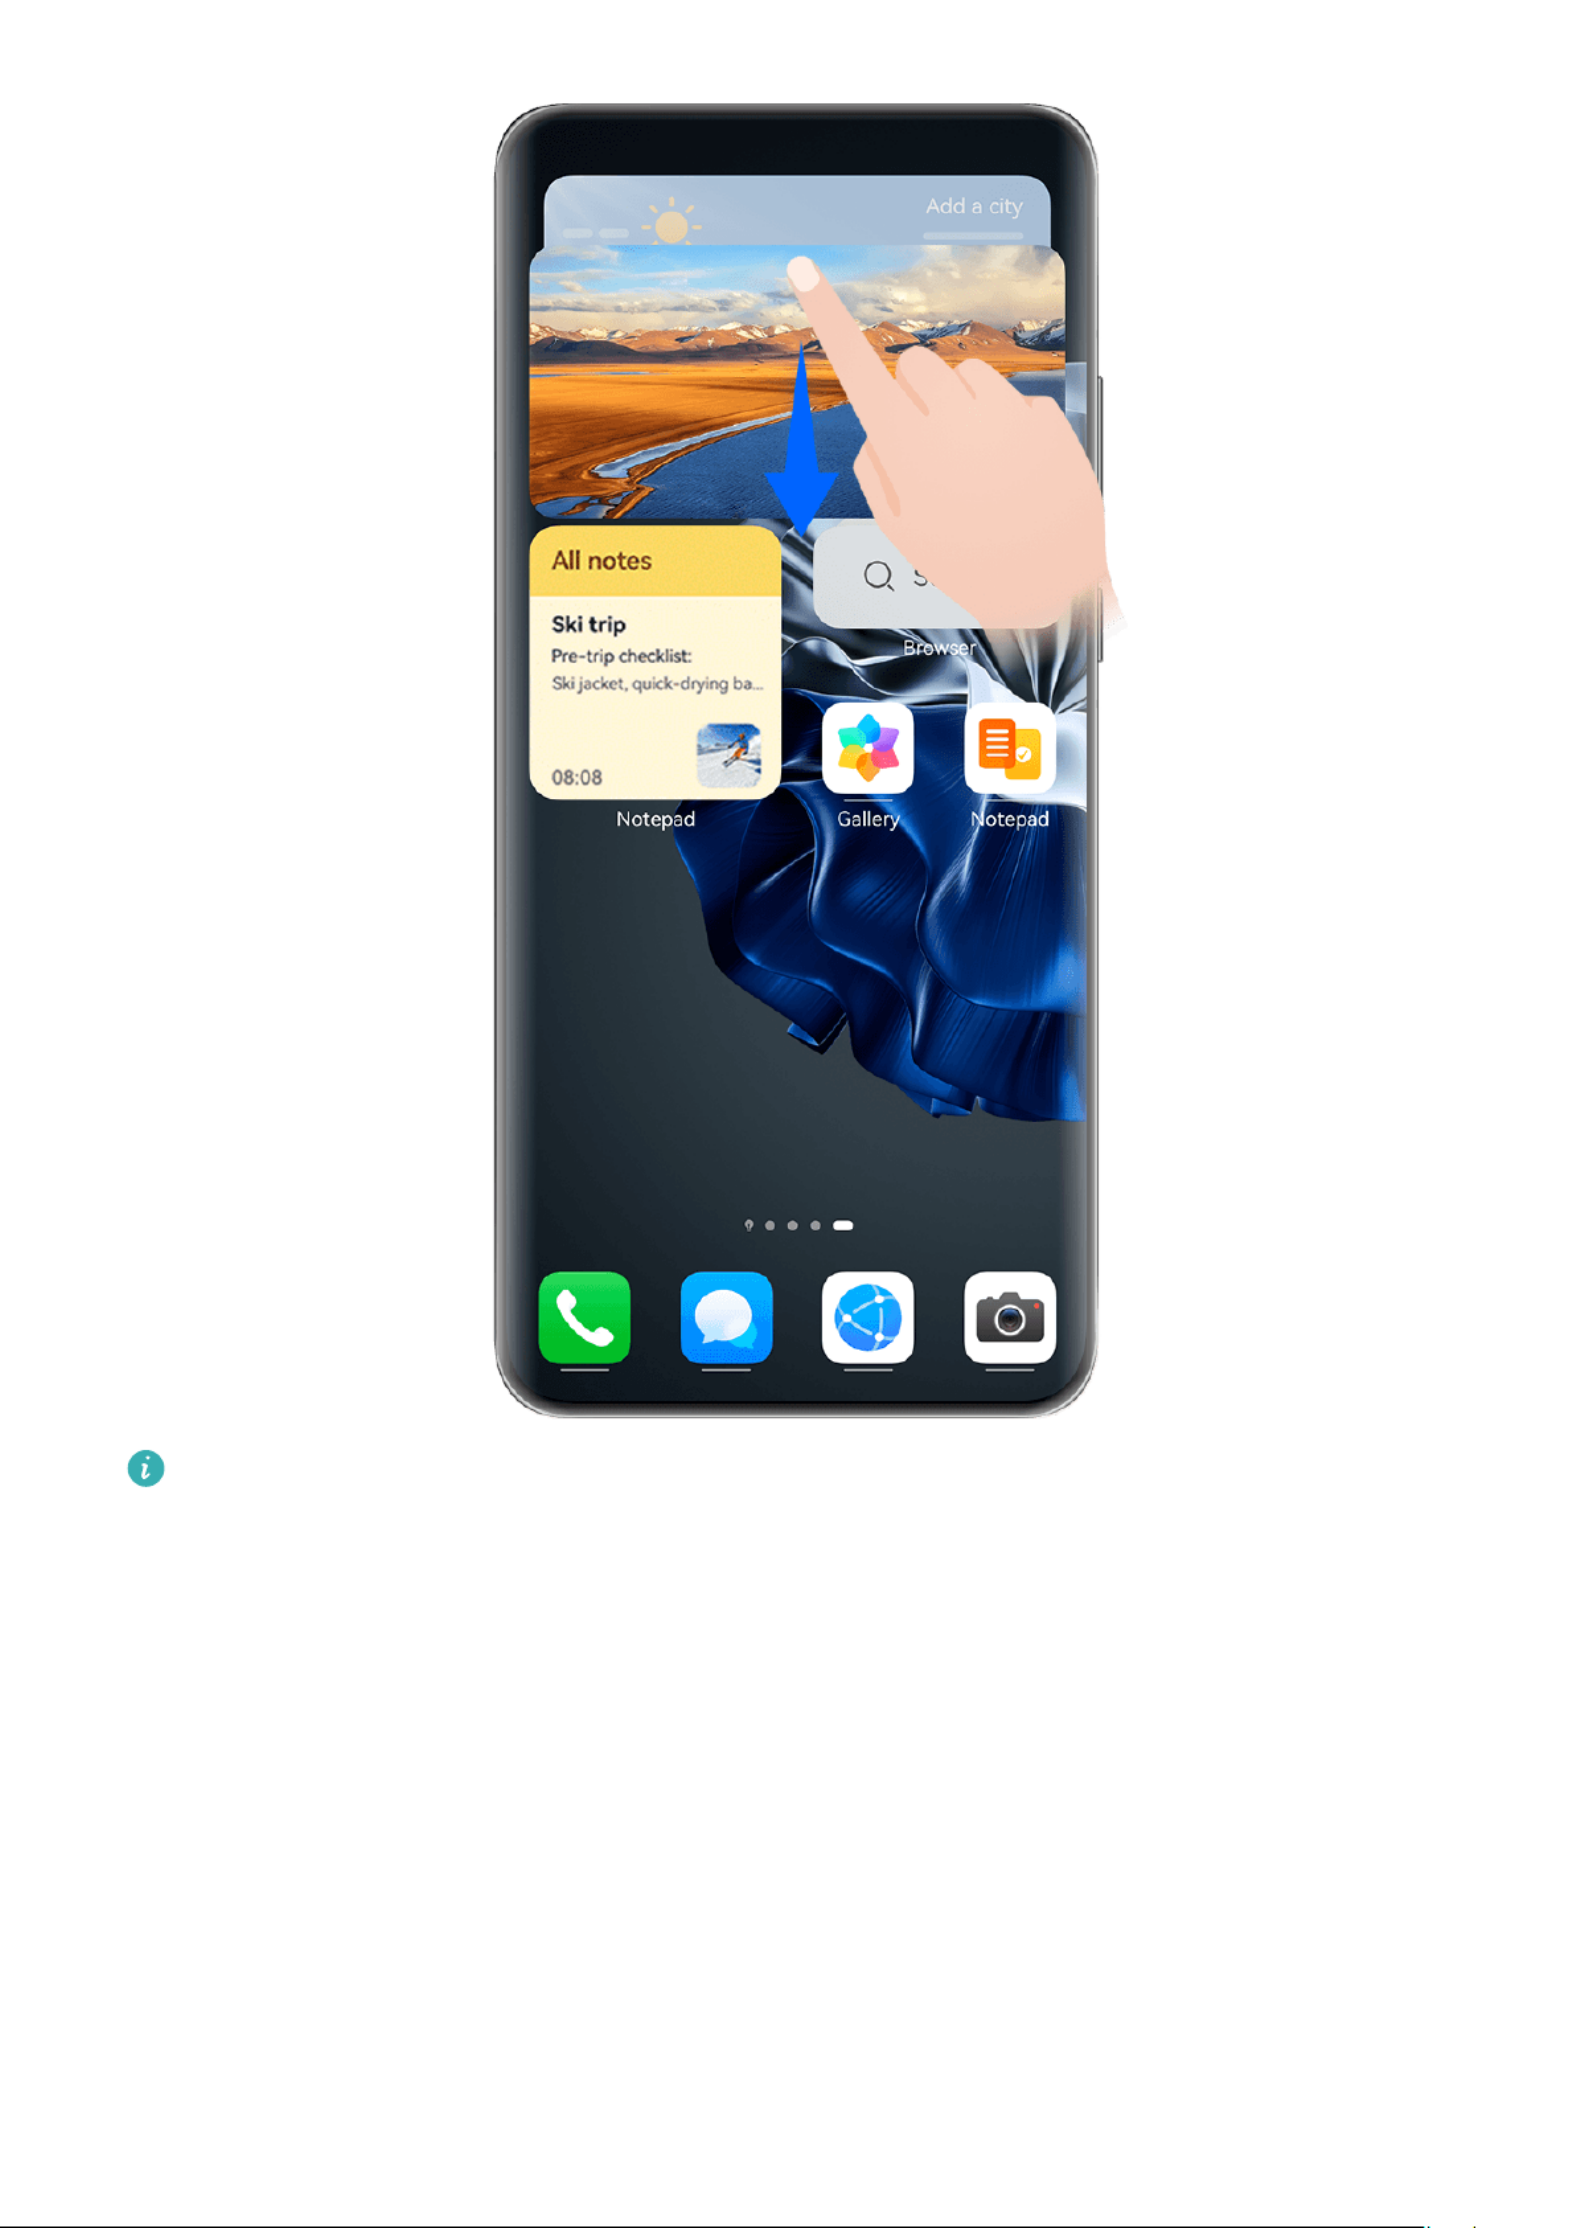
Add Service Widgets to Your Home Screen
You can add a service widget to the home screen in any of the following ways:
•Swipe up on an app icon to expand its service widget, and touch to add the service
widget to the home screen.
•Swipe up on an app icon to expand its service widget, touch and hold down on the service
widget, touch , select your desired style, and touch More service widgets Add to home
screen.
•Touch and hold down on an app icon, touch , select your desired style, andService widgets
touch .Add to home screen
•Pinch two together on the home screen, touch , select your desiredngers Service widgets
service widget, and touch . You can also touch and hold down on yourAdd to home screen
desired service widget, and drag it to any blank area on the home screen.
Please make sure your device has been updated to the latest system version.
Essentials
6

If there is no space available on the current screen, the widget will be pinned to the next
screen. If neither screen has any space, a new screen will be created for the service widget, to
the right of the current screen.
You can also touch and hold down on a service widget on the screen,More service widgets
and drag it to any blank area on the home screen. If you decide not to add the service widget
to the home screen while dragging it, drag it to the undo zone instead at the top of the
screen.
•Service widgets cannot be pinned to folders.
•Swiping up on the app icon will not expand the service widget in certain scenarios.
Actual usage shall prevail.
Stack Service Widgets
Stack same-sized service widgets/widget combos to save home screen space, and streamline
your home screen.
Essentials
7
The are for reference only.gures
Stacking service widgets:
Touch and hold down on a service widget/widget combo, drag it to another service widget/
widget combo of the same size, and release to stack the two items, once they have
completely overlapped.
Viewing widgets within a stack:
Swipe up or down on a stack to view all of its service widgets.
Managing service widgets:
1Expand the stack in any of the following ways:
•Swipe down further to expand the stack.
•Touch and hold down on the stack, and touch .Expand stack
2Then manage widgets in the stack as follows:
Essentials
8

•Adjusting the position of a service widget: Touch and hold down on a service
widget, and drag it to change its position.
•Pinning a service widget to the top: Touch a service widget to pin it to the top of the
stack.
•Removing a service widget from the stack: Touch and hold down on a service
widget, drag it to the edge of the screen and hold, wait for the service widget to be
moved out of the stack, and drag the widget to any blank area on the home screen.
•Deleting a service widget: Swipe left on a service widget to delete it.
•Deleting a widget stack: Once all of the service widgets in a stack are removed, the
stack will be automatically deleted.
Combine Service Widgets
Combine service widgets of all sizes, and add frequently-used shortcuts to widget combos, to
create shortcuts for common features.
Essentials
9

The are for reference only.gures
Adding a widget combo:
•Hold and drag a service widget to another service widget of any size, until they partially
overlap, and release to complete the combination, once the back panel has been expanded.
•Pinch two together on the home screen, go to > ,ngers Service widgets Widget combos
touch and hold down on the widget combo that you wish to add, and touch Add to home
screen. You can also touch , select your favorite service widgets to customize your own
combo, and touch .
Please make sure your device has been updated to the latest system version.
Editing a widget combo:
•Adding a service widget to the widget combo: Hold and drag a service widget on the
home screen to the widget combo.
Essentials
10

•Removing a service widget from the widget combo: Touch and hold down on the widget
combo, and wait for the pop-up menu to display. Then hold and drag a service widget to
any blank area on the home screen.
•Deleting a service widget: Touch and hold down on the widget combo, and wait for the
pop-up menu to display. Then hold and drag a service widget to in the upper rightRemove
corner.
After you're done with editing the widget combo, the system will automatically apply an
optimal template size based on the items in the combo. Touch any area outside the service
combo to exit the editing screen.
You can also touch and hold down on the service combo, and touch to add orEdit combo
remove or .Service widgets Shortcuts
Removing a widget combo:
Touch and hold down on the widget combo, and touch to remove theRemove combo
widget combo.
Renaming a widget combo:
Touch and hold down on the widget combo, and touch to rename the widgetRename
combo.
You can also touch and hold down on a service widget to edit or remove it.
Certain service widgets can't be edited.
Edit and Remove Service Widgets
Edit service widgets:
Touch and hold down on a service widget, and select to set which information willEdit
display for the widget. For example, you can select cities for the Weather service widget, or
select a time zone for the Clock service widget.
Remove service widgets:
Touch and hold down on a service widget, and select to remove it from the homeRemove
screen.
•If you uninstall certain apps, the corresponding service widgets will also be removed.
•Certain service widgets can't be edited.
Create and Use Large Folders
Large folders make it easy to categorize app icons on the home screen. Directly open an app
by touching the app icon, without expanding the folder, and adjust the folder size as needed,
to craft your ideal home screen layout.
Essentials
11

The are for reference only.gures
Create a Large Folder
1Touch and hold an app icon and drag it over another icon to create a new folder.
2Touch and hold a folder to switch between display modes. For example, you can touch
and hold a new folder and select from the displayed menu to create a largeEnlarge
folder.
3You can touch the lower right corner of the large folder to open it and then touch the
folder name to rename it.
You can also rename the folder by touching and holding it and selecting .Rename
Operations in a Large Folder
You can perform the following operations in large folders:
Essentials
12

•Adjust the folder size: Touch and hold down on a large folder, and release your nger
when the pop-up menu displays. Drag the blue edges or corners around the folder to adjust
the folder size, and touch any blank area on the home screen to complete the operation.
•Enter or exit folders: Touch the lower right corner on a large folder to enter it. Touch a
blank area in the folder to exit it.
When there are too many app icons to display on one page within a large folder, a stacked
icon will appear in the folder's lower right corner. You can touch the stack icon to open the
folder.
•Add or remove apps: Open a large folder, and touch , and add or remove apps as
required. If you deselect all apps within the folder, the folder will be deleted.
•Switch between display modes: Touch and hold down on a folder to switch between a
standard and large display. For example, you can touch and hold down on a standard
folder, and select from the displayed menu to create a large folder.Enlarge
Notication and Status Icons
Network status icons may vary depending on your region or network service provider.
Supported features vary depending on the device model. Some of the following icons
may not be relevant to your phone.
5G network connected 4G network connected
3G network connected 2G network connected
Full signal strength Roaming
Data saver enabled No SIM card inserted
Hotspot enabled Hotspot connected
Hotspot disconnected Switching networks via Wi-Fi+
Wi-Fi connected Wi-Fi network is faulty, unable to
connect to the Internet
Wi-Fi 6 connected Wi-Fi 6 network is faulty, unable
to connect to the Internet
Wi-Fi 6+ connected Wi-Fi 6+ network is faulty, unable
to connect to the Internet
Dual Wi-Fi connected Dual Wi-Fi connected, with the
main Wi-Fi supporting Wi-Fi 6
Dual Wi-Fi connected, with the
main Wi-Fi supporting Wi-Fi 6+ Alarm set
Essentials
13

Battery empty Low battery
Charging Fast charging
Super charging Wireless super charging
Wireless fast charging Regular wireless charging
Power Saving mode enabled Digital Balance enabled
Bluetooth enabled Bluetooth device battery
Bluetooth device connected VPN connected
Airplane mode enabled Do Not Disturb mode enabled
Location service enabled Eye Comfort enabled
Driving mode enabled Performance mode enabled
Headset connected Projection device connected
Calling VoLTE enabled
Missed call New message
Silent mode Vibration pattern
Syncing data Data syncing failed
New email Event reminder
Apps using the camera Apps using the microphone
NFC enabled More notications
Control Panel
Introduction to Control Panel
Manage and control audio playback, shortcuts, and , with greater ease, inSuper Device
Control Panel.
Essentials
14

Overview of Common Features in Control Panel
Swipe down from the upper right edge of the screen to display Control Panel to access the
following features:
The are for reference only.gures
•Shortcuts: Enables, disables, or sets frequently-used features.
•Super Device: Collaborates with tablets, laptops, Visions, and other devices to facilitate
seamless Multi-screen Collaboration, wireless projection, video transfers, and other cross-
device features.
•Smart devices: Allows you to manage and control devices have been added in .AI Life
If your phone is not pre-installed with some relevant apps, download it from .AppGallery
Edit Control Panel
Control Panel allows you to edit features, such as relocate shortcut switches, hide Super
Device, and edit smart scenes and smart devices, so that you can manage your devices with
greater ease.
Swipe down from the upper right edge of the screen to display Control Panel, and touch
. From there, feel free to:
Essentials
15

•Edit shortcut switches: Touch , hold and drag a shortcut switch to relocate it.Edit switches
You can also drag a frequently-used hidden shortcut switch up to the unhidden part of the
shortcut switch panel, or drag a less frequently-used shortcut switch down to the hidden
part.
•Hide Super Device: Touch to hide Super Device. Touch Hide Super Device Show Super
Device to show Super Device.
•Edit smart devices: Touch , and touch at the top of an added smart deviceEdit devices
to remove it from the Control Panel. Touch a smart device that you have linked to AI Life
below to add it to the Control Panel.
If your phone is not pre-installed with some relevant apps, download it from .AppGallery
Use Shortcut Switches
Turn on a Shortcut Switch
Swipe down from the upper right edge of the screen to display Control Panel and touch
to expand the shortcut switches panel.
Essentials
16

The are for reference only.gures
•Touch a shortcut switch to enable or disable the corresponding feature.
•Touch and hold a shortcut switch to access the settings screen of the corresponding feature
(supported by some features).
•Touch to access the system settings screen.
Customize Shortcuts
Swipe down from the upper right edge of the screen to display Control Panel, go to >
Edit switches, then touch and hold a shortcut switch to drag it to your preferred position,
and touch .Done
Essentials
17

Audio Control Panel
Manage playback and switch listening apps at any time, or even transfer streaming audio
from your phone to other devices, like a headset or speaker.
•The are for reference only.gures
•If your phone is not pre-installed with some relevant apps, download it from
AppGallery.
Manage Playback and Switch Seamlessly Between Audio Apps
When multiple audio apps (such as ) are open, use the audio control panel to manageMusic
playback and switch audio apps at any time.
1Swipe down from the upper right edge of the phone to display Control Panel, and touch
the playback control card at the top.
Essentials
18

2Current and recently-used audio apps will display in the playback control card, where you
can manage playback (such as playing, pausing, and switching tracks) in the app in use,
or switch to another audio app.
•The audio control panel is only supported for certain apps .
•Some apps need to be updated to the latest version.
Sharing Audio with Friends via Bluetooth Earphones
Sharing audio allows you to connect multiple pairs of Bluetooth earphones to the same
phone, so that you can listen to music or watch videos along with a friend.
•The are for reference only.gures
•This feature is only supported on certain Bluetooth earphones.
•If your Bluetooth earphones support this feature, update them to their latest available
version.
1Pair your device with a pair of Bluetooth earphones, and touch in the upper right
corner of the playback control card for .Control Panel
2Set a sharing mode based on the pairing status of the other pair of earphones:
Essentials
19

Self sharing (the other pair of earphones has been paired with your device): The
paired earphones will display in the device list. Select the two pairs of earphones that you
wish to share audio with.
You can also go to Control Panel Super Device > , and drag the icons for the two pairs of
earphones to the icon for this device, to initiate a connection.
Temporary sharing (the other pair of earphones has not been paired with this
device): Select the paired earphones from the device list on this device, touch Share
audio under the name of the earphones, and initiate sharing as follows:
•The other pair of earphones has not been paired with any device: Place the
earphones that you wish to share in the charging case, open the case, place it close to
this device, and follow the onscreen instructions to complete the connection. If your
phone does not detect any earphones, touch and hold down on the button on the
charging case, and place the earphones close to this device to initiate paring.
•The other pair of earphones has been paired with another tablet/phone: Turn on
the screen of the phone that is paired with that earphones, and place that phone close
to this device, and follow the onscreen instructions to complete the connection.
3Once the pairing is complete, you'll be able to share the audio on this device with the two
pairs of earphones.
To stop audio sharing, touch on the playback control card, touch the shared earphones,
and deselect it.
Transfer Phone Audio to Another Device
When your phone is connected to a listening device (such as a headset, speaker, or Vision
product), you can send the audio playing on your phone to the listening device, and continue
to manage playback in the audio control panel.
1Connect your phone to a listening device via Bluetooth, AI Life, or another method.
2Touch in the upper right corner of the playback control card in Control Panel, and
select the listening device from the list to transfer the audio playing on your phone to the
listening device.
If there is no audio cast device list in the playback control card, touch to display the list.
Transfer Calls to Another Device
When your phone is connected to a listening device (like a headset or speaker), you can
transfer an ongoing call on your phone to the listening device.
1Connect your phone to a wired headset, or connect your phone to a wireless headset or
speaker via Bluetooth.
2During a call, swipe down from the upper right edge of your phone to display Control
Panel, touch in the upper right corner of the playback control card, and select the
wired or Bluetooth listening device from the list to transfer the call there.
Essentials
20

If there is no device list in the playback control card, touch to display the list.
This feature will be supported on more devices in the near future.
Use a Phone to Control HUAWEI Smart Speakers and Other Devices
When your phone is connected to multiple HUAWEI smart audio devices (such as smart
speakers), you can use the audio control panel to manage playback and switch listening
devices at any time.
•The are for reference only.gures
•Before using this feature, update all of the devices to be connected to their latest
versions.
The following uses the HUAWEI smart speaker as an example.
Essentials
21

1Add the HUAWEI smart speaker to AI Life, and connect your phone and speaker to the
Internet.
2Touch the playback control card in Control Panel. The icon of the added device will
display above the card.
3Touch a device icon to access the corresponding device control screen. From there, you can
play, pause, switch tracks, and adjust the volume.
When multiple audio devices are connected, you can tap on a device icon to switch
listening devices.
If there are no device icons above the playback control card, touch to display the device
list.
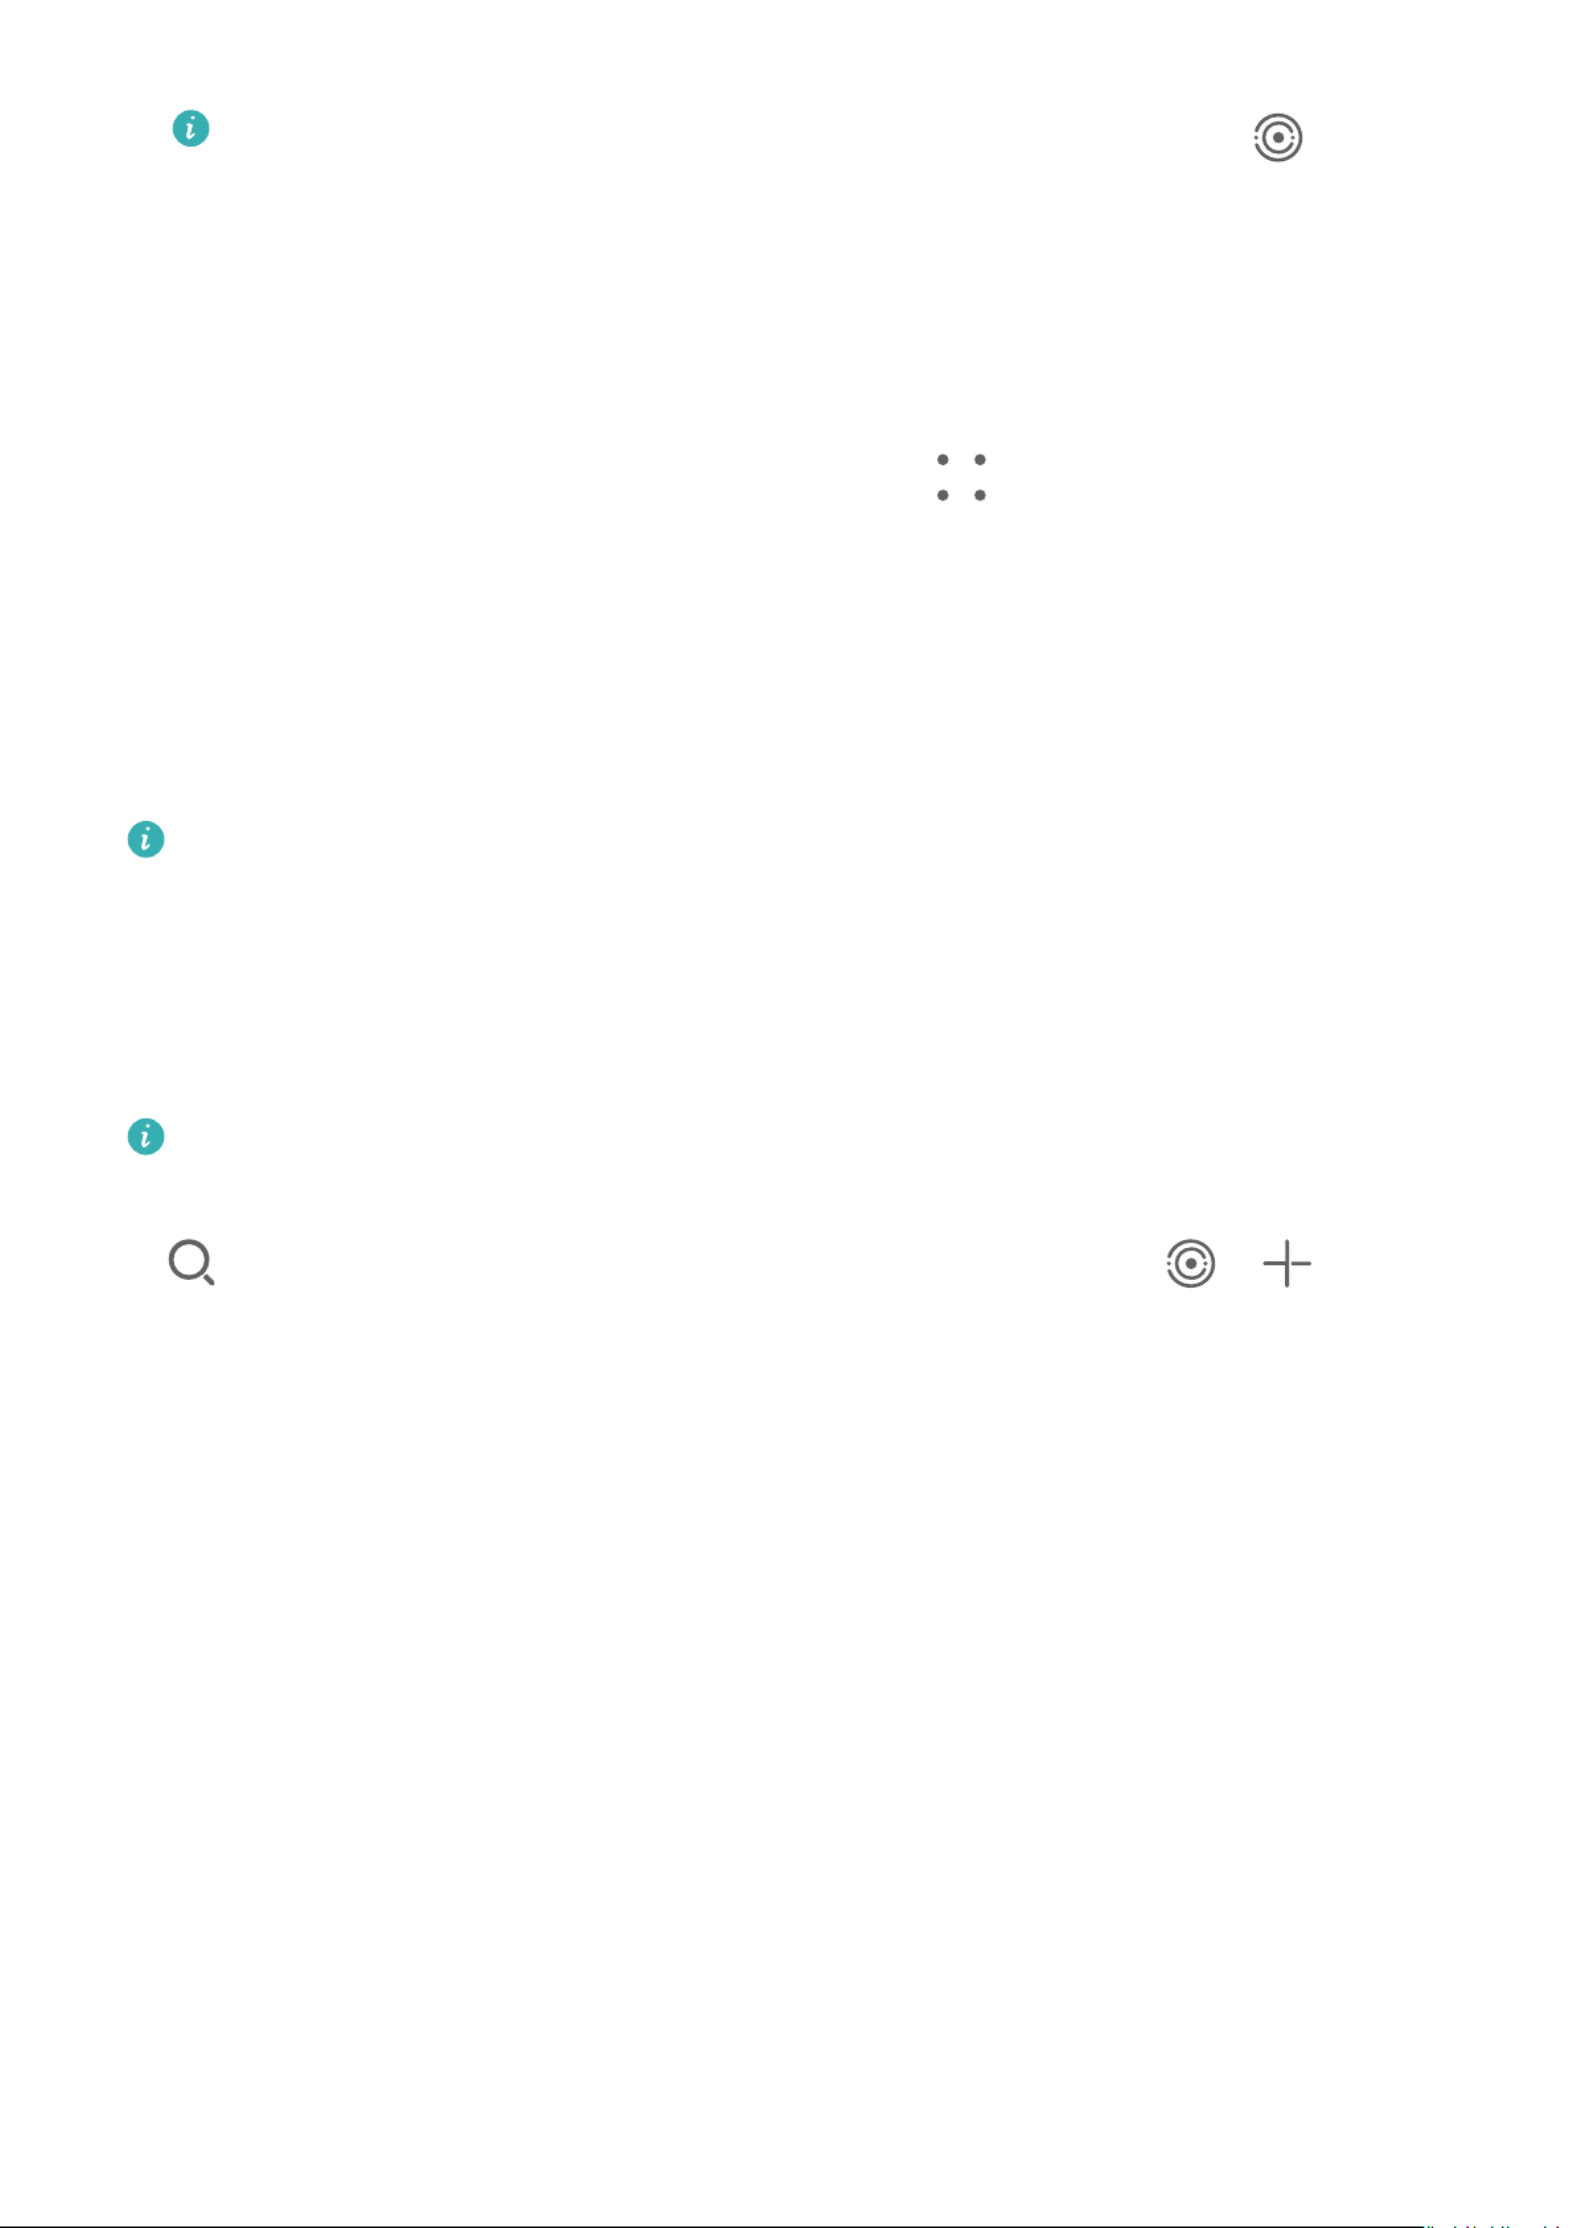
Switch Seamlessly Between Screens, with Super Device
Use for multi-device collaboration with just a tap, to turn all of your smartSuper Device
devices into one cohesive unit. For example, when you go home, you can continue watching
a movie on your HUAWEI Vision, by picking up right from where you had left on youro
phone; when you return to the you can continue to edit the same documents on youroce,
computer, by picking up right from where you had left on your phone.o
The are for reference only.gures
Set Super Device Before Getting Started
Before using , enable Bluetooth and Wi-Fi on your phone, and log in to yourSuper Device
HUAWEI ID.
Make sure that the screens of your other devices remain on, and apply the following settings
on these devices:
Device types supported by may vary by product.Super Device
Essentials
22

•Phone: Enable Bluetooth and Wi-Fi.
Only phones that support Multi-cam mode can be used as connected devices. You can
check whether Multi-cam mode is supported by going to Camera More > .
•Tablet: Enable Bluetooth and Wi-Fi.
•Tablet with an E Ink display: Enable Bluetooth and Wi-Fi, and make sure that it is logged
in to the same HUAWEI ID as your phone.
•Computer: Enable Bluetooth and Wi-Fi, and make sure that it is logged in to the same
HUAWEI ID as your phone.
•Vision or Monitor: Enable Bluetooth and Wi-Fi.
•Smart speaker or printer: Make sure that it is connected to the same LAN as your phone,
paired in AI Life with your phone, and logged in to the same HUAWEI ID.
Enter the AI Life home screen, go to , and follow the onscreen instructions to
complete the connection.
•Earphones or glasses: Make sure that they are paired and connected to your phone via
Bluetooth.
•Watch or band: Make sure that it is paired with your phone via Huawei Health, and logged
in to the same HUAWEI ID.
If your phone is not pre-installed with some relevant apps, download it from .AppGallery
Create Your Super Device, by Connecting to Nearby Devices
If you can't in Control Panel, touch in the upper right corner, andnd Super Device
touch .Show Super Device
The devices are logged in to the same HUAWEI ID.
1Swipe down from the upper right edge of your phone to display Control Panel, and touch
or in to search for nearby devices to connect with.Super Device
2Touch the device to be connected, or drag the device to be connected to this device, and
follow the onscreen instructions to complete the connection.
Once device connections are established, you can touch to switch the application
scenario.
The devices are not logged in to the same HUAWEI ID.
1On the phone/tablet that you wish to connect to, go to Settings Super Device This > >
device Visible to All nearby devices > , and select .
2Swipe down from the upper right edge of your phone to display Control Panel, and touch
in .Super Device
3Touch , select the device that you wish to connect to, and follow the onscreen
instructions to complete the connection.
Essentials
23
To unlink a device that is not logged in to the same HUAWEI ID, touch in Super
Device Delete, touch and hold down on the device, and touch . Alternatively, you can
go to Settings Super Device Other > , select the device that you wish to unlink in
devices Delete, and touch .
4Touch the device to be connected, or drag the device to be connected to this device, and
follow the onscreen instructions to complete the connection.
Once device connections are established, you can touch to switch the application
scenario.
Transfer MeeTime Calls and Streaming Audio to Connected Devices
Use to transfer a streaming video (for example, a video in HUAWEI Video),Super Device
song, or MeeTime call from your phone to another device, and pick up from exactly where
you had left without missing a beat.o,
MeeTime: This feature is only available in some countries and regions.
For instance, you can:
•Transfer to tablets.videos
•Transfer to Visions.MeeTime calls
•Transfer to Bluetooth earphones, speakers, glasses, Visions, and head units.music
Device types and transfers supported by may vary by product.Super Device
1Swipe down from the upper right edge of the phone to display Control Panel, and touch
in to search for nearby available devices, or go to > to bind aSuper Device
new device.
2Open an app running a task you wish to transfer (such as HUAWEI Video or HUAWEI
Music) on your phone.
3In of Super Device Control Panel on your phone, touch the target device to which you
wish to transfer the task, or drag the target device to this device, and follow the onscreen
instructions to complete the transfer.
Essentials
24
The are for reference only.gures
Multi-Screen Collaboration on a Computer or Tablet
Connect your phone to a computer and tablet via to make work moreSuper Device oce
ecient and collaborative. You can view and edit drag and drop copy and pasteles, les,
text, or even browse phone apps, from the Multi-screen Collaboration window on your
computer or tablet.
1Swipe down from the upper right edge of your phone to display Control Panel, and
search for or link the device you wish to connect to in the panel, using theSuper Device
methods below:
•Search for computers: Touch to search for nearby computers that can be
connected to.
•Search for tablets: Touch to search for nearby tablets that can be connected to,
or go to > to search for and link with a tablet.
2In , touch the device that you wish to connect to, or touch and drag theSuper Device
device icon to your device, and follow the onscreen instructions to complete the
connection.
Once the connection is established, your phone screen will display on the connected device.
Essentials
25

To end Multi-Screen Collaboration, touch the connected device on the screen.Super Device
Screenshots & Screen Recording
Take a Screenshot
Take a Full Screenshot with a Knuckle Tap
1Before using knuckle gestures, use either of the following methods to enable this feature
(depending on your device model):
•Go to Settings Accessibility features Shortcuts & gestures Take screenshot > > > ,
and enable .Knuckle screenshots
•Go to Settings Accessibility features Motion control Take screenshot > > > , and
enable .Smart screenshot
2Tap twice in quick succession with one knuckle to take a screenshot of the entire screen.
Essentials
26

The are for reference only.gures
Take a Screenshot with a Key Shortcut
Press and hold down on the Power and Volume down buttons at the same time to take a
screenshot.
Take a Screenshot with a Shortcut Switch
Swipe down from the upper right edge of the screen to display Control Panel, touch to
expand the shortcut switches panel, and touch to take a screenshot.Screenshot
Share or Edit a Screenshot
After you take a screenshot, a thumbnail will appear in the lower left corner of the screen.
Feel free to:
•Swipe up on the thumbnail to select a method for sharing the screenshot with others.
Essentials
27
•Tap on the thumbnail to edit, delete, or do more with the screenshot. You can also touch
to add a phone frame to the screenshot, and touch it again to remove the frame.
Screenshots are saved to by default.Gallery
Take a Partial Screenshot
Use to take a screenshot of a part of the screen. You can choose yourPartial screenshot
preferred screenshot shape (such as a rectangle, oval, or heart).
Take a Partial Screenshot with Knuckle Gestures
The are for reference only.gures
Essentials
28

1Knock on the screen with a single knuckle and hold to draw an enclosed shape around the
part of the screen that you wish to capture. Make sure that your knuckle does not leave
the screen.
2The screen will display the motion of your knuckle. From there, feel free to:
•Drag the frame to the desired position, or resize it.
•Touch any of the shape options on the toolbar to change the shape of the captured
area.
3Touch to save the screenshot.
Use a Shortcut to Take a Partial Screenshot
1Swipe down from the upper right edge of the screen to display Control Panel, touch
to expand the shortcut switch panel, touch the triangle icon next to , and thenScreenshot
touch in the pop-up.Partial screenshot
2Follow the onscreen instructions to draw an enclosed shape with your around thenger
part of the screen that you wish to capture.
3The screen will display the motion of your From there, feel free to:nger.
•Drag the frame to the desired position, or resize it.
•Touch any of the shape options on the toolbar to change the shape of the captured
area.
4Touch to save the screenshot.
Take a Scrolling Screenshot
Use to capture a memorable chat, article, or essential work document that can'tScrollshot
display in full on the screen, and share with others.
Use a Knuckle to Take a Scrolling Screenshot
Essentials
29

Swipe down on the Thumbnail to Take a Scrolling Screenshot
The are for reference only.gures
Once you take a screenshot, a thumbnail will appear in the lower left corner. You can
continue to take a scrolling screenshot.
1Swipe down on the thumbnail. Your device will automatically scroll to the bottom of the
screen to capture all of the content within a single screenshot.
2You can touch the screen at any time to stop the scrolling.
Record the Screen
Capture action onscreen to create sharable videos, to show o your gaming skills, compose
tutorials, and do so much more.
Essentials
31

The are for reference only.gures
Record Your Voice During Screen Recording
Touch the microphone icon to enable or disable the microphone while recording the screen.
•When the microphone is enabled (i.e. it is displayed as ), you can record your voice
while recording the screen.
•When the microphone is disabled (i.e. it is displayed as ) you'll only be able to record
system sounds, such as audio and video playback.
Show or Hide Touches During Screen Recordings
While recording your screen, you can choose whether or not you would like to show touches.
Essentials
33

Touch next to the red timer at the top of the screen, and enable or disable Show
touches, during the recording.
Enter Text
Use Celia Keyboard
Celia Keyboard is a secure and intuitive keyboard developed by Huawei. It supports ecient
voice inputs, smooth handwriting, as well as 170+ input languages.
If Celia Keyboard is not yet installed on your device, search for and install it in .AppGallery
Go to Settings System & updates Language & input Celia Keyboard > > and set as the
default keyboard.
The are for reference only.gures
Text Input
Keyboard input
Celia Keyboard comes with a 26-key default layout. As you begin typing, a text box will
display, where you can select predicted words.
Essentials
34
Press and hold a letter key, and swipe up to enter a number, or swipe left or right to enter a
letter.
Voice input
Turn your speech into instant text.
•Touch and hold down on to go to the voice input screen.
•On the voice input screen, touch to select your preferred language.
This feature is only available in some countries and regions.
Switch to Another Input Language
Touch and hold in the lower left corner and select or English(United States) More
languages… in the pop-up menu. Alternatively, touch to quickly switch input language.
Celia Keyboard Settings
Set the skin
On the input keyboard, go to > and select a skin.Theme
Set the font
On the input keyboard, go to > Settings Font > and select a font.
Set the Mechanical Keyboard
On the input keyboard, go to > Mechanical keyboard Mechanical and toggle on the
keyboard switch.
To switch back to the normal keyboard, toggle the o Mechanical keyboard switch.
Some devices do not support the mechanical keyboard.
Multi-Window
Edit the Multi-Window Dock
Edit apps in the Multi-Window dock, by adding or removing them, or rearranging their order,
to customize the dock to your heart's content!
Essentials
35

The are for reference only.gures
Swipe inward from the left or right edge of your phone and hold to bring up the Multi-
Window dock. From there, feel free to:
•View apps that support Multi-Window: Touch to apps that support Multi-nd
Window in the section.More apps
•Add apps: Go to > to enter the editing screen. Then touch the apps you wish to
add to the Multi-Window dock, and touch .
•Move apps: Go to > to enter the editing screen, touch and hold down on an app
icon in the Multi-Window dock, drag it to your desired position in the dock, and touch .
Essentials
36

•Remove apps: Go to > to enter the editing screen, touch in the upper right
corner of an app icon in the Multi-Window dock, and touch .
The recommended apps in the Multi-Window dock can't be deleted.
The Multi-Window dock is enabled by default. To disable it, go to Settings Accessibility >
features Multi-Window Multi-Window dock > , and turn the o switch.
Use the Floating Window
Open a window while gaming, and you can chat with a friend without missing aoating
second of the action.
The are for reference only.gures
To open a window:oating
Essentials
37

•Swipe inward from the left or right edge of your phone and hold to bring up the Multi-
Window dock. Then touch any app in the dock to open it as a window.oating
•Swipe up from the bottom of the screen to enter the Recent tasks screen, and touch the
icon in the top right corner of an app preview to open the app as a window.oating
To relocate the window:oating
Drag the bar at the top of the window to move the window to the desired location.oating
To resize the window:oating
Drag the bottom edge, two sides, or bottom corners of the window to resize it.oating
If you reduce the window to the smallest possible size, and then release theoating
window, it will automatically shrink into a small window that remains tooating xed
the upper right corner of the screen.
To minimize a windowoating , perform any of the following:
•Touch at the top of the window.oating
•Touch and hold down on the bar at the top of the oating window, and quickly drag it to
the left or right.
•Touch and hold down on the bar at the top of the window, and drag it to the leftoating
or right screen edge.
To return to full-screen mode, perform any of the following:
•Touch at the top of the window.oating
•Touch and hold down on the bar at the top of the window, and quickly drag itoating
upwards.
•Touch and hold down on the bar at the top of the window, and drag it up to theoating
status bar.
To , perform any of the following:close a windowoating
•Touch at the top of the window.oating
•Touch and hold down on the bar at the top of the window, and quickly drag itoating
downwards.
•Touch and hold down on the bar at the top of the window, and drag it down tooating
at the bottom of the screen.
To switch to Split-screen mode: If you are not on the home screen, touch and hold down
on at the top of the window, and drag it to the left or right edge (inoating
landscape mode) or the top or bottom edge (in portrait mode) of the screen.
Essentials
38

Find and Switch Between Floating Windows for Apps
You can quickly and switch between windows for apps using the nd oating oating
window management function.
1Make sure that you have opened oating windows for multiple apps and minimized them
into the ball.oating
2Touch the ball to display all window previews:oating oating
•Browse through the window previewsoating : Swipe up or down to thend
oating window preview of the app you are looking for.
•Display the window for an appoating : Touch the window preview of theoating
app to display it in a window.oating
•Close the window for an appoating : Touch on the window preview tooating
close it.
Open an Attachment in a Floating Window
You can open a link or attachment within apps (such as Email and Notepad) in aspecic
oating window.
This feature is unavailable in some apps.
1Open the Email app.
2Touch a link or attachment in the Email app to open it in the window.oating
•Open a link: Touch a link in the Email app to display it in a window.oating
•Open an attachment: Touch an attachment (such as a document, image, or video) in
the Email app to display it in a oating window.
Split the Screen, to Multi-Task Away
Open apps in split-screen mode, for seamless multi-tasking at all times.
Essentials
39
•The are for reference only.gures
•Split-screen mode is only supported in certain apps.
Split the Screen
1After opening an app from the home screen, swipe inward from the left or right edge of
your phone and hold, to bring up the Multi-Window dock.
2Hold down on an app in the dock, drag it on to the screen, and release.
Common Operations in Split-Screen Mode
When in split-screen mode, feel free to:
•Switch split screens: Touch and hold down on at the top of a split screen until this
split screen shrinks, then drag this split screen to the other split screen and release, to
switch split screens.
Essentials
40

•Adjust the split screen ratio: Drag between the two split screens to adjust the relative
size of each split screen.
•Save split-screen combinations: Save common split-screen combinations to the home
screen, and tap to apply them. Touch or between the two split screens, and touch
Save combo to save the split-screen combination to your home screen. Touch the split-
screen combination icon on the home screen to apply it right away.
•Switch a split screen to a oating window: Touch and hold down on near the top of
a split screen, and drag it to the left or right (in portrait mode) or downwards (in landscape
mode).
•Exit split-screen mode: Drag or between the two split screens, until the other
split screen disappears.
Drag and Drop Between Apps with Multi-Window
Use the Multi-Window feature to easily drag and drop images, text, and documents between
apps.
•Drag and drop an image: When taking notes with , open , select the photoNotepad Files
you want to add, and drag it into the editor.Notepad
•Drag and drop text: When sending an SMS message, open , touch and hold theNotepad
text you want to send, and drag it into the message text input box.
•Drag and drop a document: When writing an email, open , select the document youFiles
want to attach, and drag it into the email editor.
Not all apps fully support drag-and-drop with Multi-Window.
Multi-Window View for a Single App
You can create two task windows for the same app (such as and ), and dragEmail Notepad
images, text, or documents between the windows.
This feature is unavailable in some apps.
The following uses as an example.Email
To enable multi-window view for a single app:
1On the home screen, open .Email
2Swipe inward from the left or right edge of your phone and hold to bring up the Multi-
Window dock.
3Touch and hold down on the Email app icon in the dock, and drag it on to the screen and
release, to open two windows within the app.
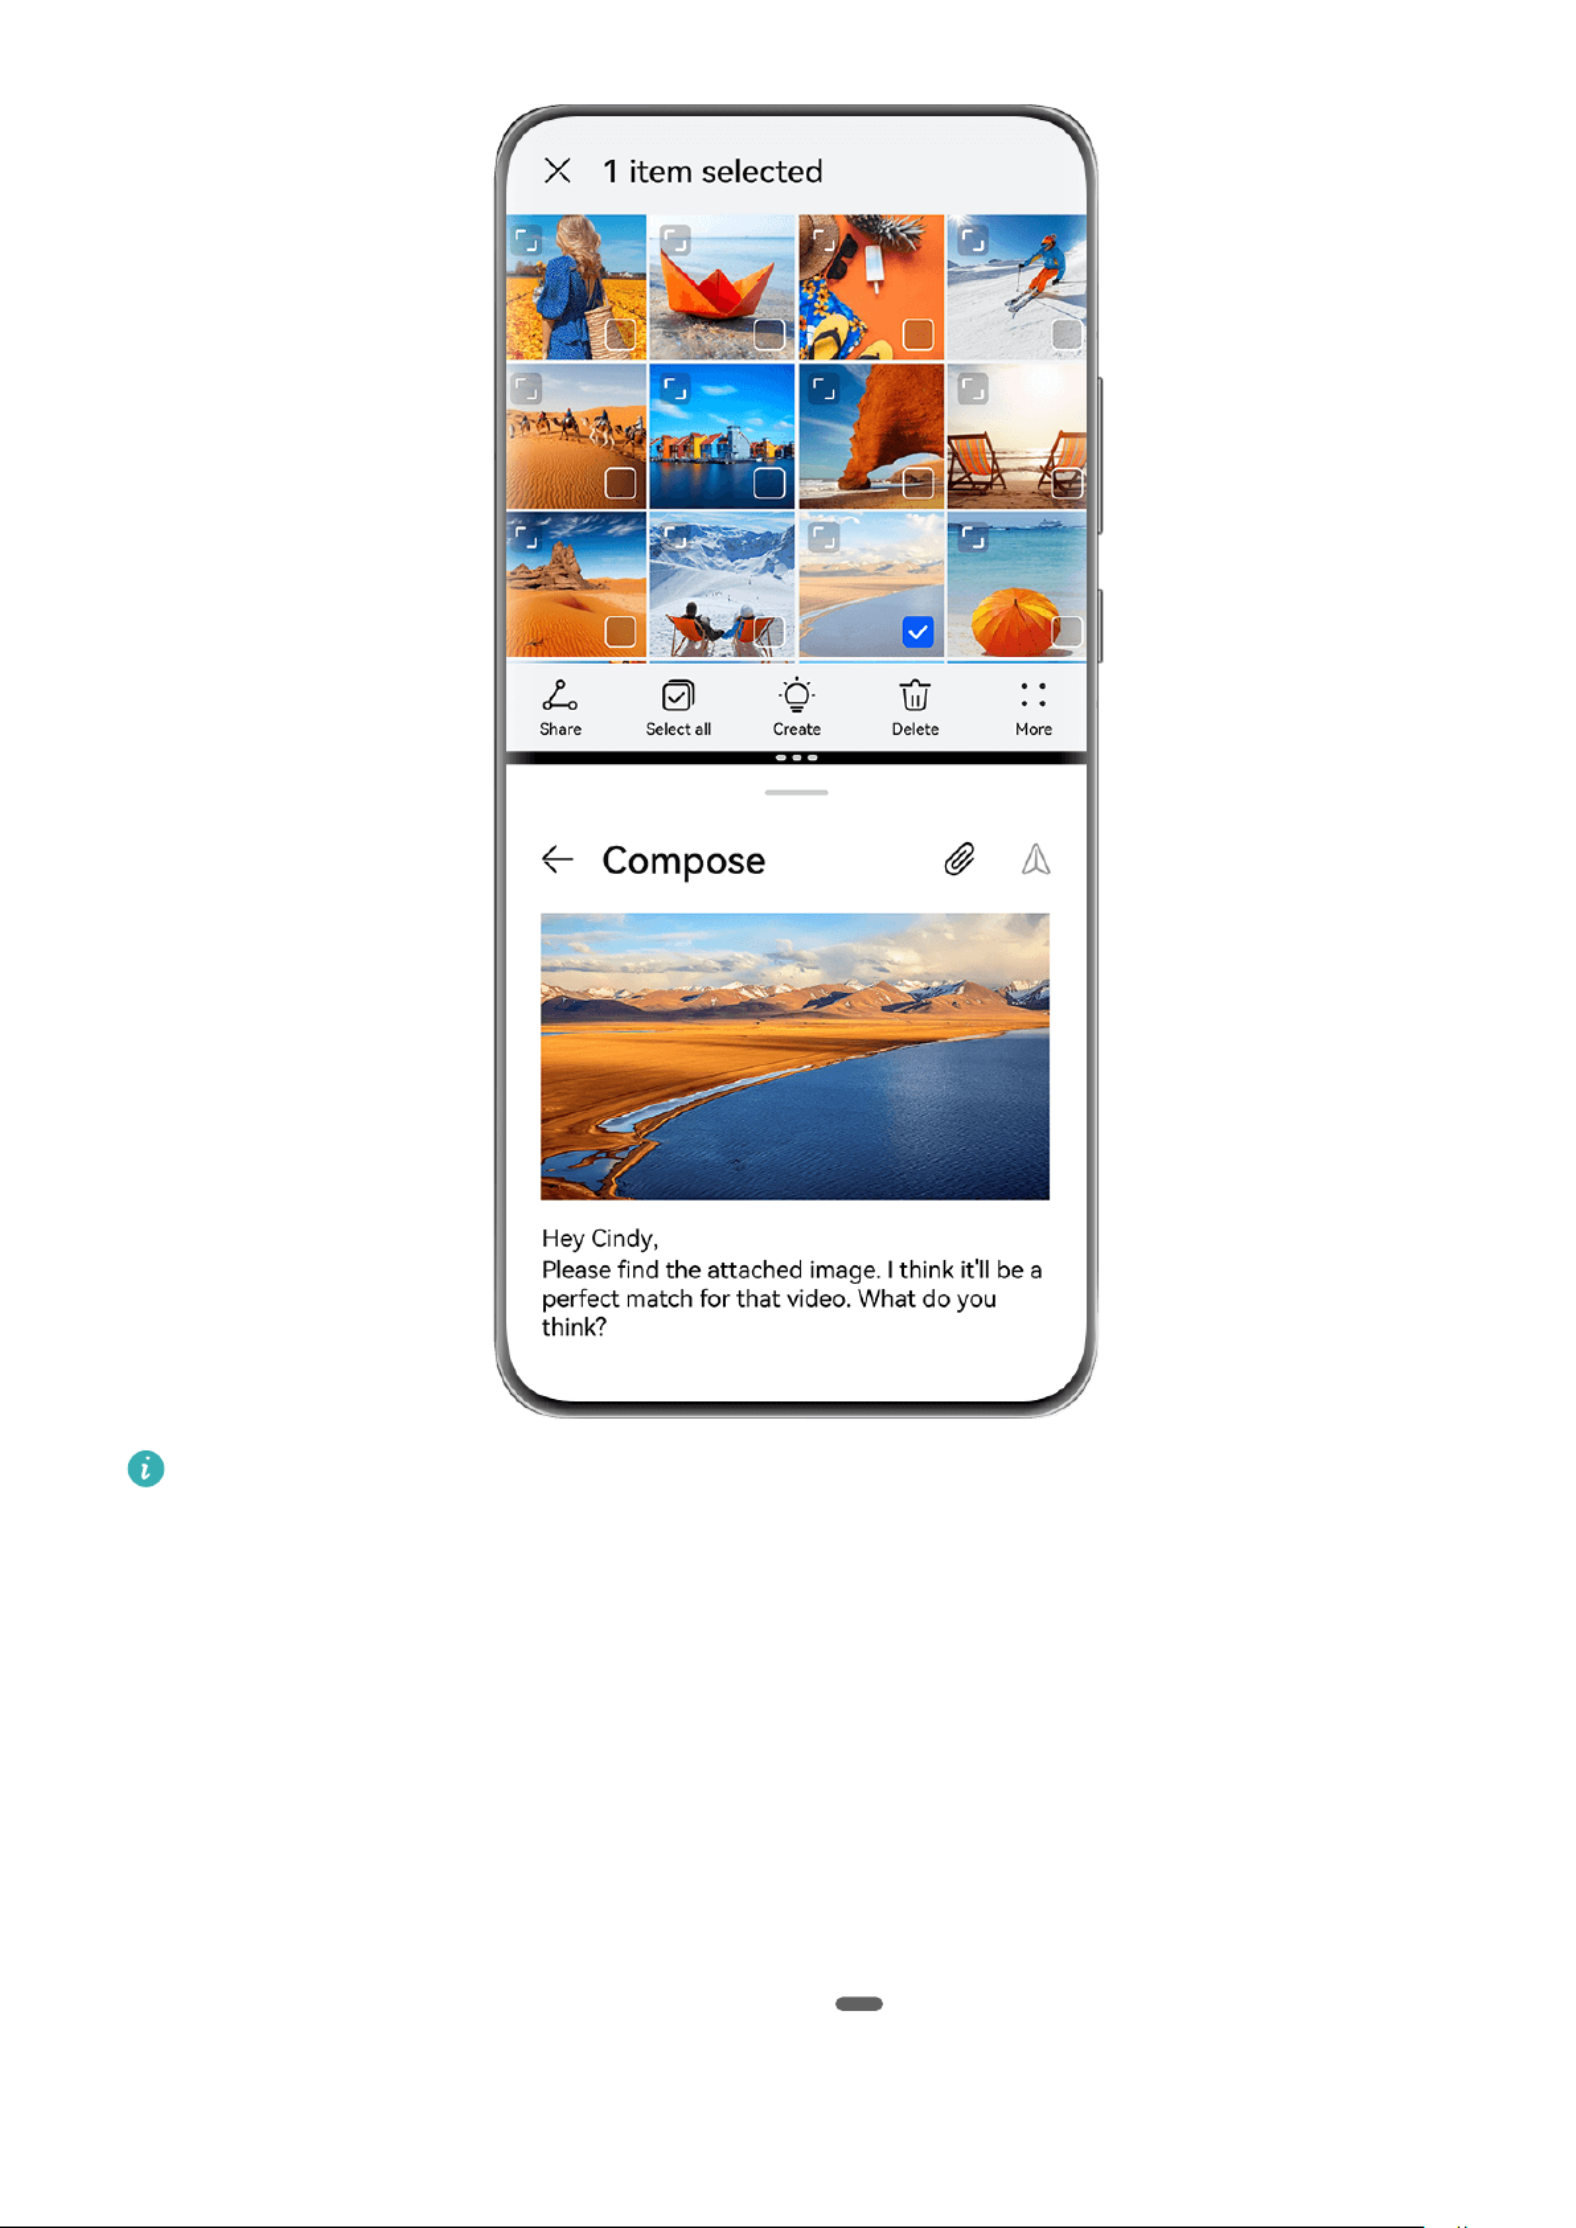
To drag images, text, or documents between a single app's split-screen windows:
•Drag an image: Select an image from one of the Email app's split-screen windows, and
drag it to the other window.
Essentials
41

•Drag text: Touch and hold down on the text and select the desired portion, from one of the
Email app's split-screen windows, then touch and hold down on the text once again, and
drag it to the other window.
•Drag a document: Select a document from one of the Email app's split-screen windows,
and drag it to the other window.
Shrink an App Window or Split the Screen
In full-screen mode, you can shrink the app screen to turn it into a window, or createoating
a split screen with another app as well, at any time.
This feature is unavailable in some apps.
Before using this feature, go to Settings System & updates System navigation > > , and
select .Gestures
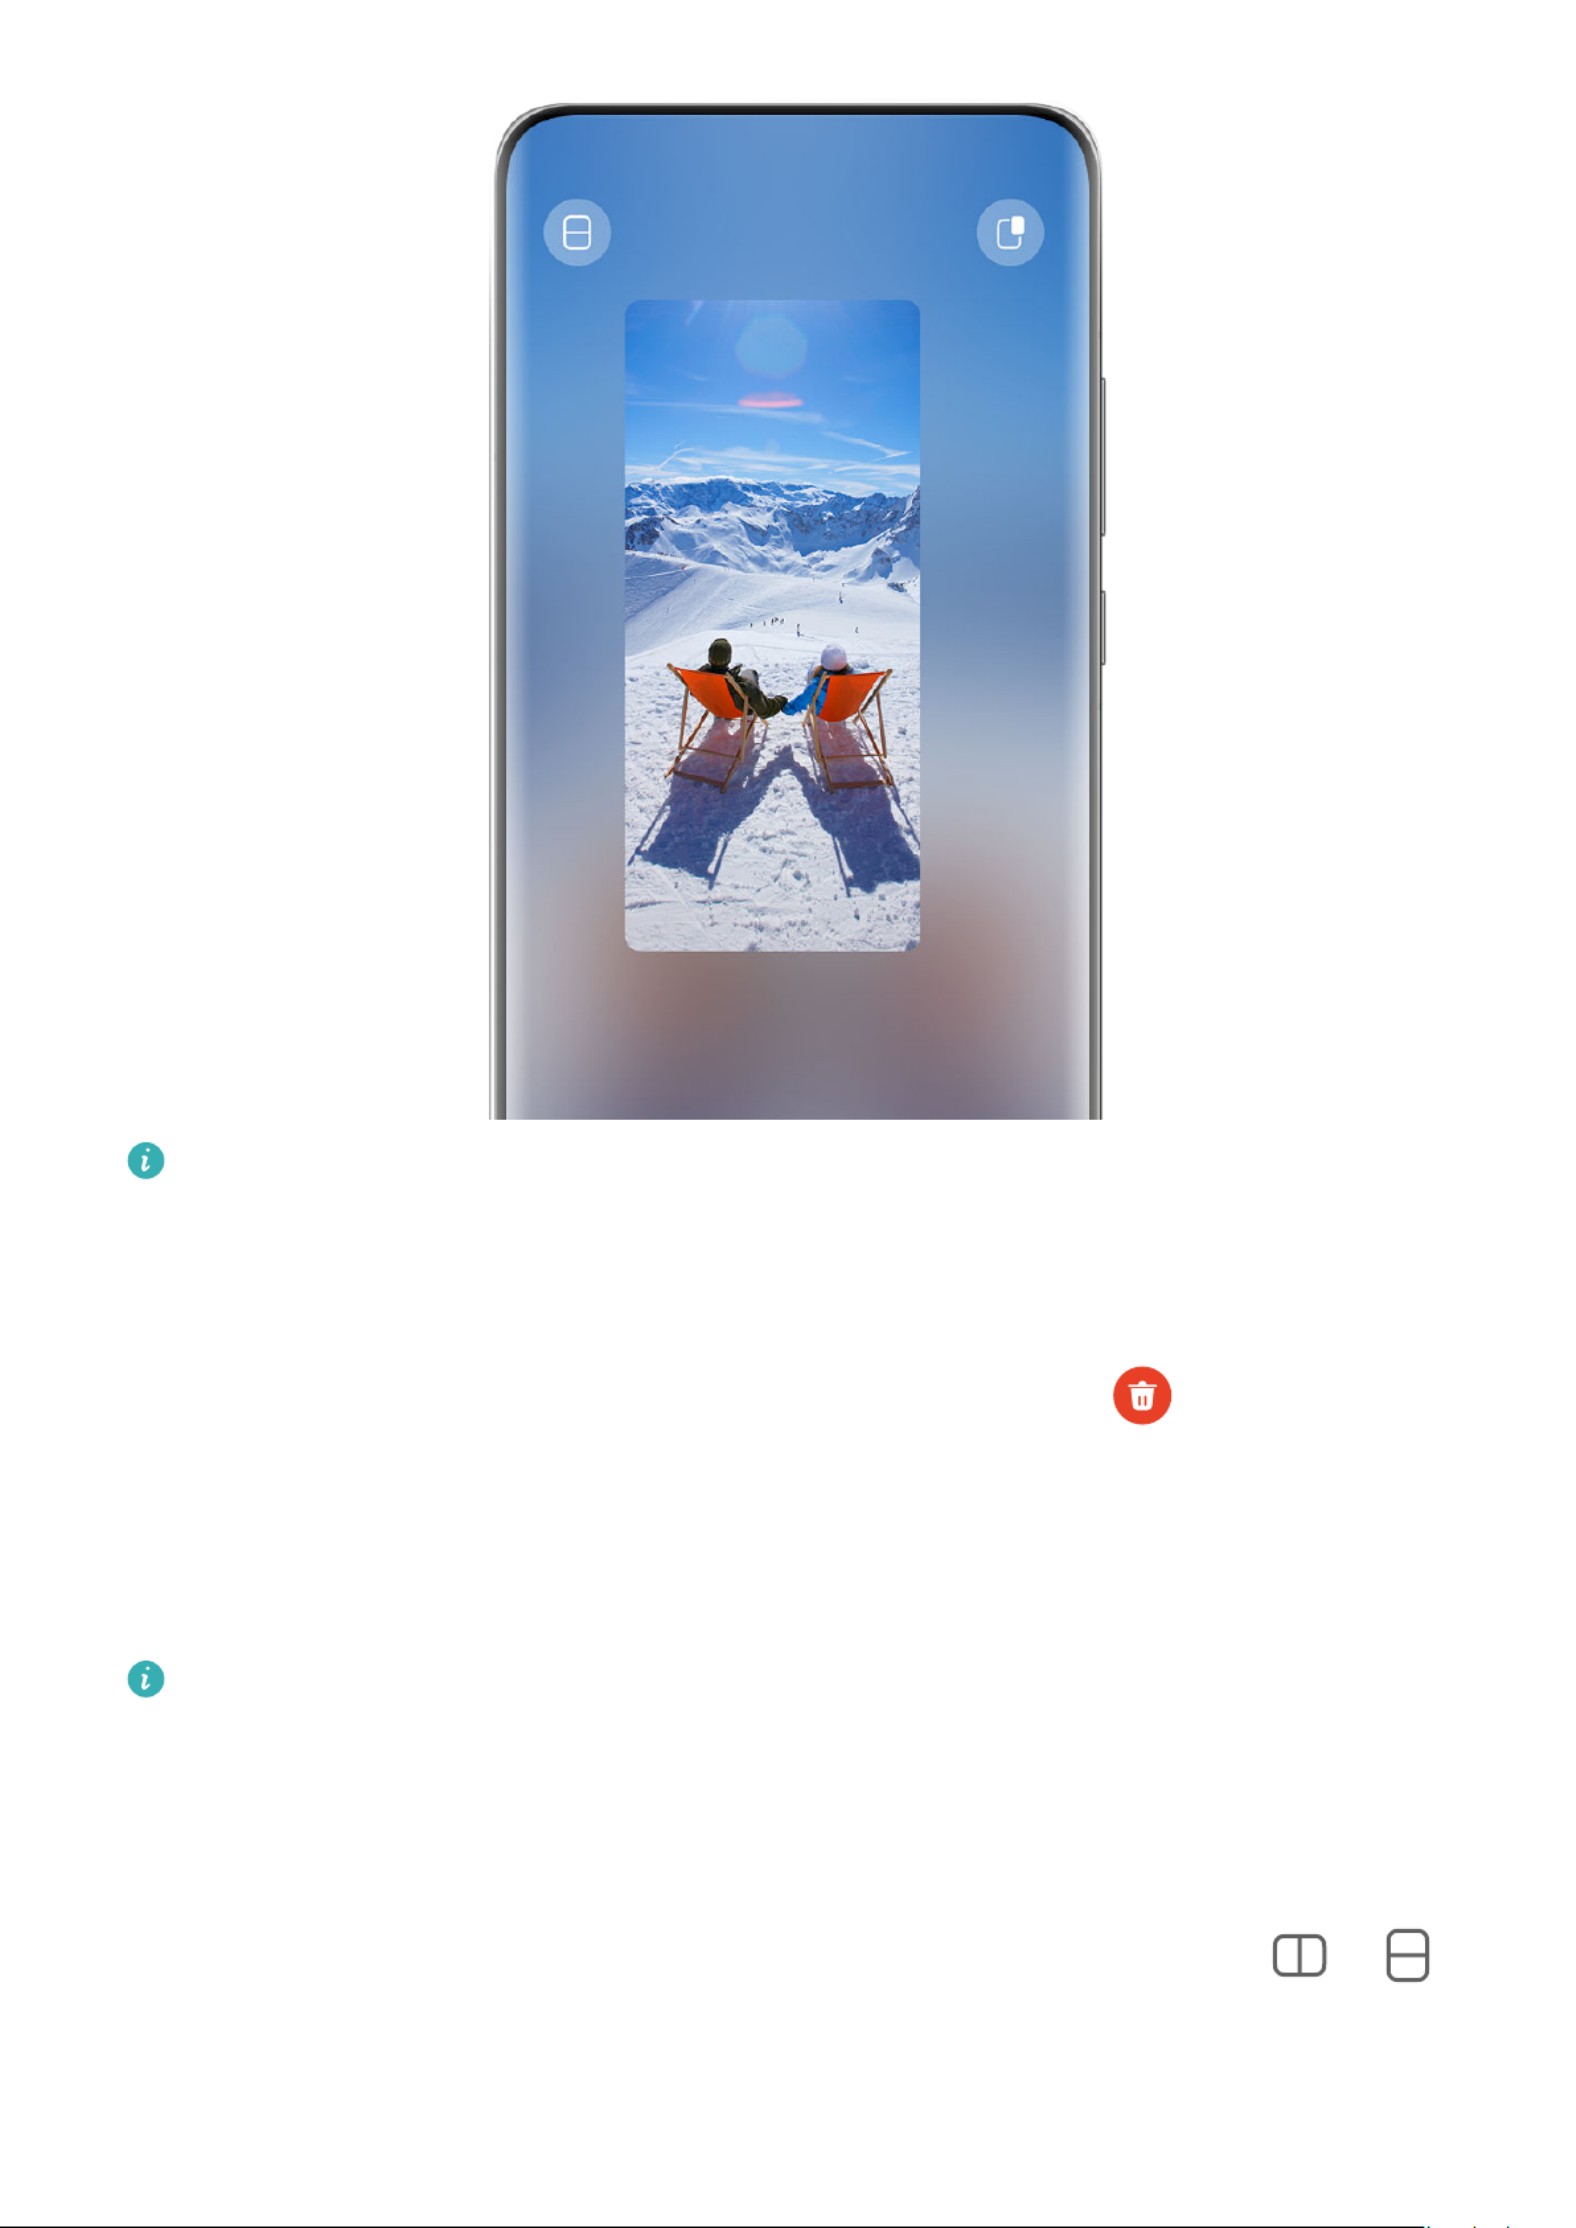
Shrink the app window
When an app is displayed in full-screen mode, swipe up from the bottom to in the top
right corner of the screen, to display the app as a small window. The small oating oating
window will automatically display in Landscape mode, when you shrink a video or game app
in landscape mode.
Small windows in Landscape mode are only supported in certain apps.oating
Essentials
42
The are for reference only.gures
You can try the following:
•To minimize a windowoating , hold down on the window, and drag it to the left or right
edge of the screen, or quickly drag it to the left or right.
•To close a oating window, hold down on the window, drag it to at the bottom of
the screen, or quickly drag it downwards.
•To open in full-screen mode, hold down on the window, drag it to the top of the screen,
or quickly drag it upwards.
•To enlarge the small windowoating , tap on it.
If you drag the bottom edge, two sides, or bottom corners of the standard-sized oating
window to reduce the window to the smallest possible size, and then release the window,
it will automatically shrink into a small window that remains to the upperoating xed
right corner of the screen.
Split the screen
1When an app is displayed in full-screen mode, swipe up from the bottom to or in
the top left corner of the screen.
2Then open another split-screen-capable app to display both apps in split-screen mode.
Essentials
43

Show Date and Time When the Screen Is O
Always On Display
With enabled, the lock screen will show the date, time, and more whenAlways On Display
the screen is o.
Enable Always On Display
1Go to Settings Home screen & wallpaper Always On Display Always > > , and enable
On Display.
2Set as prompted.Display mode
Set the Style for Always On Display
You can customize the display style for Always On Display (AOD) on your phone according to
your preferences.
Select a GIF Image or Moving Picture
You can select a local image (such as a GIF image or moving picture) for Always On Display
to make your display stand out.
1From under on the Images Always On Display screen, go to > > .Select image
After selecting a GIF image or moving picture, you can go to > to edit it.Edit Edit
2Set other options available on the screen as needed, and touch .Apply
Set an AOD with Weather Information
Get the weather forecast at just a glance, by setting the right Always on Display (AOD).
1On the screen, select the weather style from the section.Always On Display Images
When using this feature for the rst time, follow the onscreen instructions to download
the weather AOD. You can touch Preview to view the AOD display.
2Touch Apply.
To ensure the accuracy of weather information, make sure that you have set the location
to your city in the Weather app.
Set an AOD with One-Take Animation
Use your wallpaper or a Gallery image to create seamless dynamic Always on Display (AOD)
eects.
1On the screen, select the one-take animation AOD from the Always On Display Images
section.
2Touch . From there, feel free to:Change image
•Select Use current wallpaper to apply your current home screen wallpaper to the
one-take animation AOD.
Essentials
44

•Select , select your preferred image, and touch Select from Gallery APPLY.
3Apply any settings that suit your needs, and touch Preview to preview the AOD.
4Touch .Apply
Your selected image will be applied to the AOD, lock screen wallpaper, and home screen
wallpaper.
Add Grati
Personalize your Always On Display (AOD) by having certain text display, selecting a
preferred color scheme, and adding stickers.
1On the screen, select the style from the section.Always On Display grati Grati
2Enter the text in , and set the style options, such as , by following theEnter text Color
prompt.
You can also add , drag a sticker to relocate it, drag to adjust the size andStickers
direction of the sticker, or touch to delete the sticker.
3Touch .Apply
Create an Artistic Image for Always On Display
You can choose from multiple modern art styles. You can also specify the color scheme for
the artistic image, by taking a photo or choosing from your favorite photos. The colors in the
photo will form a color palette for the artistic image.
1From under on the screen, touch the style you would like toArtistic Always On Display
use.
2Set the related options for the style, such as .Artistic Layout
When setting , your phone can parse the colors in your photo and applyColor specied
the abstracted color palette to the artistic image.
Touch , take a photo or select a photo from Gallery, and then go to > Extract
colors.
3Touch .Apply
Clock Styles
You can select an or clock style for Always On Display.Analog Digital
1From under or on the Analog Digital Always On Display screen, swipe left or right to
browse the clock styles and select your preferred clock style.
2Set the related options for the selected clock style, such as .Show date
3Touch .Apply
Get More Styles for Always On Display
On the screen, touch or .Always On Display My AODs MORE AODS
Essentials
45

Charging
Wireless Reverse Charging
Wireless reverse charging allows your device to charge other devices that support this
feature, including phones, tablets, watches, and bands.
1Go to Settings Battery Optimizer > (or > ) and enable Wireless reverse charging.
2Power on the device to be charged and place it on the center of the back of your phone.
Do not place any metal objects between your phone and the device to be charged.
3If the device does not start charging within a few seconds, adjust its position and try
again.
Essentials
46

Smart Features
AI Touch
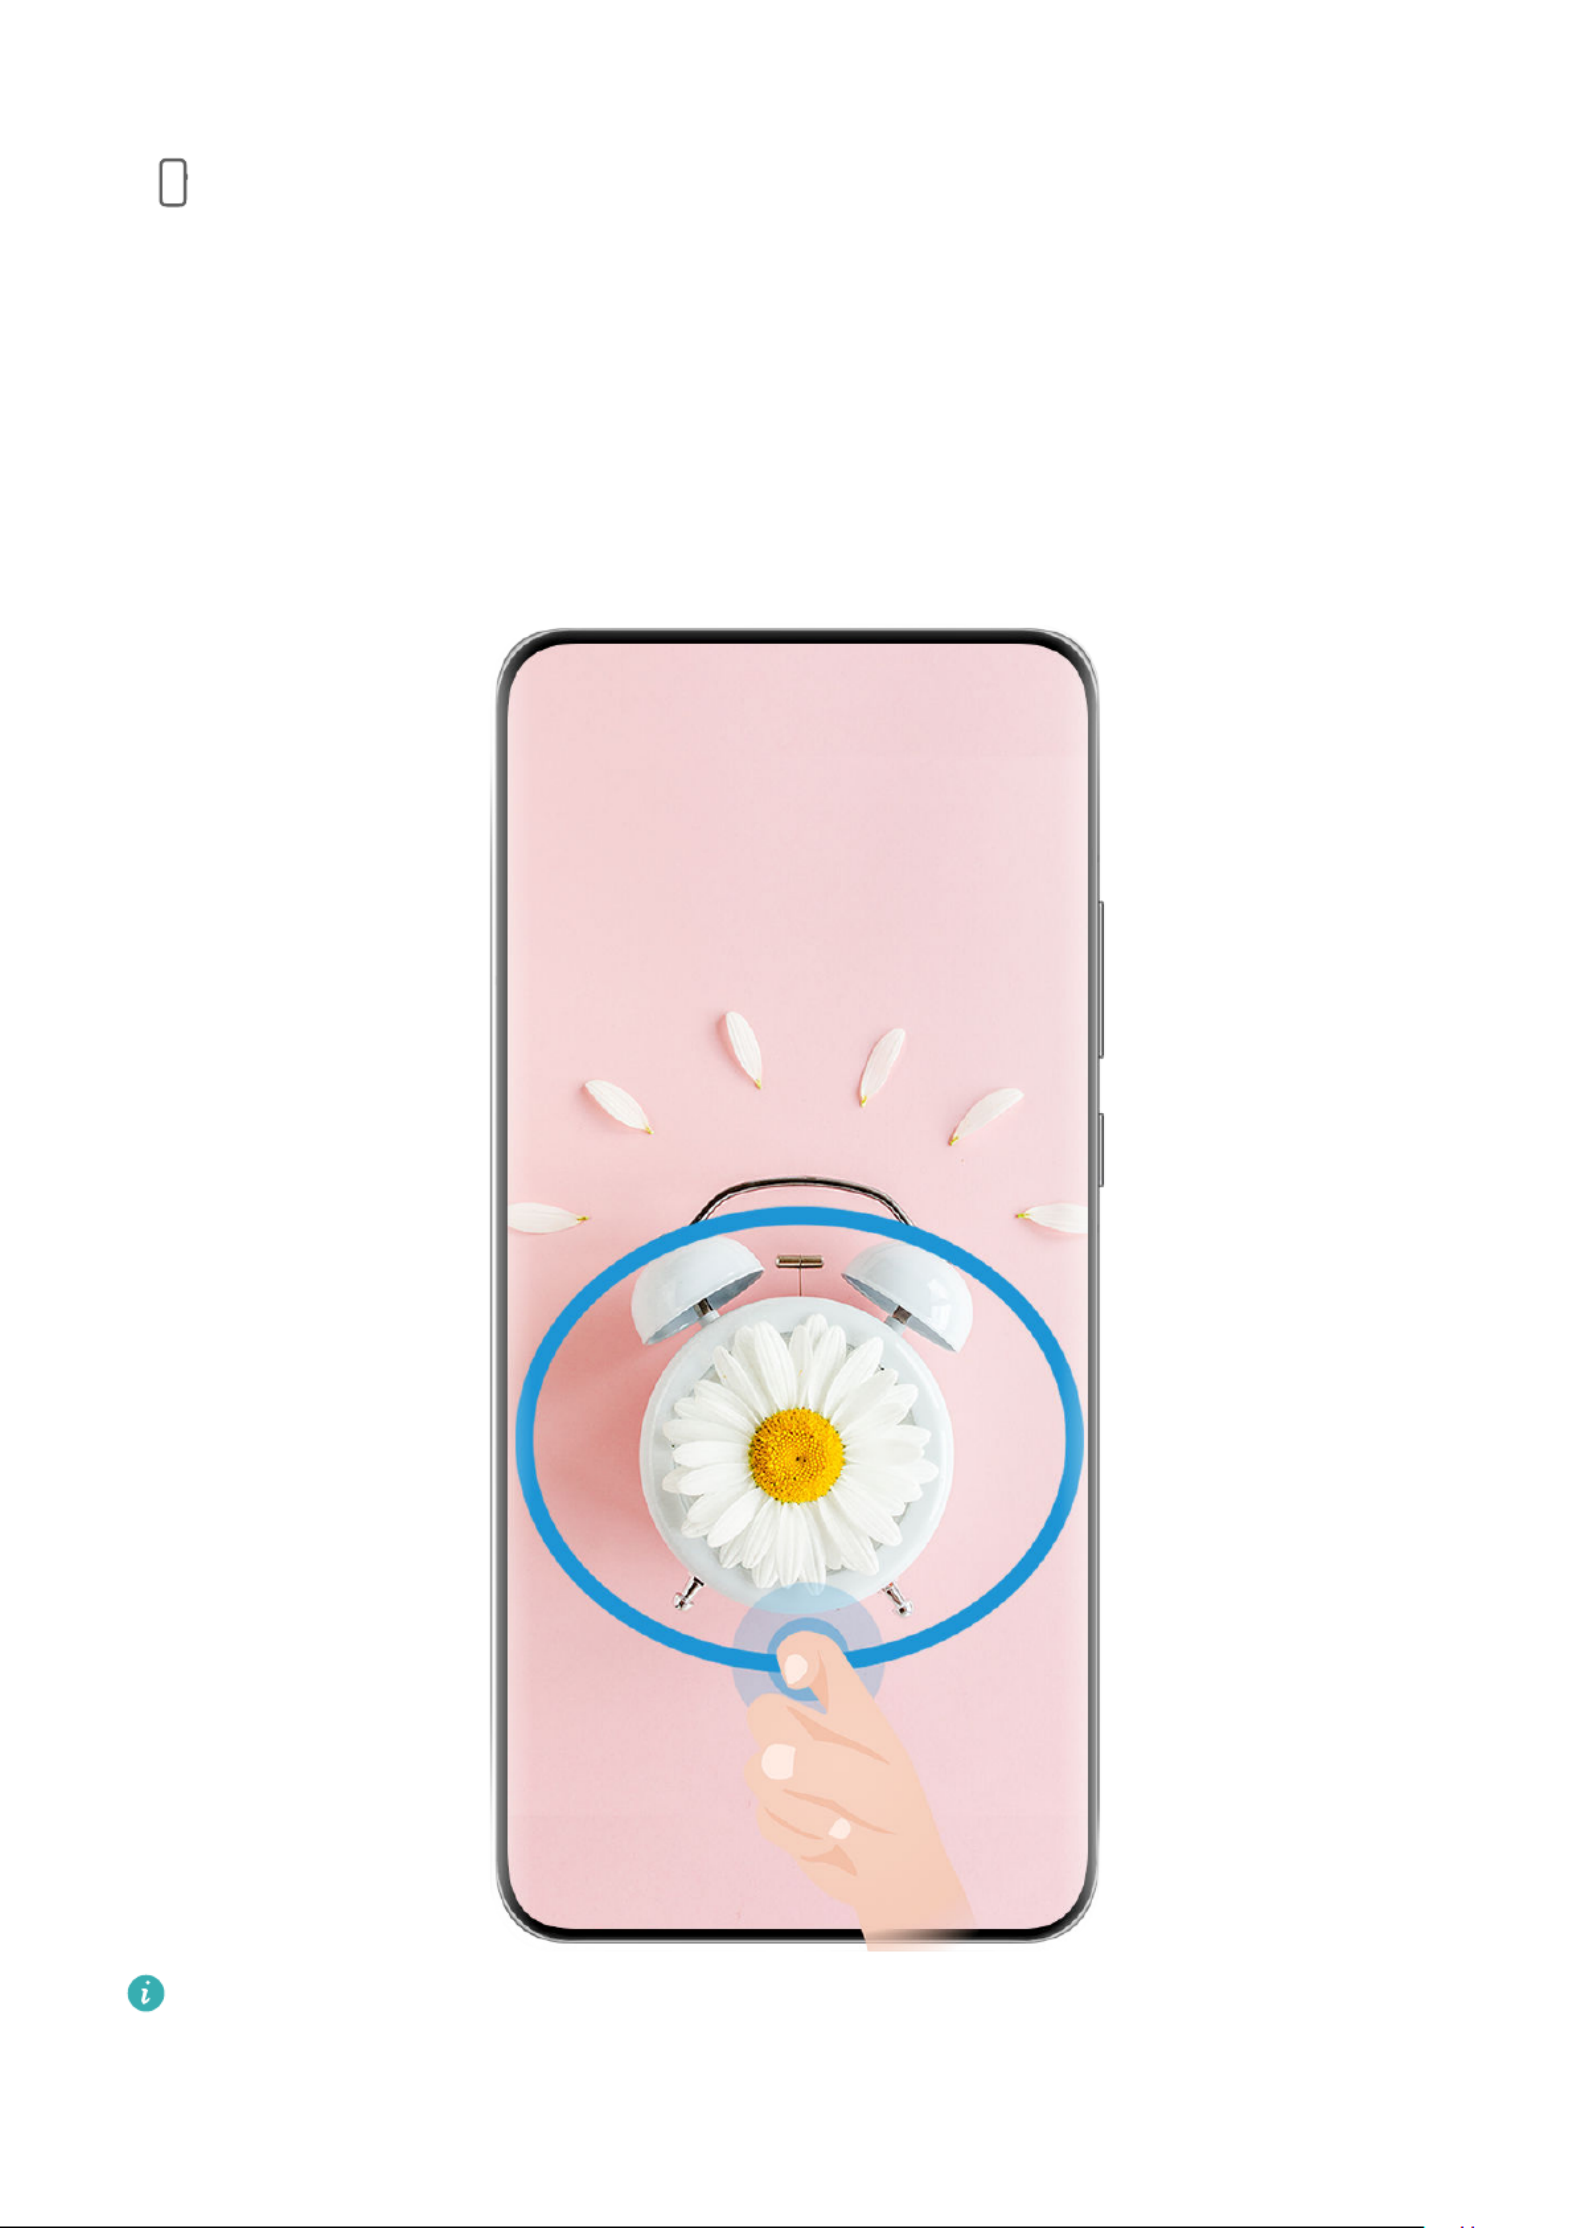
Enable AI Touch
When you see any content that you are interested in on your phone, touch and hold the
screen with two ngers to bring up AI Touch to learn more.
Go to Settings HUAWEI Assistant AI Touch AI Touch > > , and enable .
AI Touch will not be triggered when your phone is in landscape mode.
Shop with AI Touch
When you see an item you wish to buy on your phone, you can use AI Touch to quickly
search for the item and compare prices across multiple shopping platforms before making
the purchase.
Touch and Hold the Screen with Two Fingers for Visual Shopping
1Go to Settings HUAWEI Assistant AI Touch AI Touch > > , and enable .
2When you see an item that you wish to buy on your device, touch and hold down on the
image of the item with two ngers.
3Adjust the size and position of the box to around the item you wish toidentication t
identify.
4After the item has been links to purchase it on shopping platforms willidentied, dierent
be displayed.
Super Device
Switch Seamlessly Between Screens, with Super Device
Use for multi-device collaboration with just a tap, to turn all of your smartSuper Device
devices into one cohesive unit. For example, when you go home, you can continue watching
a movie on your HUAWEI Vision, by picking up right from where you had left o on your
phone; when you return to the you can continue to edit the same documents on youroce,
computer, by picking up right from where you had left on your phone.o
47

•Transfer to Bluetooth earphones, speakers, glasses, Visions, and head units.music
Device types and transfers supported by may vary by product.Super Device
1Swipe down from the upper right edge of the phone to display Control Panel, and touch
in to search for nearby available devices, or go to > to bind aSuper Device
new device.
2Open an app running a task you wish to transfer (such as HUAWEI Video or HUAWEI
Music) on your phone.
3In of Super Device Control Panel on your phone, touch the target device to which you
wish to transfer the task, or drag the target device to this device, and follow the onscreen
instructions to complete the transfer.
The are for reference only.gures
Multi-Screen Collaboration on a Computer or Tablet
Connect your phone to a computer and tablet via to make work moreSuper Device oce
ecient and collaborative. You can view and edit drag and drop copy and pasteles, les,
text, or even browse phone apps, from the Multi-screen Collaboration window on your
computer or tablet.
Smart Features
50

1Swipe down from the upper right edge of your phone to display Control Panel, and
search for or link the device you wish to connect to in the Super Device panel, using the
methods below:
•Search for computers: Touch to search for nearby computers that can be
connected to.
•Search for tablets: Touch to search for nearby tablets that can be connected to,
or go to > to search for and link with a tablet.
2In , touch the device that you wish to connect to, or touch Super Device and drag the
device icon to your device, and follow the onscreen instructions to complete the
connection.
Once the connection is established, your phone screen will display on the connected device.
To end Multi-Screen Collaboration, touch the connected device on the screen.Super Device
Easy Projection
Project Your Phone Screen Wirelessly
Project your phone wirelessly to stream movies and work on a large-screen device (such as a
Vision).
Dierent dierent display devices support projection protocols. Therefore, the projection
method may vary. Choose a suitable method based on the protocol supported by your device.
For details about the supported projection protocols, refer to the product manual or
contact the product manufacturer.
Smart Features
51

The are for reference only.gures
1Ensure that the Cast+/Miracast switch or the projection switch is enabled on the large-
screen device. For details about how to turn on the switch, refer to the product manual or
contact the product manufacturer.
2Swipe down from the upper right edge of your phone to display Control Panel, and touch
and .
3In Control Panel Wireless, touch to expand the shortcut switch panel, and touch
Projection. Your phone will then start searching for available external large-screen
devices.
You can also go to Settings More connections Easy Projection > > to enable
Wireless projection.
4Touch the device that you wish to project your phone to from the detected devices.
5Once your phone is projected, touch , and select your preferred audio device, either
the phone or Vision.
By default, after the connection is successful, banner for incoming calls,notications
messages, and alarms, and Multi-Window are only displayed on your phone instead of the
large-screen device. To change the settings, touch , and turn the switch for o Hide
notications.
The feature is only supported on certain products.Hide notications
Smart Features
52

To exit wireless projection, go to > Project screen on the phone screen; you can also
swipe down from the upper left edge of the screen to display the panel, andnotication
touch (depending on your device model).DISCONNECT
Use Desktop Mode to Make Work More Convenient
After your phone screen is projected, go to > .Desktop mode
In , your phone and the large-screen device work independently and can showDesktop mode
dierent content. The content of a phone projected on the large-screen device is in a layout
similar to that of the computer desktop.
For example, you can edit a document on the large-screen device while chatting on your
phone. You don't need to worry about missing out on calls, or messages, as anotications,
red dot will appear on the panel on the large-screen device to let you know.notication
Use Your Phone as a Touchpad
After your phone screen is projected to a large-screen device in , if noDesktop mode
keyboard or mouse is available, your phone can work as a touchpad to complete input
operations of a mouse and keyboard.
Go to > Touchpad, and you're free to:
•Use gestures as instructed to simulate mouse commands.
Smart Features
53
Produktspezifikationen
| Marke: | Huawei |
| Kategorie: | Telefon |
| Modell: | P60 Pro |
| Display-Typ: | OLED |
| Bildschirmdiagonale: | 6.67 Zoll |
| Anzahl der Farben des Displays: | 1,07 Milliarden Farben |
| Schutzfunktion: | Dust resistant, Splash proof, Water resistant |
| RAM-Kapazität: | 8 GB |
| Anzahl Prozessorkerne: | 8 |
| Gyroskop: | Ja |
| SMS (Kurznachrichtendienst): | Ja |
| Unterstützte Audioformate: | 3GP, AAC, AMR, FLAC, MIDI, MP3, MP4, OGG, WAV |
| E-Mail: | Ja |
| Elektronischer Kompass: | Ja |
| GPS: | Ja |
| BeiDou: | Ja |
| GLONASS: | Ja |
| Galileo: | Ja |
| USB Anschluss: | Ja |
| WLAN: | Ja |
| WLAN-Standards: | 802.11a, 802.11b, 802.11g, Wi-Fi 4 (802.11n), Wi-Fi 5 (802.11ac), Wi-Fi 6 (802.11ax) |
| Bluetooth: | Ja |
| Bluetooth-Version: | 5.2 |
| Bluetooth-Profile: | AAC, LDAC, SBC |
| Nahfeldkommunikation (NFC): | Ja |
| Kopfhörer-Anschluss: | USB Typ-C |
| Akku-/Batteriekapazität: | 4815 mAh |
| Kabelloses Aufladen: | Ja |
| Breite: | 74.5 mm |
| Tiefe: | 8.3 mm |
| Gewicht: | 200 g |
| AC-Netzadapter: | Ja |
| Mitgelieferte Kabel: | USB Typ-C |
| Produktfarbe: | Schwarz |
| Internationale Schutzart (IP-Code): | IP68 |
| Schnellladung: | Ja |
| Höhe: | 161 mm |
| Garantiekarte: | Ja |
| Schnellstartübersicht: | Ja |
| Markenspezifische Technologien: | Immer eingeschaltetes Display |
| Bildschirmform: | Gebogen |
| Lautsprecher: | Stereo |
| Unterstützte Videoformate: | 3GP, MP4 |
| USB-Stecker: | USB Typ-C |
| USB-Version: | 3.2 Gen 1 (3.1 Gen 1) |
| Autofokus: | Ja |
| Digitaler Zoom: | 100 x |
| Maximale Bildwiederholrate: | 120 Hz |
| Formfaktor: | Balken |
| Prozessor-Taktfrequenz: | - GHz |
| Prozessorfamilie: | Qualcomm Snapdragon |
| Prozessor: | 8+ Gen 1 |
| Standort-Position: | Ja |
| Interne Speicherkapazität: | 256 GB |
| Kompatible Speicherkarten: | Nicht unterstützt |
| Plattform: | Android |
| Rückkamera-Typ: | Dreifach-Kamera |
| Auflösung Rückkamera (numerisch): | 48 MP |
| Auflösung zweite Rückkamera (numerisch): | 13 MP |
| Rückkamera Blendenzahl: | 1.4 |
| Zweite Rückkamera Blendenzahl: | 2.2 |
| Frontkamera-Typ: | Einzelne Kamera |
| Auflösung Frontkamera (numerisch): | 13 MP |
| Frontkamera Blendenzahl: | 2.4 |
| Rückkamera-Blitz: | Ja |
| Blitz-Typ: | LED |
| Video-Auflösung: | 3840 x 2160 Pixel |
| Zeitraffer-Modus: | Ja |
| Nachtmodus: | Ja |
| Sprechzeit (3G): | - h |
| Standby-Zeit (3G): | - h |
| Annäherungssensor: | Ja |
| Umgebungslichtsensor: | Ja |
| Sim Karten Auswerfer: | Ja |
| SIM-Kartensteckplätze: | Dual-SIM |
| Mobilfunknetzgenerierung: | 4G |
| SIM-Kartentyp: | NanoSIM |
| 3G-Standards: | WCDMA |
| 4G-Standard: | LTE-TDD & LTE-FDD |
| Anti-Fingerprint Oberfläche: | Ja |
| MMS (Multimedia-Nachrichtenübermittlung Service): | Ja |
| Modulation: | 4096-QAM |
| Fingerabdruckscanner: | Ja |
| Prozessor Architektur: | ARM Cortex-X2+Cortex-A710+Cortex-A510 |
| Videoanruf: | Ja |
| Dritte Rückfahrkamera-Auflösung (numerisch): | 48 MP |
| Dritte Rückfahrkamera Blendenzahl: | 2.1 |
| Bildstabilisator: | Ja |
| Optischer Zoom: | 3.5 x |
| Bluetooth Low Energy (BLE): | Ja |
| Auflösung Frontkamera: | 4160 x 3120 Pixel |
| Schnellladetechnik: | SuperCharge |
| Schutzhülle: | Ja |
| Bildstabilisator Typ: | Optical Image Stabilization (OIS) |
| Hallsensor: | Ja |
| MIMO: | Ja |
| Hochformat: | Ja |
| Quasi-Zenit-Satelliten-System (QZSS): | Ja |
| Betriebssystem-Gabel: | EMUI 13.1 |
| Farbtemperatursensor: | Ja |
| Infrarotsensor: | Ja |
| NavIC: | Ja |
| Display-Auflösung: | 2700 x 1220 Pixel |
| 5G-Standard: | Nicht unterstützt |
| Makrofotografie: | Ja |
| Prozessorfamilie für künstliche Intelligenz: | Qualcomm |
Brauchst du Hilfe?
Wenn Sie Hilfe mit Huawei P60 Pro benötigen, stellen Sie unten eine Frage und andere Benutzer werden Ihnen antworten
Bedienungsanleitung Telefon Huawei

31 August 2024
27 August 2024
21 August 2024
7 August 2024
20 Juli 2024
1 Juli 2024
30 Juni 2024
28 Juni 2024
28 Juni 2024
28 Juni 2024
Bedienungsanleitung Telefon
- Telefon Samsung
- Telefon Infiniton
- Telefon Tristar
- Telefon Acer
- Telefon Anker
- Telefon Apple
- Telefon Asus
- Telefon BeeWi
- Telefon Hama
- Telefon Lexibook
- Telefon Logitech
- Telefon Medion
- Telefon Microsoft
- Telefon Philips
- Telefon SilverCrest
- Telefon Sony
- Telefon Sweex
- Telefon Tevion
- Telefon Trust
- Telefon Panasonic
- Telefon LG
- Telefon Roland
- Telefon ZyXEL
- Telefon Flex
- Telefon AEG
- Telefon Siemens
- Telefon Essentiel B
- Telefon Yamaha
- Telefon Yealink
- Telefon CSL
- Telefon Linksys
- Telefon XD Enjoy
- Telefon Netgear
- Telefon Denver
- Telefon Jacob Jensen
- Telefon MarQuant
- Telefon Renkforce
- Telefon Telefunken
- Telefon Thomson
- Telefon Trevi
- Telefon Blaupunkt
- Telefon Grundig
- Telefon Pyle
- Telefon GE
- Telefon Nordmende
- Telefon Fortinet
- Telefon Topcom
- Telefon ARCHOS
- Telefon Bang And Olufsen
- Telefon Pioneer
- Telefon Geemarc
- Telefon Jabra
- Telefon JBL
- Telefon Krüger And Matz
- Telefon Motorola
- Telefon Nokia
- Telefon PEAQ
- Telefon Sennheiser
- Telefon Xiaomi
- Telefon Olympia
- Telefon Switel
- Telefon Edenwood
- Telefon Hitachi
- Telefon ITT
- Telefon MT Logic
- Telefon Gigaset
- Telefon Toshiba
- Telefon Allview
- Telefon Cubot
- Telefon Fysic
- Telefon Lifetec
- Telefon Sencor
- Telefon Lindy
- Telefon Plantronics
- Telefon VXi
- Telefon Fenton
- Telefon Lenovo
- Telefon Marmitek
- Telefon Marshall
- Telefon Scosche
- Telefon TRENDnet
- Telefon Sagem
- Telefon AVM
- Telefon Parrot
- Telefon AVerMedia
- Telefon Zebra
- Telefon EnVivo
- Telefon Honor
- Telefon Aastra
- Telefon AGFEO
- Telefon Alcatel
- Telefon Amplicomms
- Telefon Audioline
- Telefon Auerswald
- Telefon Belgacom
- Telefon Binatone
- Telefon Brondi
- Telefon DeTeWe
- Telefon Doro
- Telefon Emporia
- Telefon Hagenuk
- Telefon Profoon
- Telefon Swatch
- Telefon Swissvoice
- Telefon Tiptel
- Telefon Vtech
- Telefon Logik
- Telefon Wiko
- Telefon Mackie
- Telefon Mitel
- Telefon NEC
- Telefon Overmax
- Telefon Airis
- Telefon Oricom
- Telefon Ranex
- Telefon Alcatel-Lucent
- Telefon Avaya
- Telefon Konftel
- Telefon Polycom
- Telefon Snom
- Telefon Wantec
- Telefon Uniden
- Telefon DrayTek
- Telefon Ascom
- Telefon Fanvil
- Telefon GPO
- Telefon Humantechnik
- Telefon Sagemcom
- Telefon RugGear
- Telefon D-Link
- Telefon T-Mobile
- Telefon Sylvania
- Telefon Kyocera
- Telefon EVOLVEO
- Telefon SPC
- Telefon Crosley
- Telefon Xblitz
- Telefon JPL
- Telefon HTC
- Telefon Prestigio
- Telefon Viking
- Telefon Auro
- Telefon BlackBerry
- Telefon Ericsson
- Telefon ZTE
- Telefon Cisco
- Telefon Grandstream
- Telefon Swisstone
- Telefon Unify
- Telefon OpenVox
- Telefon RCA
- Telefon OnePlus
- Telefon Bintec-elmeg
- Telefon Bogen
- Telefon Oppo
- Telefon Patton
- Telefon CAT
- Telefon Planet
- Telefon AT&T
- Telefon Realme
- Telefon Oregon Scientific
- Telefon EnGenius
- Telefon Mikrotik
- Telefon Davolink
- Telefon Gigaset Pro
- Telefon Innovaphone
- Telefon KPN
- Telefon Logicom
- Telefon Maxcom
- Telefon Oukitel
- Telefon Premier
- Telefon Proximus
- Telefon Sitecom
- Telefon SMC
- Telefon Spectralink
- Telefon Steren
- Telefon Sunstech
- Telefon Tecdesk
- Telefon Telstra
- Telefon Vimar
- Telefon British Telecom
- Telefon MXL
- Telefon AirLive
- Telefon Mitsai
- Telefon MyPhone
- Telefon BLU
- Telefon Audiocodes
- Telefon Legrand
- Telefon BT
- Telefon Amplicom
- Telefon Opel Mobile
- Telefon Digium
- Telefon Gamdias
- Telefon Chacon
- Telefon Clear Sounds
- Telefon On-Q
- Telefon Crestron
- Telefon 3Com
- Telefon Lewitt
- Telefon Teledex
- Telefon Tecno
- Telefon Sedna
- Telefon ALLO
- Telefon Hamlet
- Telefon Akuvox
- Telefon CyberData Systems
- Telefon CTA Digital
- Telefon Canyon
- Telefon Primare
- Telefon Dopod
- Telefon Neat
- Telefon Syco
- Telefon Tador
- Telefon 4family
- Telefon ArtDio
- Telefon Valcom
- Telefon Edge-Core
- Telefon Clarity
- Telefon Vogtec
- Telefon Olitech
- Telefon Cortelco
- Telefon Algo
- Telefon Future Call
- Telefon Dnake
- Telefon Liam&Daan
- Telefon FlyingVoice
Neueste Bedienungsanleitung für -Kategorien-

1 Dezember 2024
1 Dezember 2024

30 November 2024

15 Oktober 2024

15 Oktober 2024
14 Oktober 2024
13 Oktober 2024
11 Oktober 2024
9 Oktober 2024
7 Oktober 2024