Geemarc AmpliDect 595 SOS-Pro Bedienungsanleitung
Lesen Sie kostenlos die 📖 deutsche Bedienungsanleitung für Geemarc AmpliDect 595 SOS-Pro (56 Seiten) in der Kategorie Telefon. Dieser Bedienungsanleitung war für 11 Personen hilfreich und wurde von 2 Benutzern mit durchschnittlich 4.5 Sternen bewertet
Seite 1/56

USER GUIDE
English

TABLE OF CONTENTS
1. IMPORTANT SAFETY INSTRUCTIONS ............................. 1
2. SET UP THE TELEPHONE ................................................. 2
2.1 Package Contents ........................................................................... 2
2.2 Location .......................................................................................... 2
2.3 Connect the Corded Base Station ................................................... 3
2.4 Install and Charge the Handset Battery ........................................... 4
3. GET TO KNOW YOUR PHONE ........................................... 5
3.1 Overview of the Handset ................................................................. 5
3.2 Overview of the Corded Base .......................................................... 8
3.3 Handset LCD Display Icons Symbols and ...................................... 10
3.4 Handset Menu Structure ................................................................ 11
3.5 Text and Digit Entry Table ...................................................................... 12
3.5.1 English Character Set .................................................... 12
4. USE YOUR PHONE 13...........................................................
4.1 Make an External Call ................................................................... 13
4.1.1 Preparatory Dialing ......................................................... 13
4.1.2 Direct Dialing ................................................................... 13
4.1.3 Call from the Phonebook ................................................. 13
4.1.4 Call from the Call List ...................................................... 13
4.1.5 Call from the redial list ..................................................... 14
4.1.6 Call timer ......................................................................... 14
4.2 Answer a Call ................................................................................ 14
4.3 BOOSTER Function ...................................................................... 14
4.4 End a Call 15.....................................................................................
4.5 Adjust Earpiece and Speakerphone Volume .....................................15
4.6 Mute a Call .................................................................................... 15
4.7 Redial the Last Number ................................................................. 16
4.7.1 Redial a Number from the Redial List ............................ 16
4.7.2 Store a Redial Number into the Phonebook ................... 16
4.7.3 Delete a Redial Number ................................................ 16
4.7.4 Delete the Entire Redial List .......................................... 16
4.8 Find the Handset ........................................................................... 17
4.9 Make an Internal Call ..................................................................... 17
4.9.1 Intercom ........................................................................ 17
4.9.2 Call All Handsets ........................................................... 18
4.9.3 Transfer an External Call ............................................... 18
4.9.4 Make a 3-way Conference Call ...................................... 18
5 PHONEBOOK ..................................................................... 19
5.1 Add a New Phonebook Entry ......................................................... 19
5.2 Search for a Phonebook Entry ....................................................... 19
5.3 View a Phonebook entry ................................................................ 19
5.4 Edit a Phonebook Entry ................................................................. 20
5.5 Delete a Phonebook Entry ............................................................. 20
5.6 Delete a Phonebook Entry ............................................................. 20

5.7 Delete the Entire Private Phonebook ............................................. 20
5.8 Check the Phonebook Usage ........................................................ 21
5.9 Set the Fast Dial Numbers 21.............................................................
5.9.1 Add or Edit the Fast Dial Number .................................... 21
5.9.2 Delete one or all Speed Dial Number .............................. 21
5.10 VIP setting .................................................................................... 22
5.9.1 Set the VIP number ......................................................... 22
5.9.2 View the VIP list .............................................................. 22
5.9.3 Delete or delete all VIP number ....................................... 22
5.9.4 Status of the VIP ............................................................. 22
6 CALLER DISPLAY (NETWORK DEPENDENT) .................. 23
6.1 View the Call List ........................................................................... 23
6.2 More information on the call log ..................................................... 23
6.3 Store a Call List Number into the Phonebook ................................ 23
6.4 Store a call list number into the black list ....................................... 23
6.5 Delete an Entry in the Call List ...................................................... 24
6.6 Delete the Entire Call List .............................................................. 24
7 BLACK LIST FUNCTION .................................................... 24
7.1 Record or edit a black list number 24 ..................................................
7.2 Check or edit the information of the phone number blocked......... 25
7.3 Delete an or all black list number ................................................... 25
7.4 Activation of the black list function ................................................. 25
7.5 Activation of the function for the private or unavailable number ..... 25
8 PICTURE BIG BUTTON MEMORY (BASE) ............................. 26
9 PHONE SETTINGS ............................................................. 26
9.1 Handset Settings ........................................................................... 26
9.1.1 Set the Ringer Melody for Internal Calls 26..........................
9.1.2 Set the Ringer Melody for External Calls ......................... 27
9.1.3 Set the Ringer Volume ........................................................27
9.1.4 Set alarm tones ............................................................... 27
9.1.5 Set Alert Tones ........................................................................ 27
9.1.6 Set the Handset Language.............................................. 27
9.1.7 Clock setting ................................................................... 28
9.1.7.1 Set the date format ............................................... 28
9 .7.2 Set the time format .1 .............................................. 28
9.1.7.3 Set the Time & Date ............................................ 28
9.1.8 Registration..................................................................... 29
9.1.9 Reset your phone ............................................................ 29
9.2 Base Settings with the handset 30.....................................................
9.2.1 Set the Ringer Melody ..................................................... 30
9.2.2 Set the ringer volume ...................................................... 30
9.2.3 Set the Flash Time ..............................................................30
9.2.4 Remove the rst ringer .................................................... 30
10 SOS EMERGENCY CALL 31 ..................................................
10.1 SOS setting .................................................................... 31

10.2 Make a SOS calls .......................................................................... 31
10.3 Select the SOS language .............................................................. 31
10.4 Record SOS message ................................................................... 32
10.5 Play SOS message ....................................................................... 32
10.6 Delete the SOs message ............................................................... 32
11 ALARM SETTING ............................................................... 33
11.1 Turn ON/OFF the Alarm ............................................................... 33
11.2 Rename the Alarm 33 .......................................................................
11.3 Set the alarm melody ..................................................................... 33
11.4 Voice memo for the Alarm ............................................................. 34
11.5 Play a voice Memo ........................................................................ 34
11.6 Delete a voice memo ..................................................................... 34
12 TALKING FUNCTION ......................................................... 34
13 ANSWERING MACHINE 35.....................................................
13.1 Switching Answering Machine On/O ............................................ 35
13.2 Play Messages on TAM ......................................................................... 35
13.3 Delete all Messages TAM on ................................................................ 36
13.4 Record Memos TAM on ......................................................................... 36
13.5 TAM Settings ................................................................................ 36
13.5.1 Record your Outgoing Message (OGM) .......................... 37
13.5.2 Playback the Outgoing Message (OGM) ......................... 37
13.5.3 Delete a Personalized OGM (SET OGM to DEFAULT) .....38
13.5.4 Set the Answer Delay ...................................................... 38
13.5.5 Set the Recording Time of Incoming Message 38.................
13.5.6 Set the TAM Language.................................................... 39
13.5.7 Turn On or O the Base Screening ................................. 39
13.5.8 Activate Remote Access .................................................. 39
13.5.8.1 Change the 4-Digit Remote Access PIN .................. 39
13.5.8.2 Activate or Deactivate the Remote access .............. 40
13.5.8.3 MSG alert function .................................................. 40
13.5.8.4 Remote Operations ................................................. 41
14 ADDITIONNAL DEVICES ................................................... 42
14.1 Set devices .................................................................................... 42
14.2 Devices ......................................................................................... 42
15 TROUBLESHOOTING ........................................................ 43
16 TECHNICAL SPECIFICATIONS ........................................ 46
17 CARE AND MAINTENANCE INSTRUCTIONS .................. 47
18 GUARANTEE ...................................................................... 48
19 DECLARATIONS ................................................................ 48

IMPORTANT SAFETY INSTRUCTIONS
!!! Please refer to our website: www.geemarc.com for an up to date user guide, as there may
be important updates and changes you need to be aware of !!!
CAUTION : Use only the battery provided. There may be a risk explosion if a wrong type of of
battery is used for the parent unit. The battery cannot be subjected to high or low extreme
temperature and low air pressure at high altitude during use, storage or transportation. Disposal
of battery into re or a hot oven, or mechanically crushing or cutting or the battery can result in an
explosion. Leaving the battery in an extremely high temperature surrounding environment can
result in an explosion or the leakage of ammable liquid of gas. Battery subjected to extremely
low air pressure may result in an explosion or the leakage of ammable liquid or gas. Dispose of
used battery according to the instructions.
Normal operating temperature for the product (e.g. 0 oC ~ 40oC).
Use only the adapters and battery listed below.
Power adapter information output: 6V DC 0.6A 3.6W. Ten Pao. Model: : ,
S005BNV0600060(EU), S005BNB0600060(UK)
Rechargeable Battery: Model: KH-AAAJ600-D x 3pcs. 1.2V 600mAh Corun.DC, .
When using your telephone equipment, basic safety precautions should always be
followed to reduce the risk of re, electric shock and injury, including the following:
1. Read and understand all the instructions.
2. Follow all warnings instructions marked the product.and on
3. Unplug this product from the wall outlet before cleaning. Do not use liquid or aerosol
cleaners. Use a damp cloth for cleaning.
4. Do not use this product near water (for example, near a bath tub, kitchen sink,
swimming pool).
5. Do not expose the telephone to direct sunlight or extreme cold environment. Do not put
the telephone close to a heating source such as radiators, cookers, etc.
6. Do not overload wall outlets and extension cords as this can result in the risk of re
or electric shock.
7. Unplug this product from the wall outlet refer servicing the distributor and to under
The following conditions:
• When the power supply cord or plug is damaged or frayed.
• the product If does operate normally not by following the operating instructions.
• the product has and the cabinet has If been dropped been damaged.
• the product exhibits a distinct change If in performance.
8. Avoid using a telephone (other than a cordless type) during an electrical storm.
There may be a remote risk of electric shock from lightning.
9. Do not use the telephone to report a gas leak within the vicinity of the leak.
10. Use only the supplied NiMH (Nickel Metal Hydride) battery pack! The operation
periods for the handsets only applicable with the default battery capacities.are
11. The use of other battery types or non-rechargeable batteries/primary cells can be
dangerous. These may cause interference and/or unit damages. The manufacturer will
not be held liable for damage arising from such -compliance.non
12. use third party charging bays. The battery may damaged.Do not be
13. Battery should not be exposed to excessive heat such as bright sunshine or re or
immersed in water.
14. For pluggable equipment, the socket-outlet (power adaptor) should be installed near
the equipment and be easily accessible.

Disposal warning
1. When this crossed-out wheeled bin symbol is attached to a product,
it means the product is covered by the European Directive 2002/96/EC.
2. All electrical and electronic products/battery should be disposed of
separately from the municipal waste stream via designated collection
facilities appointed the government by or the local authorities.
3. The correct disposal of your old appliance/battery will help prevent
potential negative consequences for the environment and human
health.
For more detailed information about disposal of your old appliance/battery, please
contact your city oce, waste disposal service or the shop where you purchased the product.
2. SET UP THE TELEPHONE
2.1 Package Contents
The package contains the following items:
• 1 Base station
• 1 Cordless handset
• 1 AC power adapter
• 3 NiMH rechargeable batteries
• 1 Telephone line cord
• 1 User’s manual
2.2 Location
For maximum coverage and the reduction of interference, here are some guidelines you
should consider where you place the base unit,
- Place it at a convenient, high, and central location with no obstructions between the
handset and base unit in an indoor environment.
- Place it away from electronic appliances such as televisions, microwave ovens, radios,
personal computers, wireless devices or other cordless phones.
- Avoid facing radio frequency transmitters, such as external antennas of mobile phone
cell stations.
- Avoid plugging it into the same circuit as other major household electrical appliances
because the potential of interference. Try moving the other appliance or the base unit to of
another power outlet.
If the reception for a base unit location is not satisfactory, move it to another location for better
reception.
Depending on the surrounding conditions as well as spatial and
structural factors, the range may be reduced. The phone’s signal
range indoors is normally less than outdoors.
2

2.3 Connect the Corded Base Station
Connecting the telephone
Connect the telephone cable to the telephone line socket (A) and to the telephone wall
socket ( ). B
Connect the power adapter jack to the base (and DC charger) ( ) then connect the C
power adapter plug in mains power ( D).
NOTE
Use only the power adapter supplied with the base station.
Classied TNV-3 according to EN62368-1 standard.
Classified “hazardous voltage” according to EN62368-1 standard.
3
TELEPHONE CONNECTION

2.4 Install and Charge the Handset Battery
1. Slide the battery cover downwards.
Install the 3 batteries into the socket as indicated, matching correct polarity (+,- ).
2. Align the cover at against the battery compartment, and then slide it upwards
Until it clicks into place.
3. Charge the handset placing face forward by it in the base. You a beep when hear
the handset is charging in the charger.
4. Charge the batteries for at least 12 hours when charging for the rst time.
NOTES
• Only use the batteries provided or NiMH type rechargeable batteries.
If the handset is not going to be used for a period of time, remove the batteries from the
handset to prevent any possible battery leakage.
4
SET UP THE TELEPHONE

3.2 Overview of the Base
1 /HANDSET LOCATOR
While the phone is idle, press to page all handsets.
2. /ANS ON
Press to turn the built-in answering system on or o.
3. MESSAGE COUNTER
Displays the number of messages recorded.
4. /PLAY/STOP
Press to start or stop message playback.
5. - /DELETE
Press to delete the message currently playing.
Long press to delete all old/ listened to messages when the phone is in idle.
8
GET TO KNOW YOUR PHONE

6. VOL (
)
During message playback, press to increase the listening volume.
While in idle mode, press to increase the base ringer volume.
7. VOL ( )
During message playback, press to decrease the listening
volume. , press to decrease the base ringer While in idle mode
volume.
8. SLOW
During message playback , press the key to slow the listening speed
9. IN USE
On when handsets are in use, or when the answering system is answering and
recoding an incoming call
BLINK hen the base unit is ringing. : w
10. / REPEAT
During message playback , press to repeat a message.
Press twice to play the previous message.
In idle mode : Press the key to record a memo and stop after recording.
9

a. Handset LCD Display Icons and Symbols
The screen display gives you information on the current status of the telephone.
Indicates the current signal strength. More bars
indicate a stronger signal strength. If the handset is
too far from the base, this icon will disappear on the
Steadily on when a call is in progress or an intercom call is in
progress. Flashes when there is an incoming call.
Steadily on when the speakerphone is turned on.
Steadily on when the battery is fully
charged. Animates when battery is
B p and Flashes when low battery is detected to indicate that it needs ee
charging.
Steadily on when the telephone answering machine (TAM) is turned on.
Flashes when a new message is received on the answering machine.
Steadily on when an alarm is set.
Flashes when the alarm time set before reaches.
Steadily on when there are received new Voice Message
Waiting (VMWI) not yet read.
Disappears when all the voice messages have been read.
Steadily on when any block mode/ w/o num is enabled.
Display in the call list for the blocked call entry.
Steadily on when the ringer is switched off.
Steadily on when there is(are) new call(s) in call list.
Steadily on when there is(are) new call(s) in call list.
Steadily on when the boost function is activated
10
GET TO KNOW YOUR PHONE

b. Handset Menu Structure
In idle mode, pressing LEFT SOFTKEY will access the menu. Refer to the following for the
menu structure.
LEFT SOFTKEY
HS SETTINGS
SET SOS
REMINDER
TLK
DIGITS
SET
DEVICES
DEVICES
ANS. SYS.
RING SETUP
TONE SETUP
TEXT LANG
DATE & TIME
REGISTER
DEFAU LT
SOS
NUMBER
SOS MSG
SOS
LANG
ALARM 1 to
10
ON/OFF
If ON
You can
program
your alarm
ONCE
DAILY
MON-FRI
SAT-SUN
ON /
OFF
CHECK
SIGNAL
DOORBELL
Under a
selected
doorbell
CHIME
RECORD?
DBELL DVRT
DOORBELL
ALERTER
Setting
available for
the 2 devices
STATUS
LOG
RENAME
PLAYBACK
DEL OLD
MEMO
TAM ON/OFF
SET TAM
TAM LANG;
CALLSCREEN
TAM MSG
ANS. DELAY
REC. TIME
REMOTE ACC.
CHANGE PIN
MSG ALERT
11
CALL LOG
PHOTO MEM
PHONEBOOK
CALL
BLOCK
INTERCOM
BS
SETTINGS
Review
Call List
Under a
selected
Call List
entry:
DETAILS
ADD TO PB
ADD TO BL
DELETE
DELETE ALL
M0
M1
M2
M3
M4
M5
M6
M7
M8
M9
ALL
SPEED DIAL
VIP
Under an
PB entry:
ADD
VIEW
EDIT
DELETE
DELETE ALL
ADD VIP
ADD TO SD
STATUS
BLACK
LIST
SETTINGS
BLOCK
MODE
W/O NUM
HANSET
BASE
ALL
BS RINGER
RING VOL
FLASH TIME
FIRST RING

c. Text and Digit Entry Table
The following tables show you where each letter and punctuation character can be
found. This will be helpful when storing a name in the phonebook or renaming your
handset
In editing mode, a cursor is displayed to indicate the current text entry position. It is
positioned at the right of the last character entered.
Writing Tips:
1. Once a character is selected, the cursor will move to the next position after
a short pause.
2. You can move the cursor within the text by / to amend the text entry.
3. Press RIGHT SOFTKEY on the handset to delete the last character.
4. Press and hold RIGHT SOFTKEY on the handset to delete the entire
text string.
3.5.1 English Character Set
Key
Alphanumeric Editing
(For phonebook name editing and renaming handset)
Number
Editing (For
phone
number
editing, date
Press
1x
2x
3x
4x
5x
6x
7x
8x
9x
10x
11x
1
1
.
-
’
(
)
*
#
&
/
,
1
2
a
b
c
A
B
C
2
2
3
d
e
f
D
E
F
3
3
4
g
h
i
G
H
I
4
4
5
j
k
l
J
K
L
5
5
6
m
n
o
M
N
O
6
6
7
p
q
r
s
P
Q
R
S
7
7
8
t
u
v
T
U
V
8
8
9
w
x
y
z
W
X
Y
Z
9
9
0
0
0, P (Pause)
*
*
#
#
12
GET TO KNOW YOUR PHONE

4. USE YOUR PHONE
4.1 Make an External Call
4.1.1 Preparatory (Pre) Dialing
Using a handset:
Enter the phone number press and to dial the number. Press
RIGHT SOFTKEY
to clear the entry.
4.1.2 Direct Dialing
Using a handset:
Press to open the line, and then dial the phone number.
4.1.3 Call from the Phonebook
Using a handset:
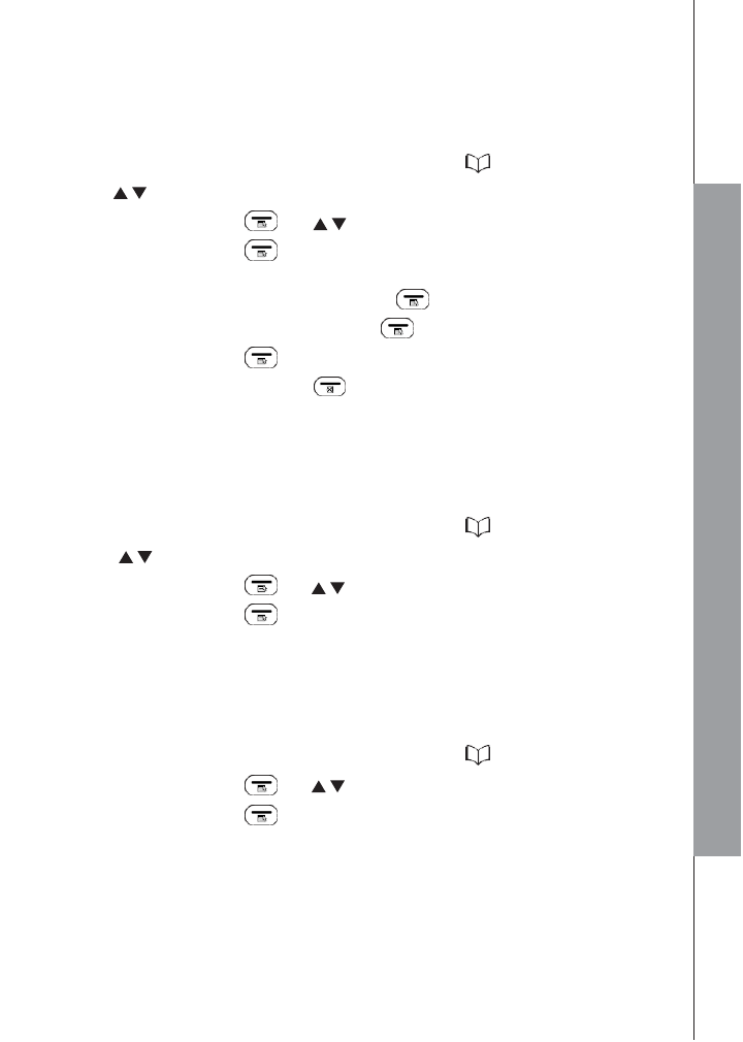
1. Press ▼ to access the phonebook list and press to select the desired
phonebook entry.
2. Press to dial the selected entry. Press it again to turn on the speakerphone.
4.1.4 Call from the Call List
Using a handset:
1. Press to access the call list.
OR
1. Press LEFT SOFTKEY to enter the main menu.
2. Press LEFT SOFTKEY to enter CALL LOG
3. Press to select the desired call list entry./
4. Press to dial the selected call list entry. Press it again to turn on the
speakerphone.
13

4.1.5 Call from the Redial List
Using a handset:
1. Press to access the redial list.
2. Press to select the desired redial number./
3. Press to dial the selected redial number. Press it again to turn on the
speakerphone.
4.1.6 Call Timer
Your handset automatically times the duration of each call. The call timer will display
a few seconds after the call has ended. shown hours, minutes and seconds It is in
format (HH:MM: SS).
4.2 Answer a Call
Using a handset:
If the handset is not in the charging cradle or the base station:
When the phone rings, press to answer a call. Press it again to turn on the
speakerphone.
If the handset is in the charging cradle or the base station: When the phone rings,
pick up the handset to answer a call.
4.3 BOOSTER Function
The BOOSTER function allows you to amplify the handset earpiece volume to
compensate for the person using the phone’s limited hearing.
Using a handset:
To turn on the BOOSTER function:
• at any time during a call. “BOOST ON” Press S OS displays on the handset
screen and the red LED on the top turns on.
• When the BOOSTER function is activated, press to increase or decrease /
the earpiece volume.
• The handset top indicator turns on as a visual reminder that the boost function is
on
To turn o the BOOSTER function and return the earpiece volume back to normal:
• Press again and the handset top indicator will turn o. S OS
NOTE:
The audio boost feature will be turned o automatically when the call is ended
To activate the booster at each call: see chapter 9.1.5
14
USE YOUR PHONE

4.4 End a Call
Using a handset:
During a call, press to end the call. OR
Put the cordless handset in the charging cradle to end the call.
4.5 Adjust Earpiece and Speakerphone Volume
There 6 levels (VOLUME 1 are to VOLUME 6) to choose from for each earpiece of
and speakerphone volume.
Using a handset: During a call:
Press to select volume 1-6. The current setting is shown. When you end the /
call, the setting will remain at the last selected level.
4.6 Mute a Call
With the call muted, you can talk to someone nearby without letting the caller hear
you during a call.
Using a handset: During a call:
Press RIGHT SOFTKEY to mute the microphone and “MUTE ON” will be
displayed on the handset screen. Your caller cannot hear you. Press RIGHT
SOFTKEY again to resume the microphone.
15
USE YOUR PHONE

4.8 Find the Handset
This feature helps you nd the misplaced handset(s).
You can locate the handset by operation on the base station as below.
• In idle mode, press /HANDSET LOCATOR.
All the handsets registered to the base will produce the paging tone, and “PAGING” will
ash on the screen. You can stop the paging by pressing / /
RIGHT SOFTKEY HANDSET LOCATOR on any handset or / on the base to stop
paging.
NOTE:
If there is an incoming call during paging, the phone will ring with the incoming call
instead of paging.
4.9 Make an Internal Call
This feature allows you to make internal calls, transfer external calls and make
conference calls. If the called handset is not answered within 60 seconds, it will stop
ringing and the calling one will return to standby mode. Please note that additional
handsets need to be registered to the base unit for this feature to be used.
4.9.1 Intercom
Using a handset:
1. In idle mode, press RIGHT SOFTKEY and the numbers of the registered
handsets will display except the calling handset.
2. Select the desired handset number that you want to intercom with.
3. The called handset rings. Press on the called handset to establish the internal
call.
17
USE YOUR PHONE

4.9.2 Call All Handsets
Using a handset:
1. In idle mode, press RIGHT SOFTKEY and the numbers of the registered
handsets will display except the calling handset.
2. Select to ring to all registered handsets.ALL
4.9.3 Transfer an External Call
Using a handset:
During an external call:
1. Press LEFT SOFTKEY and / to select .INTERCOM
2. Press LEFT SOFTKEY to select the desired handset you want to intercom
with.
3. Press LEFT SOFTKEY and the external call put is on hold automatically the and
called handset rings.
4. Press on the called handset to establish an internal call.
5. Press on the calling handset or put the calling handset on the charging cradle to
end the current call with the external party.
6. The external call is transferred automatically to the called handset.
4.9.4 Make a 3-way Conference Call
The conference call feature allows one external call to be a with two additional sh red
cordless handsets. The three parties can share the conversation. No network
subscription is required.
Using a handset: During the external call
1. Follow Steps 1 to 4 in section 9.3.4.
2. Press and hold on the calling handset to establish the conference call.
NOTE:
Any party (corded base or cordless handset) hangs up during a conference call will leave
the other party still in connection with the external call
18

5 PHONEBOOK
Your phone can store up to 50 phonebook entries in the cordless handset and the
telephone base with names numbers. Each and phonebook entry can have a
maximum of 20 digits for the phone number and 12 characters for the name.
Phonebook entries are stored alphabetically by name.
5.1 Add a New Phonebook Entry
Using a handset:
In idle:
1. Press LEFT SOFTKEY and to select main menu item PHONEBOOK and
then press LEFT SOFTKEY ALLto select .
2. Press LEFT SOFTKEY to access the phonebook list.
3. Press LEFT SOFTKEY to select ADD.
4. Press LEFT SOFTKEY and enter the number.
5. Press LEFT SOFTKEY and enter the name.
6. Press LEFT SOFTKEY to store the phonebook entry.
5.2 Search for a Phonebook Entry
Using a handset:
In idle:
1. Enter the phonebook list by press the key ▼
2. Enter the rst character of your desired name of the phonebook entries by pressing the
appropriate numeric keypad button multiple times to select the letter of the alphabet.
5.3 View a Phonebook Entry
Using a handset:
In idle:
1. Repeat the steps 1 to 2 in section 5.1 or press directly ▼.
2. Press to select the desired phonebook entry./
3. Press LEFT SOFTKEY and to select . VIEW
Press LEFT SOFTKEY and to see the number of the selected phonebook
entry
19
PRIVATE PHONEBOOK
5.4 Edit a Phonebook Entry
Using a handset: In
idle:
1. Repeat the steps 1 to 2 in section 5.1 or press directly ▼.
2. Press to select the desired phonebook entry./
3. Press LEFT SOFTKEY and to select / EDIT.
4. Press LEFT SOFTKEY and the current contents of the selected
phonebook entry displays.
5. Edit the number and press LEFT SOFTKEY .
6. Edit the name and press LEFT SOFTKEY .
7. Press LEFT SOFTKEY to conrm the setting.
Note: Use the RIGHT SOFTKEY to delete a character or a digit.
5.5 Delete a Phonebook Entry
Using a handset: In
idle:
1. Repeat the steps 1 to 2 in section 5.1 or press directly ▼.
2. Press to select the desired phonebook entry.
3. Press LEFT SOFTKEY and to select DELETE.
4. Press LEFT SOFTKEY to conrm.
5.6 Delete the Entire Private Phonebook
Using a handset: In
idle:
1. Repeat the steps 1 to 2 in section 5.1 or press directly ▼.
2. Press LEFT SOFTKEY and to select DELELE ALL.
3. Press LEFT SOFTKEY to conrm
20
PRIVATE PHONEBOOK

5.7 Check the Phonebook Usage
You can check how many phonebook entries have been occupied in your phone and how
many phonebook entries are available for you to store in the phonebook.
Using a handset:
1. Repeat the steps 1 to 2 in section 5.1 or press directly ▼.
2. Press LEFT SOFTKEY and to select STATUS.
3. Press LEFT SOFTKEY , the display shows “XX/50” (XX refer to the number of
phonebook entries).
4. Press RIGHT SOFTKEY or to EXIT.
5.8 Set the Speed Dial Numbers from 1 to 9
After setting the speed dial numbers, you can dial to the pre-set numbers by pressing
and holding the respective digit keys -9 on the handset) in idle mode.(1
5.8.1 Add or Edit the Speed Dial Number
Using a handset:
1. Press LEFT SOFTKEY and : / to select PHONEBOOK.
2. Press LEFT SOFTKEY and to select ./ SPEED DIAL
3. Press LEFT SOFTKEY / and to select from KEY 1 to KEY 9.
4. Press LEFT SOFTKEY and select .ADD
5. Press LEFT SOFTKEY and enter the NUMBER.
6. Press LEFT SOFTKEY and enter the NAME.
7. Press LEFT SOFTKEY to save
Or if there is already a number stored in the selected key:
4. Press LEFT SOFTKEY and : / to select EDIT.
5. Press LEFT SOFTKEY and modify the NUMBER with the RIGHT SOFTKEY
6. Press LEFT SOFTKEY and modify the NAME with the RIGHT SOFTKEY .
7. Press LEFT SOFTKEY to conrm.
5.8.2 Delete one or all Speed Dial Number
Using a handset:
1. Repeat the steps 1 to 3 in section 5.8.1.
2. Press LEFT SOFTKEY and to select / DELETE or DELETE ALL.
3. Press LEFT SOFTKEY to valid.
4. Press LEFT SOFTKEY to conrm
21

5.9
VIP Phonebook
Once you have saved your VIP numbers, you can search them in the VIP phonebook to nd
them easier .
5.9.1 Set the VIP number
Using a handset:
1. Press LEFT SOFTKEY and : / to select PHONEBOOK.
2. Press LEFT SOFTKEY and to select ./ ALL
3. Press LEFT SOFTKEY / and to select the phone number.
4. Press LEFT SOFTKEY and / to select ADD VIP.
5. Press LEFT SOFTKEY to save.
5.9.2 View the VIP list
Using a handset:
1. Press LEFT SOFTKEY PHONEBOOKand : / to select .
2. Press LEFT SOFTKEY and to select ./ VIP
3. Press LEFT SOFTKEY / and to select the phone number.
4. Press LEFT SOFTKEY VIEWand / to select .
5. Press LEFT SOFTKEY to access at the information
5.9.3 Delete or delete all the VIP number
Using a handset:
1. Press LEFT SOFTKEY PHONEBOOKand : / to select .
2. Press LEFT SOFTKEY and to select ./ VIP
3. Press LEFT SOFTKEY / and to select the phone number.
4. Press LEFT SOFTKEY Delete or delete alland / to select .
5. Press LEFT SOFTKEY to valid
6. Press LEFT SOFTKEY to conrm
5.9.4 Status of the VIP
Using a handset:
1. Press LEFT SOFTKEY and : / to select PHONEBOOK.
2. Press LEFT SOFTKEY and to select ./ VIP
3. Press LEFT SOFTKEY and / to select STATUS.
4. Press LEFT SOFTKEY to conrm The display shows “XX/50” (XX refer to the
number of VIP entries)
5. Press RIGHT SOFTKEY or to EXIT.
22
PRIVATE PHONEBOOK

6
CALLER DISPLAY (NETWORK DEPENDENT)
This feature is available if you have subscribed the Caller Line Identication service
with your telephone/network service provider. Your phone can store up to 20 received
calls on the cordless handset with date/time information in the call list. The number will
be shown on the LCD when the phone is ringing. If the number matches with one of
the entries in your private phonebook, the caller’s name stored in the private
phonebook will be displayed with the number. The phone will ring with the melody
associated with that phonebook entry.
If the caller caller display function is disabled’s , “UNAVAIL” will be displayed.
If the call is an international call or with unknown number, “OUT OF AREA” will be
displayed.
In standby, if three unanswered calls are received, “3 NEW CALLS” will be displayed.
(as an example)
6.1 View the Call List
All unanswered calls are saved in the calls log with the latest call at the top of the
list. When the call list is full, the oldest call will be replaced by a new call. The
unanswered call which has not been read is marked with icon.
Using a handset:
1. Press LEFT SOFTKEY and / to select CALL LOG.
2. Press LEFT SOFTKEY and / to see the desired call list entry.
6.2 More information on the call log
1. Follow Section 6.1 to access the call list.
2. Press LEFT SOFTKEY and / to select DETAILS
You will have the name and the date & time of the call you missed.
3. Press LEFT SOFTKEY to see the phone number
4. Press RIGHT SOFTKEY or to EXIT
6.3 Store a Call List Number into the Phonebook
Using a handset:
1. Follow Section 6.1 to access the call list.
2. Press LEFT SOFTKEY and to select / ADD TO PB.
3. Press LEFT SOFTKEY and the selected call list number will be displayed.
4. Press LEFT SOFTKEY and enter the Name.
5. LEFT SOFTKEY Press to conrm.
23
CID SETTING

6.4 Store a Call List Number into the Black list
Using a handset:
If you want to block a phone number, do the following to place the number in the
Black List
1. Follow Section 6.1 to access the call list.
2. Press LEFT SOFTKEY and ADD TO . / to select BL
3. Press LEFT SOFTKEY and the selected call list number will be displayed.
4. Press LEFT SOFTKEY and enter the Name.
5. Press LEFT SOFTKEY to conrm
6.5 Delete an Entry in the Call List
Using a handset:
1. Follow Section 6.1 to access the call list.
2. Press LEFT SOFTKEY and to select / DELETE.
3. Press LEFT SOFTKEY to valid.
4. Press LEFT SOFTKEY to conrm.
6.6 Delete the Entire Call List
Using a handset:
1. Follow Section 6.1 to access the call list.
2. Press LEFT SOFTKEY and to select / DELETE ALL.
3. Press LEFT SOFTKEY to valid.
4. Press LEFT SOFTKEY to conrm
7.
BLACK LIST FUNCTION
This feature allows you to block calls from the numbers you have entered.
You have the option to put up to 100 contacts and choose whether you reject all calls,
all calls except the VIP contact list, all private or unknown numbers.
7.1 Record or Edit a black list number
1. and Press to select / CALL BLOCK
2. and Press to select / BLACK LIST
3. Press to select ADD EDITor .
4. Press and enter the number.
5. Press and enter the name.
6. Press to store the phonebook entry.
24
BLACK LIST FUNCTION

7.2 Check or edit the information of the phone number blocked
With this function, you have the possibility to check the black list number
1. Follow steps from 1 to 2 in section 7.1
2. and Press to see the desired blocked phone number/
3. Press and to select / VIEW .
4. Press to see the name and the phone number
5. Press to exit
7.3 Delete an or all black list number
1. Follow steps from 1 to 2 in section 7.1
2. and Press to choose the desired blocked phone number/
3. Press and to select / DELETE or DELETE ALL .
4. Press and the display shows “CONFIRM?”.
5. Press conrm.to
7.4 Activation of the black list function
You have the possibility to block all the incoming calls, authorized only the VIP
numbers or to stop the function.
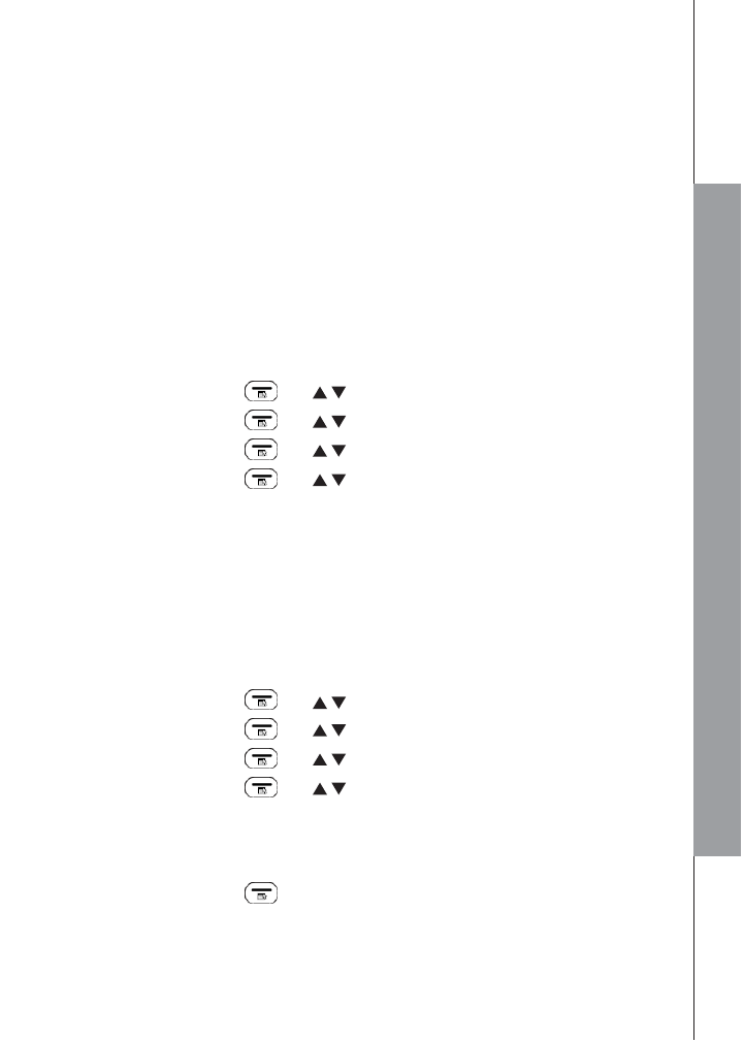
1. Press , and ▼/▲ to select CALL BLOCK.
2. Press , and ▼/▲ to select SETTINGS
3. Press and ▼/▲ to select BLOCK MODE
4. Press choose the type of blocking and OFF, BLOCK ALL ALLOW VIPor
5. Press conrm your choose and the display shows the icon to
7.5 Activation of the function for the Private or Unavailable numbers
You have the possibility to block the private or available numbers only. un
1. Follow steps from 1 to 2 in section 7.4
2. Press and to select / W/O NUMBER .
3. Press and choose the type of blocking PRIVATE UNAVAILBLEor
4. Press and / BLOCK to select
5. Press conrm. to
25
8.
PICTURE BIG BUTTON MEMORIES
This function is not available on the Amplidect 595ULE
9. PHONE SETTINGS
Your phone comes with a selection of settings that you can change to personalize your
phone the way you want it to work.
9.1 Handset Settings
9.1.1 Set the Ringer Melody for Internal Calls
You can set special melody personalize your internal ringer. A total melodies to of 10 are
provided for your selection.
1. Press LEFT SOFTKEY and to select ./ HS SETTINGS
2. Press LEFT SOFTKEY and to select / RING SETUP.
3. Press LEFT SOFTKEY and to select / INT RING.
4. Press LEFT SOFTKEY and to select the desired ringer melody for setting /
ringer melody for internal calls.
NOTE:
The respective ringer melody will be played while you are browsing the melody list.
5. Press LEFT SOFTKEY to conrm.
9.1.2 Set the Ringer Melody for External Calls
You can set special melody to personalize your external ringer. A total of 10 melodies are
provided for your selection.
1. Press LEFT SOFTKEY and to select ./ HS SETTINGS
2. Press LEFT SOFTKEY and to select / RING SETUP.
3. Press LEFT SOFTKEY and to select / EXT RING.
4. Press LEFT SOFTKEY / and to select the desired ringer melody for setting
ringer melody for external calls.
NOTE:
The respective ringer melody will be played while you are browsing the melody list.
5. Press LEFT SOFTKEY to conrm.
26
PHONE SETTINGS

9.1.3 Set the Ringer Volume
You can set the ringer volume level. A total of 6 ringer volume levels including
VOLUME OFF are provided for your selection.
1. Press LEFT SOFTKEY and / SETTINGSto select HS .
2. Press LEFT SOFTKEY and / RING SETUPto select .
3. Press LEFT SOFTKEY and / RING VOLUMEto select .
4. Press LEFT SOFTKEY and / to select the desired ringer volume.
NOTE:
• The respective ringer volume will be played during your selection.
• If OFF is selected, will be displayed on the handset screen.
5. Press LEFT SOFTKEY to conrm.
9.1.4 Set Alert Tones
A single beep is emitted when you press a key. You can turn on or o the key
tone/beep. You can also turn on the alert tones when low battery and/or out of
range are detected. Low battery tone will be emitted while you are talking with the
phone to alert you that you need to charge up the handset battery.
1. Press LEFT SOFTKEY and / SETTINGSto select HS .
2. Press LEFT SOFTKEY and / TONE SETUPto select .
3. Press LEFT SOFTKEY and / KEY TONE / BATT TONE to select /
RANGE TONE.
4. Press LEFT SOFTKEY and / OFFto select ON or .
5. Press LEFT SOFTKEY to conrm.
9.1.5 Activate the boost automatically
You can activate the boost at each call
1. Press LEFT SOFTKEY and to select / HS SETTINGS.
2. Press LEFT SOFTKEY and / AUTO BOOSTto select .
3. Press LEFT SOFTKEY and / OFFto select ON or .
4. Press LEFT SOFTKEY to conrm.
9.1.6 Set the Handset Language
You can choose the language to be displayed on the handset screen from a total
of 7 languages (English, Français, Deutsch, Nederlands, Italiano, Espanol,
Portugues).
1. Press LEFT SOFTKEY and / SETTINGSto select HS .
2. Press LEFT SOFTKEY and / TEXT LANGto select .
27

3. Press LEFT SOFTKEY and to select your desired language./
4. Press LEFT SOFTKEY to conrm.
9.1.7 Clock Settings
You will need to set the correct date and time so that you know when you received
answering machine messages or call list entries.
Using the handset:
9.1.7.1 Set the Date Format
1. Press LEFT SOFTKEY and / to select HS SETTING
2. Press LEFT SOFTKEY / and to select DATE & TIME.
3. Press LEFT SOFTKEY DATE FORMto show .
4. Press LEFT SOFTKEY / and to select your desired date format
(DD-- --MM YY or MM-- --DD YY).
5. Press LEFT SOFTKEY to conrm.
9.1.7.2 Set the Time Format
1. Follow Set the Date Format to arrive to DATE & TIME.
2. Press LEFT SOFTKEY / and to select TIME FORMAT.
3. Press LEFT SOFTKEY / and to select your desired time format (12
HR or 24 HR).
4. Press LEFT SOFTKEY to conrm.
9.1.7.3 Set the Date & Time
1. Follow Set the Date Format to arrive to DATE & TIME.
2. Press LEFT SOFTKEY / and to select SET DATE.
3. Press LEFT SOFTKEY and enter the date information. The date entered will be
in the format you set in section 9.1.7.1.
4. Press LEFT SOFTKEY and enter the time information. The time entered will be
in the format you set in section 9.1.7 ..2
5. Press LEFT SOFTKEY to conrm.
NOTE:
If time has been set before, the current time will display, otherwise, “HH MM” will be --
displayed.
If date has been set before, the current date will display, otherwise, “DD YY” will -- --MM
be displayed.
28
PHONE SETTINGS

9.2 Base Settings
Using the handset:
9.2.1 Set the Ringer Melody
You can set special melody to personalize your base external ringer. A total of 5 a
melodies are provided for your selection.
1. Press LEFT SOFTKEY and / SETTINGSto select BS .
2. Press LEFT SOFTKEY and / RINGER to select BS .
3. Press LEFT SOFTKEY and / to select the desired ringer melody.
4. Press LEFT SOFTKEY to conrm.
9.2.2 Set the Ringer Volume
You can adjust the volume level of the ringer for internal call (INT RING) and external
call (EXT RING) separately, with settings from 1 (the quietest) to 5 (loudest), or set it to
VOLUME OFF.
1. Press LEFT SOFTKEY and to select ./ BS SETTINGS
2. Press LEFT SOFTKEY / and to select RING VOL.
3. Press LEFT SOFTKEY / and to select the desired volume level list.
4. Press MENU/OK to conrm.
9.2.3 Set the Flash Time
The default ash time is best suitable for your country and network operator. It is
unlikely that you should need to change this setting unless advised to do so.
1. Press LEFT SOFTKEY and / SETTINGSto select BS .
2. Press LEFT SOFTKEY and / FLASH TIMEto select .
3. Press LEFT SOFTKEY and / to select your desired ash time (SHORT
100ms, MEDIUM LONG 300ms, 600ms).
4. Press LEFT SOFTKEY to conrm.
9.2.4 Remove the rst ring
We can remove the rst ring to remove the de-notication or notication from your call
waiting.
1. Press LEFT SOFTKEY and / SETTINGSto select BS .
2. Press LEFT SOFTKEY and / FIRST RINGto select .
3. Press LEFT SOFTKEY and select or .ON OFF
4. LEFT SOFTKEY Press to valid
30
PHONE SET
PHONE SETTINGS

10 SOS Emergency calls
10.1 SOS Settings
You need to set the SOS numbers before you can make SOS emergency calls
using the handset.
Using the handset:
1. Press LEFT SOFTKEY and to select / SET . SOS
2. Press LEFT SOFTKEY to show SOS NUMBER.
3. Press LEFT SOFTKEY and to select the SOS number to edit (/ SOS 1,
SOS 2 SOS 3 SOS 4, or ).
4. Press LEFT SOFTKEY ADD EDITand select or to modify the number stored
already.
5. Press LEFT SOFTKEY and enter the phone number
6. Press LEFT SOFTKEY and enter the Name
7. Press LEFT SOFTKEY RIGHT SOFTKEY to conrm or to delete.
10.2 Make SOS Emergency Calls
Using the handset:
Press and hold SOS key on the handset to initiate the emergency calling sequence
from the number to number. A call will be rst dialed to the SOS 1 SOS 4 SOS 1
number. If the SOS 1 number does not answer in 60 seconds, the call be will made
to the number, and so on. SOS 2
Note: The other party receiving SOS message must press any number on their
phone to open the SOS call. Thereafter by pressing any number on their phone
every 2minutes will keep the emergency call open otherwise the phone drops the call
10 seconds thereafter.
10.3 Select the SOS language talking
1. Press LEFT SOFTKEY and to select . / SET SOS
2. Press LEFT SOFTKEY and to select / SOS LANG.
3. Select one of the 4 languages (English, French, Deutsch and Nederland) and
Press LEFT SOFTKEY to save.
31
SOS FUNCTION

11. Alarm Settings
You can use this phone to set an alarm. When an alarm is set, the displays on the
screen. When the alarm time is reached, the and “ALARM ON” flash on the screen
ringing with the alarm melody for a duration of 45 seconds. You can press any key to
cancel the alarm.
NOTES:
a. The alarm volume level is the same as the settings of the handset ringer volume. If
the handset ringer is set to , the alarm still sounds at OFF VOLUME 1 level.
b. During an external call or an internal call, if an alarm is set and when the alarm time
is reached, the and “ALARM ON” will still flash. An alarm tone will be emitted
from the earpiece to notify user the alarm time is reached. Once user press any key
or press and hold to cancel the alarm, It will revert to the call duration screen.
c. During paging or ringing, the alarm will not sound when the alarm time is reached.
11.1 Turn on/o the Alarm
1. Press LEFT SOFTKEY and / REMINDERto select .
2. Press LEFT SOFTKEY and / to select the number of your ALARM
3. Press LEFT SOFTKEY and select ON/OFF.
4. Press LEFT SOFTKEY and / to select ON
5. Press LEFT SOFTKEY and enter the hour and minute.
6. Press LEFT SOFTKEY and choose the frequency (Once, Daily, MON-FRI,
SAT-SUN)
7. Press LEFT SOFTKEY and is displayed.
11.2 Rename the Alarm name
1. Follow Steps 1 to 2 in section 11.1.
2. Press LEFT SOFTKEY and choose RENAME.
3. Press RIGHT SOFTKEY to delete a character and enter the new name
4. Press LEFT SOFTKEY to conrm.
11.3 Set the Alarm Melody
1. Follow Steps 1 to 2 in section 11.1.
2. Press LEFT SOFTKEY and choose melody.
3. Press LEFT SOFTKEY and / to choose your melody
4. Press LEFT SOFTKEY to conrm.
33
ALARM SETTINGS

11.4 Voice memo for the Alarm
If you record a voice memo, the handset will play your message recorded instead of
the alarm melody
1. Follow Steps 1 to 2 in section 11.1.
2. Press LEFT SOFTKEY and select VOICE MEMO.
3. Press LEFT SOFTKEY and select RECORD
4. Press LEFT SOFTKEY and leave your message after the beep.
5. Press LEFT SOFTKEY to stop the recording
11.5 Play a Voice memo
If you have recorded a voice memo, you can check your message in choose play
1. Follow Steps 1 to 2 in section 11.1.
2. Press LEFT SOFTKEY and select VOICE MEMO.
3. Press LEFT SOFTKEY and select PLAY
4. Press LEFT SOFTKEY to conrm.
11.6 Delete a Voice memo
If you have recorded a voice memo, you can delete your message in choose play
1. Follow Steps 1 to 2 in section 11.1.
2. Press LEFT SOFTKEY and select VOICE MEMO.
3. Press LEFT SOFTKEY and select DELETE
4. Press LEFT SOFTKEY to conrm.
12 TALKING function
The AD595 is capable of speaking the numbers that you press on the numeric keypad
(Talk Keypad).
Using the handset:
1. Press LEFT SOFTKEY and to select / TLK DIGITS.
2. Press LEFT SOFTKEY and to select / ON/OFF.
3. Press LEFT SOFTKEY to Valid.
34
ALARM SETTINGS

13 ANSWERING MACHINE
Your telephone base includes a telephone answering machine that records
unanswered calls when it is on. The answering machine can store up to 59 messages
within the maximum recording time of approximately minutes. As well as recording 30
incoming messages, you can record memos for other users of your phone.
13.1 Switching Answering Machine On/O
Using a handset:
1. Press LEFT SOFTKEY to select . and ▼/▲ ANS.SYS
2. Press LEFT SOFTKEY and ▼/▲ to select . TAM ON / OFF
3. Press LEFT SOFTKEY and ▼/▲ to select . ON or OFF
4. Press LEFT SOFTKEY to conrm.
Note:
You can press the key ANSWER ON of the base to activate the answering machine.
13.2 Play Messages on TAM
If you have new messages, the handset display will show e.g. 2 NEW MESSAGE,
which means you have 2 new messages. New messages are played rst, and then
are saved as old messages, until they are deleted. Old messages are played again
after all new messages are played completely.
Using the base
Press the key to start the playback of the message
Using the handset:
1) Press LEFT SOFTKEY and ▼/▲ to select ANS. SYS.
2) Press LEFT SOFTKEY to show PLAYBACK.
3) Press LEFT SOFTKEY again to start message playback and the screen
displays the date and hour of the message received.
4) During message playback, press to adjust the message playback volume ▼/▲
respectively.
NOTE: After new message is played, the new message will be saved as an old
message automatically unless it is deleted.
5) Press LEFT SOFTKEY and to select ▼/▲ STOP, FORWARD, PREVIOUS or
DELETE to perform the following functions during message playback.
STOP: Stop the current message playback and return to the ANS. MACHINE menu.
FORWARD: Skip to play the next message. The date and hour information of the next
message will display if there is next message.
PREVIOUS: Skip to repeat playing the current message from the beginning. The date
and hour information of the current message will display.
DELETE: Delete the current message the next message will played. and be
6) Press LEFT SOFTKEY to confirm the setting.
35
ANSWERING MACHINE

NOTE:
Alternatively, you can use the following shortcut keys to control dierent operation during
message playback.
• Press to stop message playback 5
• Press to skip to repeat playing the current message from the beginning.4
• Press 4 twice to skip backward to the previous message .
• Press to skip to play next message.6
• Press to delete the current message playback.2
• Press to listen the message slowly8
• Press to adjust the playback volume./
13.3 Delete all Messages on TAM
Using a handset:
1. Press LEFT SOFTKEY / and to select ANS. SYS.
2. Press LEFT SOFTKEY / and to select .DEL OLD
3. Press LEFT SOFTKEY .
4. Press LEFT SOFTKEY again to conrm delete all old messages.
NOTE:
You cannot delete new messages, so you will to play them before trying to delete.need
13.4 Record Memos on TAM
You can record your memo message for another user. When you record a memo, the
message counter will increase by one and the message can be played in the same way
as answering machine messages. Memo recording can still function even when the
answering machine is turned o.
Using a handset:
1. Press LEFT SOFTKEY / and to select ANS. SYS.
2. Press LEFT SOFTKEY / and to select .MEMO
3. Press LEFT SOFTKEY to start memo recording after the beep and
“RECORDING” will displayed.be
4. Press LEFT SOFTKEY to stop memo recording and save the memo.
OR
Press RIGHT SOFTKEY to stop memo recording without saving and go back
to TAM menu.
36
ANSWERING MACHINE

13.5 TAM SETTING
13.5.1 Record your outgoing Message (OGM)
You can record your own OGM. When you record your own OGM, it will be used when
the answering machine answers the call.
If your personalized OGM is deleted, the pre-set OGM will be restored automatically.
Using a handset:
1. Press LEFT SOFTKEY / ANS. SYSand to select .
2. Press LEFT SOFTKEY / and to select SET TAM.
3. Press LEFT SOFTKEY / TAM MSGand to select .
4. Press LEFT SOFTKEY / RECORDand to select .
5. Press LEFT SOFTKEY to start recording your personalized OGM after
the beep and “RECORDING” will be displayed on the screen.
6. Press LEFT SOFTKEY to stop and save your personalized OGM. Your newly
saved OGM will play automatically. Alternatively, press RIGHT SOFTKEY to
return to previous screen without saving the personalized OGM.
13.5.2 Playback the Outgoing Message (OGM)
Using a handset:
1. Press LEFT SOFTKEY / ANS. SYSand to select .
2. Press LEFT SOFTKEY / and to select SET TAM.
3. Press LEFT SOFTKEY / TAM MSGand to select .
4. Press LEFT SOFTKEY / and to select PLAY.
5. Press LEFT SOFTKEY to play your personalized OGM (if you have recorded a
personalized OGM before) and “PLAYING ANNC “will be displayed on the screen.
6. Press LEFT SOFTKEY to stop the OGM playback and return to the previous
menu.
NOTE:
If a personalized OGM is not recorded before, the -set OGM will be played.pre
37
ANSWERING MACHINE

13.5.3 Delete a Personalized OGM (SET OGM to DEFAULT)
Using a handset:
1. Repeat Steps 1 to 3 in the section 14.5.2.
2. Press LEFT SOFTKEY / and to select DELETE.
3. Press LEFT SOFTKEY RESET TO DEFAULT and is displayed.
NOTE:
Your personalized OGM return previous menu and to and the pre-set OGM is
restored automatically.
13.5.4 Set the Answer Delay
You can set the number of rings before the answering machine answers and starts
playing your OGM. You can set the answering machine to answer after two to ten rings
or TIME SAVER.
The TIME SAVER function answers calls after 6 ring signals, until the rst new message
has been registered then the answering machine switches to answering after
approximately 2 rings. This is useful when using remote access; if you call up the
answering machine and there is no reply after four rings that means there are no
messages recorded and you can hang up before you are charged for the call.
Using a handset:
1. Press LEFT SOFTKEY / and to select ANS. SYS.
2. Press LEFT SOFTKEY / and to select SET TAM.
3. Press LEFT SOFTKEY / and to select ANS. DELAY
4. Press LEFT SOFTKEY / and to select your desired answer delay.
(Available options: 2 RINGS, 4 RINGS, 6 RINGS, 8 RINGS, 10 rings or TOLL SAVE)
5. Press LEFT SOFTKEY to conrm.
13.5.5 Set the Recording Time of Incoming Message
You can set the maximum length of the recording time of the incoming messages.
Using a handset:
1. Press LEFT SOFTKEY / and to select ANS. SYS.
2. Press LEFT SOFTKEY / and to select SET TAM.
3. Press LEFT SOFTKEY / and to select RECORD TIME.
4. Press LEFT SOFTKEY / and to select your desired recording time
(Available options: 60S, 120S or 180S).
5. Press LEFT SOFTKEY to conrm.
38
ANSWERING MACHINE

13.5.6 Set the talking TAM Language
You can choose the voice prompt language of the answering machine from a total of 4
languages( English, Deutsch, Français and Nederlands).
1. Press and MENU/OK / to select ANS. SYS.
2. Press and MENU/OK / to select SET TAM.
3. Press and MENU/OK / to select TAM LANG.
4. Press and MENU/OK / to select the desired voice prompt language for the
answering machine and SOS message.
5. Press to confirmMENU/OK
13.5.7 Turn On or O the Base Screening
You can select to turn on or o the call screening on base. When the answering machine
is set to ON and when there is an incoming message, the base will start call screening
automatically after the preset numbers of rings of answer delay.
Using a handset:
1. Press LEFT SOFTKEY / ANS. SYSand to select .
2. Press LEFT SOFTKEY / and to select SET TAM.
3. Press LEFT SOFTKEY / CALL SCREENand to select .
4. Press LEFT SOFTKEY / ON or OFFand to select .
5. Press LEFT SOFTKEY to conrm.
13.5.8 Activate Remote Access
Your phone lets you check your messages, or otherwise operate your answering
machine, by calling the answering machine when you are away from home by entering a
4-digit remote access PIN on a tone-dialing phone. Use the 4-digit remote access PIN
code to prevent other people from unauthorized access of your answering machine.
13.5.8.1 Change the 4-Digit Remote Access PIN
Using a handset:
1. Press LEFT SOFTKEY / and to select ANS. SYS.
2. Press LEFT SOFTKEY / and to select SET TAM.
3. Press LEFT SOFTKEY / and to select CHANGE PIN.
4. Press LEFT SOFTKEY to enter the new 4-digit PIN.
5. Press LEFT SOFTKEY to valid
39
ANSWERING MACHINE

13.5.8.2 Activate or Deactivate the Remote access
Using a handset:
1. Press LEFT SOFTKEY / and to select ANS. SYS.
2. Press LEFT SOFTKEY / and to select SET TAM.
3. Press LEFT SOFTKEY / and to select REMOTE ACC.
4. Press LEFT SOFTKEY / and to select ON or OFF to turn on or o the
remote access respectively.
5. Press LEFT SOFTKEY to conrm.
13.5.8.3 MSG ALERT function
Set this function to make the TAM beep every 10 seconds to remind you that there is a new
message to listen to.
Using a handset:
1. Press LEFT SOFTKEY / and to select ANS. SYS.
2. Press LEFT SOFTKEY / and to select SET TAM.
3. Press LEFT SOFTKEY / and to select MSG ALERT.
4. Press LEFT SOFTKEY / and to select ON or OFF to turn on or o the
message alert function.
5. Press LEFT SOFTKEY to conrm.
40
Produktspezifikationen
| Marke: | Geemarc |
| Kategorie: | Telefon |
| Modell: | AmpliDect 595 SOS-Pro |
Brauchst du Hilfe?
Wenn Sie Hilfe mit Geemarc AmpliDect 595 SOS-Pro benötigen, stellen Sie unten eine Frage und andere Benutzer werden Ihnen antworten
Bedienungsanleitung Telefon Geemarc

3 September 2024
21 August 2024
20 August 2024
18 August 2024
18 August 2024
17 August 2024
17 August 2024
10 Juni 2024
10 Juni 2024
10 Juni 2024
Bedienungsanleitung Telefon
- Telefon Samsung
- Telefon Infiniton
- Telefon Tristar
- Telefon Acer
- Telefon Anker
- Telefon Apple
- Telefon Asus
- Telefon BeeWi
- Telefon Hama
- Telefon Lexibook
- Telefon Logitech
- Telefon Medion
- Telefon Microsoft
- Telefon Philips
- Telefon SilverCrest
- Telefon Sony
- Telefon Sweex
- Telefon Tevion
- Telefon Trust
- Telefon Panasonic
- Telefon LG
- Telefon Roland
- Telefon ZyXEL
- Telefon Flex
- Telefon AEG
- Telefon Siemens
- Telefon Essentiel B
- Telefon Yamaha
- Telefon Yealink
- Telefon CSL
- Telefon Linksys
- Telefon XD Enjoy
- Telefon Netgear
- Telefon Denver
- Telefon Jacob Jensen
- Telefon MarQuant
- Telefon Renkforce
- Telefon Telefunken
- Telefon Thomson
- Telefon Trevi
- Telefon Blaupunkt
- Telefon Grundig
- Telefon Pyle
- Telefon GE
- Telefon Nordmende
- Telefon Fortinet
- Telefon Topcom
- Telefon ARCHOS
- Telefon Bang And Olufsen
- Telefon Pioneer
- Telefon Jabra
- Telefon JBL
- Telefon Krüger And Matz
- Telefon Motorola
- Telefon Nokia
- Telefon PEAQ
- Telefon Sennheiser
- Telefon Xiaomi
- Telefon Olympia
- Telefon Switel
- Telefon Edenwood
- Telefon Hitachi
- Telefon ITT
- Telefon MT Logic
- Telefon Gigaset
- Telefon Toshiba
- Telefon Allview
- Telefon Cubot
- Telefon Fysic
- Telefon Lifetec
- Telefon Sencor
- Telefon Lindy
- Telefon Plantronics
- Telefon VXi
- Telefon Fenton
- Telefon Lenovo
- Telefon Marmitek
- Telefon Marshall
- Telefon Scosche
- Telefon TRENDnet
- Telefon Sagem
- Telefon AVM
- Telefon Parrot
- Telefon AVerMedia
- Telefon Zebra
- Telefon EnVivo
- Telefon Honor
- Telefon Aastra
- Telefon AGFEO
- Telefon Alcatel
- Telefon Amplicomms
- Telefon Audioline
- Telefon Auerswald
- Telefon Belgacom
- Telefon Binatone
- Telefon Brondi
- Telefon DeTeWe
- Telefon Doro
- Telefon Emporia
- Telefon Hagenuk
- Telefon Profoon
- Telefon Swatch
- Telefon Swissvoice
- Telefon Tiptel
- Telefon Vtech
- Telefon Logik
- Telefon Wiko
- Telefon Mackie
- Telefon Mitel
- Telefon NEC
- Telefon Overmax
- Telefon Airis
- Telefon Huawei
- Telefon Oricom
- Telefon Ranex
- Telefon Alcatel-Lucent
- Telefon Avaya
- Telefon Konftel
- Telefon Polycom
- Telefon Snom
- Telefon Wantec
- Telefon Uniden
- Telefon DrayTek
- Telefon Ascom
- Telefon Fanvil
- Telefon GPO
- Telefon Humantechnik
- Telefon Sagemcom
- Telefon RugGear
- Telefon D-Link
- Telefon T-Mobile
- Telefon Sylvania
- Telefon Kyocera
- Telefon EVOLVEO
- Telefon SPC
- Telefon Crosley
- Telefon Xblitz
- Telefon JPL
- Telefon HTC
- Telefon Prestigio
- Telefon Viking
- Telefon Auro
- Telefon BlackBerry
- Telefon Ericsson
- Telefon ZTE
- Telefon Cisco
- Telefon Grandstream
- Telefon Swisstone
- Telefon Unify
- Telefon OpenVox
- Telefon RCA
- Telefon OnePlus
- Telefon Bintec-elmeg
- Telefon Bogen
- Telefon Oppo
- Telefon Patton
- Telefon CAT
- Telefon Planet
- Telefon AT&T
- Telefon Realme
- Telefon Oregon Scientific
- Telefon EnGenius
- Telefon Mikrotik
- Telefon Davolink
- Telefon Gigaset Pro
- Telefon Innovaphone
- Telefon KPN
- Telefon Logicom
- Telefon Maxcom
- Telefon Oukitel
- Telefon Premier
- Telefon Proximus
- Telefon Sitecom
- Telefon SMC
- Telefon Spectralink
- Telefon Steren
- Telefon Sunstech
- Telefon Tecdesk
- Telefon Telstra
- Telefon Vimar
- Telefon British Telecom
- Telefon MXL
- Telefon AirLive
- Telefon Mitsai
- Telefon MyPhone
- Telefon BLU
- Telefon Audiocodes
- Telefon Legrand
- Telefon BT
- Telefon Amplicom
- Telefon Opel Mobile
- Telefon Digium
- Telefon Gamdias
- Telefon Chacon
- Telefon Clear Sounds
- Telefon On-Q
- Telefon Crestron
- Telefon 3Com
- Telefon Lewitt
- Telefon Teledex
- Telefon Tecno
- Telefon Sedna
- Telefon ALLO
- Telefon Hamlet
- Telefon Akuvox
- Telefon CyberData Systems
- Telefon CTA Digital
- Telefon Canyon
- Telefon Primare
- Telefon Dopod
- Telefon Neat
- Telefon Syco
- Telefon Tador
- Telefon 4family
- Telefon ArtDio
- Telefon Valcom
- Telefon Edge-Core
- Telefon Clarity
- Telefon Vogtec
- Telefon Olitech
- Telefon Cortelco
- Telefon Algo
- Telefon Future Call
- Telefon Dnake
- Telefon Liam&Daan
- Telefon FlyingVoice
Neueste Bedienungsanleitung für -Kategorien-

1 Dezember 2024
1 Dezember 2024

30 November 2024

15 Oktober 2024
15 Oktober 2024
14 Oktober 2024
13 Oktober 2024
11 Oktober 2024
9 Oktober 2024
7 Oktober 2024