Canon PowerShot A400 Bedienungsanleitung
Lesen Sie kostenlos die 📖 deutsche Bedienungsanleitung für Canon PowerShot A400 (148 Seiten) in der Kategorie Camcorder. Dieser Bedienungsanleitung war für 10 Personen hilfreich und wurde von 2 Benutzern mit durchschnittlich 4.5 Sternen bewertet
Seite 1/148

Camera User Guide
zPlease read the Read This First section (p. 5).
zPlease also see the Canon Digital Camera Software Starter Guide Disk
and the Direct Print User Guide.
DANSK
ENGLISH

Flowchart and Reference Guides
This Guide
Shooting with the Camera
Canon Digital Camera
Software Starter Guide Disk
Installing the Software
This Guide
This Guide
Connecting the Camera to a Computer
Canon Digital Camera
Software Starter Guide Disk
Direct Print User Guide
Printer User Guide
Using the Printer and Printing
Downloading Images to a Computer
Use of genuine Canon accessories is
recommended.
This product is designed to perform optimally
when used with genuine Canon accessories.
Canon shall not be liable for any damage to this
product and/or accidents such as fire, etc.,
caused by the malfunction of non-genuine Canon
accessories (e.g., a leakage and/or explosion of
a battery pack). Please note that this warranty
does not apply to repairs arising out of the
malfunction of non-genuine Canon accessories,
although you may request such repairs on a
chargeable basis.

1
Camera Body Temperature
If your camera is used for prolonged periods, the
camera body may become warm. Please be aware
of this and take care when operating the camera
for an extended period.
About the LCD Monitor
The LCD monitor is produced with extremely high-
precision manufacturing techniques. More than
99.99% of the pixels operate to specification. Less
than 0.01% of the pixels may occasionally misfire
or appear as red or black dots.
This has no effect on the recorded image and does
not constitute a malfunction.
Video Format
Please set the camera’s video signal format to the
one used in your region before using it with a TV
monitor (p. 104).
Language Setting
Please see page 22 to change the language
setting.
Disclaimer
zWhile every effort has been made to ensure
that the information contained in this guide is
accurate and complete, no liability can be
accepted for any errors or omissions. Canon
reserves the right to change the specifications
of the hardware and software described
herein at any time without prior notice.
zNo part of this guide may be reproduced,
transmitted, transcribed, stored in a retrieval
system, or translated into any language in any
form, by any means, without the prior written
permission of Canon.
zCanon makes no warranties for damages
resulting from corrupted or lost data due to a
mistaken operation or malfunction of the
camera, the software, the SD memory cards
(SD cards), personal computers, peripheral
devices, or use of non-Canon SD cards.

2
Trademark Acknowledgments
• Canon and PowerShot are trademarks of Canon,
Inc.
• Macintosh, PowerBook, Power Macintosh and
QuickTime are trademarks of Apple Computer,
Inc, registered in the United States and other
countries.
• Microsoft, Windows, and Windows NT are either
registered trademarks or trademarks of Microsoft
Corporation in the United States and/or other
countries.
• SD is a trademark.
• Other names and products not mentioned above
may be registered trademarks or trademarks of
their respective companies.
Copyright © 2004 Canon Inc. All rights reserved.
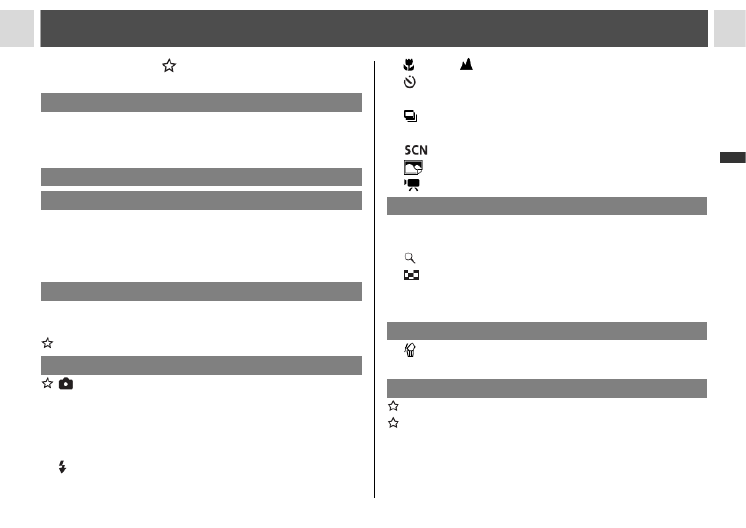
Symbols Used
Icons under title bars show the operations mode.
As in the example below, the shooting mode
should be set to , , or .
Adjusting the Tone (White Balance)
This mark denotes issues that may affect
the camera's operation.
This mark denotes additional topics that
complement the basic operating
procedures.
In this guide SD memory card (Secure Digital, a
copyright protection system) is referred to as SD
card.
Shooting Mode
3
Table of Contents
Items marked with are lists or charts that
summarize camera functions or procedures.
Read This First 5
Please Read...........................................................5
Safety Precautions .................................................6
Preventing Malfunctions .......................................11
Components Guide 12
Preparing the Camera 15
Installing the Battery and SD Card.......................15
Formatting an SD Card.........................................19
Setting the Date/Time...........................................21
Setting the Language ...........................................22
Basic Functions 23
Turning the Power On/Off..................................... 23
Mode Switch.........................................................25
Using the LCD Monitor .........................................26
Shooting – The Basics 31
Auto Mode.......................................................31
Reviewing an Image Right After Shooting............34
Selecting a Shooting Mode...................................35
Changing the Resolution and Compression.........37
Quick Shots ..........................................................38
Using the Flash .................................................39
Macro/ Infinity Modes ................................... 42
Self-timer ......................................................... 43
Digital Zoom ......................................................... 44
Continuous Shooting........................................ 45
Shooting Panoramic Images (Stitch Assist) ......... 46
Special Scene Mode..................................... 48
Postcard Print Mode ...................................... 51
Movie Mode ................................................... 53
Playback – The Basics 55
Displaying Images Individually
(Single Image Playback) ...................................... 55
Magnifying Images...........................................55
Viewing Images in Sets of Nine (Index Playback)
... 56
Jumping between Images ....................................57
Viewing/Editing Movies ........................................ 57
Erasing 61
Erasing Single Images..................................... 61
Erasing All Images ............................................... 61
Shooting – Advanced Functions 62
Selecting Menus and Settings.............................. 62
Menu Settings and Default Settings..................... 65
Resetting the Settings to Default.......................... 72
Shooting Problem Subjects for the Autofocus...... 73
Switching between Focus Settings....................... 74
4
Table of Contents
Switching between Light Metering Modes ....... 75
Adjusting the Exposure.........................................76
Adjusting the Tone (White Balance).....................77
Changing the ISO Speed......................................79
Changing the Photo Effect....................................80
Setting the Auto Rotate Function..........................81
Playback – Advanced Functions 83
Rotating Images in the Display.............................83
Attaching Sound Memos to Images......................84
Auto Play..............................................................85
Protecting Images.................................................86
Various Functions 88
About Printing.......................................................88
DPOF Print Settings.............................................90
Image Transmission Settings
(DPOF Transfer Order).........................................94
Downloading Images to a Computer ....................95
Computer System Requirements .................... 96
Downloading Directly from a SD card.................103
Viewing Images on a TV Set ..............................103
Resetting the File Number..................................105
Customizing the Camera
(My Camera Settings).........................................106
Registering My Camera Settings........................108
List of Messages 112
Troubleshooting 114
Appendix 120
Replacing the Date Battery ................................ 120
Using the Power Kits (Sold Separately) ............. 121
Camera Care and Maintenance......................... 125
Specifications 126
Battery Performance .......................................... 129
SD Cards and Estimated Capacities (Recordable
Images) .............................................................. 129
Photo Tips and Information 132
Index 134
Functions Available in Each Shooting Mode...... 138

5
Read This First
Please Read
Test Shots
Before you try to photograph important subjects, we highly recommend that you shoot several trial images
to confirm that the camera is operating and being operated correctly. Please note that Canon, its
subsidiaries and affiliates, and its distributors are not liable for any consequential damages arising from
any malfunction of a camera or accessory, including SD cards, that results in the failure of an image to be
recorded or to be recorded in a format that is machine readable.
Warning Against Copyright Infringement
Please note that Canon digital cameras are intended for personal use and should never be used in a
manner that infringes upon or contravenes international or domestic copyright laws and regulations.
Please be advised that in certain cases the copying of images from performances, exhibitions, or
commercial properties by means of a camera or other device may contravene copyright or other legal
rights even if the image was shot for personal use.
Warranty Limitations
For information on your camera's warranty, please refer to the Canon European Warranty System (EWS)
Booklet supplied with your camera.
For Canon Customer Support contacts, please see rear of this booklet or the European Warranty
System (EWS) Booklet.

6
Read This First
Safety Precautions
zBefore using the camera, please ensure that you have read and understood the safety precautions
described below. Always ensure that the camera is operated correctly.
zThe safety precautions noted on the following pages are intended to instruct you in the safe and correct
operation of the camera and its accessories to prevent injuries or damage to yourself, other persons and
equipment.
zIn the next few pages, the term "equipment" refers primarily to the camera, batteries, and separately sold
battery and charger kit and compact power adapter.
Storing SD cards
WARNINGS
Store the SD memory card out of the reach of children and infants.
It may be swallowed accidentally. If this occurs, consult a doctor immediately.
zDo not aim the camera directly into the sun or at other intense light sources which could damage
your eyesight.
zDo not trigger the flash in close proximity to human or animal eyes. Exposure to the intense light
produced by the flash may damage eyesight. In particular, remain at least one meter (39 inches) away
from infants when using the flash.

7
Read This First
zStore this equipment out of the reach of children and infants. Accidental damage to the camera or
batteries by a child could result in serious injury. In addition, placement of the strap around a child's neck
could result in asphyxiation.
zBe particularly careful to keep the date battery used in the camera away from children. Seek
medical assistance immediately if a child swallows a battery.
zDo not attempt to disassemble or alter any part of the equipment that is not expressly described
in this guide. Disassembly or alteration may result in high-voltage electrical shock. Internal inspections,
alterations and repairs should be conducted by qualified service personnel authorized by your camera
distributor or a Canon Customer Support Help Desk.
zTo avoid the risk of high-voltage electrical shock, do not touch the flash portion of the camera if it
has been damaged. Similarly, never touch internal portions of the equipment that become exposed as a
result of damage. There is a risk of high-voltage electrical shock. Please take the first opportunity to
consult your camera distributor or a Canon Customer Support Help Desk.
z
Stop operating the equipment immediately if it emits smoke or noxious fumes.
Failure to do so may
result in fire or electrical shock. Immediately turn the camera's power off, remove the camera batteries or
unplug the power cord from the power outlet. Confirm that smoke or fume emissions have ceased.
Please consult your camera distributor or the closest Canon Customer Support Help Desk.
zStop operating the equipment if it is dropped or the casing is damaged. Failure to do so may result
in fire or electrical shock. Immediately turn the camera's power off, remove the camera batteries or
unplug the power cord from the power outlet. Please consult your camera distributor or the closest
Canon Customer Support Help Desk.

8
Read This First
zDo not allow the equipment to come into contact with, or become immersed in, water or other
liquids. Do not allow liquids to enter the interior. The camera has not been waterproofed. If the exterior
comes into contact with liquids or salt air, wipe it dry with a soft, absorbent cloth. In the event that water
or other foreign substances enter the interior, immediately turn the camera's power off and remove the
camera batteries or unplug the power cord from the power outlet. Continued use of the equipment may
result in fire or electrical shock. Please consult your camera distributor or the closest Canon Customer
Support Help Desk.
zDo not use substances containing alcohol, benzene, thinners or other flammable substances to
clean or maintain the equipment. The use of these substances may lead to fire.
zRemove the power cord on a regular periodic basis and wipe away the dust and dirt that collects
on the plug, the exterior of the power outlet and the surrounding area. In dusty, humid or greasy
environments, the dust that collects around the plug over long periods of time may become saturated
with humidity and short-circuit, leading to fire.
zDo not cut, damage, alter or place heavy items on the power adapter cord. Any of these actions
may cause an electrical short circuit, which may lead to fire or electrical shock.
zDo not handle the power cord if your hands are wet. Handling it with wet hands may lead to electrical
shock. When unplugging the cord, ensure that you hold the solid portion of the plug. Pulling on the
flexible portion of the cord may damage or expose the wire and insulation, creating the potential for fires
or electrical shocks.
z
Use only the recommended power accessories.
Use of power sources not expressly recommended for
this equipment may lead to overheating, distortion of the equipment, fire, electrical shock or other hazards.
zDo not place the batteries near a heat source or expose them to direct flame or heat. Neither
should you immerse them in water. Such exposure may damage the batteries and lead to the leakage
of corrosive liquids, fire, electrical shock, explosion or serious injury.

9
Read This First
zDo not attempt to disassemble, alter or apply heat to the batteries. There is serious risk of injury due
to an explosion. Immediately flush with water any area of the body, including the eyes and mouth, skin,
or clothing that comes into contact with the inner contents of a battery.
zAvoid dropping or subjecting the batteries to severe impacts that could damage the casings. It
could lead to leakage and injury.
zDo not short-circuit the battery terminals with metallic objects, such as key holders. It could lead
to overheating, burns and other injuries.
z
Before you discard a battery, cover the terminals with tape or other insulators to prevent direct
contact with other objects.
Contact with the metallic components of other materials in waste containers
may lead to fire or explosions. Discard the batteries in specialized waste facilities if available in your area.
zUse only recommended batteries and accessories. Use of batteries not expressly recommended for
this equipment may cause explosions or leaks, resulting in fire, injury and damage to the surroundings.
zIf using AA-size NiMH batteries, use only Canon AA-size NiMH batteries and the charger
recommended for use with these batteries. Use of another charger may cause batteries to overheat
or deform, posing risk of fire or electric shock.
zDisconnect the battery charger or compact power adapter from both the camera and power outlet
after recharging and when the camera is not in use to avoid fires and other hazards. Continuous
use over a long period may cause a unit to overheat and distort, resulting in fire.
zThe camera terminal of the battery charger cord and the compact power cord is designed for
exclusive use with your camera. Do not use it with other products or batteries. There is a risk of fire
and other hazards.
Caution about magnetic fields
Keep objects that are sensitive to magnetic fields (such as credit cards) away from the speaker of the
camera (p. 12). Such items may lose data or stop working.

11
Read This First
Preventing Malfunctions
Avoid Strong Magnetic Fields
Never place the camera in close proximity to electric motors or other equipment generating strong
electromagnetic fields. Exposure to strong magnetic fields may cause malfunctions or corrupt image data.
Avoid Condensation Related Problems
Moving the equipment rapidly between hot and cold temperatures may cause condensation (water
droplets) to form on its external and internal surfaces. You can avoid this by placing the equipment in an
airtight, resealable plastic bag and letting it adjust to temperature changes slowly before removing it from
the bag.
If Condensation Forms Inside the Camera
Stop using the camera immediately if you detect condensation.
Continued use may damage the equipment. Remove the SD card and battery or power cord (if connected)
from the camera and wait until the moisture evaporates completely before resuming use.
Extended Storage
When not using the camera for extended periods of time, remove the batteries from the camera or battery
charger and store the equipment in a safe place. Storing the camera for extended periods with batteries
installed will run down the battery and may damage the camera.

12
Components Guide
* Be careful not to wave the camera about or catch it on other items when dangling it from the wrist strap.
ON/OFF Button (p. 23)
Strap Mount*
Shutter Button (p. 31)
Microphone (p. 84)
Viewfinder Window
Speaker
Flash (p. 39)
AF-assist Beam (p. 34)
Red-eye Reduction Lamp (p. 41)
Self-timer Lamp (p. 43)
Lens/Lens Cover

13
Components Guide
* To connect the camera to a computer or printer, use one of the following cables.
• Computer: Interface Cable IFC-400PCU (supplied with the camera)
• Direct Print Compatible Printers (Sold Separately)
• CP Printers: Interface Cable IFC-400PCU (supplied with the camera) or the Direct Interface Cable
DIF-100 (supplied with the CP-100/CP-10)
• Bubble Jet Printers:
-Bubble Jet Direct Compatible Printers: Please refer to your Bubble Jet printer user guide.
-PictBridge Compliant Printers: Interface Cable IFC-400PCU (supplied with the camera)
• PictBridge Compliant Non-Canon Printers: Interface Cable IFC-400PCU (supplied with the camera)
Please refer to the System Map or the Direct Print User Guide supplied with the camera for direct
print compatible printer information.
Date Battery Holder (p. 120)
Viewfinder (p. 33)
A/V (Audio/Video) Out Terminal
Tripod Socket
SD Card Slot/Battery Cover (p. 15)
Terminal Cover
DIGITAL Terminal* (p. 98)
DC IN Terminal (p. 124)
LCD Monitor (p. 26)
Battery Cover Lock

14
Components Guide
(Print/Share) Button
The following operations are accessible through one
easy press of the button.
- Printing: See the Direct Print User Guide (separate
from this guide).
- Downloading images (Windows only): See page 95 of
this guide and the Canon Digital Camera Software
Starter Guide Disk (separate from this guide).
The indicator blinks or lights during a printer or
computer connection.
Blue: Ready to Print/Ready to transfer images
Blinking Blue: Printing/Transferring
Button
Button (p. 63)
(Function) Button (p. 62)/
(Single Image Erase) Button (p. 61)
(Display) Button (p. 26)
Mode Switch (p. 25)
Omni Selector (p. 39, 42, 43, 45, 75)
(Light Metering)/ , (Flash)/
(Continuous) (Self-timer)/
(Macro)/ (Infinity)/
The indicators light or blink when you open the lens cover or whenever you press the shutter button.
Blinking Orange: Ready to shoot (camera shake warning)
or charging the flash (with LCD monitor On).
Lower Indicator
Yellow: Macro mode or Infinity mode
Blinking Yellow: Focusing difficulty (although you can press
the shutter button, try using focus lock (p. 73))
Upper Indicator
Green: Ready to shoot or ready to communicate with
your computer.
Blinking Green: Starting-up, recording to the SD card,
reading the SD card, erasing data on the SD
card, or transmitting data to your computer.
Orange: Ready to shoot (using the flash).
Zoom Button (p. 31)
Shooting: (Wide Angle)/ (Telephoto) (p. 31)
Playback: (Index)/ (Magnify) (p. 55)

15
Preparing the Camera
Installing the Battery and SD Card
Write Protect Tab
The SD card has a write protect tab. Sliding the tab
downward prevents recording of data and protects
existing data (e.g. images). When recording to,
erasing from or formatting the SD card, slide the
tab upward.
Write Protect
Tab
Writing/Erasing possible Writing/Erasing impossible
Insert two (2) AA-size alkaline batteries
(included with the camera) or two (2) AA-size
NiMH batteries (sold separately) and insert
the SD card.
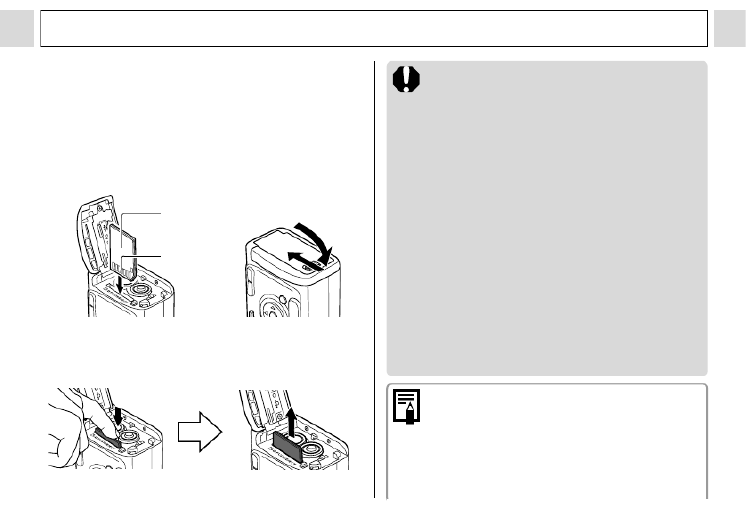
1
Check that the camera power is off.
2
Press the battery cover lock towards
the arrow to open the cover.
3Insert the batteries as shown.
c
d
(+) Positive end
(-) Negative end
16
Preparing the Camera
4
Insert the SD card as shown and
close the SD card slot/battery cover.
z Insert the SD card as shown on the inside of
the battery cover until you hear it click into
place.
z Do not touch or allow metal objects to contact
the terminals on the back of the SD card.
To remove the SD card
Push in the SD card until you hear it click, then
release it.
Back
Terminals
c
d
z Since the camera is writing, reading,
erasing or transmitting data to or from the
SD card when the indicator blinks green,
never perform the following actions during
this time. It could corrupt the image data.
• Subject the camera body to vibration
or shocks.
• Turn the camera’s power off or open
the SD card slot/battery cover.
z Please note that SD cards formatted
with other manufacturers’ cameras or a
computer, or formatted or edited with
application programs, may slow down
writing to the SD card or may not
operate correctly in the camera.
z
You are recommended to use SD cards
that have been formatted in your camera
(p. 19
)
. The card supplied with the camera
may be used without further formatting
.
z We recommend that you use the
separately sold AC Adapter Kit ACK800 to
power the camera during long usage
sessions (p. 124).
z The separately sold battery charger kit
lets you use rechargeable NiMH
batteries to power the camera (p. 121).

17
Preparing the Camera
z See Battery Performance (p. 129).
z For information about the Battery and
Charger Kit and AA-size rechargeable
NiMH batteries, see the System Map
(separate from this guide).
z See SD Cards and Estimated Capacities
(Recordable Images) (p. 129).
Proper Battery Handling
z Use AA-size alkaline or Canon AA-size NiMH
batteries (sold separately) only. For information
on handling the AA-size rechargeable NiMH
batteries, see Using the Power Kits (Sold
Separately) (p. 121).
z Since the performance of alkaline batteries
may differ according to brand, the operating
time of the batteries you purchase may not be
as long as the batteries that came with the
camera.
z Camera operating time may shorten at low
temperatures when alkaline batteries are used.
Also due to their specifications, alkaline batteries
may expire faster than NiMH batteries. If you are
using the camera in cold areas or for a long time,
we recommend using Canon AA-size NiMH
Battery Kit NB4-200 (a four-battery Kit).
z While it is possible to use AA-size nickel-
cadmium batteries, performance is unreliable
and their use is not recommended.
z Never mix unused and partially used
batteries. Always load two fresh (or fully
recharged) batteries at the same time. The
partially used batteries may leak.
z
Be careful to load the batteries with their positive
(+) and negative (-) ends in the right direction
.
z Never mix batteries of different types or from
different manufacturers. Both batteries
should be identical.
z Before inserting the batteries, wipe the battery
terminals well with a dry cloth. Oil from one's skin
or other dirt may cause a considerable reduction
in the number of recordable images or reduced
usage time.
z
Battery performance deteriorates at low
temperatures (especially with alkaline batteries).
If you are using the camera in cold areas and
batteries are running down faster than they
should, you may be able to restore performance
by placing batteries in an inner pocket to warm
them up prior to use. But be careful that you don't
put the batteries into a pocket together with a
metal key chain or other metallic objects, as these
objects may cause batteries to short-circuit.

18
Preparing the Camera
z If you do not plan to use the camera for a long
time, remove the batteries from the camera and
store them in a safe place. Batteries may leak
and damage the camera if left installed during
prolonged periods of non-use.
WARNINGS
Never use damaged batteries or batteries
whose outer seal is completely or partially
missing or peeled off, as there is risk that
such batteries may leak, overheat, or burst.
Always check the seals on store-bought
batteries before loading them, as some
batteries may come with defective seals. Do
not use batteries with defective seals.
Never use batteries that look like this.
Batteries with all or part of the
seal (electrical insulation sheath)
peeled off.
The positive electrode (plus
terminal) is flat.
The negative terminal is correctly
formed (protruding from the
metal base), but the seal does
not extend up over the edge of
the metal base.
Battery Status Indications
The LCD monitor displays an icon or message to
let you know when batteries are low or depleted.
Batteries are beginning to run low.
Replace (or recharge) batteries
promptly. If the LCD monitor is off,
this icon will appear when you press
any of the following buttons: the
omni selector,
DISP.
button and
FUNC.
button.
Change the
batteries
Batteries are fully depleted and the
camera can no longer operate.
Replace the batteries immediately.

19
Preparing the Camera
Formatting an SD Card
You should always format an SD card when
you wish to use a new one, or when you wish
to delete not only the images in the SD card
but also other data.
Formatting an SD card will permanently
erase all data already on it, including all of
its protected images. Check the contents
before formatting cards that were
previously used.
1Turn the power on (p. 23).
2Press the MENU
button and select
[ (Set up)] using
.
3Select (Format)
using or and
press the SET
button.
4Select [OK] using
or and press
the SET button.
z To cancel formatting
instead, select [Cancel]
and press the SET button.
z The capacity of the SD card displayed after
formatting will be less than the rated capacity
of the SD card. This is not a malfunction of
the SD card or camera.
5Press the MENU button.

20
Preparing the Camera
z
If the camera is not operating correctly, the
SD card may be corrupted. Formatting the
card may solve the problem.
z
If you are using an SD card from another
manufacturer and the card is not functioning
correctly, you may be able to correct the
problem by formatting the card.
z
SD cards formatted with another camera, a
computer or peripheral device may not
operate correctly. Format these cards with
this camera. If formatting in the camera
doesn't work properly, turn the camera off
and re-insert the SD card. Then turn the
camera back on and format again.
Handling Precautions for SD Cards
z
SD cards are high-precision electronic devices. Do not
bend them, apply force to them, or subject them to
shocks or vibration.
z
Do not attempt to disassemble or alter the SD card.
z
Do not allow dirt, water or foreign objects to contact
the terminals on the back of the card. Do not touch the
terminals with your hands or metal objects.
z
Do not peel away the original label on the SD card or
cover it with another label or sticker.
z
When writing on the SD card, use a soft point pen (e.g.
felt-tip pen). Using a sharp point pen (e.g. ball-point
pen) or pencil may damage the SD card or corrupt the
recorded data.
z
Since some or all of the data recorded on the SD card
may be corrupted or erased by electrical noise, static
electricity or card malfunction, making a backup copy
of important data is recommended.
z
Moving an SD card rapidly between temperature
extremes will cause condensation to form in the card
and lead to a malfunction. To avoid condensation,
place the SD card in a sealed plastic bag before
moving it into a different temperature zone and allow it
to adjust slowly to the new temperature.
z
If condensation forms on the SD card, store it at room
temperature until the water droplets have evaporated
naturally.
z
Do not use or store SD cards in the following locations.
• Locations subject to dust or sand
• Locations subject to high humidity and high
temperatures
Precaution for Multi Media Cards
This camera is designed to perform optimally when
used with genuine Canon-brand SD cards. You may
use multi media cards (MMC) with this camera.
However, Canon makes no warranties concerning the
use of multi media cards (MMC).

21
Preparing the Camera
Setting the Date/Time
The Date/Time menu will be displayed when
camera power is turned on for the first time or
with low date battery power. Perform
operations from Step 4 (Replace the date
battery when power from the current one is
exhausted (p. 120)).
1Turn the power on (p. 23).
2Press the MENU
button and select
the [ (Set up)]
menu using .
3Select (Date/
Time) using or
and then press
the SET button.
4Set the date and
time.
z Use or to change
the value of the
highlighted field.
z Press or to set the date and time.
z The date can be set up to the year 2030.
z The factory default for the date format may
differ from that shown here in some regions.
5Press the SET button.
6Press the MENU button.
z For embedding the date on the image
data, refer to page 52.
z Setting the date and time settings does
not cause the date/time stamp to appear
on images. For printing images with the
date on them, refer to page 92, the
Direct Print User Guide or Canon Digital
Camera Software Starter Guide Disk.
z For important information, see
Replacing the Date Battery (p. 120).

22
Preparing the Camera
Setting the Language
Sets the display language for LCD monitor
menus and messages.
1Turn on the camera (p. 23).
2Press the MENU
button and select
the [ (Set up)]
menu using .
3
Select (Language)
using
or
and
press the SET
button.
4Select a language
using , , or
and press the SET
button.
z The setting menu will
reappear without
changing the language setting if you press
the MENU button instead of the SET button.
5Press the MENU button.
Shortcut Operation
The Language menu can also be displayed
in Playback mode by holding down the
SET button and pressing the MENU
button. (This function cannot be used while
a movie clip is played back, or when a
separately sold printer is connected to the
camera.)

23
Basic Functions
Turning the Power On/Off
Turning the Power On
1Press the ON/OFF button until the
upper indicator next to the
viewfinder lights green.
Shooting Mode
z Current shooting settings will appear in the
LCD monitor.
z Current shooting settings will disappear
in about 6 seconds when the LCD
monitor is set to Standard (No
information) or No Display(p. 26).
z
If you turn the mode switch to , the lens
will retract after approximately 1 minute.
Playback Mode
z The LCD monitor displays an image.
Turning the Power Off
z Press the ON/OFF button again to turn the
power off.
z If the "Card locked!" message appears
right after the power is turned on, the SD
card cannot record (p. 15).
z
You will hear a start-up sound and see the
start-up image when the power comes on.
(To change the start-up sound and image,
see below and p. 71 and 106.)
z The start-up image does not appear
when the LCD monitor is off in Shooting
mode or the A/V OUT terminal is
connected to a TV.
Turning on the camera without the
start-up sound and image
Press and hold the SET button, then
turn on the power.

24
Basic Functions
Power Saving Function
This camera is equipped with a power saving
function. Depending on the power saving setting
(p. 69), the camera may power down or the LCD
monitor may go off automatically.
zAuto Power Down
[On]
Shooting mode:
Powers down approximately 3 minutes after the
last time a camera control is accessed.
Playback mode:
Powers down approximately 5 minutes after the
last time a control is accessed on the camera.
Printer Connection mode:
Powers down approximately 5 minutes after the
last time a control is accessed on the camera or
something is printed on the printer.
When the Auto Power Down Function Activates
Press the
ON/OFF
button again.
[Off]
The power saving function does not activate.
zDisplay Off
The LCD monitor automatically shuts off
approximately 1 minute* after the last time a
camera control is accessed.
* This time can be changed (p. 69).
When the Display Off Function Activates
The LCD monitor display turns back on if any
button other than the ON/OFF button is pressed.
The power saving function is disabled
during Auto Play or during a computer
connection (p. 85, 95).

25
Basic Functions
Mode Switch
Use the mode switch to select the camera's
operating mode.
Shooting Mode
(Still Image)
Shoots still images. Shooting mode is selectable
from Auto (p. 31), Manual, or Stitch Assist (p. 46).
(Special Scene Mode)
Shoots the image with the most appropriate
settings for the scene.
(Movie)
Shoots movie clips (p. 53).
Replay Mode
Replay Mode
z Replay or delete images from the SD card (p. 55,
61).
z Download and display images on a connected
computer (p. 95).
z Print images directly to a connected printer (p.
88).
When a printer (sold separately) is properly
connected, , , or appears on the
LCD monitor.

26
Basic Functions
Using the LCD Monitor
Use the LCD monitor to shoot and review images, for menu operations and playing back
images.
Pressing the DISP. button cycles the LCD monitor to the next mode.
Shooting Mode
The AF frame changes according to its On/Off setting. (LCD monitor On)
AiAF set to [On] (p. 74) AiAF set to [Off] (p. 74)
z zGreen: Focusing complete (focused AF frame) Green: Focusing complete
z zDoes not appear: Focusing difficulty Yellow: Focusing difficulty
Standard
(No Information) Detailed
(Information View)
No Display
• Still images:Shots Remaining
• Movies (seconds):
- Remaining Movie Time
- Elapsed Time
Spot AE
Point Frame
AF Frame
Button Button
Button
27
Basic Functions
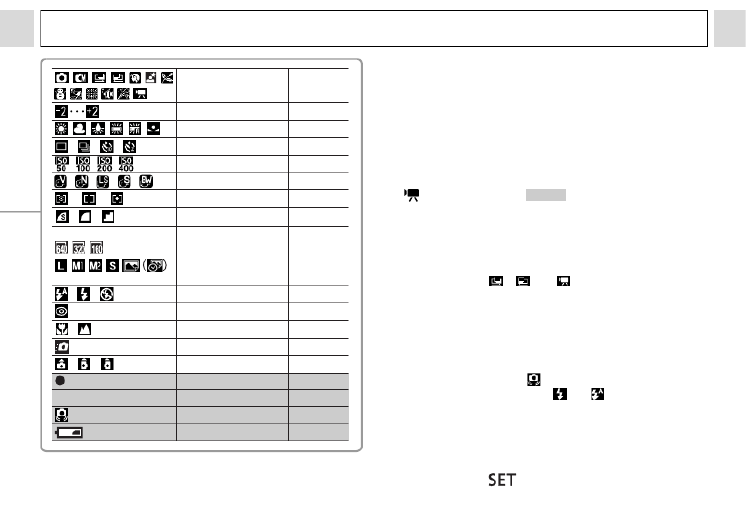
Shooting Mode
Exposure Compensation
White Balance
Drive Mode
ISO Speed
Photo Effect
Light Metering Mode
Compression
Resolution
Postcard Print
Flash
Red-eye Reduction
Macro/Infinity Mode
Quick Shots
Auto Rotate Function
Movie Recording Mode
Digital Zoom Setting*
1
Camera Shake Warning
Low Battery
(Red)
2.8x 3.5x 4.4x 5.4x 7.0x
p. 35, 48
p. 76
p. 77
p. 43, 45
p. 79
p. 80
p. 75
p. 37
p. 37
p. 51
p. 39
p. 39, 41
p. 42
p. 38
p. 83
p. 53
p. 44
p. 27
p. 18
z
When a Shooting mode setting is changed, the
settings appear on the LCD monitor for about 6
seconds even if the LCD monitor is set to No
information or off. (The Shooting mode settings
may not appear depending on the camera setting.)
You can set the flash, red-eye reduction, macro/
infinity mode, self-timer, continuous shooting, and
the light metering mode settings while this
information appears on the LCD monitor.
z and the icons in (the shaded area of
the chart) appear even when the information view
is turned off.
z
In addition to the above, the AF frame, spot metering
frame, recordable images or recordable movie time
are displayed as in the example to the left
.
zSetting to the , or modes turns the
LCD monitor on regardless of whether it is set to
on or off.
zA slow shutter speed has likely been selected
because of insufficient lighting if the upper
indicator beside the viewfinder blinks orange after
the metering preparations are complete and the
camera shake icon ( ) displays in the LCD
monitor. Set the flash to or , or affix the
camera to a tripod to shoot.
zAfter you take a photo by fully pressing the
shutter button, the image displays on the LCD
monitor for approximately three seconds (or the
review duration you set from 3 to 10 seconds). If
you press the button while the image is
displayed, it will continue to display (p. 34).
*1 : Zoom powers reflect the combined optical and digital zoom
effects. These figures appear when the digital zoom is activated.

28
Basic Functions
Playback Mode
* Detailed Display is not available
in index playback (9 images).
Standard
File Number
Shooting
Date/Time
Image Number and Total
(Display Image/Total)
No Display Detailed*
Histogram
Movie Length
Compression
p. 37
Resolution (Still image)
p. 37
Sound memo (WAVE file)
p. 84
Movie
p. 53
Protection status
p. 86
Button
ButtonButton

29
Basic Functions
Shooting Mode
Exposure Compensation
White Balance
ISO Speed
Photo Effect
Resolution (Movie)
Flash
Light Metering Mode
Macro/Infinity
In addition to the above, the histogram and recorded
movie time are displayed.
A JPEG file not supported by "Design Rule for
Camera File System" standards.
RAW file format
Unrecognizable file formats
An audio file other than a wave file, or a file with
unrecognized format is attached.
The following information may be displayed, depending on
the image.
p. 35, 48
p. 76
p. 77
p. 79
p. 80
p. 37
p. 39
p. 75
p. 42
The image in the LCD monitor may
darken when the monitor is used under
sunlight or other strong lighting. This is
not a defect.
z
The on/off setting of the LCD monitor
display mode is memorized when the
camera is turned off. When the camera is
turned on again it assumes the last
mode. However, when the LCD monitor is
turned on and the "Change the batteries"
message appears, the LCD monitor may
not automatically turn on the next time
the camera is started.
z
While a recorded image is displayed on
the LCD monitor, you can check the
exposure with the graph (See About the
Histogram). It shows the distribution of
the brightness data. If the exposure
requires adjustment, set the exposure
compensation and re-shoot (Press the
button if the histogram and other
information is not shown.).
z
Please note that image information
recorded by this camera may not display
correctly on other cameras and image
information recorded by other cameras
may not display correctly on this camera.

30
Basic Functions
About the Histogram
The histogram is a graph that allows you to
judge the brightness of the shot image.
The greater the bias toward the left in the
graph, the darker the image. The greater
the bias toward to the right, the brighter the
image. If the image is too dark, adjust the
exposure compensation to a positive
value. Similarly, adjust the exposure
compensation to a negative value if the
image is too bright (p. 76).
Sample Histograms
Dark image Balanced image Bright image

31
Shooting – The Basics
Auto Mode
In this mode, all you have to do is press the
shutter button and let the camera do
everything else.
1Set the mode switch to .
2
Select from menu.
z See Selecting Menus and Settings (p. 62).
* The current setting is displayed.
3Aim the camera at the subject
you wish to shoot.
See Functions Available in Each Shooting Mode
(p. 143) at the end of this manual to find out which
settings can be changed in which shooting modes.
Shooting Mode
4Use the zoom button to achieve
the desired composition (relative
subject size in the viewfinder).
z The angle of view can be adjusted within the
45 to 100 mm range, in 35mm film
equivalent.
z When the LCD monitor is on, the combined
use of the digital zoom and optical zoom
enables magnified shooting up to approx. 7x
(See Digital Zoom, p. 44).
5Press the shutter
button halfway.
z The shutter button has a
two-stage action.
Pressing Halfway
Pressing halfway
automatically sets the
exposure and focus.
:
Magnifies the size of
subject (Telephoto)
:
Decreases the size of
the subject (Wide angle)

32
Shooting – The Basics
• Two beeps will sound when the camera has
finished metering, and the indicator will light
green or orange. If the LCD monitor is on,
the AF frame will appear green.
• The indicator will blink yellow and the beep
will sound one time if the subject is difficult
to focus.
6Press the shutter
button all the way.
Pressing Fully
Pressing fully releases
the shutter.
• You will hear the shutter sound when the
shot is complete. Do not move the camera
until you hear this sound.
• The indicator next to the viewfinder blinks
green while data is recorded onto the SD
card.
• The picture appears for three seconds on
the LCD monitor, if it is on.
z Functions Available in Each Shooting
Mode (p. 143).
z With the Review function, you can
change the length of time images show
on the LCD monitor after shooting, or set
it so they do not show at all (p. 35).
z If the orange or yellow indicator blinks
while you press halfway, you can still
press fully to take the shot.
z Images are first saved into the camera's
internal memory before being recorded
onto the SD card, allowing the next
images to be taken immediately as long
as sufficient space is available in the
internal memory.
z The beep and shutter sound can be set
On/Off in the Set up menu (p. 67).
z Even when the shutter sound is set to
[ , , (On)] (p. 71), no sound will
be heard if [Mute] is set to [On].
z There is no shutter sound in movie
mode.
z Shots cannot be taken while the flash is
charging.

33
Shooting – The Basics
Shooting with Viewfinder
You can save power by turning the LCD
monitor off and using the viewfinder to shoot.
1
Compose the image so that the
subject appears in the center of
the viewfinder.
ViewfinderShows approximate
center of the image
About the AF Function
This camera employs AiAF (artificial
intelligence autofocus) technology, which
uses a broad metering field to calculate the
focal distance with high precision. It delivers
a crisp focus even when the photographic
subject is slightly off-center.
The camera can also automatically focus on
the center when AiAF is set to [Off].
Image Seen in Viewfinder vs. Recorded
Image
When shooting an image, a larger range than
the one visible in the viewfinder usually gets
recorded. You can confirm the actual range
that will be recorded in the LCD monitor. In
addition, due to the viewfinder’s
specification, the range visible in the
viewfinder may actually differ from the actual
recorded image. The closer the subject is to
the lens, the more noticeable the difference
will be. In some cases, portions of images
shot up close that appear in the viewfinder
will not appear in the recorded image. You
are recommended to use the LCD monitor
during macro photography (p. 42).

34
Shooting – The Basics
AF-assist Beam
- The AF-assist beam will sometimes emit
when the shutter button is pressed
halfway to assist focusing in certain
conditions, i.e. dark conditions.
- The AF-assist beam can be turned off
(p. 65).
If animals are your subject, turn off the
beam when shooting in the dark to avoid
startling them. However, please keep in
mind the following facts.
• If the AF-assist beam is turned off, it
may become more difficult for the
camera to focus in dark conditions.
• The red-eye reduction lamp may emit
when you press the shutter button
halfway even if the AF-assist beam is
turned off.
In order to prevent any lamp from
emitting before the flash fires, set both
the red-eye reduction function and the
AF-assist beam to [Off] in the Shooting
menu.
Reviewing an Image Right After
Shooting
After a photo is taken, the image displays on
the LCD monitor for 3 seconds. In addition,
the image will keep on displaying regardless
of the review duration setting if one of the
following operations is performed.
z Keeping the shutter button fully pressed
z Pressing the button while the image is
displayed*
Press the shutter button halfway again to stop
displaying it.
You can perform the following while
images are displayed.*
• Erasing Images Individually (p. 61)
• Display the setting details of the image
(p. 26).
• Magnifying Images (p. 55)
* This cannot be performed in Stitch Assist mode.
Shooting Mode
35
Shooting – The Basics
Changing the Image Display Duration
The length of time images are displayed after a
photo has been taken can be changed from
between 3 seconds to 10 seconds or turned off.
1Press the MENU button.
z The [ (Rec.)] menu appears.
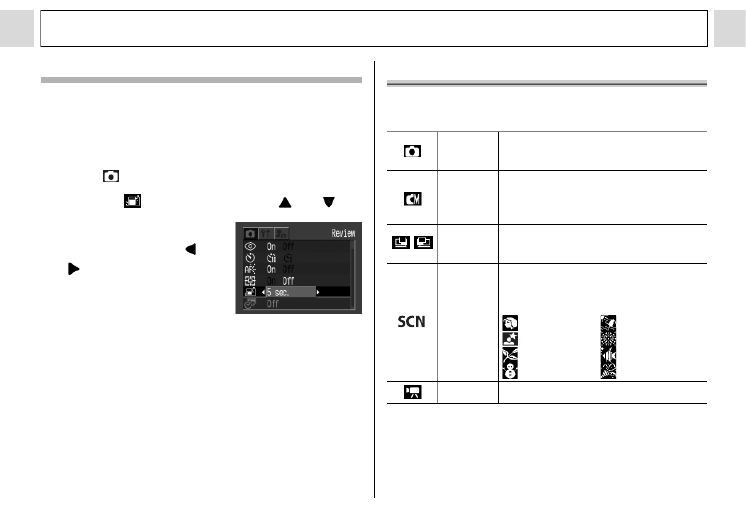
2Select (Review) using or .
3Select a Review
setting using or
and press the
MENU button.
z With the [Off] option, the
image will not display.
z With the [3 sec.] to [10 sec.] options, the
image will appear for the time selected even
if you release the shutter button.
z You can continue to display the image as
long as the shutter button is fully held
pressed regardless of the Review setting.
z Another picture can be taken even while the
last is displayed.
Selecting a Shooting Mode
The following modes are available with this
camera.
The settings selected for each mode are kept even
if the shooting mode is changed. When the power
is turned off, the settings are also retained for
certain shooting modes, but not for others (p. 143).
Auto
The camera automatically makes
most of the settings for you.
Manual
You can manually adjust the
exposure, white balance, and
other settings before shooting.
Stitch
Assist
For shooting panorama
composition images
Special
Scene
Select from 8 scene modes to
shoot with the most appropriate
settings for the scene.
Portrait Beach
Night Scene
Fireworks
Foliage Underwater
Snow Indoor
Movie For shooting movies
36
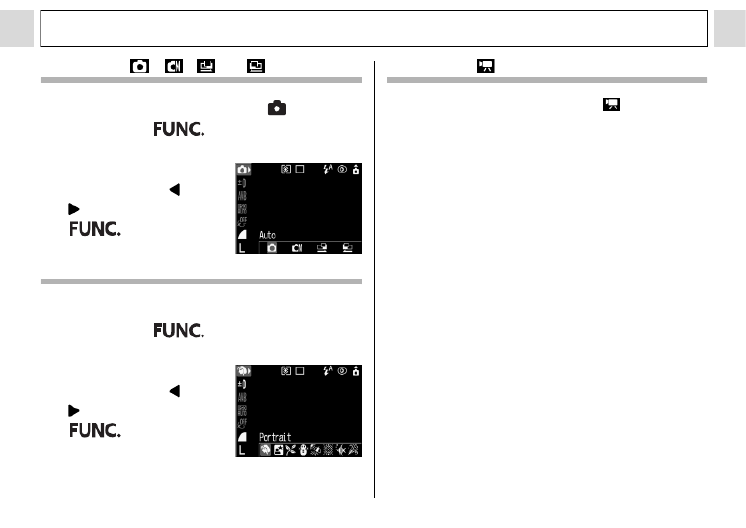
Shooting – The Basics
Selecting , , or
1Set the mode switch to and
press the button.
2
Select the shooting
mode using or
, and press the
button.
Selecting SCN
1Set the mode switch to SCN and
press the button.
2
Select the shooting
mode using or
, and press the
button.
Selecting
1
Set the mode switch to .
z This will switch to movie mode.

37
Shooting – The Basics
Changing the Resolution and
Compression
You can change the resolution and compression
(excluding movie) depending on the purpose.
* Paper sizes vary according to region.
Shooting Mode
The Postcard Print mode is not available in , and .
Resolution Purpose
L
(Large)
2048 x
1536 pixels
Large
Small
zPrint up to A4 size*
210 x 297 mm (8.3 x
11.7 in.) prints
zPrint up to Letter size*
216 x 279 mm (8.5 x
11 in.) prints
M1
(Medium1)
1600 x
1200 pixels
zPrint postcard size
148 x 100 mm (6 x 4
in.) prints
zPrint L-size 119 x 89
mm (4.7 x 3.5 in.)
prints
M2
(Medium2)
1024 x 768
pixels
zPrint card size 86 x 54
mm (3.4 x 2.1 in.)
prints
S
(Small)
640 x 480
pixels
zSend images as e-
mail attachments
zShoot more images
Movies can be shot with the following
resolutions.
or
zThe resolution is set to M1 (1600 x
1200) and the compression is set to
(Fine).
zSee page 51 for Postcard Print mode
information.
Compression Purpose
Superfine
High
Quality
Normal
Shoot higher quality
images
Fine Shoot normal quality
images
Normal Shoot more images
Resolution
640 x 480 pixels
320 x 240 pixels
160 x 120 pixels

38
Shooting – The Basics
1Press the FUNC. button.
2Select * or *
using or .
* The current setting is
displayed.
3Select the
compression or
resolution you
wish to set using
or .
4Press the FUNC. button.
z Image File Sizes (Estimated) (p. 130)
z
Types of SD cards and resolution (p. 129)
Example (excluding ):
Compression
Example (excluding ):
Compression
Quick Shots
You can reduce shutter lag time to capture those
fleeting "photo opportunities".
z You cannot select the quick shot method
for use with the viewfinder (LCD monitor
must be on).
z The LCD monitor display freezes while
the camera is autofocusing.
1Press the DISP. button to turn the
LCD monitor on.
2In the (Rec.)
menu, select .
z See Selecting Menus
and Settings (p. 62).
Shooting Mode
Number of shots remaining* (Only
displayed when the resolution or
compression is selected.)
*In the case of a movie clip, the remaining
shooting time (in seconds) appears.

40
Shooting – The Basics
z You can switch between settings by pressing
the button.
z This operation may not work in certain
Shooting modes (p. 143).
2Shoot the image.
z The flash will fire if the indicator beside the
viewfinder lights orange when the shutter
button is pressed halfway. (Does not fire in .)
z Shooting procedures are the same as for the
Auto Mode (p. 31).
z If the flash is used in macro mode, the
light may not be controlled correctly. In
this case, set a higher ISO sensitivity or
use other light sources instead of using
the flash.
When the red-eye reduction function is on
When the red-eye reduction function is off
z When shooting with a high ISO
sensitivity and using the flash, there is
more of a chance of overexposure the
closer you are to the subject.
z Please note that a slow shutter speed
will be selected in dark places or when
the flash is set to off. Be careful to avoid
camera shake under these conditions.
Shooting in Mode
Be careful to hold the camera still to
avoid camera shake.
Shooting in , , , or Mode
Fix the camera to a tripod since the
shutter speed will be slower than in the
mode. If an image is dark in
mode, reshooting in mode will
make it brighter.
z The flash may take approximately 10
seconds to charge. The LCD monitor, if
it is on, will go off after the indicator
blinks orange while recharging. The
LCD monitor will come back on after the
indicator lights a steady orange when
recharging is completed. Recharging
time may vary according to shooting
conditions and battery charge levels.

41
Shooting – The Basics
z The flash fires twice. A pre-flash will fire
and will be followed by the main flash.
The pre-flash is used by the camera to
obtain the subject’s exposure data so
that the main flash can be set to the
optimal intensity for the shot.
Setting the Red-eye Reduction
Function
The red-eye reduction lamp fires when the
flash is used in dark areas. This reduces light
reflecting back from the eyes and making
them appear red.
1In the [ (Rec.)]
menu, set (Red-
eye) to [On].
z See Selecting Menus
and Settings (p. 62).
z appears on the LCD
monitor.
z The red-eye reduction function cannot
be set when the Special Scene mode
(p. 48) is set to (Fireworks).
Red-eye Reduction
z For this mode to be effective, the subject
must be looking right at the red-eye
reduction lamp. Try asking them to look
directly at the lamp.
Even better results can be obtained by
increasing the lighting in indoor settings
or coming closer to the subject.

42
Shooting – The Basics
Macro/ Infinity Modes
1Press / ( on the omni
selector) to display or .
z Pressing / ( on the omni selector)
cancels the macro mode.
2Shoot the image.
z Shooting procedures are the same as for the
Auto Mode (p. 31).
z The indicator beside the viewfinder will light
yellow when the shutter button is pressed
halfway.
Shooting Mode
Macro
Use this mode when the distance
from the lens tip to the subject is in
the range of 5 to 47 cm (2.0 in. to 1.5
ft.) at wide angle end and 30 to 47
cm (1.0 to 1.5 ft.) at telephoto end
.
Infinity
Use this mode to shoot
landscapes. Also use this mode for
compositions combining both near
and distant objects.
If the flash is used in macro mode, the light
may not be controlled correctly. In this
case, set a higher ISO sensitivity or use
other lightings instead of using the flash.
z Always use the LCD monitor to compose
images in macro mode. Shooting with
the viewfinder is possible, however, part
of the image may not appear in the final
shot (p. 33).
z When the lens is zoomed out to the wide
angle end, the recordable area is
approx. 47 × 35 mm (1.9 × 1.4 in.) *1, and
at telephoto end, it is 115 × 87 mm (4.5 ×
3.4 in.). *2
When the zoom position is located
between the telephoto end and the wide
angle end, the distance between the
front of the lens and the subject will be
the same as the telephoto end.
z The exposure may not be optimal when
the flash is used in macro mode.
*1 Closest focal distance.
*2 Maximum optical telephoto setting.
Produktspezifikationen
| Marke: | Canon |
| Kategorie: | Camcorder |
| Modell: | PowerShot A400 |
| Bildschirmdiagonale: | 1.5 Zoll |
| Eingebautes Mikrofon: | Ja |
| Breite: | 107 mm |
| Tiefe: | 53.4 mm |
| Gewicht: | 165 g |
| Produktfarbe: | Silber |
| Akku-/Batterietyp: | AA |
| Akku-/Batterietechnologie: | Alkali |
| Höhe: | 36.8 mm |
| Gleichstrom-Anschluss (DC): | Ja |
| Display: | LCD |
| Anzahl unterstützter Akkus/Batterien: | 2 |
| Megapixel (ca.): | 3.2 MP |
| Digitaler Zoom: | 2.2 x |
| Maximale Video-Auflösung: | 640 x 480 Pixel |
| Schnittstelle: | USB |
| Eingebauter Blitz: | Ja |
| Fokuseinstellung: | Auto |
| Kompatible Speicherkarten: | SD |
| RAM-Speicher: | - MB |
| Brennweitenbereich: | 5.9 - 13.2 mm |
| Videoaufnahme: | Ja |
| Objektiv-System: | 9/7 |
| Sensor-Typ: | CCD |
| Kamera-Typ: | Kompaktkamera |
| Maximale Bildauflösung: | 2048 x 1536 Pixel |
| Bildstabilisator: | Nein |
| Optischer Zoom: | 3.2 x |
| Autofokus (AF)-Modi: | Zentrumsgewichteter Auto-Fokus |
| ISO-Empfindlichkeit: | 100,200,400,Auto |
| Belichtungsmessung: | Centre-weighted, Spot |
| Akkulaufzeit (CIPA Standard): | 300 Schüsse |
| Blitz-Modi: | Auto, Red-eye reduction |
| Bildschirmauflösung (numerisch): | 115000 Pixel |
| Dreh- und schwenkbares Display: | Ja |
| PictBridge: | Ja |
| Weißabgleich: | Auto, Cloudy, Custom modes, Daylight, Fluorescent, Tungsten |
| Bildstile: | Beach, Fireworks, Night, Snow, Underwater, Landscape (scenery) |
| Fotoeffekte: | Black&White, Muted, Neutral, Sepia, Vivid |
| Kamera Wiedergabe: | movie, single image |
| Kamera Verschlusszeit: | 1 - 1/1.500 s |
| Digitale-SLR: | Nein |
| Brennweite (äquivalent 35 mm Kleinbild): | 45 - 100 mm |
| Videofunktionalität: | Ja |
| Kombinierter Zoom: | 7 x |
Brauchst du Hilfe?
Wenn Sie Hilfe mit Canon PowerShot A400 benötigen, stellen Sie unten eine Frage und andere Benutzer werden Ihnen antworten
Bedienungsanleitung Camcorder Canon

22 September 2024
13 September 2024
28 August 2024
27 August 2024
27 August 2024
20 August 2024
19 August 2024
15 August 2024
14 August 2024
13 August 2024
Bedienungsanleitung Camcorder
- Camcorder Samsung
- Camcorder 3M
- Camcorder Sanyo
- Camcorder BenQ
- Camcorder Gembird
- Camcorder Genius
- Camcorder Hama
- Camcorder HP
- Camcorder Lexibook
- Camcorder Macally
- Camcorder Medion
- Camcorder Nedis
- Camcorder Philips
- Camcorder SilverCrest
- Camcorder Sony
- Camcorder T'nB
- Camcorder Trust
- Camcorder Panasonic
- Camcorder OK
- Camcorder Linksys
- Camcorder Maginon
- Camcorder Bresser
- Camcorder Denver
- Camcorder Intenso
- Camcorder König
- Camcorder National Geographic
- Camcorder Renkforce
- Camcorder Trevi
- Camcorder Braun
- Camcorder Kenwood
- Camcorder Sharp
- Camcorder Pyle
- Camcorder Salora
- Camcorder Aiptek
- Camcorder Coby
- Camcorder Lenco
- Camcorder Mpman
- Camcorder Nilox
- Camcorder Polaroid
- Camcorder Jay-Tech
- Camcorder JVC
- Camcorder Xiaomi
- Camcorder Hitachi
- Camcorder Hyundai
- Camcorder Toshiba
- Camcorder Olympus
- Camcorder Zoom
- Camcorder Garmin
- Camcorder GOCLEVER
- Camcorder Lamax
- Camcorder Prixton
- Camcorder Mio
- Camcorder Sencor
- Camcorder ViewSonic
- Camcorder Marshall
- Camcorder Nikkei
- Camcorder Samson
- Camcorder SBS
- Camcorder Fujifilm
- Camcorder MINOX
- Camcorder Nikon
- Camcorder Ricoh
- Camcorder DJI
- Camcorder Dragon Touch
- Camcorder EnVivo
- Camcorder Midland
- Camcorder Vtech
- Camcorder Kodak
- Camcorder Agfa
- Camcorder Easypix
- Camcorder Konica-Minolta
- Camcorder Leica
- Camcorder Minolta
- Camcorder Praktica
- Camcorder Rollei
- Camcorder SeaLife
- Camcorder Traveler
- Camcorder IGet
- Camcorder Contax
- Camcorder Mamiya
- Camcorder Voigtländer
- Camcorder Yashica
- Camcorder Bauer
- Camcorder Overmax
- Camcorder Airis
- Camcorder Akaso
- Camcorder Uniden
- Camcorder Kitvision
- Camcorder Kogan
- Camcorder Elmo
- Camcorder Energy Sistem
- Camcorder Jobo
- Camcorder Soundmaster
- Camcorder Bolex
- Camcorder Magellan
- Camcorder TomTom
- Camcorder Kyocera
- Camcorder Cobra
- Camcorder AEE
- Camcorder CamOne
- Camcorder Contour
- Camcorder EVOLVEO
- Camcorder GoPro
- Camcorder Quintezz
- Camcorder ION
- Camcorder DNT
- Camcorder Insignia
- Camcorder Swann
- Camcorder DataVideo
- Camcorder Aida
- Camcorder Prestigio
- Camcorder Mediacom
- Camcorder Tracer
- Camcorder Cisco
- Camcorder RCA
- Camcorder ARRI
- Camcorder Transcend
- Camcorder Oregon Scientific
- Camcorder Blackmagic Design
- Camcorder Insta360
- Camcorder Zorki
- Camcorder DOD
- Camcorder Drift
- Camcorder Ematic
- Camcorder FHD 1080P
- Camcorder Flip
- Camcorder ISAW
- Camcorder Leotec
- Camcorder MMTC
- Camcorder Mobius
- Camcorder Naxa
- Camcorder Replay
- Camcorder Sakar
- Camcorder SJCAM
- Camcorder Spypoint
- Camcorder Storex
- Camcorder TacTic
- Camcorder Veho
- Camcorder Vivitar
- Camcorder YI
- Camcorder Zagg
- Camcorder Best Buy
- Camcorder AgfaPhoto
- Camcorder Vupoint Solutions
- Camcorder Kaiser Baas
- Camcorder Microtek
- Camcorder Runcam
- Camcorder Activeon
- Camcorder BlackVue
- Camcorder Braun Phototechnik
- Camcorder Hamlet
- Camcorder RSC
- Camcorder Kobian
- Camcorder Hamilton Buhl
- Camcorder Contour Design
- Camcorder Curve
- Camcorder Beaulieu
- Camcorder Qoltec
- Camcorder Stealth Cam
- Camcorder DXG
- Camcorder GoXtreme
- Camcorder ATN
- Camcorder Whistler
- Camcorder Aqua-Vu
Neueste Bedienungsanleitung für -Kategorien-

25 November 2024
25 November 2024
24 November 2024
12 Oktober 2024

12 Oktober 2024

8 Oktober 2024

7 Oktober 2024
3 Oktober 2024
28 September 2024
24 September 2024